Specify training class details
You can specify details about the training class, such as the class name and ID number, how and where it will be taught, its accreditation code, and more.
Note: You must have the full version of PM to specify class details.
For information on upgrading to the full version of PM, go to https://www.eso.com/pm-demo/ and fill out the fields to request a demonstration and speak with a sales representative.
In the PM and Admin modules, your PM and Admin administrators can configure a number of important lists you need when creating and working with training classes. Some of the lists exist in the PM module, on the Settings pages; other lists exist in the Admin module, in the PM pages.
In the PM module, an administrator needs to review and define class-related lists on the Settings > Class Lists page, for the following:
-
Class Names
-
Session Names
-
Absence Reasons
-
Credits
Note: These lists may have been initially populated through importing class data from a spreadsheet, and the administrator may need to manually update or disable imported list items, and add more items to the lists. The administrator can also add values in class-related lists by performing additional class data imports from spreadsheets.
Information on importing class data is available in Import data.
These list items appear when you click the corresponding fields in the PM module.
|
Example: When adding sessions to a class, you may need session name options such as Tanker truck management, Driving tanker trucks in wildlands, Driving tanker trucks in urban settings, Tanker truck refill, Cleaning tanker trucks, and so forth. Your PM module administrator must add custom ADL items to the PM module, on the Settings > Session Names screen, for items to appear as menu choices. The administrator must also verify that the ADL items are enabled for them to appear; items that are disabled on the Settings > Session Names screen will not appear as options for the Session Name field. |
Information on creating a session names list is available in Build the session names list.
If no options appear, or if the menu does not have an option that meets your needs, contact your PM module administrator and ask them to add the necessary menu choices. You will need to work closely with your administrator to create and maintain these lists, as your department's needs evolve over time.
In the Admin module, an administrator needs to define class-related lists of items under the following, for adding or filtering the list of personnel in the PM module.
-
PM > Class Lists >
- Training Location
- Education Facility
- Class Method
- Categories
- Accreditation Code
These list items appear when you click the corresponding fields in the PM module.
|
Example: In the PM module, for the Education Facility field, you may need options such as St. Lawrence Hospital, Main St. Fire Depart., Fire Supply Supply Depot, ISU, DMACC, and so forth. Your ESO Suite administrator must add corresponding ADL items in the Admin module, under PM > Class Lists > Education Facility, for these items to appear as menu choices in the PM module. |
Information on defining class-related list menu options in the Admin module is available in Build class lists.
If no options appear in a class-related field with a drop-down menu, or if the menu does not have an option that meets your needs, contact your PM module administrator and ask them to add the necessary menu choices. You will need to work closely with your administrator to create and maintain these lists, as your department's needs evolve over time.
-
 (If you have not done so already) Access the PM or PM Basic module in the ESO Suite.
Which version of the module opens depends on whether your agency or department has purchased the PM Basic or full version of the PM module.
-
Do one of the following.
-
(If you are already working in the ESO Suite) Click the Home icon in the upper left corner of the screen.
-
 (If you have not yet logged in) Log in to the ESO Suite.
-
In a web browser, go to https://www.esosuite.net/EsoSuite.
The ESO Suite login screen appears.
-
Enter your user name, password, and agency name, then click Let's Go.
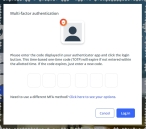
If MFA is enabled, the Multi-factor authentication dialog box appears, displaying one or more methods you can use to verify your login credentials. The number of methods that appear in the dialog box depends on what MFA methods your ESO Suite administrators enabled in the Admin module.

Click graphics
to open them.Information on enabling MFA and specific MFA methods is available in the Admin module online help, in Configure multiple-factor authentication.
Note: If your ESO Suite administrators have disabled MFA ("opted-out"), this dialog does not appear.
-
(If the Multi-factor authentication dialog box appears) Depending on which buttons appear in the dialog box, verify your login in one of the following ways.
 With an authenticator application.
-
Click MFA verification via authenticator app.
The dialog box updates with boxes for entering the numbers of the authentication code, and the ESO Suite sends an authentication code to the authenticator application installed on your device.
-
Open your authenticator application and note the authentication code currently displayed.
-
Enter the authentication code displayed in the authenticator application.
-
Click Log In.
 With a text message (SMS).
-
Click MFA verification via SMS.
The dialog box updates with boxes for entering the numbers of the authentication code, and the ESO Suite sends an authentication code to the phone number recorded in your PM records and identified with MFA codes.
-
Enter the authentication code sent to your MFA-registered phone number.
-
Click Log In.
 With an email message.
-
Click MFA verification via email.
The dialog box updates with boxes for entering the numbers of the authentication code, and the ESO Suite sends an authentication code to your agency or department email address, recorded in your PM records.
-
Enter the authentication code sent to your agency or department email address.
-
Click Log In.
-
-
The ESO Suite landing screen appears.

Click graphics
to open them.Note: If MFA is enabled, you can access and manage your MFA options through the PM module, on the Settings > Account page, as described in Manage a user account. If your agency or department has enabled MFA but has not purchased the full-featured version of the PM module, you can access your own MFA settings by clicking Change my Multi-Factor Authentication settings on the landing screen, then using the Settings > Account page that appears. If your agency has not enabled MFA, the Change my Multi-Factor Authentication settings link does not appear on the landing screen.
-
-
On the top side of the home screen, click PM.
Tip: If your screen or browser window is too narrow to display all your agency's ESO Suite module icons, an options icon appears on the right side of the icon bar. If you click the options icon, a menu appears containing additional module icons.
A list of all the personnel in the PM module appears, displayed in a grid format.
PM (full version) PM Basic Note: If you can access the full-featured PM module, you can view all your own information in it. The amount of information you can edit in the PM module depends on what roles and permissions your ESO Suite administrator assigned to your user account.
Information on user accounts, roles, and permissions is available in Manage a user account.
-
-
In the navigation bar on the left side of the screen, click the Training (
 ) icon.
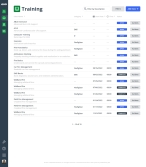
 The Training screen appears, displaying a list of the classes currently in the PM module.
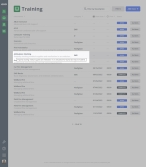
Tip: If the column widths truncate the contents of the Class Name column, you can hover your mouse pointer over the entry in this column to see a pop-up containing the full class name and class description.
-
(If you are not adding a new class) Open the record of the training class you want to work with, as described in Find and open an existing training class.
The training class record opens and displays class details, set to the Class details bookmark in the left pane.
In the Class details section, the Class Name, Class Description, Class Objectives, and Class Number automatically populate based on information you entered when you created the class. Origin automatically populates with
TrainingorQuick Credit, depending on how the class entered the PM module. An origin value ofTrainingindicates that the class was created using the Training component of the PM module, and a value ofQuick Creditindicates that the training information was imported from the Silverlight-based version 4 of the PM module. -
 Identify the class, and where and how it will be taught.
-
On the right side of the Class details section, click Edit.
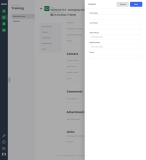
The Class dialog box appears on the right. By default, the PM module populates Class Name, Class Description, Class Objectives, and Class Number with the information provided when the class was created. You can still edit these fields if they are not populated, or if you need to tailor the information in them for this specific class.
-
For any of the following fields, click the field or the list icon to the right of the field, then select the appropriate single option from the menu that appears.
Field Information needed Class Name
The name for the class, as defined by your PM administrator on the Settings > Class Lists > Class Names screen.
Class Description A short description of the class.
Class Number The internal course number used by your agency or department.
Class Type
An indication of whether the class was taught by your agency or department, or whether the class was taught by a third-party organization.
Category
Broad-based themes by which classes are grouped together into categories.
Method
The methods of instruction used in your agency's training programs, such as lecture, classroom, lab, hands-on, video, and so forth.
Educational Facility
The educational credentialing system that your local program or external programs fall under. If your agency is certified by your state as an educational facility, you can use the agency's name as the education facility. If your crew members and staff utilize external facilities, use the information about those facilities.
Accreditation Code
The code the credentialing authority such as ISO, NREMT, or NFPA, uses to identify the class.
Class Objective
The list of objectives the class will cover.
An objective is a knowledge base and/or set of skills taught during a training class.
- Click Save.
-
-
 Supply contact information for the class.
-
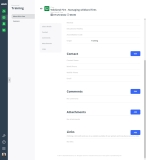
On the left, click the Contact bookmark.
The right side scrolls down to the Contact section of the about this class tab.
-
On the right side of the Contact section, click Edit.
The Contact dialog box appears.
- In First Name and Last Name, type the first and last name of the person to contact about the training class.
- In Work Phone and Mobile Phone, type the phone numbers that apply to the contact person.
-
In Email, type the email address for the contact person.
Email addresses must be in the
name@domain.suffixformat.Example:
YourName@eso.com - Click Save.
-
-
 Provide comments about the class.
-
On the left, click the Comments bookmark.
The right side scrolls down to the Comments section of the About this class tab.
-
On the right side of the Comments section, click Edit.
The Comments dialog box appears.
- In Comments, type any observations or remarks relevant to all the sessions, or to the class in general.
-
Click Save.
-
-
 Add and work with attachments for the training class.
You can add and then work with attachments for the training class record as needed. Attachments may include images used in the class, PDF files, certificates of completion, and so forth.
-
On the left, click the Attachments bookmark.
The right side scrolls down to the Attachments section of the About this class tab.
-
Do any of the following.
 Add a new attachment.
-
On the right side of the Attachments section, click Add.
The Add Attachment dialog box appears.
- For File, click the field, then use the file browser that appears to navigate to and select the attachment you want to add.
- In Description, type a description of the attachment, or any other information that should accompany it.
-
Click OK.
The attachment appears as a list item in the Attachments section of the About this class tab.
 View an attachment.
-
In the listing of the attachment, do one of the following.
- Click the thumbnail image or icon for the attachment.
- To the right of the attachment file name, click View.
The attachments viewer opens. If the attachment is an image or PDF file, the image or PDF appears; if the file is of some other type, a message that this type of file can not be previewed appears.
Tip: (Optional, if there are multiple attachments) In the upper left corner of the attachment viewer, in the attachments counter, click the left- and right-pointing arrows to scroll through and view the attached files.
-
In the upper right corner of the viewer, click the close (X) icon.
 View information about an attachment.
-
In the listing of the attachment, do one of the following.
- Click the thumbnail image or icon for the attachment.
- To the right of the attachment file name, click View.
The attachments viewer opens. If the attachment is an image or PDF file, the image or PDF appears; if the file is of some other type, a message that this type of file can not be previewed appears.
Tip: (Optional, if there are multiple attachments) In the upper left corner of the attachment viewer, in the attachments counter, click the left- and right-pointing arrows to scroll through and view the attached files.
-
In the upper right corner of the viewer, click the information icon (an i in a circle), then read the information in the menu that appears.
-
In the upper right corner of the viewer, click the close (X) icon.
 Edit the description of an attachment.
-
In the listing of the attachment you want to edit the description for, do one of the following.
 View the attachment before editing the description.
-
In the listing of the attachment, do one of the following.
- Click the thumbnail image or icon for the attachment.
- To the right of the attachment file name, click View.
The attachments viewer opens. If the attachment is an image or PDF file, the image or PDF appears; if the file is of some other type, a message that this type of file can not be previewed appears.
Tip: (Optional, if there are multiple attachments) In the upper left corner of the attachment viewer, in the attachments counter, click the left- and right-pointing arrows to scroll through and view the attached files.
-
In the upper right corner of the viewer, click the three-dot menu icon, then choose Edit Description.
The Edit Description dialog box appears.
- In Description, edit the text describing the attachment as needed.
-
Click OK.
The attachment's description updates in the center of the attachment viewer's top black bar.
-
In the upper right corner of the viewer, click the close (X) icon.
-
 Download an attachment.
-
In the listing of the attachment, do one of the following.
- Click the thumbnail image or icon for the attachment.
- To the right of the attachment file name, click View.
The attachments viewer opens. If the attachment is an image or PDF file, the image or PDF appears; if the file is of some other type, a message that this type of file can not be previewed appears.
Tip: (Optional, if there are multiple attachments) In the upper left corner of the attachment viewer, in the attachments counter, click the left- and right-pointing arrows to scroll through and view the attached files.
-
In the upper right corner of the viewer, click the three-dot menu icon, then choose Download.
The file downloads to the default download location on your computer.
-
In the upper right corner of the viewer, click the close (X) icon.
 Print an attachment.
-
In the listing of the attachment, do one of the following.
- Click the thumbnail image or icon for the attachment.
- To the right of the attachment file name, click View.
The attachments viewer opens. If the attachment is an image or PDF file, the image or PDF appears; if the file is of some other type, a message that this type of file can not be previewed appears.
Tip: (Optional, if there are multiple attachments) In the upper left corner of the attachment viewer, in the attachments counter, click the left- and right-pointing arrows to scroll through and view the attached files.
-
In the upper right corner of the viewer, click the three-dot menu icon, then choose Print.
A new browser tab appears, displaying the standard Windows browser printing capabilities.
- Continue with the print process in the new browser tab.
-
In the upper right corner of the viewer, click the close (X) icon.
 Delete an attachment.
-
In the listing of the attachment you want to delete, do one of the following.
 Delete the attachment without viewing it first.
-
In the listing for the file you want to remove, click Delete.
A delete confirmation dialog box appears.
-
Click Yes.
The module deletes the attachment.
 View the attachment before deleting it.
-
In the listing of the attachment, do one of the following.
- Click the thumbnail image or icon for the attachment.
- To the right of the attachment file name, click View.
The attachments viewer opens. If the attachment is an image or PDF file, the image or PDF appears; if the file is of some other type, a message that this type of file can not be previewed appears.
Tip: (Optional, if there are multiple attachments) In the upper left corner of the attachment viewer, in the attachments counter, click the left- and right-pointing arrows to scroll through and view the attached files.
-
In the upper right corner of the viewer, click the three-dot menu icon, then choose Delete.
The Delete Confirmation dialog box appears.
-
Click Yes.
The module deletes the file and closes the viewer.
-
-
-
-
 Add, copy, edit, or delete links for the training class.
You can add links to a training class, to provide reference material, useful exercises, and other resources that are available online.
-
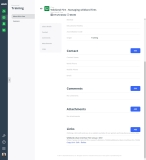
On the left, click the Links bookmark.
The right side scrolls down to the Links section of the About this class tab.
-
Do any of the following.
 Add a new link.
-
On the right side of the Links section, click Add.
The Add Link dialog box appears.
- In Description, type a description of the online material the link going to.
- In Link, type or paste the URL for the web site you are linking to.
-
Click Done.
The information you entered appears as a summary in the Links section of the About this class tab.
 Edit an existing link.
-
In the listing for the link you want to edit, click Edit.
The Edit Link dialog box appears, displaying the information already specified for the link.
- Change the information in the fields as needed.
- Click Done.
 Delete a link.
-
In the listing for the link you want to delete, click Delete.
A confirmation dialog box appears.
- Click Yes.
-
-
-
Add one or more sessions to the class, as described in Add, edit, or delete sessions for a class.
Tip: To return to the listing of all training classes, click the left-pointing arrow beside the class name.


