Import data
|
Note:
|
Staff member records include a person's demographics, address, work history, contact information, and so forth.
A certification or license is a document from an external entity, verifying that a person has the required skills and knowledge in a certain area, and allowing them to conduct activities that would otherwise be illegal without the certification or license. Licenses and certifications are usually valid for a limited term and must be renewed periodically.
Example: Common certifications include NREMT Paramedic, state EMT certifications or licenses, Firefighter I, and CDL. Common EMS licenses are EMR, EMT, AEMT, and Paramedic. A license can also include various forms of driver's licenses, hazardous materials licenses, and so forth.
A credential is granted locally to a person within an agency or department, allowing that person to perform duties aligned with a certain level of task. Credentials relate to conditions of employment within your agency.
Example: A medical director credentialing an EMS provider, or a physician being credentialed to practice in a hospital.
A training class is a class given to develop your staff members' skills. Training classes can be credited toward any training requirements for the person, agency, or department.
A credit is a unit that counts towards receiving or renewing a certification or license, such as continuing education credits, to receive or renew a credential, qualification or skill, or for a state or national requirement such as ISO. You can use credit points to track LOSAP or other award programs, and to track training requirements.
Note: You must have the full version of the PM module and the Credits security permission as part of one of your users roles to import credit types.
For ISO, National Registry, Lexipol, and some states, you must use standardized lists of credits types and, in some cases, specific codes. Global reports built for ISO reporting require the specific ISO credit types.
-
States that require a specific set of codes and a standardized list of credit types:
-
California
-
Kentucky
-
-
States that require a standardized list of credit types:
|
Note:
|
- To access the Settings > Import screen, your ESO Suite user account must have a security role that includes the
Import Classes,Import Certifications and Credentials, orAdd Personsecurity permission. Your ESO Suite administrator manages the roles and permissions assigned to your user account. -
It is strongly recommended that you work with the ESO Implementation team to extract staff records from FH and import them into the PM module, instead of using the
ESO Personnel Import.xlsxfile. This process lets you import a great deal more data than is supported through theESO Personnel Import.xlsxfile. This special FH process automatically populates the ESO Suite database for you, without generating a spreadsheet.Information on the tool used in this process and the data brought into the ESO Suite database is available in the Firehouse Data Extractor online help.
-
Ask the ESO Implementation team to export Training Class or Training Programs data from FH into spreadsheets for you.
Note:
- For Training Classes, the data imports into the individual personnel records for each class attendee, not into the Training class list.
- For Training Programs, only individual staff records export, and they appear in the spreadsheet as credentials information. However, the different achievements from the FH training programs are called credentials or certifications in the ESO Suite PM module. The ESO Suite EHR module requires EMS certifications and licenses in EHR patient care reports and NEMSIS extracts.
- (Training records) If the exported data contains certification information, you must download the spreadsheet from the PM module and make updates to it to identify the appropriate records as certifications or licenses, add certificate or license numbers for individual staff members, and so forth. When you are satisfied with the contents of the spreadsheet, you can upload and import the data into the PM module yourself.
-
Decide whether you want the data in the spreadsheet to automatically import into the ESO PM module, or if you want to review and edit the spreadsheet before it is imported.
Note: If you elect to review the spreadsheet and possibly edit values in it, go straight to step 8 below, and look for your import with a status of
Needs Review. -
The spreadsheet of exported data does not have color-coded headings to indicate which columns contain required data, or pop-up heading text to describe the data needed in the column. Be sure to download the template spreadsheet as described in the steps below, and use it as a reference to guide you when editing the exported data in the FH-generated spreadsheet.
In the template spreadsheet, column headings with red text indicate that the data in that column is required. In the certifications and credentials spreadsheet, whether a column is required or not also depends on whether you are importing a certification or license, or a credential.
|
Caution: With the exception of the credit types spreadsheets, be sure to download and use the template spreadsheet from the PM module, as described in the steps below. The heading pop-ups in the spreadsheet provide critical information, and the drop list values in the spreadsheet will help guide your edits. |
-
 (If you have not done so already) Access the PM or PM Basic module in the ESO Suite.
Which version of the module opens depends on whether your agency or department has purchased the PM Basic or full version of the PM module.
-
Do one of the following.
-
(If you are already working in the ESO Suite) Click the Home icon in the upper left corner of the screen.
-
 (If you have not yet logged in) Log in to the ESO Suite.
-
In a web browser, go to https://www.esosuite.net/EsoSuite.
The ESO Suite login screen appears.
-
Enter your user name, password, and agency name, then click Let's Go.
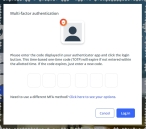
If MFA is enabled, the Multi-factor authentication dialog box appears, displaying one or more methods you can use to verify your login credentials. The number of methods that appear in the dialog box depends on what MFA methods your ESO Suite administrators enabled in the Admin module.

Click graphics
to open them.Information on enabling MFA and specific MFA methods is available in the Admin module online help, in Configure multiple-factor authentication.
Note: If your ESO Suite administrators have disabled MFA ("opted-out"), this dialog does not appear.
-
(If the Multi-factor authentication dialog box appears) Depending on which buttons appear in the dialog box, verify your login in one of the following ways.
 With an authenticator application.
-
Click MFA verification via authenticator app.
The dialog box updates with boxes for entering the numbers of the authentication code, and the ESO Suite sends an authentication code to the authenticator application installed on your device.
-
Open your authenticator application and note the authentication code currently displayed.
-
Enter the authentication code displayed in the authenticator application.
-
Click Log In.
 With a text message (SMS).
-
Click MFA verification via SMS.
The dialog box updates with boxes for entering the numbers of the authentication code, and the ESO Suite sends an authentication code to the phone number recorded in your PM records and identified with MFA codes.
-
Enter the authentication code sent to your MFA-registered phone number.
-
Click Log In.
 With an email message.
-
Click MFA verification via email.
The dialog box updates with boxes for entering the numbers of the authentication code, and the ESO Suite sends an authentication code to your agency or department email address, recorded in your PM records.
-
Enter the authentication code sent to your agency or department email address.
-
Click Log In.
-
-
The ESO Suite landing screen appears.

Click graphics
to open them.Note: If MFA is enabled, you can access and manage your MFA options through the PM module, on the Settings > Account page, as described in Manage a user account. If your agency or department has enabled MFA but has not purchased the full-featured version of the PM module, you can access your own MFA settings by clicking Change my Multi-Factor Authentication settings on the landing screen, then using the Settings > Account page that appears. If your agency has not enabled MFA, the Change my Multi-Factor Authentication settings link does not appear on the landing screen.
-
-
On the top side of the home screen, click PM.
Tip: If your screen or browser window is too narrow to display all your agency's ESO Suite module icons, an options icon appears on the right side of the icon bar. If you click the options icon, a menu appears containing additional module icons.
A list of all the personnel in the PM module appears, displayed in a grid format.
PM (full version) PM Basic Note: If you can access the full-featured PM module, you can view all your own information in it. The amount of information you can edit in the PM module depends on what roles and permissions your ESO Suite administrator assigned to your user account.
Information on user accounts, roles, and permissions is available in Manage a user account.
-
-
 Download the template spreadsheet you need.
Note: For spreadsheets containing standardized lists of credit types, contact the ESO implementation team or support team. These spreadsheets are not available for download from the PM module.
-
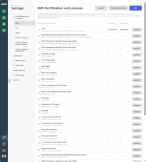
In the left pane, near the bottom, click the Settings icon.
Download the template spreadsheet you need.
Note: Click thumbnail graphics in the help to view the full-sized image.
If you have the necessary permissions assigned to your ESO Suite user roles to configure settings, the Settings screen appears. The list of features that appears in the left pane reflects your permissions to access and configure the PM module, and whether your agency or department has PM Basic or the full-featured version of the PM module. By default, the module opens to the Certifications and Licenses > EMS screen.
PM (full version) PM Basic -
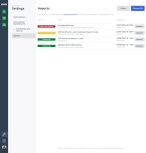
On the left side of the screen, click Imports.
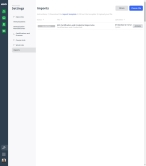
The Imports screen appears, listing any spreadsheets already imported into the module in the left pane.
PM (full version) PM Basic -
At the top of the screen, near the center, click import template.
The Download Import Templates dialog box appears.
PM (full version) PM Basic Note: While you can create your own spreadsheet of information, the columns and data in it must be set up in a specific way for the data to import correctly. It is recommended that you use the provided template from the module instead.
-
To the right of the type of spreadsheet template you need, click Download.
A correspondingly named spreadsheet, already set up in the format needed to import the data, downloads to your default download location, or prompts you for a location, depending on your browser settings.
-
-
 Fill out the template.

ESO Personnel Import.xlsx-
Navigate to the download location and open the spreadsheet.
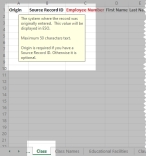
By default, the first sheet selected at the bottom of the spreadsheet is Personnel, and the first cell selected on that sheet is cell A1, titled Source Record ID.
-
In the yellow Protected View banner across the top of the spreadsheet, click Enable Editing.
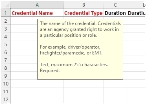
A pop-up for the first column automatically appears, explaining what values should go in the field, whether it is required, what the data format for the column is text, and any restrictons for the cell (example: maximum number of characters allowed in the column's cells).
Note: Columns with red headings are required.
-
Click cell B1, and read the pop-up information that appears for values allowed in that column.
- Continue clicking in each of the titled cells in the first row, to understand the type of data you can enter for the corresponding column.
-
Fill in the columns on that sheet and all the others with the data you want to import into the module.
Note: Be sure to include a user name in the User name column for each person who will have an ESO Suite login, so the import process creates a user account for them and you can assign user roles to them after the import.
 Important notes about the
 ESO Personnel Import.xlsxspreadsheet .To add data to existing personnel records in the module:
-
The employee number in the spreadsheet must exactly match the person's employee number in the module.
-
Data must also exist in the required fields in the spreadsheet.
-
Only empty fields in the record populate with data from the spreadsheet—no data from the spreadsheet overwrites data that already exists in the module.
-
New race values import, but duplicate race values do not import.
Example: If the Race field is set to
Whitein the module, andHispanic or Latino, Asian or Pacific Islanderis entered in the spreadsheet, then in the module, the race appear asWhite,Hispanic or Latino, Asian or Pacific Islander. -
Additional, non-duplicated phone numbers are added to the existing list of phone numbers for the person.
-
- Save and close the spreadsheet.

ESO Certification And Credentials Import.xlsx-
Navigate to the download location and open the spreadsheet.
By default, the first sheet selected at the bottom of the spreadsheet is Certification or Credential, and the first cell selected on that sheet is cell A1, titled Source Record ID.
-
In the yellow Protected View banner across the top of the spreadsheet, click Enable Editing.
A pop-up for the first column automatically appears, explaining what values should go in the field, whether it is required, what the data format for the column is text, and any restrictons for the cell (example: maximum number of characters allowed in the column's cells).
Note: Columns with red headings are required.
-
Click cell B1, and read the pop-up information that appears for values allowed in that column.
- Continue clicking in each of the titled cells in the first row, to understand the type of data you can enter for the corresponding column.
-
At the bottom of the spreadsheet, click the next sheet tab to the right.
In the
ESO Certification And Credentials Import.xlsxspreadsheet, this is the Certification or Credential sheet tab.As on the previous sheet, cell A1 is automatically selected by default, and a pop-up about the information expected and allowed automatically appears.
-
Continue clicking each sheet and labeled cell in the first row, reading the pop-ups to understand the information about what you can and cannot include in the import spreadsheet.
-
Return to the first sheet in the spreadsheet, and then fill in the columns on that sheet and all the others with the data you want to import into the module.
 Important notes about the
 ESO Certification And Credentials Import.xlsxspreadsheet-
The other sheets after the Certification or Credential sheet contain values for lists within the module, that the certification and license records rely on.
Note: Because of this reliance, every list value used in the Certification or Credential sheet must exist either in the corresponding sheet in the spreadsheet, or already exist in as a menu option in the module.
-
On the Certification or Credential sheet, every row must indicate in the Credential or Certification column if it is a certification or credential record.
Note:
- Only certification and license data imports into the PM Basic module.
- Some of the columns are only applicable to one type of record or another. Click each column header and review the information that appears in the pop-up for specifics.
-
For certifications and licenses, multiple columns together determine the list value, as certifications and license can have the same name, but with other information differing.
Example: Paramedic (with national certification) and Paramedic (with state certification)
-
List values may be imported separately from certification and credential records.
-
Exported training program data from FH appears only in the Certification or Credential and Credential sheets.
Note: PM Basic does not import credential data.
On the Credential sheet, the values always default to the value
Other. If you would like a credential imported with a different value, on the Credential sheet, from the cell in the Credential Type column, choose the appropriate category for the credential (Fire,EMS,Other)Caution: You must review the Credential sheet carefully and make changes to it as needed before importing the spreadsheet. If there are EMS certifications or licenses listed on the Credential sheet, you must edit the spreadsheet and enter them as EMS certifications or licenses. You must also modify the data on the Certification or Credential sheet, so this data will import as certifications and licenses, instead of as credentials. This is important, because EMS certifications and licenses are what are required in ESO Suite's EHR module.
Warning: If you do not to make any changes to the data in the spreadsheet, all FH training program personnel records import as credentials.
-
- Save and close the spreadsheet.
 (PM full version only)
 ESO Training Class Import.xlsx-
Navigate to the download location and open the spreadsheet.
By default, the first sheet selected at the bottom of the spreadsheet is Class, and the first cell selected on that sheet is cell A1, titled Origin.
-
In the yellow Protected View banner across the top of the spreadsheet, click Enable Editing.
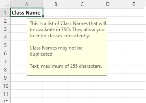
A pop-up for the first column automatically appears, explaining what values should go in the field, whether it is required, what the data format for the column is text, and any restrictons for the cell (example: maximum number of characters allowed in the column's cells).
Note: Columns with red headings are required.
-
Click cell B1, and read the pop-up information that appears for values allowed in that column.
- Continue clicking in each of the titled cells in the first row, to understand the type of data you can enter for the corresponding column.
-
At the bottom of the spreadsheet, click the next sheet tab to the right.
In the
ESO Training Class Import.xlsxspreadsheet, this is the Class Names sheet tab.As on the previous sheet, cell A1 is automatically selected by default, and a pop-up about the information expected and allowed automatically appears.
-
Continue clicking each sheet and labeled cell in the first row, reading the pop-ups to understand the information about what you can and cannot include in the import spreadsheet.
-
Return to the first sheet in the spreadsheet, and then fill in the columns on that sheet and all the others with the data you want to import into the PM module.
 Important notes about the
 ESO Training Class Import.xlsxspreadsheet.- The Class sheet contains the class records, and the other sheets, such as Class Names, contains values for lists within the PM module, that the class records rely on.
- Because of this reliance, every list value used in the Class sheet must exist either in the corresponding sheet in the spreadsheet, or already exist in the list in the PM module.
-
List values may be imported separately from class records.
Example: You could fill out the Class Names sheet and import the spreadsheet to build the list in the Settings > Class Names screen of the PM module, without filling out any class information on the Class sheet of the spreadsheet.
- Save and close the spreadsheet.
- Import the data in the spreadsheet.
-
-
 Import the data in the spreadsheet.
-
In the upper right corner, click Choose File.
The Import File dialog box appears.
-
For Import Category, click the field or the list icon to the right of the field.
The Import Category dialog box appears.
Note:
-
If you are importing a credit types spreadsheet, choose Classes.
-
The Classes option does not appear as an option in PM Basic.
-
-
In the dialog box, click the name of the category corresponding to the type of data you are importing.
The name of the category appears in the Import File dialog box, in the Import Category field.
-
For File, click the paperclip (
 ) icon on the right side of the field, then use the file browser that appears to find and select the spreadsheet containing the information you want to import.
 -
In Import Notes, type any additional information you want to include about the file or data you are importing.
Example: For personnel data:
April 2021 Recruit ClassExample: For certification and credential data:
State EMS certificationsExample: (Full PM version) For class data:
Ladder Training 10-2-2020orImport of corrected records -
Click Import.
The spreadsheet appears as a new listing on the Imports screen, with an initial status of
Validating.
-
-
 Check the status of the import.
When the module completes data verification, the status to the left of the file name updates as relevant.
Status Indicates ValidatingThe file is being readied for import into the module.
Failed ValidationThe file did not pass validation, and was not imported.
 Examine the spreadsheet for formatting errors.
-
Reopen the spreadsheet you had imported, and examine it for unintended changes to the template headers or missing data in one of the required columns.
- Make any corrections needed to the spreadsheet, then save and close it.
-
Import the spreadsheet again, as described in the step Import the data in the spreadsheet.
Note: If you still receive a status of
Failed Validation, please contact ESO support.
In QueueThe file has passed validation, and is waiting its turn for processing.
ProcessingThe data in the file is being imported into the module.
Needs Review(FH customers only)
You had indicated to the ESO Implementation team that wanted to review and possibly edit information in the spreadsheet before it was uploaded into the module.
 Review and make changes to the file before importing it.
-
On the right side of the listing for the import you want to review, click the menu icon and choose Download.
An Excel (.xlsx) file downloads to your default download location, or prompts you for a location, depending on your browser settings.
- Navigate to the download location and open the file.
- In the yellow Protected View banner across the top of the spreadsheet, click Enable Editing.
- Make any changes needed to the values on the different sheets in the spreadsheet, and save your changes.
- Import the spreadsheet into the module, as described in step Import the data in the spreadsheet.
CompletedThe import completed successfully and all records imported into the module.
Completed w/ ErrorsThe import completed successfully, but some records did not imported because they had errors.
 Review the error information in the application.
-
Do any of the following.
- Click the listing for the import you want to review.
-
On the right side of the listing for the import you want to review, click the menu icon and choose View Details.
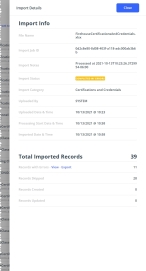
The Import Details dialog box appears.
-
Under Total Imported Records, to the right of Records with Errors, click View.
The Records with Errors dialog box appears, listing detailed information about the error and where to find the erroneous data in the spreadsheet.
Tip: If the information in the Value or Error columns is wider than can be displayed in the column, and ellipses (...) appears at the right edge of the column. If you hover your mouse pointer over the ellipses, the full information appears in a pop-up.
- (Optional) Click up and down arrow (
 ) icon to the right of a column header to sort the data in the Records with Errors dialog box by the values in that row.
 - Reopen the spreadsheet you had imported, and correct the problematic data identified in the Records With Errors dialog box.
- Save and close the spreadsheet.
-
In the Records with Errors dialog box, click Close.
The Import Details dialog box becomes visible again.
- Click Close.
- Import the spreadsheet again, as described in the step Import the data in the spreadsheet.
 Export the error list to a
 .csvfile for review.You have the option of exporting a list of the errors discovered during the import to a comma-separated value file, which can be opened by a spreadsheet program such as Microsoft Excel. This feature is particularly useful if the list is long, and provides you with a way to sort or mark it up in some way as you study and resolve the errors.
-
Do any of the following.
- Click the listing for the import you want to review.
-
On the right side of the listing for the import you want to review, click the menu icon and choose View Details.
The Import Details dialog box appears.
-
Under Total Imported Records, to the right of Records with Errors, click Export.
A comma-separated value file named import file name
_Errors.csvdownloads to your default download location, or prompts you for a location, depending on your browser settings. -
Open import file name
_Errors.csvin the spreadsheet application of your choice, and review the list of errors. -
Resolve the listed errors as needed in the original import spreadsheet, and save the changes.
- Import the spreadsheet again, as described in the step Import the data in the spreadsheet.
Unexpected FailureThe import did not complete.
 Examine the spreadsheet for formatting errors.
-
Reopen the spreadsheet you had imported, and examine it for unintended changes to the template headers or missing data in one of the required columns.
- Make any corrections needed to the spreadsheet, then save and close it.
-
Import the spreadsheet again, as described in the step Import the data in the spreadsheet.
Note: If you still receive a status of
Unexpected Failure, please contact ESO support.
-
-
(Optional, for any status) Do any of the following.
 Review detailed information about the imported data.
-
Do any of the following.
- Click the listing for the import you want to review.
-
On the right side of the listing for the import you want to review, click the menu icon and choose View Details.
The Import Details dialog box appears.
- Review the information in the dialog box as needed.
-
(If errors occurred during the import) Do any of the following.
 Review the error information in the application.
-
Under Total Imported Records, to the right of Records with Errors, click View.
The Records with Errors dialog box appears, listing detailed information about the error and where to find the erroneous data in the spreadsheet.
Tip: If the information in the Value or Error columns is wider than can be displayed in the column, and ellipses (...) appears at the right edge of the column. If you hover your mouse pointer over the ellipses, the full information appears in a pop-up.
- (Optional) Click up and down arrow (
 ) icon to the right of a column header to sort the data in the Records with Errors dialog box by the values in that row.
 -
In the Records with Errors dialog box, click Close.
The Import Details dialog box becomes visible again.
 Export the error information to a
 .csvfile for review.You have the option of exporting a list of the errors discovered during the import to a comma-separated value file, which can be opened by a spreadsheet program such as Microsoft Excel. This feature is particularly useful if the list is long, and provides you with a way to sort or mark it up in some way as you study and resolve the errors.
-
Do any of the following.
- Click the listing for the import you want to review.
-
On the right side of the listing for the import you want to review, click the menu icon and choose View Details.
The Import Details dialog box appears.
-
Under Total Imported Records, to the right of Records with Errors, click Export.
A comma-separated value file named import file name
_Errors.csvdownloads to your default download location, or prompts you for a location, depending on your browser settings. -
Open import file name
_Errors.csvin the spreadsheet application of your choice, and review the list of errors. -
Resolve the listed errors as needed in the original import spreadsheet, and save the changes.
- Import the spreadsheet again, as described in the step Import the data in the spreadsheet.
-
- Click Close.
 Download the import file.
-
On the right side of the listing for the import you want to review, click the menu icon and choose Download.
An Excel (.xlsx) file downloads to your default download location, or prompts you for a location, depending on your browser settings.
- Navigate to the download location and open the file.
-
Examine the data in the spreadsheet as needed.
-
-
(If necessary) Return to the spreadsheet and correct data that caused errors, then repeat the steps to re-import the corrected spreadsheet and review the new results.
Only class, certification and license, and credential records that do not already exist in the PM module are brought into the ESO Suite database on additional imports of the same spreadsheet.


