Add, edit, or delete sessions for a class
You can specify details about the training class, such as the class name and ID number, how and where it will be taught, its accreditation code, and more.
A session is a unit of the class, that deals with a specific and discrete chunk of content. It is common to have a class with multiple sessions, particularly if there is a classroom component, followed by one or more hands-on components. You can add as many sessions as needed to a class, and manage the information in each session independently of the other sessions.
Note: You must have the full version of PM to add, edit, or delete sessions.
For information on upgrading to the full version of PM, go to https://www.eso.com/pm-demo/ and fill out the fields to request a demonstration and speak with a sales representative.
In the PM and Admin modules, your PM and Admin administrators can configure a number of important lists you need when creating and working with training classes. Some of the lists exist in the PM module, on the Settings pages; other lists exist in the Admin module, in the PM pages.
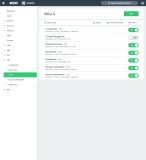
In the PM module, an administrator needs to review and define class-related lists on the Settings > Class Lists page, for the following:
-
Class Names
-
Session Names
-
Absence Reasons
-
Credits
Note: These lists may have been initially populated through importing class data from a spreadsheet, and the administrator may need to manually update or disable imported list items, and add more items to the lists. The administrator can also add values in class-related lists by performing additional class data imports from spreadsheets.
Information on importing class data is available in Import data.
These list items appear when you click the corresponding fields in the PM module.
|
Example: When adding sessions to a class, you may need session name options such as Tanker truck management, Driving tanker trucks in wildlands, Driving tanker trucks in urban settings, Tanker truck refill, Cleaning tanker trucks, and so forth. Your PM module administrator must add custom ADL items to the PM module, on the Settings > Session Names screen, for items to appear as menu choices. The administrator must also verify that the ADL items are enabled for them to appear; items that are disabled on the Settings > Session Names screen will not appear as options for the Session Name field. |
Information on creating a session names list is available in Build the session names list.
If no options appear, or if the menu does not have an option that meets your needs, contact your PM module administrator and ask them to add the necessary menu choices. You will need to work closely with your administrator to create and maintain these lists, as your department's needs evolve over time.
In the Admin module, an administrator needs to define department-related information under the following, for filtering personnel when adding attendees to sessions.
-
General >
- Divisions
- Shifts
- Stations
- Units and Apparatus
These list items appear when you click the corresponding fields in the PM module.
|
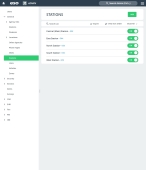
Example: In the PM module, for the Stations field, you may need options such as Central (Main) Station, East Station, North Station, South Station, and West Station. Your Admin administrator must add corresponding ADL items in the Admin module, under General > Stations, for these items to appear as menu choices in the PM module. |
Information on defining these options is available in Configure shifts, Configure stations, Configure units and apparatus, and in Build work lists, respectively.
If no options appear in a class-related field with a drop-down menu, or if the menu does not have an option that meets your needs, contact your PM module administrator and ask them to add the necessary menu choices. You will need to work closely with your administrator to create and maintain these lists, as your department's needs evolve over time.
-
 (If you have not done so already) Access the PM or PM Basic module in the ESO Suite.
Which version of the module opens depends on whether your agency or department has purchased the PM Basic or full version of the PM module.
-
Do one of the following.
-
(If you are already working in the ESO Suite) Click the Home icon in the upper left corner of the screen.
-
 (If you have not yet logged in) Log in to the ESO Suite.
-
In a web browser, go to https://www.esosuite.net/EsoSuite.
The ESO Suite login screen appears.
-
Enter your user name, password, and agency name, then click Let's Go.
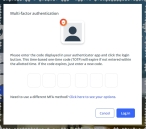
If MFA is enabled, the Multi-factor authentication dialog box appears, displaying one or more methods you can use to verify your login credentials. The number of methods that appear in the dialog box depends on what MFA methods your ESO Suite administrators enabled in the Admin module.

Click graphics
to open them.Information on enabling MFA and specific MFA methods is available in the Admin module online help, in Configure multiple-factor authentication.
Note: If your ESO Suite administrators have disabled MFA ("opted-out"), this dialog does not appear.
-
(If the Multi-factor authentication dialog box appears) Depending on which buttons appear in the dialog box, verify your login in one of the following ways.
 With an authenticator application.
-
Click MFA verification via authenticator app.
The dialog box updates with boxes for entering the numbers of the authentication code, and the ESO Suite sends an authentication code to the authenticator application installed on your device.
-
Open your authenticator application and note the authentication code currently displayed.
-
Enter the authentication code displayed in the authenticator application.
-
Click Log In.
 With a text message (SMS).
-
Click MFA verification via SMS.
The dialog box updates with boxes for entering the numbers of the authentication code, and the ESO Suite sends an authentication code to the phone number recorded in your PM records and identified with MFA codes.
-
Enter the authentication code sent to your MFA-registered phone number.
-
Click Log In.
 With an email message.
-
Click MFA verification via email.
The dialog box updates with boxes for entering the numbers of the authentication code, and the ESO Suite sends an authentication code to your agency or department email address, recorded in your PM records.
-
Enter the authentication code sent to your agency or department email address.
-
Click Log In.
-
-
The ESO Suite landing screen appears.

Click graphics
to open them.Note: If MFA is enabled, you can access and manage your MFA options through the PM module, on the Settings > Account page, as described in Manage a user account. If your agency or department has enabled MFA but has not purchased the full-featured version of the PM module, you can access your own MFA settings by clicking Change my Multi-Factor Authentication settings on the landing screen, then using the Settings > Account page that appears. If your agency has not enabled MFA, the Change my Multi-Factor Authentication settings link does not appear on the landing screen.
-
-
On the top side of the home screen, click PM.
Tip: If your screen or browser window is too narrow to display all your agency's ESO Suite module icons, an options icon appears on the right side of the icon bar. If you click the options icon, a menu appears containing additional module icons.
A list of all the personnel in the PM module appears, displayed in a grid format.
PM (full version) PM Basic Note: If you can access the full-featured PM module, you can view all your own information in it. The amount of information you can edit in the PM module depends on what roles and permissions your ESO Suite administrator assigned to your user account.
Information on user accounts, roles, and permissions is available in Manage a user account.
-
-
In the navigation bar on the left side of the screen, click the Training (
 ) icon.
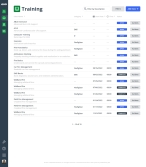
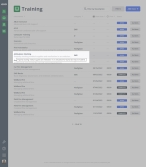
 The Training screen appears, displaying a list of the classes currently in the PM module.
Tip: If the column widths truncate the contents of the Class Name column, you can hover your mouse pointer over the entry in this column to see a pop-up containing the full class name and class description.
-
(If you are not adding a new class) Open the record of the training class you want to work with, as described in Find and open an existing training class.
The training class record opens and displays class details, set to the Class details bookmark in the left pane.
When there are no sessions for a training class, the Start Date & Time field is blank. This field populates when you add at least one session to the class.
-
Click the Sessions tab.
The All sessions page appears, providing a summary listing of any sessions already added to the class.
-
Work with sessions for a training class in any of these ways.
 Add a session and attendees, and manage the session sign-in sheet.
-
Depending on how many sessions are already added to the class, do one of the following.
 No sessions have been added yet.
-
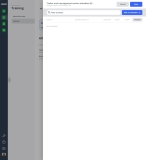
On the left, click Add Session.
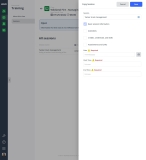
The New Session dialog box appears.
-
For Session Name, click the field or the list icon to the right of the field, then select the appropriate single option from the menu that appears.
If the information was included in the session name definition when it was created, the Session Description, Session Objective, and Required fields automatically populate in the New Session dialog box with the information.
Note: Even if the Session Description, Session Objective, and Required fields automatically populated, you can still edit the values in these field as necessary for the session you are adding.
-
 Add or update the populated session information.
-
In Session Description, type a description of what this session of the class covers.
Example:
Driving tanker trucks in non-urban settings. -
In Session Objective, type a description of what take-away knowledge the personnel should after attending the session.
Example:
Learn how to drive a tanker truck in off-road environments to assist in combating a wildland fire. - Select or clear Required to indicate whether or not this session is required in a class.
-
- For Date, click the calendar icon on the right end of the field and select the appropriate date from the calendar that appears.
- In Start Time and End Time, type the times the session begins and ends, in military time.
-
From Instructors, click the list icon to the right of the field, select the names of all the staff members and external instructors involved in teaching the session, then click Done or click outside the menu.
Note: This menu list is populated from the Users list in the Admin module. External instructors are identified by a gray text label to the right of their name.
Information on user accounts, roles, and permissions is available in Manage a user account.
-
Specify the location for the session in one of these ways.
 Choose a predefined location.
In the Admin module, you can build a list of locations your agency or department typically uses for training classes. In the PM module, you can then choose one of these locations instead.
-
From Training Location, click the list icon to the right of the field, select all the appropriate options from the menu that appears, then click OK or click outside the menu.
The address for the location automatically populates the Street Address 1, Street Address 2, City, State, Zip, and County fields. A lock icon appears on the right side of these fields, indicating that the field is locked and you can not make changes to it in the PM module.
 Manually enter the address of the training location.
-
In Street Address 1 and Street Address 2, type the building number and street information for the location.
-
Identify the city where the person lives in one of these ways.
- In City, type the full name of the city into the field.
-
 Search for the city.
-
In City, type the first three (or more) characters of the city name, then click the search icon (magnifying glass).
A list of cities, states, or zip codes matching what you entered appears.
Example: In City, type
Ame, then click the search icon.A list of cities beginning with
Ameappears on the right. -
Select the entry that corresponds to the rest of the address you are entering.
The rest of the information from that match automatically populates the City, State, and County fields.
-
-
In Zip, type the zip code for the location, then click the search icon (magnifying glass).
A list of cities, states, or zip codes matching what you entered appears.
Example: In Zip, type
50248, then click the search icon.A list of zip codes matching
50248appears on the right. -
Select the entry that corresponds to the rest of the address you are entering.
The rest of the information from that match automatically populates the City, State, and County fields.
-
-
Click Save.
The Start Date & Time field displays the date and time of the session, the information you entered appears as a summary in the All Sessions list.
 One or more sessions have been added
-
Depending on what level of session information you want to start with, do one of the following.
 Start with a blank new session.
-
To the right of All sessions section, click Add another session, then choose either Add New Session.
The New Session dialog box appears.
-
For Session Name, click the field or the list icon to the right of the field, then select the appropriate single option from the menu that appears.
If the information was included in the session name definition when it was created, the Session Description, Session Objective, and Required fields automatically populate in the New Session dialog box with the information.
Note: Even if the Session Description, Session Objective, and Required fields automatically populated, you can still edit the values in these field as necessary for the session you are adding.
-
 Add or update the populated session information.
-
In Session Description, type a description of what this session of the class covers.
Example:
Driving tanker trucks in non-urban settings. -
In Session Objective, type a description of what take-away knowledge the personnel should after attending the session.
Example:
Learn how to drive a tanker truck in off-road environments to assist in combating a wildland fire. - Select or clear Required to indicate whether or not this session is required in a class.
-
- For Date, click the calendar icon on the right end of the field and select the appropriate date from the calendar that appears.
- In Start Time and End Time, type the times the session begins and ends, in military time.
-
From Instructors, click the list icon to the right of the field, select the names of all the staff members and external instructors involved in teaching the session, then click Done or click outside the menu.
Note: This menu list is populated from the Users list in the Admin module. External instructors are identified by a gray text label to the right of their name.
Information on user accounts, roles, and permissions is available in Manage a user account.
-
Specify the location for the session in one of these ways.
 Choose a predefined location.
In the Admin module, you can build a list of locations your agency or department typically uses for training classes. In the PM module, you can then choose one of these locations instead.
-
From Training Location, click the list icon to the right of the field, select all the appropriate options from the menu that appears, then click OK or click outside the menu.
The address for the location automatically populates the Street Address 1, Street Address 2, City, State, Zip, and County fields. A lock icon appears on the right side of these fields, indicating that the field is locked and you can not make changes to it in the PM module.
 Manually enter the address of the training location.
-
In Street Address 1 and Street Address 2, type the building number and street information for the location.
-
Identify the city where the person lives in one of these ways.
- In City, type the full name of the city into the field.
-
 Search for the city.
-
In City, type the first three (or more) characters of the city name, then click the search icon (magnifying glass).
A list of cities, states, or zip codes matching what you entered appears.
Example: In City, type
Ame, then click the search icon.A list of cities beginning with
Ameappears on the right. -
Select the entry that corresponds to the rest of the address you are entering.
The rest of the information from that match automatically populates the City, State, and County fields.
-
-
In Zip, type the zip code for the location, then click the search icon (magnifying glass).
A list of cities, states, or zip codes matching what you entered appears.
Example: In Zip, type
50248, then click the search icon.A list of zip codes matching
50248appears on the right. -
Select the entry that corresponds to the rest of the address you are entering.
The rest of the information from that match automatically populates the City, State, and County fields.
-
-
Click Save.
The new session you added appears as a new list item on the Sessions tab.
 Copy an existing session and change the copied information.
-
Do one of the following.
-
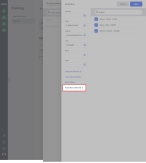
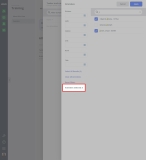
To the right of All sessions section, click Add another session, then choose Copy Existing Session.
-
On the right side of the listing, click Actions, and choose Copy
The Copy Session dialog box appears. If you chose to select Actions > Copy for a specific session listing, the PM module automatically populates and locks the Session field, based on the session you copied. It also automatically populates the instructor and location as part of the basic session information, and selects and locks the Basic session information option.
-
-
(If it is not locked) For Session, click the field or the list icon to the right of the field, then select the appropriate single option from the menu that appears, to indicate which session you want to copy the information from.
The PM module populates the instructor and location as part of the basic session information, and selects and locks the Basic session information option.
-
Select or clear the following options to indicate whether you want to also copy other session information.
Choose this To copy this Attendees
The list of attendees in the session.
Credits, credentials, and skills
Any credits earned, credentials granted, and skills learned by completing the session.
Attachments and Links
Any attachments and links needed for the session.
- For Date, click the calendar icon on the right end of the field and select the appropriate date from the calendar that appears
- In Start Time and End Time, type the times the session begins and ends, in military time.
-
Click Save.
The new session you added appears as a new list item on the Sessions tab.
-
-
-
Click the listing of the new session to open it, so you can add additional information.
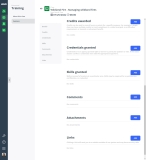
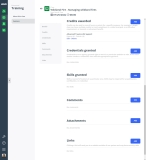
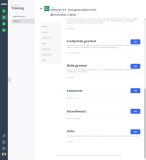
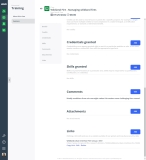
The Sessions tab updates to display all the information specific to that session. This information includes the basic session information you just specified, and provides sections for specifying the credits, credentials, skills, and attendees specific to that section.
Tip: To return to the listing of sessions for this class, above the name of the session, click < Back to sessions list.
-
 List credits awarded by completing the session.
A credit is a unit that counts towards receiving or renewing a certification or license, such as continuing education credits, to receive or renew a credential, qualification or skill, or for a state or national requirement such as ISO. You can use credit points to track LOSAP or other award programs, and to track training requirements. A credit hour is the unit of measure for contact time a personnel member has during a training class. It includes any lecture or hands-on time involved while the instructor is teaching or coaching the student, as they apply the class information to an activity.
LOSAP is as a system established to provide tax-deferred income benefits to active volunteer members of an emergency service organization.
-
On the left, click the Credits bookmark.
The right side scrolls down to the Credits awarded section of this tab.
-
Do any of the following.
 Add credits.
-
On the right side of the Credits awarded section, click Add.
The Add Credit dialog box appears.
-
For Credit Type, click the field or the list icon to the right of the field.
A list of credit categories appears.
-
Click the right-pointing arrow for the category the credit you want to add would be in.
A list of credits specific to that category appears.
Example: If you chose EMS as the category, a list of EMS credit selections appears.
-
Select the option corresponding to the credit you are adding.
The Add Credit dialog box becomes visible again.
-
In Hours, type the number of hours granted for the class.
Hours can be applied toward certification or a CEU.
- In Points, type the number of points the person received toward this credit type.
-
Click Done.
The information you entered appears as a summary in the Credits section on this tab.
 Edit existing credits.
-
In the listing for the credits listing you want to edit, click Edit.
The Edit Credit dialog box appears, displaying the information already specified for the credit.
- Change the information in the fields as needed.
- Click Save.
 Delete credit.
-
In the listing for the credits you want to delete, click Delete.
A confirmation dialog box appears.
- Click Yes.
-
-
-
 List credentials granted by completing the session
A credential is granted locally to a person within an agency or department, allowing that person to perform duties aligned with a certain level of task. Credentials relate to conditions of employment within your agency.
Example: A medical director credentialing an EMS provider, or a physician being credentialed to practice in a hospital.
 Understand the link between the PM and Admin modules, when specifying credential information.
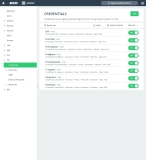
Before you begin adding credentials, you may need to contact your ESO Suite administrator and ask them to add items to the ADLs in the Admin module, under PM > Credentials. These lists provide the menu options for the Credential field in the PM module.
Example: In the PM module, for the Credential field, Fire menu extension, you may need options such as Fire Chief, Fire Inspector, Firefighter, Lieutenant, and so forth. Your ESO Suite administrator must add corresponding ADL items in the Admin module, under PM > Credentials, for these items to appear as menu choices in the PM module.
If no options appear, or if the menu does not have an option that meets your needs, contact your ESO Suite administrator and ask them to add the necessary menu choices. You will need to work closely with your administrator to create and maintain these lists, as your department's needs evolve over time.
Information on defining credential menu options is available in List credentials.
-
On the left, click the Credentials bookmark.
The right side scrolls down to the Credentials granted section of this tab.
-
Do any of the following.
 Add a new credential.
-
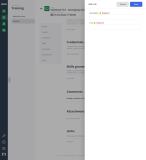
On the right side of the Credentials granted section, click Add.
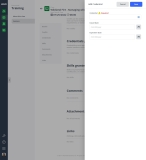
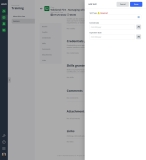
The Add Credential dialog box appears on the right.
-
For Credential, click the field or the list icon to the right of the field.
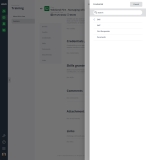
A list of credential categories appears.
-
Click the right-pointing arrow for the category the credential you want to add would be in.
A list of credentials specific to that category appears.
Example: If you chose EMS as the category, a list of EMS credentials selections appears.
-
Select the option corresponding to the credential you are adding.
The Add Credential dialog box becomes visible again.
-
For Issued Date and Expiration Date, click the calendar icon on the right end of the field and select the appropriate date from the calendar that appears.
If a duration period was specified when the credential was defined, then the PM module automatically calculates the expiration date based on the duration period.
Information on defining a credential duration period is available in List credentials, under Add a credential.
-
Click Save.
The information you entered appears as a summary in the Credentials section on this tab.
 Edit an existing credential.
-
In the listing for the credential you want to edit, click Edit.
The Edit Credential dialog box appears, displaying the information already specified for the credential.
- Change the information in the fields as needed.
- Click Save.
 Delete a credential.
-
In the listing for the credential you want to delete, click Delete.
A confirmation dialog box appears.
- Click Yes.
-
-
-
 List skills learned by completing the session
A skill is the ability to carry out a task with determined results often within a given amount of time, energy, or both. Common skills include intubation, intravenous access, SCBA emergency don/doff procedures, and so forth. You can build a list of the various skills the person has demonstrated, and record the duration of each skill.
 Understand the link between the PM and Admin modules, when specifying skill information.
Before you begin adding skills, you may need to contact your ESO Suite administrator and ask them to add items to the ADLs in the Admin module, under PM > Skills. This list provides the menu options for the Skill field in the PM module.
Example: In the PM module, for the Skill Type field, you may need options such as 12 Lead ECG, Advanced Airway, Glucometer, Intubations, Transport Ventilator, and so forth. Your ESO Suite administrator must add corresponding ADL items in the Admin module, under PM > Skills, for these items to appear as menu choices in the PM module.
If no options appear, or if the menu does not have an option that meets your needs, contact your ESO Suite administrator and ask them to add the necessary menu choices. You will need to work closely with your administrator to create and maintain these lists, as your department's needs evolve over time.
Information on defining skill menu options is available in List skills.
-
On the left, click the Skills bookmark.
The right side scrolls down to the Skills granted section of this tab.
-
Do any of the following.
 Add a new skill.
-
On the right side of the Skills granted section, click Add.
The Add Skill dialog box appears on the right.
- For Skill Type, click the field or the list icon to the right of the field, then select the appropriate single option from the menu that appears.
-
For Earned Date and Expiration Date, click the calendar icon on the right end of the field and select the appropriate date from the calendar that appears.
If a duration period was specified when the skill was defined, then the PM module automatically calculates the expiration date based on the duration period.
Information on defining a skill duration period is available in List skills, under Add a skill.
-
Click Save.
The information you entered appears as a summary in the Skills granted section of this tab.
 Edit an existing skill.
-
In the listing for the skill you want to edit, click Edit.
The Edit Skill dialog box appears, displaying the information already specified for the skill.
- Change the information in the fields as needed.
- Click Save.
 Delete a skill.
-
In the listing for the skill you want to delete, click Delete.
A confirmation dialog box appears.
- Click Yes.
-
-
-
 Add comments.
-
On the left, click the Comments bookmark.
The right side scrolls down to the Comments section of the Session tab.
-
On the right side of the Comments section, click Edit.
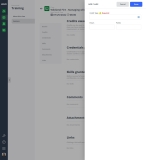
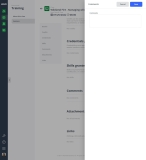
The Comments dialog box appears.
- In Comments, type any observations or remarks relevant to this specific session.
-
Click Save.
The information you entered appears as a summary in the Comments section on this tab.
-
-
 Add and work with attachments for the session.
You can add and then work with attachments for the session as needed. Attachments may include images used in the class, PDF files, certificates of completion, and so forth.
-
On the left, click the Attachments bookmark.
The right side scrolls down to the Attachments section of the Sessions tab.
-
Do any of the following.
 Add a new attachment.
-
On the right side of the Attachments section, click Add.
The Add Attachment dialog box appears.
- For File, click the field, then use the file browser that appears to navigate to and select the attachment you want to add.
- In Description, type a description of the attachment, or any other information that should accompany it.
-
Click OK.
The attachment appears as a list item in the Attachments section of the Sessions tab.
 View an attachment.
-
In the listing of the attachment, do one of the following.
- Click the thumbnail image or icon for the attachment.
- To the right of the attachment file name, click View.
The attachments viewer opens. If the attachment is an image or PDF file, the image or PDF appears; if the file is of some other type, a message that this type of file can not be previewed appears.
Tip: (Optional, if there are multiple attachments) In the upper left corner of the attachment viewer, in the attachments counter, click the left- and right-pointing arrows to scroll through and view the attached files.
-
In the upper right corner of the viewer, click the close (X) icon.
 View information about an attachment.
-
In the listing of the attachment, do one of the following.
- Click the thumbnail image or icon for the attachment.
- To the right of the attachment file name, click View.
The attachments viewer opens. If the attachment is an image or PDF file, the image or PDF appears; if the file is of some other type, a message that this type of file can not be previewed appears.
Tip: (Optional, if there are multiple attachments) In the upper left corner of the attachment viewer, in the attachments counter, click the left- and right-pointing arrows to scroll through and view the attached files.
-
In the upper right corner of the viewer, click the information icon (an i in a circle), then read the information in the menu that appears.
-
In the upper right corner of the viewer, click the close (X) icon.
 Edit the description of an attachment.
-
In the listing of the attachment you want to edit the description for, do one of the following.
 View the attachment before editing the description.
-
In the listing of the attachment, do one of the following.
- Click the thumbnail image or icon for the attachment.
- To the right of the attachment file name, click View.
The attachments viewer opens. If the attachment is an image or PDF file, the image or PDF appears; if the file is of some other type, a message that this type of file can not be previewed appears.
Tip: (Optional, if there are multiple attachments) In the upper left corner of the attachment viewer, in the attachments counter, click the left- and right-pointing arrows to scroll through and view the attached files.
-
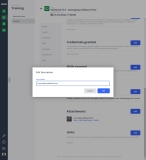
In the upper right corner of the viewer, click the three-dot menu icon, then choose Edit Description.
The Edit Description dialog box appears.
- In Description, edit the text describing the attachment as needed.
-
Click OK.
The attachment's description updates in the center of the attachment viewer's top black bar.
-
In the upper right corner of the viewer, click the close (X) icon.
-
 Download an attachment.
-
In the listing of the attachment, do one of the following.
- Click the thumbnail image or icon for the attachment.
- To the right of the attachment file name, click View.
The attachments viewer opens. If the attachment is an image or PDF file, the image or PDF appears; if the file is of some other type, a message that this type of file can not be previewed appears.
Tip: (Optional, if there are multiple attachments) In the upper left corner of the attachment viewer, in the attachments counter, click the left- and right-pointing arrows to scroll through and view the attached files.
-
In the upper right corner of the viewer, click the three-dot menu icon, then choose Download.
The file downloads to the default download location on your computer.
 Print an attachment.
-
In the listing of the attachment, do one of the following.
- Click the thumbnail image or icon for the attachment.
- To the right of the attachment file name, click View.
The attachments viewer opens. If the attachment is an image or PDF file, the image or PDF appears; if the file is of some other type, a message that this type of file can not be previewed appears.
Tip: (Optional, if there are multiple attachments) In the upper left corner of the attachment viewer, in the attachments counter, click the left- and right-pointing arrows to scroll through and view the attached files.
-
In the upper right corner of the viewer, click the three-dot menu icon, then choose Print.
A new browser tab appears, displaying the standard Windows browser printing capabilities.
- Continue with the print process in the new browser tab.
-
In the upper right corner of the viewer, click the close (X) icon.
 Delete an attachment.
-
In the listing of the attachment you want to delete, do one of the following.
 Delete the attachment without viewing it first.
-
In the listing for the file you want to remove, click Delete.
A delete confirmation dialog box appears.
-
Click Yes.
The module deletes the attachment.
 View the attachment before deleting it.
-
In the listing of the attachment, do one of the following.
- Click the thumbnail image or icon for the attachment.
- To the right of the attachment file name, click View.
The attachments viewer opens. If the attachment is an image or PDF file, the image or PDF appears; if the file is of some other type, a message that this type of file can not be previewed appears.
Tip: (Optional, if there are multiple attachments) In the upper left corner of the attachment viewer, in the attachments counter, click the left- and right-pointing arrows to scroll through and view the attached files.
-
In the upper right corner of the viewer, click the three-dot menu icon, then choose Delete.
The Delete Confirmation dialog box appears.
-
Click Yes.
The module deletes the file and closes the viewer.
-
-
-
-
 Add, copy, edit, or delete links.
You can add links to a training class, to provide reference material, useful exercises, and other resources that are available online.
-
On the left, click the Links bookmark.
The right side scrolls down to the Links section of the Sessions tab.
-
Do any of the following.
 Add a new link.
-
On the right side of the Links section, click Add.
The Add Link dialog box appears.
- In Description, type a description of the online material the link going to.
- In Link, type or paste the URL for the web site you are linking to.
-
Click Done.
The information you entered appears as a summary in the Links section of the Session tab.
 Edit an existing link.
-
In the listing for the link you want to edit, click Edit.
The Edit Link dialog box appears, displaying the information already specified for the link.
- Change the information in the fields as needed.
- Click Done.
 Delete a link.
-
In the listing for the link you want to delete, click Delete.
A confirmation dialog box appears.
- Click Yes.
-
-
-
 Add and work with attendees.
You can add and remove attendees as needed from each session, track attendance for the session, assign either a pass/fail or a grade to each attendee, and so forth.
-
Do any of the following.
 Add attendees.
-
Open the dialog box for managing session attendees in one of he these ways.
-
To the right of the session title, click Manage Attendees.
-
On the right side of the listing, click Actions, and choose Manage Attendees.
A dialog box titled with the name of the session appears.
-
-
Click Add an attendee.
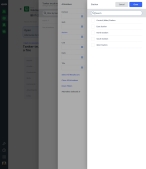
The Attendees dialog box appears on the right, listing the personnel in your department or agency.
-
For any of the following fields, click the list icon to the right of the field, then select all the appropriate options from the menu that appears, and click Done.
Field Searches for this Division
The organizational unit within the department or agency that the person belongs to. Common divisions are administration, training, operations, and so forth.
Shift
The named time span the person was working. A shift is one of two or more recurring periods in which different groups of personnel do the same jobs in relay.
Station
The name or location of the building the person was working from. A station is a place or building where a specific activity or service is based.
Unit
The apparatus or vehicle the person was assigned to.
Note: Units and apparatus are conceptually different from vehicles, particularly in the EMS industry. A unit may consist of one or more personnel, who can perform a particular level of service, and they may use one of any number of available vehicles. The concept of a unit captures both unit-identifying and equipment information.
Rank
The position or role the person fulfills for the department or agency. Common ranks are Chief, Captain, Lieutenant, Firefighter, Engineer, and Paramedic.
Title
The current employment title of the person within the department or agency.
Note: Titles may be related to a rank, but do not necessarily fall within the defined organizational structure.
Example: Chief of Operations, and Administrative Coordinator.
As you select filters, the list of personnel names to the right reduces to display only the ones that match your choices.
Note: The filtering methods all work in conjunction, letting you build a logical expression.
Example: You can initially filter the list to find personnel who work at the Central (Main) Station, reduce the results further by filtering for shifts A or B, then search those results further yet by adding the unit FireEng01 filter. Only the personnel who work at the Central (Main) Station, on either the A or B shift, and who worked on unit FireEng01 during those shifts appear in the result.
-
(If necessary) Click Reset Filters to clear all your filter selections at once.
-
Choose the personnel whose record you want to add records to in one of the following ways.
To do this Do this Select all personnel currently listed.
- Below the list of filters, click Select All Results.
Manually select individual personnel.
- In the list of personnel on the right, select the names of the individuals.
The total number of personnel you select appears at the bottom left side of the dialog box.
Note: Once you select a person, they remain selected, even if you change the filter criteria and that person no longer appears in the filtered list. Check the number of attendees to verify how many personnel are actually selected.
-
(If necessary) Click Clear All Attendees to clear all your selections at once.
Caution: Verify the total number personnel selected in Attendees Selected, before clicking Clear All Attendees.
Example: If you only see two personnel selected in the list because you are filtering the list, and Attendees Selected indicates you have 4 personnel selected, clicking Clear All Personnel clears all 4 selected personnel.
-
Click Apply
The personnel you selected appear under Attendees on the training screen.
-
Click Save.
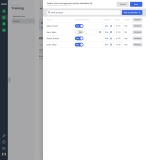
 Indicate which personnel attended the session.
By default, all session attendees are set to "did not attend," so that attendees are not accidentally given credit if they do not end up attending after all.
-
Indicate whether each attendee was present at the session.
To indicate this Do this Absent
-
In the row for each attendee absent from the session, in the Did they attend? column, click the field or the list icon to the right of the field, then select the appropriate single option from the menu that appears, to indicate why the attendee was absent from the session.
Present
-
In the row for each attendee present at the session, in the Did they attend? column, drag the slider button to the right until the slider background turns green.
The field to the right of the slider button disappears.
-
Tip: If all the attendees passed the course, you can set the pass/fail selection for all attendees at once by clicking Actions on the right, above the list, and choosing Mark all attended.
 Sort attendees alphabetically or by attendance.
-
At the top of the Name and Did they attend? columns, click the up and down arrow icons in the column headers to sort the column contents.
When you click the icon for the Name column, the PM module sorts the table from A-Z or Z-A, based on the attendee last names. When you click the icon for the Did they attend? column, the PM module sorts the table based on those who attended the session and those who did not.
 Pass, fail, or grade an attendee.
You can grade an attendee on their performance in the session, and you can indicate whether or not the attendee passed or failed the session.
-
In the row for each attendee, do one or both of the following.
- In the Grade column, type the percentage the attendee's performance in the session merited.
-
In the Pass/Fail column, click the cell (initially displaying the value N/A), then select the appropriate single option from the menu that appears.
Tip: If all the attendees passed the course, you can set the pass/fail selection for all attendees at once by clicking Actions on the right, above the list, and choosing Mark all passed.
The PM module automatically calculates any credits the attendee has earned by completing the session, and displays the number of credits in the Credit? column.
 Delete an attendee from the session.
-
In the row for the attendee you want to delete from the class, on the right end of the row, click Remove.
The PM module deletes the attendee from the session.
-
-
Click Save.
-
-
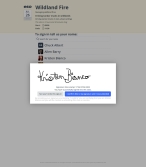
 Work with the session sign-in sheet.
The sign-in sheet helps you track which attendees were actually present during a session.
-
On the right side of the listing, click Actions, and choose Open Sign In Sheet.
The sign-in sheet opens in a separate browser window, summarizing the basic class information and identifying the session the sign-in sheet applies to. Only the attendees for the session appear on the sign-in sheet.
-
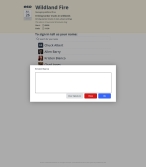
(Optional, if the attendee list is long) In To sign in tell us your name, type part or all of the attendee name.
As you type, the list of session attendees reduces to list only those that contain the series of characters you are typing.
-
In the list, click the name of the attendee who is ready to sign in for the session.
A signature box for that attendee appears.
-
Click in the box, and hold down the mouse button (or place the finger or a stylus on a mobile device), and move the mouse (or finger or stylus) through the motions of writing the signature, to "sign" the name in the box.
-
(If you are dissatisfied with your signature drawing) Click Clear Signature, and "sign" your name again.
-
Click OK.
A signature confirmation dialog box appears.
-
Click I confirm this is my signature and I have attended.
In the list of session attendees, a green circle with a white check mark in it appears to the left of the attendee's name, indicating that they have completed the sign-in process for the class.
-
Repeat the steps above for each attendee present in the session.
-
Return to the browser window containing the session attendee list.
In the Did they attend? column, the View signature link appears for each attendee that has completed the sign-in session.
-
 (Optional) Work with the session signatures in any of the following ways.
 View information about the signature.
-
For the attendee whose signature you want to view, in the Did they attend? column, click View signature.
The signature viewer opens and displays the signature the attendee approved for the sign-in sheet.
-
In the upper right corner of the viewer, click the information icon (an i in a circle), then read the information in the menu that appears.
-
In the upper right corner of the viewer, click the close (X) icon.
 Download the signature.
-
For the attendee whose signature you want to view, in the Did they attend? column, click View signature.
The signature viewer opens and displays the signature the attendee approved for the sign-in sheet.
-
In the upper right corner of the viewer, click the three-dot menu icon, then choose Download.
The file downloads to the default download location on your computer.
-
In the upper right corner of the viewer, click the close (X) icon.
 Print the signature.
-
For the attendee whose signature you want to view, in the Did they attend? column, click View signature.
The signature viewer opens and displays the signature the attendee approved for the sign-in sheet.
-
In the upper right corner of the viewer, click the three-dot menu icon, then choose Print.
A new browser tab appears, displaying the standard Windows browser printing capabilities.
- Continue with the print process in the new browser tab.
-
In the upper right corner of the viewer, click the close (X) icon.
-
-
-
 Copy the link for the sign-in sheet.
You can copy the link to the sign-in sheet and send it instructors so they can access the sign-in sheet without having to go through the PM module, to managers interested in verifying who attended classes, and so forth.
Note: For someone to view the sign-in sheet, they must have an ESO Suite login, and the Sign in Sheet Access security permission included in one of their user roles.
Information on user accounts, roles, and permissions is available in Manage a user account.
-
On the right side of the listing, click Actions, and choose Open Sign In Sheet.
A confirmation message appears briefly at in the lower right corner of the screen, indicating that the URL to the sign-in sheet is copied to your computer's internal clipboard. You can now paste it into a web page, email, document, and so forth.
-
 Edit an existing session.
-
Click the Sessions tab.
The All sessions page appears, providing a summary listing of any sessions already added to the class.
-
Depending on what session information you want to edit, do one of the following.
To do this Do this Edit only basic session information
Access and edit all session information
- Change the information in the fields as needed.
- Click Save.
 Delete a session.
-
Click the Sessions tab.
The All sessions page appears, providing a summary listing of any sessions already added to the class.
-
On the right side of the listing, click Actions, and choose Delete.
A confirmation dialog box appears.
-
Click Yes.
The listing for the session is deleted from the Sessions tab.
-


