Add, copy, edit, or delete a training class
A training class is a class given to develop your staff members' skills. Training classes can be credited toward any training requirements for the person, agency, or department. You can create a new training class, add one or more sessions to the class, track which personnel attended the class, award credits, grant credentials or skills, assign pass/fail or graded completion, add attachments and links, and so forth. You can also track which personnel attended which sessions of a class. You can view the detailed record of an existing class, edit a class, and delete it from the list.
Note: You must have the full version of PM to add, edit, or delete training classes.
For information on upgrading to the full version of PM, go to https://www.eso.com/pm-demo/ and fill out the fields to request a demonstration and speak with a sales representative.
In the PM and Admin modules, your PM and Admin administrators can configure a number of important lists you need when creating and working with training classes. Some of the lists exist in the PM module, on the Settings pages; other lists exist in the Admin module, in the PM pages.
In the PM module, an administrator needs to review and define class-related lists on the Settings > Class Lists page, for the following:
-
Class Names
-
Session Names
-
Absence Reasons
-
Credits
Note: These lists may have been initially populated through importing class data from a spreadsheet, and the administrator may need to manually update or disable imported list items, and add more items to the lists. The administrator can also add values in class-related lists by performing additional class data imports from spreadsheets.
Information on importing class data is available in Import data.
These list items appear when you click the corresponding fields in the PM module.
|
Example: When creating class records, you may need class name options such as ABLS Instructor, ACLS, Car Fire Management, Computer Training, Field Fire Management, and so forth. Your PM module administrator must add custom ADL items to the PM module, on the Settings > Class Names screen, for items to appear as menu choices. The administrator must also verify that the ADL items are enabled for them to appear; items that are disabled on the Settings > Class Names screen will not appear as options for the Class or Class Name field. |
Information on creating a class names list is available in Build the class names list.
If no options appear, or if the menu does not have an option that meets your needs, contact your PM module administrator and ask them to add the necessary menu choices. You will need to work closely with your administrator to create and maintain these lists, as your department's needs evolve over time.
In the Admin module, an administrator needs to define class-related lists of items under the following, for adding or filtering the list of personnel in the PM module.
-
PM > Class Lists >
- Training Location
- Education Facility
- Class Method
- Categories
- Accreditation Code
These list items appear when you click the corresponding fields in the PM module.
|
Example: In the PM module, for the Education Facility field, you may need options such as St. Lawrence Hospital, Main St. Fire Depart., Fire Supply Supply Depot, ISU, DMACC, and so forth. Your ESO Suite administrator must add corresponding ADL items in the Admin module, under PM > Class Lists > Education Facility, for these items to appear as menu choices in the PM module. |
Information on defining class-related list menu options in the Admin module is available in Build class lists.
If no options appear in a class-related field with a drop-down menu, or if the menu does not have an option that meets your needs, contact your Admin module administrator and ask them to add the necessary menu choices. You will need to work closely with your administrator to create and maintain these lists, as your department's needs evolve over time.
-
 (If you have not done so already) Access the PM or PM Basic module in the ESO Suite.
Which version of the module opens depends on whether your agency or department has purchased the PM Basic or full version of the PM module.
-
Do one of the following.
-
(If you are already working in the ESO Suite) Click the Home icon in the upper left corner of the screen.
-
 (If you have not yet logged in) Log in to the ESO Suite.
-
In a web browser, go to https://www.esosuite.net/EsoSuite.
The ESO Suite login screen appears.
-
Enter your user name, password, and agency name, then click Let's Go.
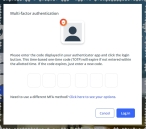
If MFA is enabled, the Multi-factor authentication dialog box appears, displaying one or more methods you can use to verify your login credentials. The number of methods that appear in the dialog box depends on what MFA methods your ESO Suite administrators enabled in the Admin module.

Click graphics
to open them.Information on enabling MFA and specific MFA methods is available in the Admin module online help, in Configure multiple-factor authentication.
Note: If your ESO Suite administrators have disabled MFA ("opted-out"), this dialog does not appear.
-
(If the Multi-factor authentication dialog box appears) Depending on which buttons appear in the dialog box, verify your login in one of the following ways.
 With an authenticator application.
-
Click MFA verification via authenticator app.
The dialog box updates with boxes for entering the numbers of the authentication code, and the ESO Suite sends an authentication code to the authenticator application installed on your device.
-
Open your authenticator application and note the authentication code currently displayed.
-
Enter the authentication code displayed in the authenticator application.
-
Click Log In.
 With a text message (SMS).
-
Click MFA verification via SMS.
The dialog box updates with boxes for entering the numbers of the authentication code, and the ESO Suite sends an authentication code to the phone number recorded in your PM records and identified with MFA codes.
-
Enter the authentication code sent to your MFA-registered phone number.
-
Click Log In.
 With an email message.
-
Click MFA verification via email.
The dialog box updates with boxes for entering the numbers of the authentication code, and the ESO Suite sends an authentication code to your agency or department email address, recorded in your PM records.
-
Enter the authentication code sent to your agency or department email address.
-
Click Log In.
-
-
The ESO Suite landing screen appears.

Click graphics
to open them.Note: If MFA is enabled, you can access and manage your MFA options through the PM module, on the Settings > Account page, as described in Manage a user account. If your agency or department has enabled MFA but has not purchased the full-featured version of the PM module, you can access your own MFA settings by clicking Change my Multi-Factor Authentication settings on the landing screen, then using the Settings > Account page that appears. If your agency has not enabled MFA, the Change my Multi-Factor Authentication settings link does not appear on the landing screen.
-
-
On the top side of the home screen, click PM.
Tip: If your screen or browser window is too narrow to display all your agency's ESO Suite module icons, an options icon appears on the right side of the icon bar. If you click the options icon, a menu appears containing additional module icons.
A list of all the personnel in the PM module appears, displayed in a grid format.
PM (full version) PM Basic Note: If you can access the full-featured PM module, you can view all your own information in it. The amount of information you can edit in the PM module depends on what roles and permissions your ESO Suite administrator assigned to your user account.
Information on user accounts, roles, and permissions is available in Manage a user account.
-
-
In the navigation bar on the left side of the screen, click the Training (
 ) icon.
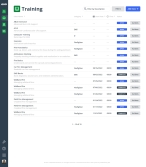
 The Training screen appears, displaying a list of the classes currently in the PM module.
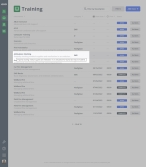
Tip: If the column widths truncate the contents of the Class Name column, you can hover your mouse pointer over the entry in this column to see a pop-up containing the full class name and class description.
-
Work with training classes in any of these ways.
 Add a new class.
You can add a new class with no existing values, and specify the details for the class as needed.
-
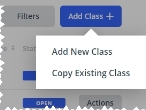
In the upper right corner of the screen, click Add Class, then choose Add New Class from the menu that appears.
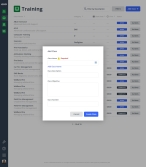
The Add Class dialog box appears.
-
For Class Name, click the field or the list icon to the right of the field, then select the appropriate single option from the menu that appears.
Note: The options that appear in the menu were added earlier by your PM administrator in the Settings screen, under Class Lists > Class Names. If the class name you need does not already exist in the Class Name's menu, and if you have the necessary permissions in the PM module, you can add a new class name as a menu option without going to the Settings screen.
 Add a class name while on the Classes tab.
-
Under the Class Name field, click Add Class Name.
The Add Class Name dialog box appears.
- In Class Name, type the name for the class.
- In Class Description, type a short description of the class.
-
In Class Objective, type the list of objectives the class will cover.
An objective is a knowledge base and/or set of skills taught during a training class.
-
Click Save.
The class name you created appears as a new menu option in the Class Names field. The class name also appears in the Settings screen of the PM module, under Class Lists > Class Names.
By default, when the class name is selected, the PM module populates Class Description and Class Objectives with the information provided as part of the class name list value.
-
- (If necessary) In Class Description and Class Objectives, edit the text as needed for the class.
- In Class Number, type the internal course number used by your agency or department.
-
Click Create Class.
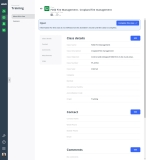
The class's page appears, set to the Class details section, most of the fields are blank, and no attachments or links are associated with the class.
Tip: To return to the listing of all training classes, click the left-pointing arrow beside the class name.
- Supply details such as where and how the class will be taught, the instructors for the course, the sessions in the class, and more, as described in Specify training class details.
- Add sessions to the class, as described in Add, edit, or delete sessions for a class, starting at step 4.
- Mark the training class as completed, as described in Change a class status.
 Find training classes.
Note: The filtering methods below all work in conjunction.
Example: You can initially filter the list using a report on expiring certifications, reduce the results further by filtering by rank, then search those results by name.
 Search for a class by description.
You can search for a class through the text in the class's description.
 Sort the class list by ascending or descending values in columns.
-
At the top of all the columns, click the column sort (
 ) icon.
The ascending values (
 ) icon appears, and the column sorts from A–Z, or from 1 to the highest numerical value.
 -
Click the ascending values icon to sort the list into descending order.
The descending values (
 ) icon appears, and the column sorts from Z–A, or from the highest numerical value to 1.
 Use filters to reduce the class list.
The PM module applies the filters you select in the steps below in a logical AND construction, to reduce the matches with each additional criteria you use.
-
In the upper right corner, click Filters.
The Filters dialog box appears on the right side of the screen.
-
For any of the following fields, click the list icon to the right of the field, then select all the appropriate options from the menu that appears, and click Done.
Field Searches for this Class Name
The name for the class, as defined by your PM administrator on the Settings > Class Lists > Class Names screen.
Category
Broad-based themes by which classes are grouped together into categories.
Method
The methods of instruction used in your agency's training programs, such as lecture, classroom, lab, hands-on, video, and so forth.
Type
An indication of whether the class was taught by your agency or department, or whether the class was taught by a third-party organization.
Status
An indication of whether the class's status is set to
OpenorCompleted.The filters you selected appear directly on each of the filter buttons.
-
Click Done.
The list of matches for the filter criteria appear, and the criteria you selected appears across the top of the screen.
-
 (Optional) Remove criteria to widen the current custom search results.
-
At the top of the current custom search results, click the X (close) button on one or more filters at the top of the list.
The list updates with items matching the remaining criteria.
Example: In the search results below, one of the criteria is Status = Complete.
If you click the X (close) button for that criteria, the class list updates to display classes of any status, categorized for EMS or firefighter (Category = EMS, Firefighter), and that were taught within the department or agency (Type= Internal).
-
Note: If you want to filter the list by only one of the methods above, such as by name, be certain that the list is not already reduced with one or more of the other methods.
Tip: You can tell at a glance if the list is filtered by class description if part or all of a word appears in the search bar on the left side of the page. You can also tell at a glance if other filters are applied if filter names across the top of the class list.
 Copy a class.
If you have a class already defined in the class list that is similar to one you want to add, it may be more efficient to copy that class and simply change the copied information to fit the new class, such as the sessions, list of attendees, links or attachments, and so forth.
-
Do one of the following.
-
In the upper right corner of the screen, click Add Class, then choose Copy Existing Class from the menu that appears.
-
On the right side of the listing for the class you want to copy, choose Actions > Copy.
Tip: If the class list is long, you can find the specific class you want to copy by searching, sorting, or filtering the list, as described above in Find training classes.
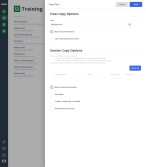
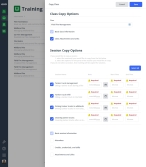
The Copy Class dialog box appears. If you chose Add Class > Copy Existing Class, the fields in the dialog box are not populated. If you chose choose Actions > Copy from the class you wanted to copy, the Class field automatically populates with the name of the class, and any sessions defined for the original class appear in the Session Copy Options section of the dialog box.
In either case, the Basic class information and Basic session information are selected by default, and you can not clear the check boxes for these options. Basic class information includes additional details such as the class number, type (internal or external), how and where it will be taught, its accreditation code, and more. A session is a unit of the class, that deals with a specific and discrete chunk of content. Session information includes the date and time of each session, the instructors, where the session will be taught, and more.
-
-
(If not already populated) For Class, click the field or the list icon to the right of the field, then select the appropriate single option from the menu that appears.
-
(Optional, if the class you copied has attachments or links) Select Class Attachments and Links to copy any links and attachments associated with the original class record, into the new class you are creating.
Attachments may include images used in the class, PDF files, certificates of completion, and so forth. Links can provide reference material, useful exercises, and other resources that are available online.
-
 Under Session Copy Options, specify details for the sessions in the new class, and (if a session list appears) select which sessions to include in the copy.
-
In the list of sessions, select any sessions in the class you are copying, that you want to include in the new class.
Tip: To quickly select all the sessions in the class, click Select All.
The Required alert appears over all components of the sessions that you must specify details for in the new class.
-
 For each session you selected, specify the date and times of the session.
- For Date, click the calendar icon on the right end of the field and select the appropriate date from the calendar that appears.
- In Start Time and End Time, type the times the session begins and ends, in military time.
-
(Optional) Select Attendees to copy the list of attendees in all of the selected sessions to the corresponding sessions in the new class.
-
(Optional) Select Credits, credentials, and skills to copy the list of attendees in each of the selected sessions to the corresponding sessions in the new class.
-
(Optional) Select Attachments and Links to copy any links and attachments associated with the each of the selected sessions to the corresponding sessions in the new class.
-
Click Save.
A listing for the new class appears in the Training list.
-
-
Click the listing for the new class.
The class's page appears, set to the Class details section, fields are populated with information from the class this class was copied from, one or more sessions may be defined, and attachments or links may already be associated with this new class.
Tip: To return to the listing of all training classes, click the left-pointing arrow beside the class name.
- Supply details such as where and how the class will be taught, the instructors for the course, the sessions in the class, and more, as described in Specify training class details.
- Add sessions to the class, as described in Add, edit, or delete sessions for a class, starting at step 4.
- Mark the training class as completed, as described in Change a class status.
 Edit a class.
A completed class is one that has had its status changed from
OpentoCompleted. After you change a class's status toCompleted, you can no longer make any changes to skills or credentials, and you can no longer add or delete sessions. While you can not edit the dates of the sessions, you can edit all the rest of the session information.An
Opentraining class is one that has not had its status changed yet toCompleted. When you change the status toCompleted, the PM module adds the class information to the attendees record. Any changes made to a class after it is locked updates the records for all attendees.Information on changing a classes status is available in Change a class status.
Note: For you to edit a class in the PM module, your ESO Suite user login must have a role assigned to it that includes the
Edit Class Detailspermission. If you need this capability, contact your ESO Suite administrator and ask that it be added to one of your roles.Information on user accounts, roles, and permissions is available in Manage a user account.
-
Find the class you want to edit, as described above in Find training classes.
-
Click the listing for the class you want to edit.
The class opens, displaying the information already specified for the class.
-
For the section containing the information you want to change or add, click Edit.
A dialog box containing the information already specified for that section of the class appears.
- Change the information in the fields as needed.
- Click Save.
 Delete a class.
To delete a class, your ESO Suite user login must have a role assigned to it that includes specific permissions. Which permission you need depends on the status of the class you want to delete.
Class status Permission required OpenEdit Class DetailsCompletedDelete Locked ClassIf you need either of these permissions, contact your ESO Suite administrator and ask that the appropriate one be added to one of your roles.
Information on user accounts, roles, and permissions is available in Manage a user account.
-


