Create, update, and place draft orders
You can create a draft order with an external vendor, for a location that needs to increase stock for specific items, and for which there is not enough stock available within the agency to resupply one location by transferring stock from another location. An order lists the stock needed from vendors, and lets you track orders to the point of receiving shipments of items from vendors
Orders with a Draft status have not yet been placed with a vendor for fulfillment. You may have only one Draft order for a single location, though you may have multiple orders with a Open status for a location.
Information on the different statuses an order may have is available in Order new inventory items.
-
(If you have not done so already) Access the Orders features in the Inventory module, select the location you want to work with, and manage the amount of data on the page, as described in Order new inventory items.
-
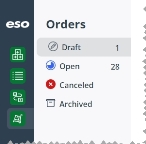
(If it is not selected by default) In the Orders pane, click Draft.
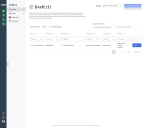
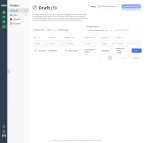
The table on the page updates to display the summary of a draft order, if one exists.
-
 Create a new order or open an existing order.
Depending on what you need to do for the location, you can either create a new order or, if an order already exists, you can update the existing order as needed.
Note: To prevent duplicate orders, a location can have only one open draft order at a time.
 Create a new order.
-
In the upper right corner of the page, click Create a new order.
Note: This button is active only when the location selected in the Viewing field does not already have a draft order started for it.
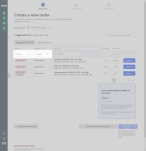
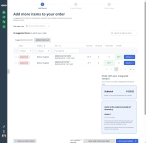
The Create a new order page appears, and at the top of the page, the Inventory module highlights 1 Add items to let you know what stage of the ordering process you are currently in.
The This order is for field automatically populates with the station you had selected earlier. Under Suggested items to add to your order, the Suggested items tab is automatically selected, and the table that appears on the tab lists the items that have fallen below par or expired.
 Open an existing order.
Tip: Before opening the order, you can determine what stage the order is in by checking its value in the Stage column on the Draft status page.
-
On the right end of the row for the order you want to work with, click View.
Tip: After the order opens, you can determine what stage the draft order is in by checking the stage line across the top of the page.
The draft order opens, displaying the stage it was at when it was last saved.
Example: You had created a new draft order and been at the stage of checking the contents of your shopping basket when an EMS call arrives, and you had to save the order and leave. When you click View on the right side of that order listing, the order opens to the In your basket page, which was the stage the draft order was in when you saved it.
If you had saved the order at the Final review stage, the draft order would have opened to that page instead.
-
Depending on what stage the order opened to, continue with the corresponding steps below.
If the order is at this stage Continue with this step below 1 Add items
Step 4, Build the list of items to include in the order.
2 In your basket
Step 5, Review the ordered items in the shopping basket.
3 Final review
Step 6, Verify items and place the order with vendors.
-
-
 Build the list of items to include in the order.
The Inventory module tracks the inventory used by every location your agency manages, and when it detects items that fall below par, the module automatically adds them to a list of items suggested for ordering from a vendor. You can also add to the list of suggested items, if you anticipate a need for specific items for an upcoming event or predicted natural disaster.
-
 (Optional) Manage the amount of data displayed.
You can search for items to add to the order, search individual columns, sort and filter column contents, hide and display columns, and so forth.
-
Depending on what data you want to view on the page, do one or more of the following.
 Search the inventory list for items not already added to the order.
You can search the entire list for a specific combination of characters, regardless of what column the data appears in. The search includes only items not already added to the order.
-
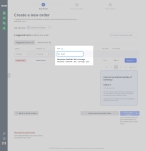
Above the list of items, on the right side, in the Search to add an item field, type the combination of characters you want to search the inventory for, and select an option from the menu that appears.
As you type each character, the list of options in the menu reduces to only those whose names or values contain that combination of characters.
Example: If you typed the characters
acet, the list of menu options reduces to display only the items whose names or values contain these characters, and which have not been added to the order.
 Search within a table column for a character combination.
You can also search within a column, to find items already added to the table, which contain a specific combination of characters.
-
At the top of the column you want to search, in Search, type the combination of characters you want to search the entire list for.
As you type each character, the list of items in the column reduces to only those whose names or values contain that combination of characters.
Example: In the Item column if you typed the characters
pad, the entire list reduces to display only the items that contain these characters in the medical supply name.
 Sort the table into ascending or descending order, based on the values in a column.
-
At the top of all the columns, click the column sort (
 ) icon.
 The ascending values (
 ) icon appears and the column sorts from A–Z, or from 1 to the highest numerical value.
 -
Click the ascending values icon to sort the list into descending order.
The descending values (
 ) icon appears and the column sorts from Z–A, or from the highest numerical value to 1.
-
-
-
 Work with items suggested for order by the Inventory module.
-
On the Suggested items tab, on the right end of the row for the item you want to work with, click Actions.
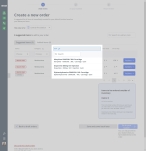
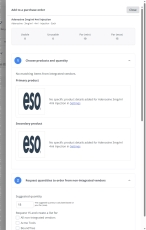
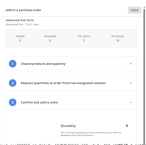
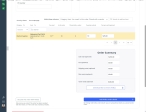
The Add to a purchase order dialog box appears. At the top of the dialog box, the item's name, and the number of usable, unusable, min, and max par currently available for the item at the location appears. In the rest of the dialog box, product details and matches among vendors integrated with your agency or department appear.
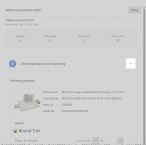
The contents that appear in the dialog box under Choose products and quantities depends on whether your agency or department is integrated with one or more vendors or not. If it is integrated, and if any of the vendors carries that item, information about the item, its price, available quantities, and (if available) a picture of the item appears in the dialog box. If your agency or department is not integrated with a vendor, or if the item is not carried by integrated vendors, the dialog box displays the ESO logo for the product image, and a short statement that no specific product details are available.
Information on setting up an integration with an external vendor is available in Integrate with vendors for ordering. Information on the item's settings page is available in Specify item details.
-
 (Integrated vendors) Specify how much of each item you want to order.
The vendor may carry competing brands for the same item, and in different quantities and at different prices.
Example: For 5” x 9” abdominal pads, the vendor Bound Tree offers pads made by Dukal, Medline Industries, Med Plus Services USA, Curaplex, Dynarex Corporation, Medsource International, and Honeywell Safety Production USA. Each of these manufacturers offer the pads in boxes, cases, packs, individually, and so forth, and the prices vary from manufacturer to manufacturer.
-
In the Choose products and quantity section, in the lower right corner of the listing for the manufacturer you want to order from, in the quantity fields, type how many of that quantity you want to order.
A small green circle with a check mark appears to the right of the field.
-
(Optional) On the right side of the Choose products and quantity section heading, click the collapse (^) icon to close the display of the section.
The icon changes to an expand (v) icon, and the section contracts to make it easier to see the remaining sections of the dialog box.
-
-
 (Non-integrated vendors) Specify how much of each item you want to order.
If an integrated vendor does not currently have stock in the item your agency or department needs, or if your department is not integrated with any vendors, you can order stock from non-integrated vendors.
-
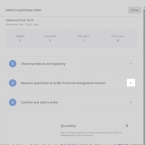
(If necessary) On the right side of the Request quantities to order from non-integrated vendors section heading, click the expand (v) icon, to open the display the section.
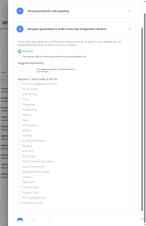
The section expands to display all the vendors your agency orders from, including the ones that are not integrated with the Inventory module.
-
Select Yes please, add this item and quantity to a downloadable list.
The fields and options in this section of the dialog box activate.
-
(If necessary) In Suggested quantity, change the value from the quantity calculated based on your max par.
-
Under Request <number> and create a list for, choose the name(s) of the vendors you want to order the item from.
-
(Optional) On the right side of the Request quantities to order from non-integrated vendors section heading, click the collapse (^) icon to close the display of the section.
-
-
 Confirm the addition to the order.
-
(If necessary) On the right side of the Confirm and add to order section heading, click the expand (v) icon, to open the display the section.
-
Review the order totals for quantity, sub-total, and any non-integrated vendors for accuracy.
-
Click Confirm and add to order.
The dialog closes and a Success message appears in the upper right corner of the screen.
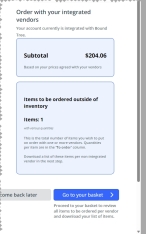
On the Create a new order page, the Inventory modules moves the item from the Suggested items tab to the Added items tab. In the lower right corner of the screen, a blue box appears with a subtotal for items ordered through your agency or department’s integrated vendors. A blue box labeled Items to be ordered outside of inventory appears to reflect any items you plan to order through a non-integrated vendor.
-
-
Repeat the steps above as many times as needed to add suggested items to the order.
-
-
 (If necessary) Add additional items that need to be ordered.
You can search for items in the inventory that are not already in the Suggested items table, and add any items from the search results as needed.
Example: You anticipate a need for more cold packs than usual to apply to strain and sprain injuries during an upcoming athletic event your agency is servicing, and additional cold packs have not yet been added to the order. You can search for the item and add it to the table, so that it is fully stocked (or temporarily over-stocked) before the event.
This search includes the item name and any agency "preferred names" the Inventory module administrator configured for items on the Settings pages.
-
On the right side above the list of items, in Search to add an item, type the combination of characters you want to search the list of items for.
A menu appears below the field, containing options that match the characters currently entered in the field.
As you type each character, the list of options in the menu reduces to only those whose names or values contain that combination of characters.
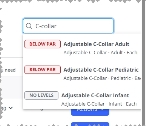
Example: If you typed the characters
C-Collar, the list of menu options reduces to display only the items whose names or values contain these characters, and which have not been added to the order. -
Choose the item in the menu you want to add to the list.
The Add to a purchase order dialog box appears. At the top of the dialog box, the item's name, and the number of usable, unusable, min, and max par currently available for the item at the location appears. In the rest of the dialog box, product details and matches among vendors integrated with your agency or department appear.
-
Follow the instructions under step 4.b, Work with items suggested for order by the Inventory module. to specify how many of the additional item you want to order from integrated and/or non-integrated vendors, and to confirm the addition to the order.
-
Repeat the steps above as many times as needed to add items that were not automatically suggested by the Inventory module.
-
-
 Review the items added to the order.
-
On the Create a new order page, click the Added items tab.
The list of items currently ordered, including through non-integrated vendors, appears.
The table on the tab reflects the number of each item that you need to achieve minimum par, how many are in the current order through an integrated vendor, and how many you need to order manually through a non-integrated vendor.
Note: Only the items you added appear in the draft order; items listed on the Suggested items tab are not included.
-
 (Optional) View detailed information about each ordered item.
You can open an expanded view of each item in the table, to see where the item is stored at the agency or department, the amount needed for the item, who submitted the order, the order number, the purchase order number, the vendor its ordered from, and so forth.
-
Depending on what type of information you need about the item, do one of the following.
 View the item's storage location and how much of the item is currently available there.
-
In the item's listing, in the You need column, click the expand (v) icon.
A drop-down appear as the item's listing expands, and information appears about where the item is stored, how much is available, and what the par levels are for the item.
-
In the item's listing, in the You need column, click the contract (^) icon.
The drop-down contracts back up, and only the summary listing for the item appears in the table.
 View the amount of the item in the order, and the amount available from the vendor.
-
In the item's listing, in the In this order column, click the expand (v) icon.
A drop-down appear as the item's listing expands, and information appears about the vendor the item is ordered from, its item number with the vendor, the quantity ordered, and who added the item to the order.
-
In the item's listing, in the In this order column, click the contract (^) icon.
The drop-down contracts back up, and only the summary listing for the item appears in the table.
 View the purchase order information for the item.
-
In the item's listing, in the On its way column, click the expand (v) icon.
A drop-down appear as the item's listing expands, and information appears about when the item was ordered, what the purchase order number was, who submitted it, and for which location.
-
In the item's listing, in the On its way column, click the contract (^) icon.
The drop-down contracts back up, and only the summary listing for the item appears in the table.
-
-
-
(If necessary) Update the items listed on the tab in any of the following ways.
 Change the quantity of an item in the order.
-
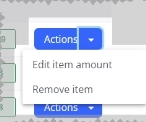
On the Items you have added tab, on the right end of the row for the item you want to work with, click Actions and choose Edit item from the menu that appears.
The Add to a purchase order dialog box appears. At the top of the dialog box, the item's name, and the number of usable, unusable, min, and max par currently available for the item at the location appears. In the rest of the dialog box, product details and matches among vendors integrated with your agency or department appear.
-
Edit the amount to order for the product as needed.
-
At the bottom of the dialog box, click Confirm changes and add to order.
A confirmation message appears in the upper right corner of the page.
 Remove an item from the order.
-
On the Added items tab, on the right end of the row for the item you want to work with, click Actions and choose Remove item from the menu that appears.
The Inventory module moves the item back to the Suggested items tab, a success message appears in the upper right corner of the page, and an Undo button appears in the table row of the item you removed.
-
(Optional, to retrieve the deleted item) Click Undo.
The Inventory module moves the item back to the Added items tab.
-
-
-
 Save or (if necessary) discard the order.
-
Depending on whether you want to save your progress on the order, or discard it completely, do one of the following.
 Save the items currently added to the draft order, but do not place the order yet.
-
In the lower right corner of the page, click Save and come back later.
The Draft page reappears, and the order you created appears in the table on that page.
Tip: If you click Back to draft orders in the lower left corner of the page, the Inventory module automatically saves your changes and the Draft page reappears.
-
-
-
-
 Review the ordered items in the shopping basket.
-
In the lower right corner of the page, click Go to your basket.
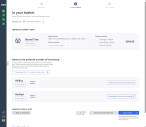
The In your basket page appears, and in the progress tracker at the top of the page, the Inventory module highlights 2 In your basket to let you know what stage of the ordering process you are currently in. The module locks the This order is for field at this point during the process, but displays the hospital, station, or for which you intend the order.
In the Items to order now section, the Inventory module lists a summary of the number of items ordered through your integrated vendors, the billing and delivery addresses for the order, and the several shipping method choices.
-
 Under Items to order now, verify integrated vendor details and select a shipping method.
-
On the left, under the vendor’s name, click View number items.
A summary of the items you selected for order from this vendor appears.
-
(Optional, for long orders) At the top of the Product Name column, in Search, type the combination of characters you want to search the entire list for.
As you type each character, the list of items in the column reduces to only those whose names or values contain that combination of characters.
-
Review the list of items in your order, to ensure accuracy and confirm whether or not that particular vendor currently has the item in stock.
-
(If necessary) In the listing for an item you want to remove from the order, on the right side of the listing, click Remove.
The Inventory module removes the item from the order, and updates the display in the dialog box.
-
(If necessary) Click Discard this order with vendor name to remove all items you ordered from that vendor from your shopping cart.
A success message appears in the upper right corner of the page.
-
In the upper right corner of the dialog box, click the X icon to close the dialog box.
-
For Delivery address, click the field, then select the appropriate single option from the menu that appears
-
For Shipping methods, select the type of shipping your agency or department prefers for the order from this vendor.
-
(If the order contains items from more than one integrated vendor) Repeat the previous steps for each vendor, to their order details and select a shipping method.
-
-
 Under Items to be ordered outside of inventory, verify items ordered from each non-integrated vendor, and download the order lists.
Because you need to manually contact non-integrated vendors to place an order, it is useful to have a list of the items for each order. Depending on your agency or department’s relationship with the vendor, you can email or fax the list to the vendor, or call the vendor and place the order person-to-person.
-
On the left, under the vendor’s name, click View number items.
A summary of the items you selected for order from this vendor appears.
-
(Optional, for long orders) At the top of the Product Name column, in Search, type the combination of characters you want to search the entire list for.
As you type each character, the list of items in the column reduces to only those whose names or values contain that combination of characters.
-
Review the list of items in your order, to ensure accuracy.
-
(If necessary) Click Discard this order with vendor name to remove all items you ordered from that vendor from your shopping cart.
A success message appears in the upper right corner of the page.
-
In the upper right corner of the dialog box, click the X icon to close the dialog box.
-
On the right side of the vendor’s listing, click Download list to send to vendor name.
The Inventory module generates and downloads a spreadsheet to your default download location. The spreadsheet lists the items you included in the order for that specific vendor. It also lists the number of each item you should order to reach minimum part, and the number you actually specified for each item in the order.
-
Repeat the previous steps for each vendor, to review their order details and download the order spreadsheet for the vendor.
-
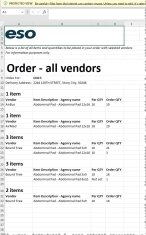
(Optional) Under Items to be ordered outside of inventory and above the list of individual vendors, click Download list for number vendors in this order to create a "master" list containing all items ordered from all vendors.
The Inventory module generates and downloads a spreadsheet to your default download location. The spreadsheet lists each vendor in the order, in alphabetical order, and the items you included in the order. It also includes both non-integrated and integrated vendors, lists the number of each item you should order to reach minimum part, and the number you actually specified for each item in the order.
-
-
 (Optional) Save the draft order, but do not place it yet.
-
(If necessary) In the lower right corner of the page, click Save and come back later.
This feature is particularly useful if you are interrupted by an incident call at the agency or station before you finish placing the order.
The Draft page reappears, and the order you created appears in the table on that page.
Tip: If you click Back to add items in the lower left corner of the page, the Inventory module automatically saves your changes to the draft, and the Add items page reappears.
-
-
-
 Verify items and place the order with vendors.
You now need to verify the items you need to order, and place the order with as many vendors as needed to acquire the items.
-
In the lower right corner of the page, click Final review.
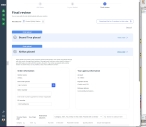
The Final review page appears, and in progress tracker at the top of the page, the 3 Final review highlights.
-
(Optional) Click Download list for number vendors in this order.
The Inventory module generates and downloads a spreadsheet to your default download location. The spreadsheet lists each vendor in the order, in alphabetical order, and the items you included in the order. It also includes both non-integrated and integrated vendors, lists the number of each item you should order to reach minimum part, and the number you actually specified for each item in the order.
-
 (Integrated vendors) Place the order.
-
For the listing of an integrated vendor, on the right side of the listing, click the expand (v) arrow.
The listing expands to display a summary of the number of items in the order with the vendor, the associated costs, and the order total.
-
 (Optional) Review the items in the order.
-
In the Order summary box, click View items to see what items are being ordered from the vendor.
A summary of the items you selected for order from this vendor appears.
-
(Optional, for long orders) At the top of the Product Name column, in Search, type the combination of characters you want to search the entire list for.
As you type each character, the list of items in the column reduces to only those whose names or values contain that combination of characters.
-
Review the list of items in your order, to ensure accuracy.
-
(If necessary) In the listing for an item you want to remove from the order, on the right side of the listing, click Remove.
The Inventory module removes the item from the order, and updates the display in the dialog box.
-
(If necessary) Click Discard this order with vendor name to remove all items you ordered from that vendor from your shopping cart.
-
In the upper right corner of the dialog box, click the X icon to close the dialog box.
-
-
(Optional) Click Download vendor name draft order.
The Inventory module generates and downloads a spreadsheet to your default download location. The spreadsheet lists the delivery information ,the total cost of the order, the items in the order, and the breakdown of the item costs.
-
(If applicable) In Add your PO number, type the purchase order number your agency or department will use to pay for the order.
-
Click Place this order with vendor name.
The Final review page updates, and a success message appears in the listing for the vendor, and the Inventory module changes the status of the order from
DrafttoOpen.Once an order is placed with a vendor, your agency or department is integrated with, you will receive tracking numbers from carriers like Fedex or UPS directly into the Inventory module, where you can view the shipping status as needed.
-
Repeat the previous steps for each integrated vendor you need to place an order with.
-
-
 (Non-integrated vendors) Place the order.
-
For the listing of a non-integrated vendor, on the right side of the listing, click the expand (v) icon.
The listing expands to display basic order information, your agency or department's information, and a table of the items your are ordering from that vendor.
-
 Specify the date and order number information.
-
In the Order information section, for Date order placed, click the calendar icon on the right end of the field and select the appropriate date from the calendar that appears.
-
In Order number, type the unique number assigned to the order by the vendor.
-
In PO number, type the purchase order number your agency or department will use to pay for the order.
-
-
In the Your agency information section, review the information about your account number with the vendor, the payment terms, and where the order will be delivered.
-
 Review the items in the order.
-
In the table below the Order information and Your agency information sections, review the list of items that will be ordered from the vendor.
-
(Optional) Follow the instructions under step 4.a, (Optional) Manage the amount of data displayed. to efficiently review the list of items.
You can search for items to add to the order, search individual columns, sort and filter column contents, hide and display columns, and so forth.
-
In the You need column, for an item you discover you need to change the amount or number to order, click the expand (v) arrow.
The listing expands to display the quantity you currently need at the agency or department, where existing stock in that item is located, and the number of usable, min par, and max par currently available for the item.
-
Click the collapse (^) arrow to contract the listing back to a single line.
-
(If necessary) In the Quantity ordered column for the item, edit the number or quantity you want to order from the vendor.
-
(Optional) In the Cost per each (optional) column for the item, type the amount the vendor charges for the item.
-
Repeat the previous steps for each item in the order table for that vendor.
-
-
In the Order Summary section, in Sub total (optional), Tax (optional), Shipping costs (optional), Misc costs (optional), and Order total (optional), specify the various costs associated with the order.
-
Below Order Summary, click Download list to send to vendor name.
The Inventory module generates and downloads a spreadsheet to your default download location. The spreadsheet lists the agency or department the order is for, the delivery address, the account ID assigned by the vendor to your agency or department, and a list of the items you plan to order.
-
Click Add vendor name order details.
A success message appears in the upper right corner of the page, and the Inventory module changes the status of the order from
DrafttoOpen. The Final review page updates to indicate that the order is now placed with the vendor.Note: Even though the order is listed as "placed," you still need to manually contact the vendor and manually place the order with it.
-
(If necessary) In the lower left corner of the page, click Discard this draft order.
A success message appears in the upper right corner of the page, and the Inventory module removes the vendor listing from the Final review page.
-
Contact the vendor and use the information in the spreadsheet as your reference list when placing the order.
Typical ways of contacting a vendor outside the Inventory module include phone, email, and the vendor's web site.
Note: If a single vendor is not able to completely fill the order, you can contact as many vendors as your agency permits to resupply the location with the items it needs.
-
Repeat the previous steps for each of the non-integrated vendors you selected for the order.
-
-
(Optional) On the right side of the vendor's listing, click View order.
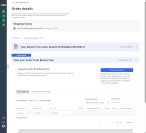
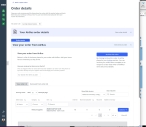
The Order details page appears. Depending on whether you placed the order with an integrated vendor or a non-integrated vendor, different information appears on the page.
The Inventory module changes the status of the order from
DrafttoOpen. -
