Integrate with vendors for ordering
A vendor is a person or company that manufactures or supplies goods or provides services. Your agency or department likely does business with multiple vendors when purchasing supplies for.
After your agency or department establishes a relationship with a vendor for purchasing products, and an ESO administrator sets up an integration between that vendor's online ordering system and the ESO Suite, you can enable or disable the integration for the vendor in the Inventory module.
Note: Not all vendors your agency or department orders from or works with have online integrations available.
After you enable a vendor integration, your agency or department can check the availability of items with the vendor and order supplies directly from the vendor's online inventory, without having the constraints of open business hours, placing phone calls, maintaining spreadsheets of ordered items and their status, and more.
-
 If you have not done so already) Access the Inventory module in the ESO Suite.
-
Do one of the following.
-
(If you are already working in the ESO Suite) Click the Home icon in the upper left corner of the screen.
-
(If you have not yet logged in) Log in to the ESO Suite.
-
In a web browser, go to https://www.esosuite.net/EsoSuite.
The ESO Suite login screen appears.
-
Enter your user name, password, and agency name, then click Let's Go.
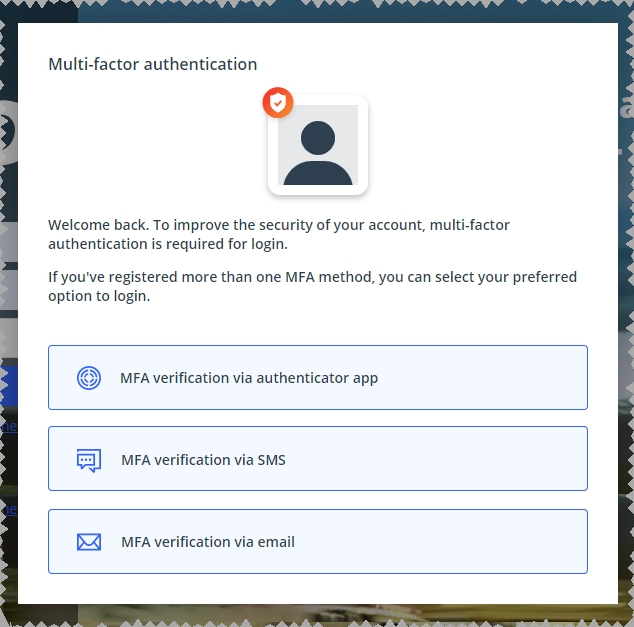
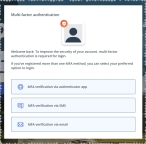
If MFA is enabled, the Multi-factor authentication dialog box appears, displaying one or more methods you can use to verify your login credentials. The number of methods that appear in the dialog box depends on what MFA methods your ESO Suite administrators enabled in the Admin module.
Click graphics
to open them.Information on enabling MFA and specific MFA methods is available in the Admin module online help, in Configure multiple-factor authentication.
Note: If your ESO Suite administrators have disabled MFA ("opted-out"), this dialog does not appear.
-
(If the Multi-factor authentication dialog box appears) Depending on which buttons appear in the dialog box, verify your login in one of the following ways.
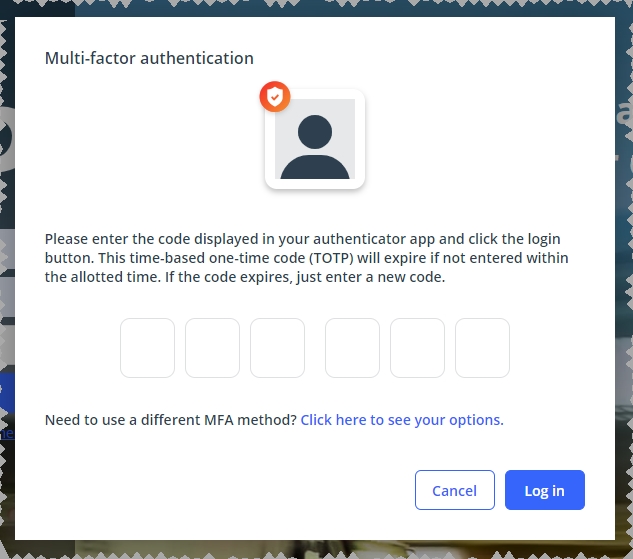
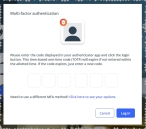
With an authenticator application.
-
Click MFA verification via authenticator app.
The dialog box updates with boxes for entering the numbers of the authentication code, and the ESO Suite sends an authentication code to the authenticator application installed on your device.
-
Open your authenticator application and note the authentication code currently displayed.
-
Enter the authentication code displayed in the authenticator application.
-
Click Log In.
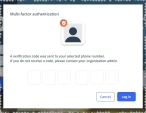
With a text message (SMS).
-
Click MFA verification via SMS.
The dialog box updates with boxes for entering the numbers of the authentication code, and the ESO Suite sends an authentication code to the phone number recorded in your PM records and identified with MFA codes.
-
Enter the authentication code sent to your MFA-registered phone number.
-
Click Log In.
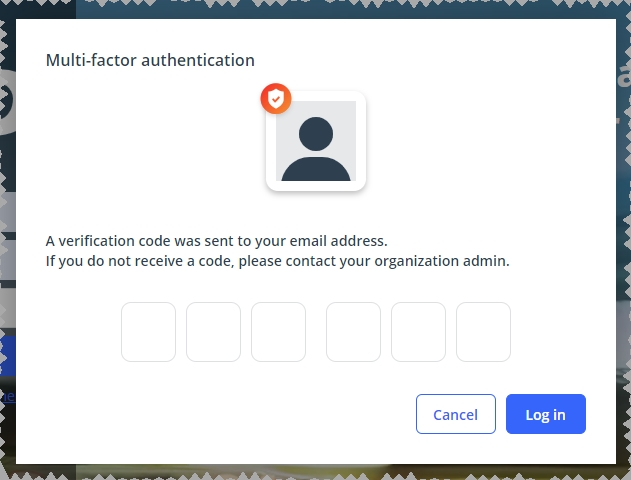
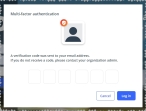
With an email message.
-
Click MFA verification via email.
The dialog box updates with boxes for entering the numbers of the authentication code, and the ESO Suite sends an authentication code to your agency or department email address, recorded in your PM records.
-
Enter the authentication code sent to your agency or department email address.
-
Click Log In.
-
-
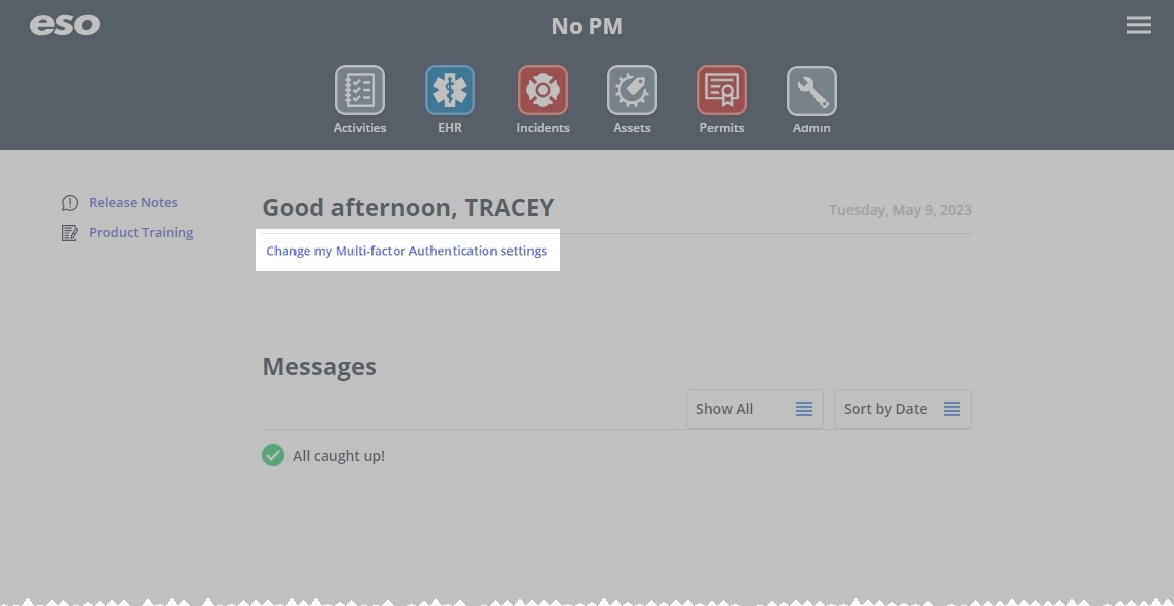
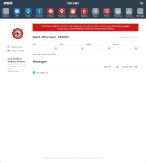
The ESO Suite landing screen appears.
Click graphics
to open them.Note: If MFA is enabled, you can access and manage your MFA options through the PM module, on the Settings > Account page, as described in Manage a user account. If your agency or department has enabled MFA but has not purchased the full-featured version of the PM module, you can access your own MFA settings by clicking Change my Multi-Factor Authentication settings on the landing screen, then using the Settings > Account page that appears. If your agency has not enabled MFA, the Change my Multi-Factor Authentication settings link does not appear on the landing screen.
-
-
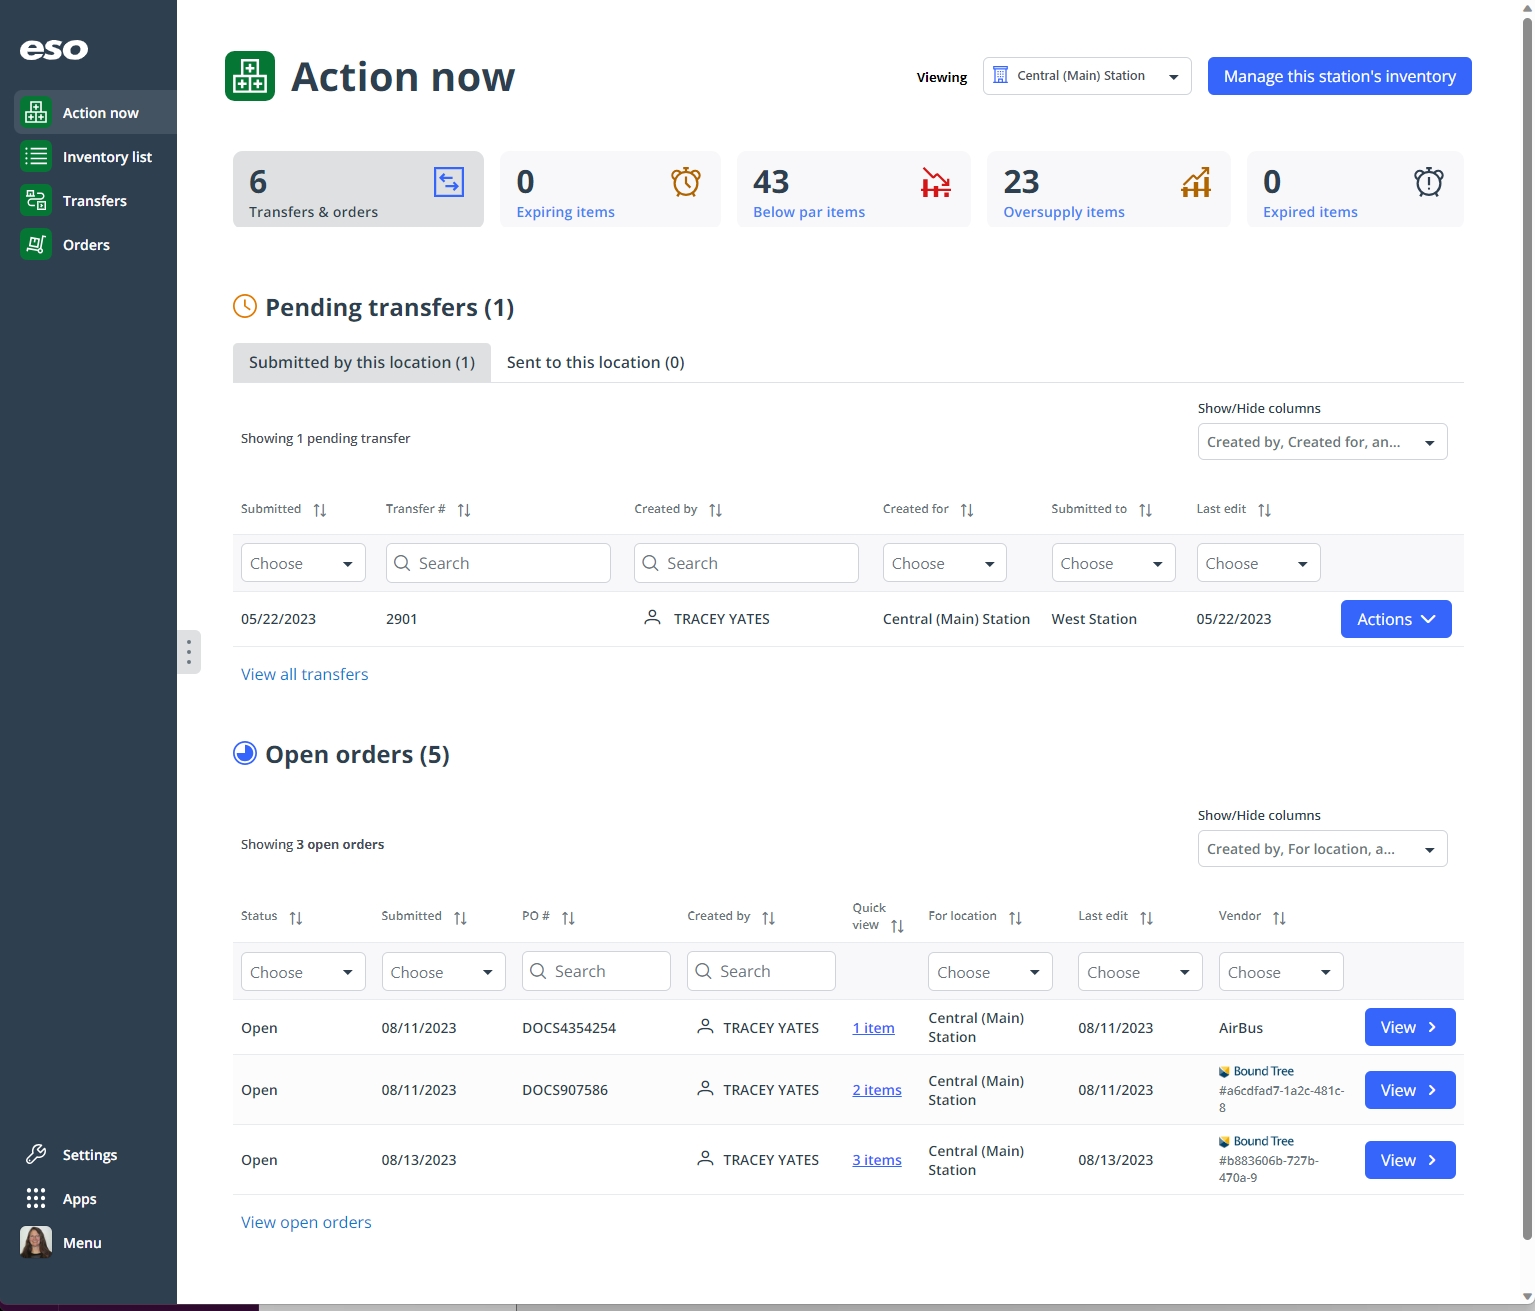
On the top side of the home screen, click Inventory.
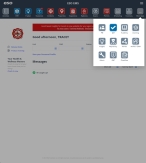
 Tip: (On a narrow screen or browser window) Display more module icons.
If your screen or browser window is too narrow to display all your agency's ESO Suite module icons, the More Apps icon appears on the right side of the icon bar. If you click this icon, a menu appears containing additional module icons.
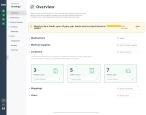
The Inventory module opens, displaying the Action now page.

Click graphics
to open them.
-
-
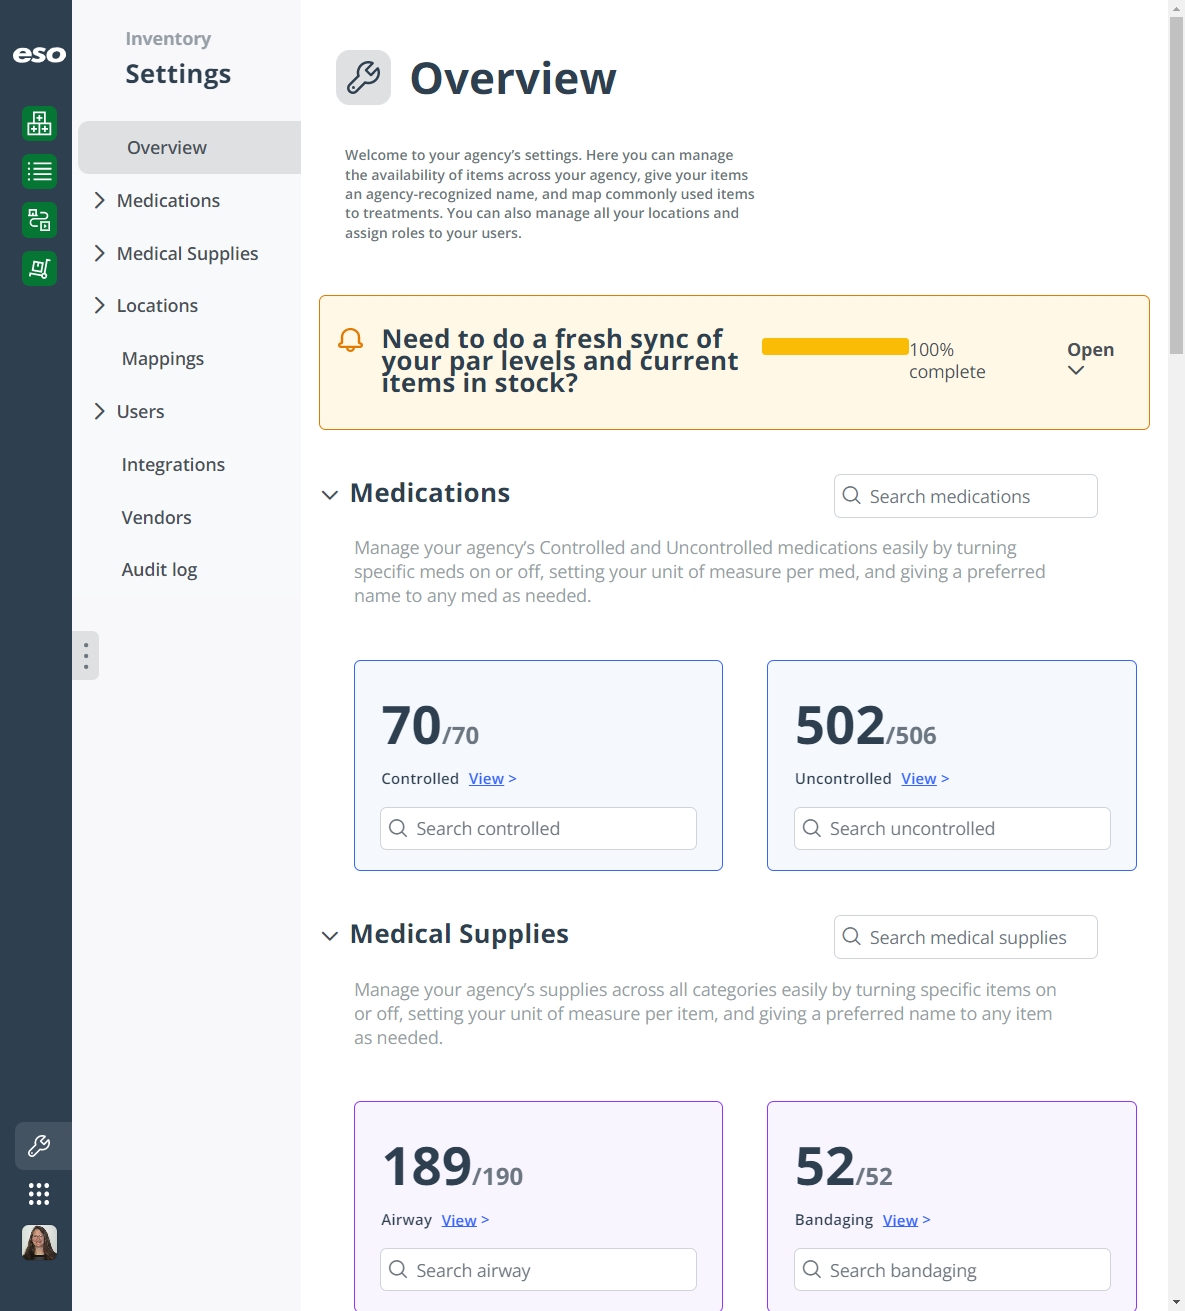
In the left pane, near the bottom, click the Settings icon.

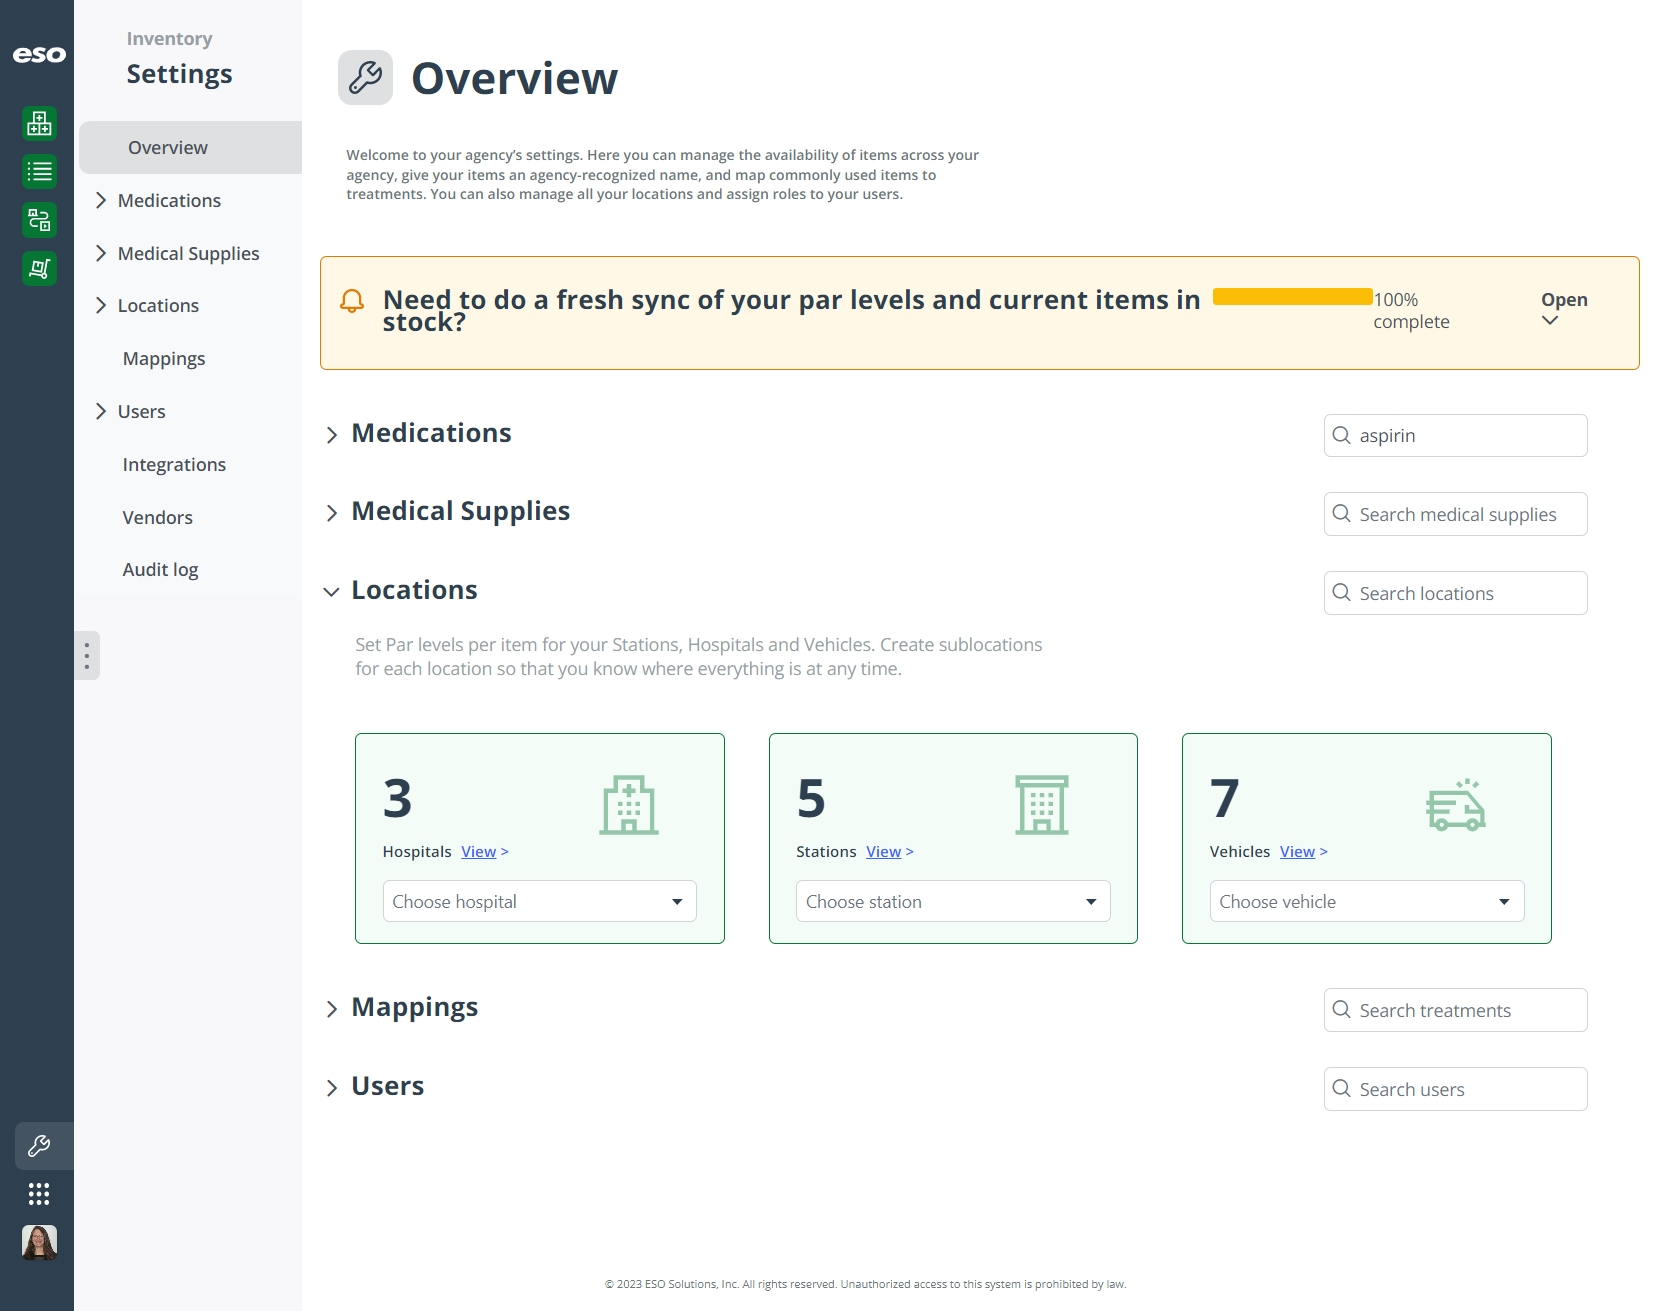
The Settings screen appears, displaying the Overview pane on the right. This page provides a summary of the information in the Settings pages. The Overview pane groups the information into drop-downs named Medications, Medical Supplies, Locations, Mappings, and Users. By default, these drop-downs are expanded; however, you can collapse and expand them as needed to view only the information you want.

-
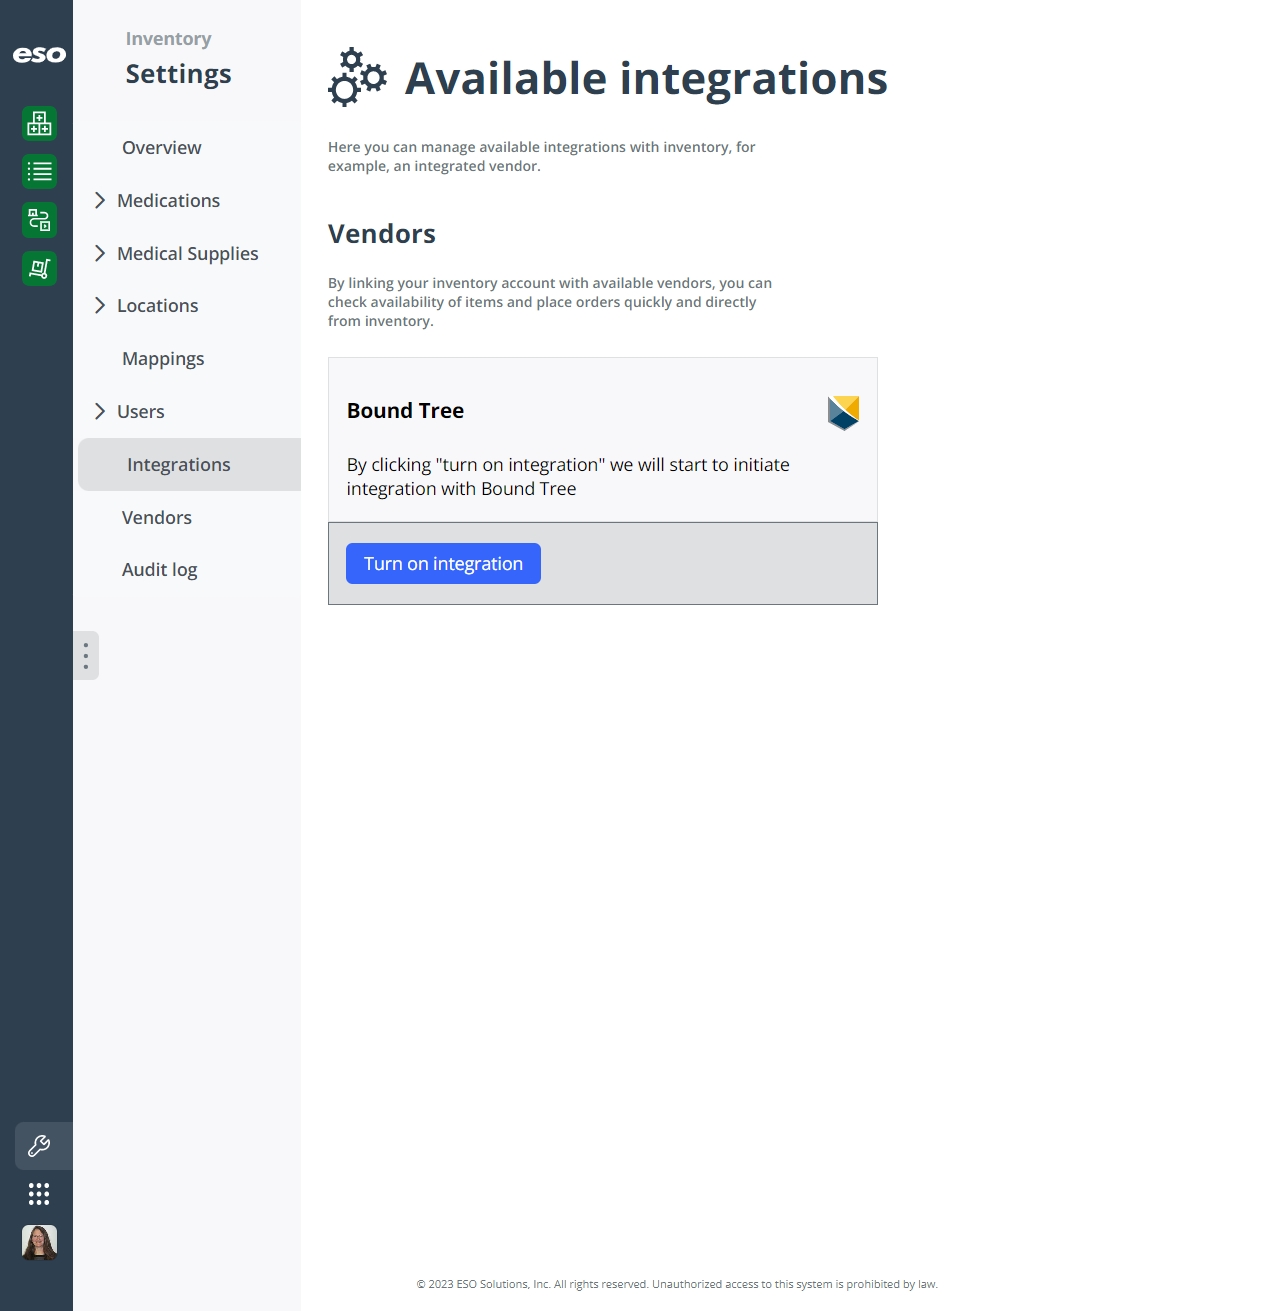
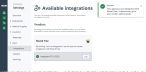
In the left pane of the Settings pages, click Integrations.
The Available integrations page appears, displaying any vendors that your agency or department have established a relationship for direct-ordering from the Inventory module, and that ESO Suite administrators have added to the page.

-
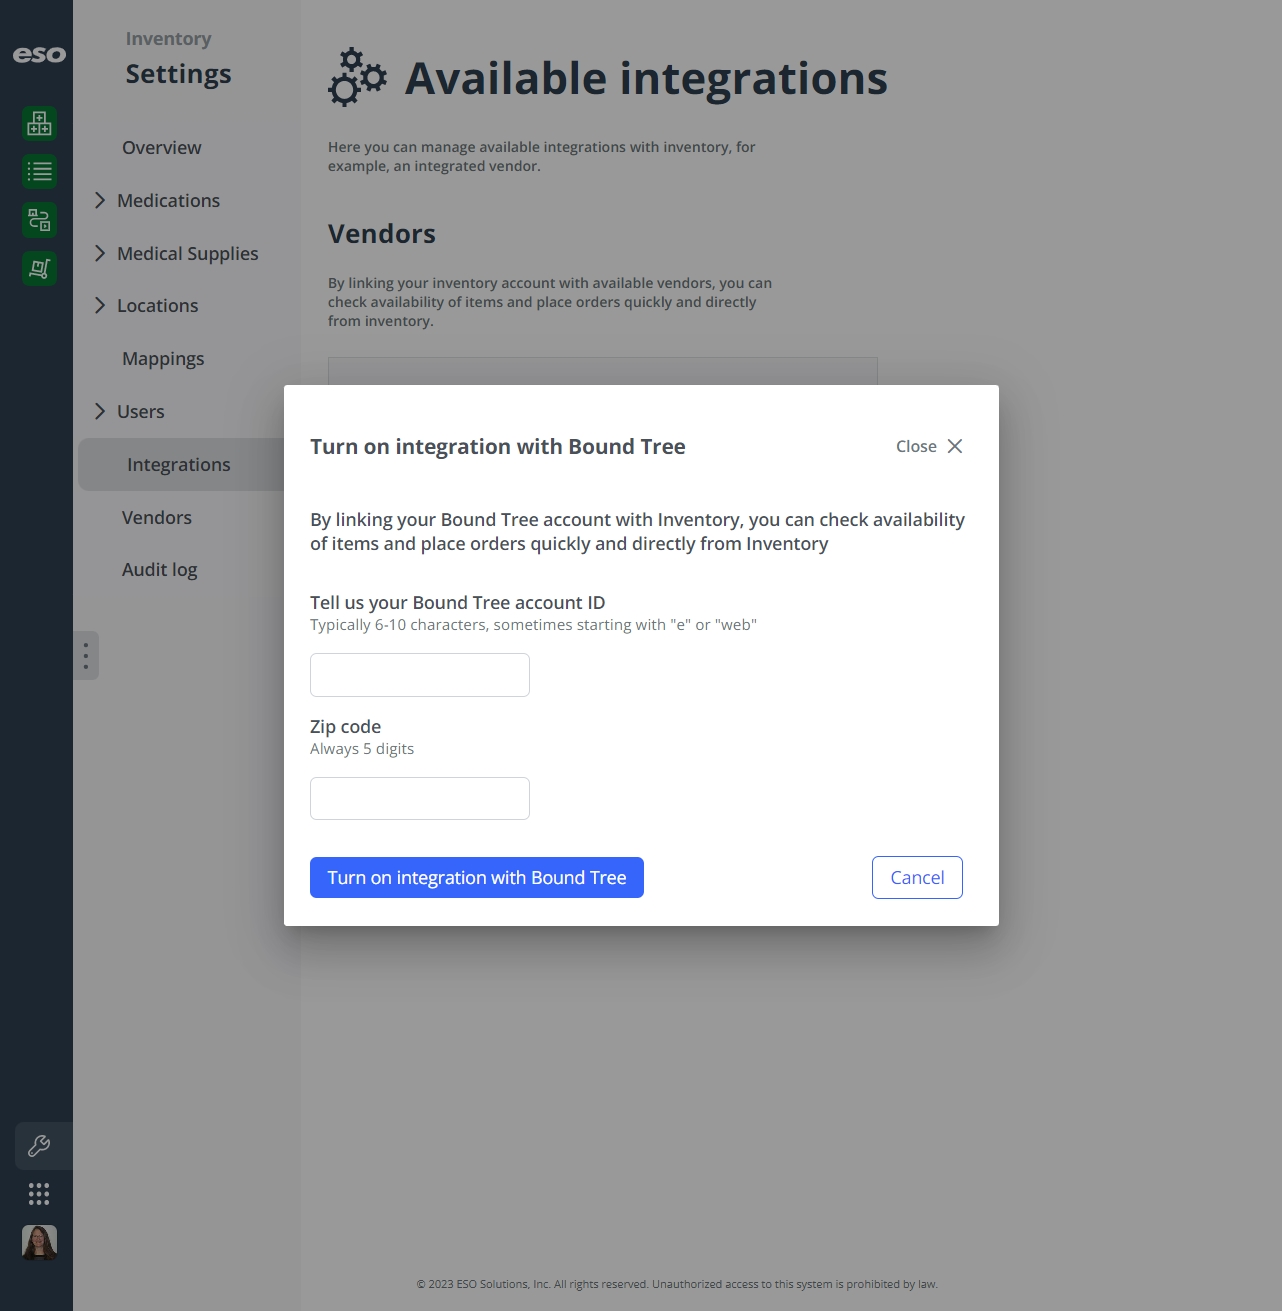
In the box containing the name of the vendor you want integrate the Inventory module with, click ‘Turn on integration.
The Turn on integration with vendor name dialog box appears.

-
In Tell us your vendor name account ID, type your agency or department's account number with that vendor.
This number may be 6–10 characters long.
-
In Zip code, type your agency or department's zip code.
-
Click the Turn on integration with vendor name
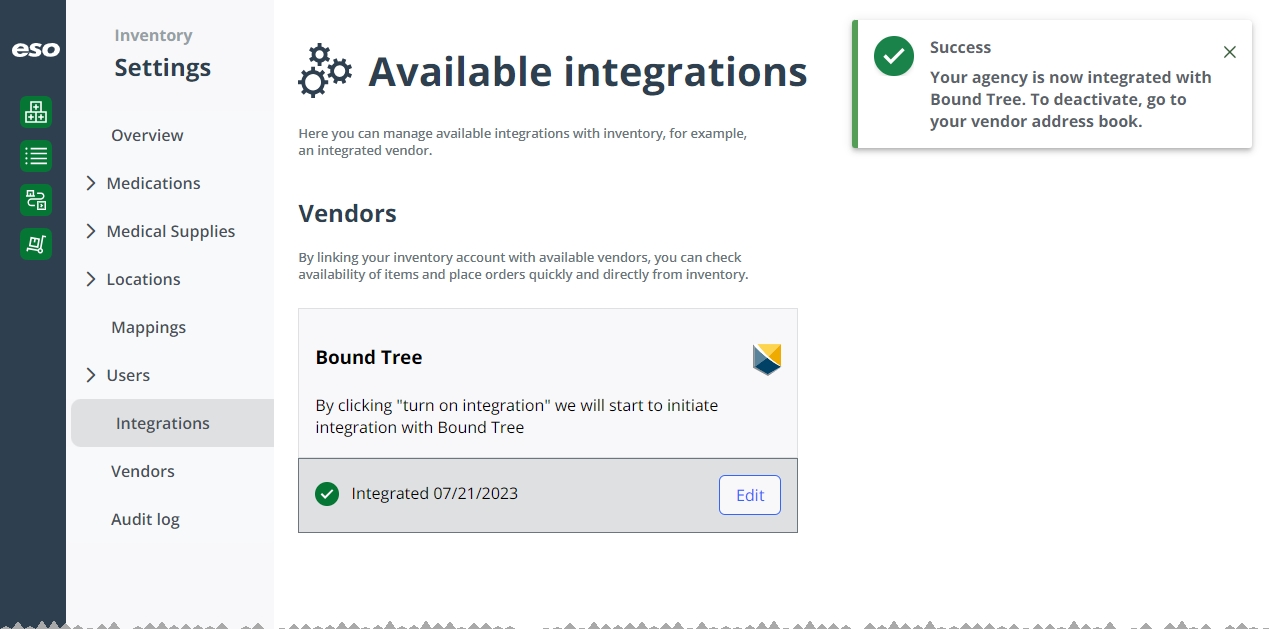
The Inventory module verifies the information and establishes the integration with the vendor, then a success message appears in the upper right corner of the screen, a success message appears in the vendor box, and the Edit button replaces ‘Turn on integration.
Note:
-
The verification may take a full minute to complete.
-
Once the integration completes, you can activate and deactivate it, but not de-integrate it.
Information on deactivating an integration is available in Build the vendor list.
-
-
Repeat steps 4–8 for any other vendors listed on that page, that you want to integrate with your department or agency's Inventory module.
-
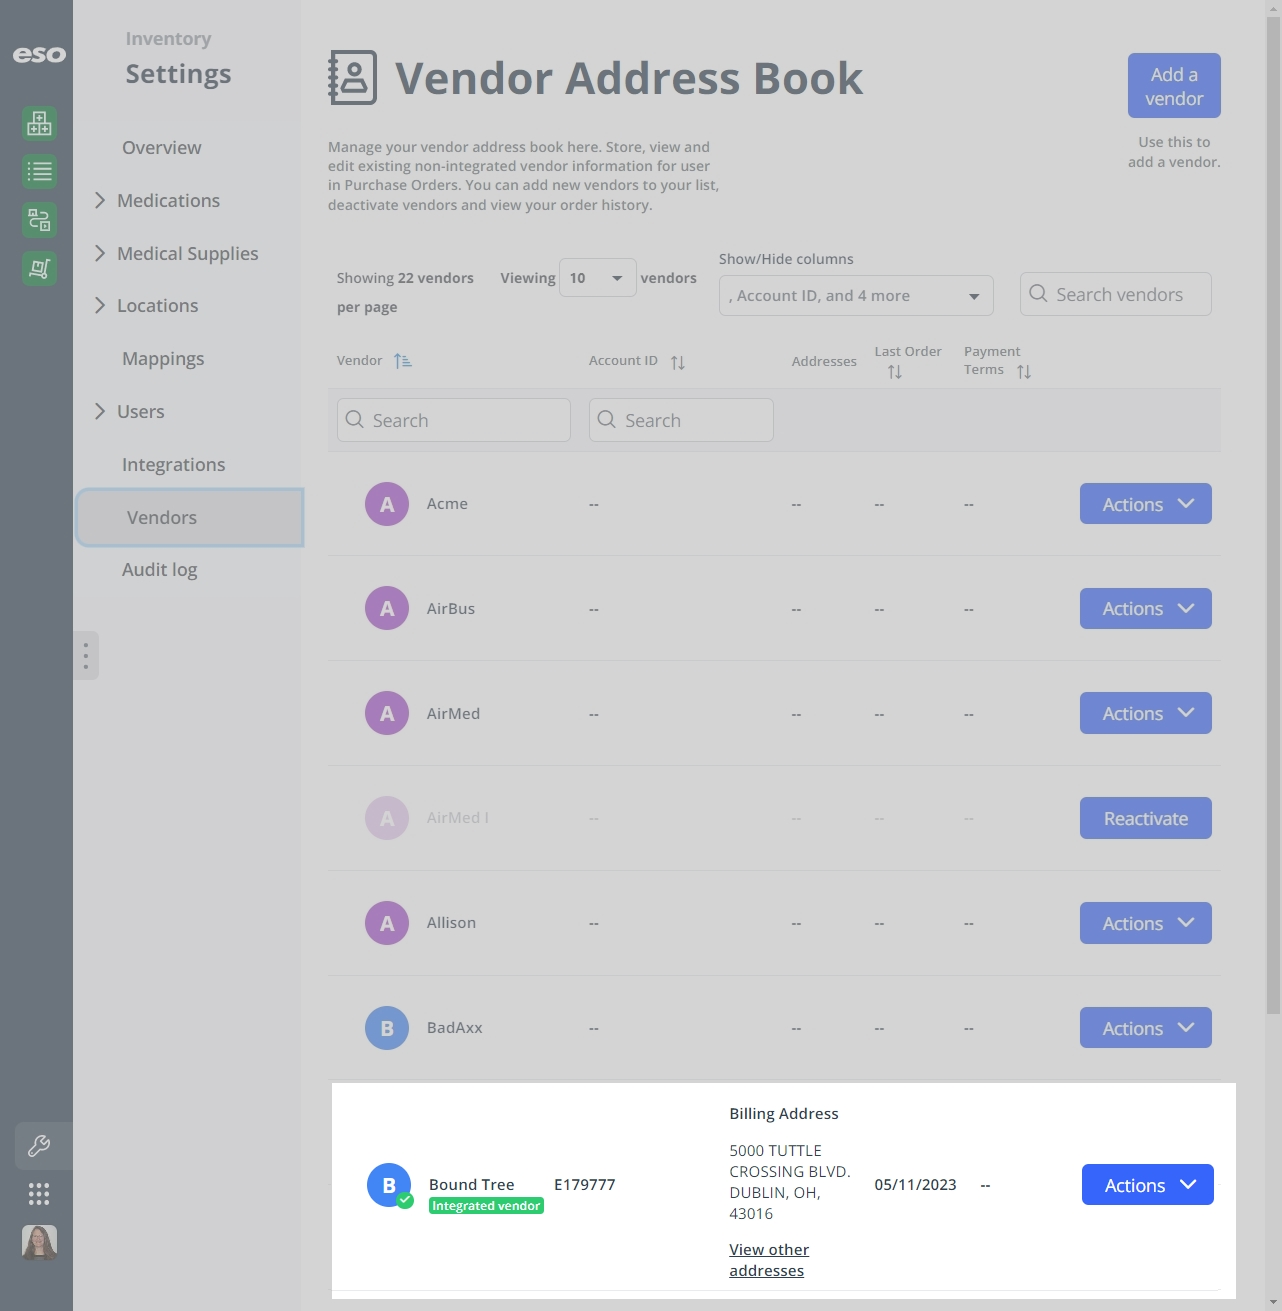
(Optional) In the listing for an integrated vendor you want to update information for, click Edit.
The Inventory module changes screens to display the Vendor Address Book page, where a green check mark and Integrated vendor label appears in the listing of any vendor you can order from while in the ESO Inventory module. On this page, you can update information about every vendor your agency or department works with, view the order history for each vendor, and enable and disable integrations.
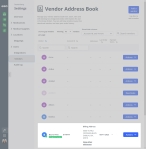
Information on working with features on the Vendor Address Book page is available in Build the vendor list.