Work with the inventory list
You can view a list of every item you have at any of your agency's locations, and quickly scan an item for its current usable and unusable stock, par levels, and stock coming in from transfers and orders. You can also quickly view the total quantity of the item across all the agency's locations, and expand that total to see the breakdown of that quantity in each location that holds stock in the item. When necessary, you can place a transfer request or item order for items in the list.
-
 If you have not done so already) Access the Inventory module in the ESO Suite.
-
Do one of the following.
-
(If you are already working in the ESO Suite) Click the Home icon in the upper left corner of the screen.
-
 (If you have not yet logged in) Log in to the ESO Suite.
-
In a web browser, go to https://www.esosuite.net/EsoSuite.
The ESO Suite login screen appears.
-
Enter your user name, password, and agency name, then click Let's Go.
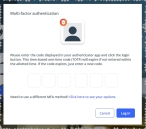
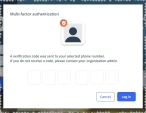
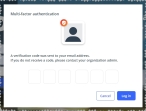
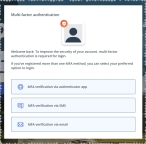
If MFA is enabled, the Multi-factor authentication dialog box appears, displaying one or more methods you can use to verify your login credentials. The number of methods that appear in the dialog box depends on what MFA methods your ESO Suite administrators enabled in the Admin module.
Click graphics
to open them.Information on enabling MFA and specific MFA methods is available in the Admin module online help, in Configure multiple-factor authentication.
Note: If your ESO Suite administrators have disabled MFA ("opted-out"), this dialog does not appear.
-
(If the Multi-factor authentication dialog box appears) Depending on which buttons appear in the dialog box, verify your login in one of the following ways.
 With an authenticator application.
-
Click MFA verification via authenticator app.
The dialog box updates with boxes for entering the numbers of the authentication code, and the ESO Suite sends an authentication code to the authenticator application installed on your device.
-
Open your authenticator application and note the authentication code currently displayed.
-
Enter the authentication code displayed in the authenticator application.
-
Click Log In.
 With a text message (SMS).
-
Click MFA verification via SMS.
The dialog box updates with boxes for entering the numbers of the authentication code, and the ESO Suite sends an authentication code to the phone number recorded in your PM records and identified with MFA codes.
-
Enter the authentication code sent to your MFA-registered phone number.
-
Click Log In.
 With an email message.
-
Click MFA verification via email.
The dialog box updates with boxes for entering the numbers of the authentication code, and the ESO Suite sends an authentication code to your agency or department email address, recorded in your PM records.
-
Enter the authentication code sent to your agency or department email address.
-
Click Log In.
-
-
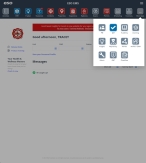
The ESO Suite landing screen appears.

Click graphics
to open them.Note: If MFA is enabled, you can access and manage your MFA options through the PM module, on the Settings > Account page, as described in Manage a user account. If your agency or department has enabled MFA but has not purchased the full-featured version of the PM module, you can access your own MFA settings by clicking Change my Multi-Factor Authentication settings on the landing screen, then using the Settings > Account page that appears. If your agency has not enabled MFA, the Change my Multi-Factor Authentication settings link does not appear on the landing screen.
-
-
On the top side of the home screen, click Inventory.

The Inventory module opens, displaying the Action now page.
Click graphics
to open them.
-
-
In the upper left corner of the screen, click the Inventory list icon.

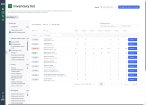
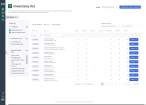
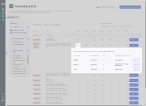
The Inventory list page appears, displaying a listing of every item in your agency's item catalog at the location selected in the upper right corner of the page, from the Viewing menu. The page contains information about the number or quantity of each item currently in the inventory at that location, the min and max par levels for that locations, and so forth.
-
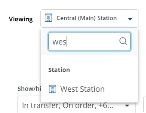
In the upper right corner of the page, from the Viewing menu, choose the location whose item list you want to work with.
The item list updates to display that location's inventory information.
-
 (Optional) Manage the amount of data displayed on the page.
You can control how much data appears on the page, search for items in the entire list, search individual columns, sort and filter column contents, hide and display columns, and so forth.
-
Depending on what data you want to view on the page, do one or more of the following.
 Filter the items by category and sub-category.
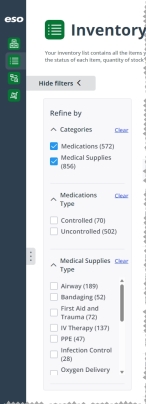
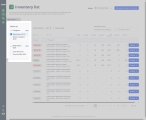
On the left side of the page, the Refine by box lists the categories and sub-categories of items you can choose to display on the Inventory list page. The items are organized into two major categories: Medications and Medical Supplies. Further down in the box, the categories are broken into sub-categories, such as (medications) Controlled, (medical supplies) Airway, Bandaging, and so forth. You can expand and contract the category and sub-category listings in the box as needed, to focus only on the ones you want to work with.
-
Depending on what information you want to view on the page, do one or more of the following.
 Display only one major category of items.
-
At the top of the Refine by box, in the Categories drop-down, clear the check box for the category of items you do not want to display on the page.
The sub-category listing for the category you cleared disappears from the Refine by box, The item counter on the left above the list updates to indicate how many items are still included in the list, and the list updates to remove the items in that category from the page.
You can restore the listing of category items by selecting the check box you cleared.
 Display only specific sub-categories.
-
(If the category of items you want to work with does not appear in the Refine by box) At the top of the Refine by box, in the Categories drop-down, select the check box for the category of items you want to work with.
The sub-categories in that category appear in the Refine by box, The item counter on the left above the list updates to indicate how many items are still included in the list, and the list updates to add the items in that category to the page.
-
In the sub-category of items you want to filter, select the check boxes for the types of items you want to display in the list, and clear the check boxes for the types of items you do not want to display.
Example: You want to filter the list to display items related to airway, bandaging, and IV therapies. In the Refine by box, under Categories, you would select Medical Supplies, then in the Medical Supplies Type drop-down, you would select the Airway, Bandaging, and IV Therapy sub-categories. The item counter on the left above the list updates to indicate how many items are still included in the list, and the list updates to display only the items in that category from the page.
 Hide or display the Refine by box.
-
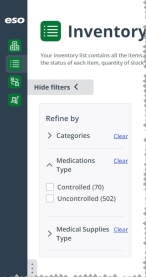
Above the Refine by box, click Hide filters to remove the filter list from the page.
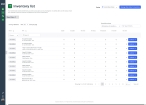
The Refine by box disappears from the page, the columns widen to use the additional space available, and the Hide filters button is renamed Show filters.
-
(If you hid the Refine by box) Above the list, click Show filters to return the filter list to the page.
The Refine by box reappears on the page, and the Show filters button is renamed Hide filters.
-
 Search the entire list for a character combination.
You can search the entire list for a specific combination of characters, regardless of what column the data appears in. The search includes only items not already added to the list. This search includes the item name and any agency "preferred names" the Inventory module administrator configured for items on the Settings pages.
Example: If you perform a full-list search for
500, 26 results would return because the search looks at multiple data points, including the preferred name and data that is not displayed on the page.The search does not include numerical values from the other columns on the page.
-
Above the list of items, on the right side, in the Search list field, type the combination of characters you want to search the entire list for.
As you type each character, the list of items on the page reduces to only those whose names or values contain that combination of characters.
Example: If you typed the characters
Ab, the entire list reduces to display only the items whose names or values contain these characters.
 Search within a column for a character combination.
The text that appears in the Item column is a combination of multiple pieces of data. The text in bold characters is the name of the medicine, ingredient, or medical supply item. If your Inventory module administrator had configured any agency "preferred names" for items on the Settings pages, those names replace the default medicine or medical supply item names. The original (default) names for items still appear as the lighter text below the bold item names. These original names are particularly important for medicines, as these names include dosage and strength information, which can reduce mistakes that might be introduced from preferred names.
Note: While the Item column can display multiple pieces of data grouped together, the Item column search can only search on the ingredient, medical supply, or preferred names.
Example: If you perform a full-list search for
500, 26 results would return because the search looks at multiple data points, including the preferred name and data that is not displayed on the page. If you perform a search for500at the top of the Item column, no results are found because the column search only looks at ingredient, medical supply, or preferred name, not the strength or dosage information also appearing in the Item column.-
At the top of the column you want to search, in Search, type the combination of characters you want to search the entire list for.
As you type each character, the list of items in the column reduces to only those whose names or values contain that combination of characters.
Example: If you typed the characters
ab, the entire list reduces to display only the items that contain theabcharacter combination in the ingredient name or medical supply name.
 Sort the entire list into ascending or descending order, based on the values in a column
-
At the top of the Item and Status columns, click the column sort (
 ) icon.
 The ascending values (
 ) icon appears and the column sorts from A–Z, or from 1 to the highest numerical value.
 -
Click the ascending values icon to sort the list into descending order.
The descending values (
 ) icon appears and the column sorts from Z–A, or from the highest numerical value to 1.
 Hide or display entire columns.
You can decide which columns of data you want to display on the page and which columns you do not need, and hide the unnecessary columns. You can also redisplay any columns you hid in past.
-
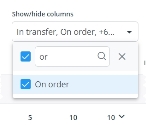
Above the list of items, on the right side, click the Show/Hide columns menu.
-
(Optional) In the blank (search) field at the top of the menu, type the combination of characters you want to search the entire list for.
As you type each character, the list of options in the menu reduces to only those whose names contain that combination of characters.
Example: If you typed the characters
Or, the list reduces to only the options that contain those characters. -
In the menu, select the check boxes for columns you want to display on the page, and clear the check boxes for columns you want to hide.
Only the columns you selected remain visible on the page.
Example: If your agency decides it does not need to know how many unusable items it has at a glance, you do not need to display the Unusable column on the page. If you clear the check box for the Unusable option in the menu, the Unusable column disappears from the page.
-
-
-
Work with the inventory at the selected location in any of the following ways.
 Remove items or update an item quantity.
When inventory items become damaged, spoiled, or are past their expiration date, you need to discard them and update the quantity available in the Inventory module accordingly. This process lets you capture historic audit trail or reportable information. You can also update the count of an item quantity if an incorrect quantity was entered during stock checks, or when transferring items between locations.
-
In the item row you want to work with, in the Usable column, click the numerical value.
A drop-down appears, listing information about that item at this location, including lot number and expiration date (if applicable), the quantity of the item on hand, and what sublocation the item is stored in.
-
In the lower right corner of the drop-down, click Edit.
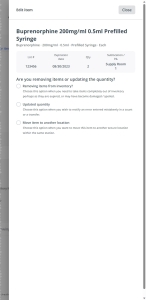
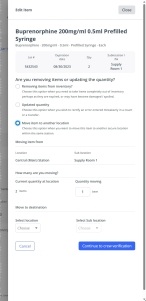
The Edit item dialog box appears, and information about the current item quantities appears at the top of the dialog box.
-
Depending on what you want to accomplish, do one of the following.
 Remove items.
-
Under Are you removing items or updating the quantity?, choose Removing items from inventory.
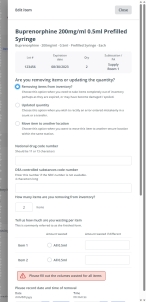
Additional fields related to removing items from the inventory appear in the right pane. The number of fields that appear depend on whether or not you are removing a controlled medication, or an uncontrolled medication or medical supply item.
-
Depending on the item you are working with, do one of the following.
 Remove an uncontrolled medication or medical supply item.
-
Under How many are you removing from inventory?, in Items, type the quantity of items you need to discard.
-
For Please let us know why you are removing these items, select the option that describes the reason you need to discard the items.
Example: Someone dropped a box of vials and they smashed, and so can not be used. You would need to update the Inventory module because this box of vials has been swept up and discarded. In this type of situation, you would choose Damaged from the menu.
If you choose Something else, the Brief description box appears in the dialog box.
-
In Brief description, type an explanation for why the item needs to be discarded.
-
Under When are you removing these items from inventory?, click the calendar icon on the right end of the field and select the appropriate date from the calendar that appears.
-
 (If applicable) Include any donation information that may apply.
If it is a medical supply item, your agency may want to donate it to a training class or secondary school outside the agency. In this case, you should note this information for audit trail purposes.
Note: Uncontrolled medications are not donated, but may be transferred outside the agency for disposal.
-
In If you are choosing to send these items elsewhere let us know (optional), type the name of the person or organization the items were given or sent to.
-
-
In the lower right corner of the dialog box, click Remove (number) medication name.
The dialog box closes, and in the upper right corner of the page, a Success message briefly appears.
On the Inventory list page the item's row, the values in the Usable and All locations columns update to reflect the change to that item's available quantities.
 Remove a controlled medication.
-
 Record the medication's code number.
-
In National drug code number, type the NDC number for the medication.
The NDC is a unique 11- to 13-digit, three-segment number that serves as the FDA's identifier for human drugs in the United States. You can find this code on all non-prescription (over-the-counter) and prescription medication packages, and medication inserts in the U.S.
-
(If the NDC is not available) In DEA controlled substances code number, type the DEA controlled substances code number for the medication.
The DEA is a United States federal law enforcement agency under the U.S. Department of Justice, tasked with combating illicit drug trafficking and distribution within the U.S. The controlled substances code number is a number assigned to drugs listed on the schedules created by the US CSA.
Each chemical/drug on one of the schedules is assigned an ACSCN. The code number is used on various documents used in administration of the system mandated by the CSA. The CSA is the statute establishing federal U.S. drug policy under which the manufacture, importation, possession, use, and distribution of certain substances is regulated.
-
-
 Indicate how many or the quantity of the items you are removing.
-
Under How many are you removing from inventory?, in Items, type the quantity of items you need to discard.
Under Tell us how much you are wasting per item, a table with the same number of rows as quantity of items appears.
Example: If you entered
2, a table of two rows appears. -
For each row in the table, do one of the following.
-
Choose All to indicate that all of the medication was wasted
-
In Amount wasted if different, type the volume that was actually wasted.
Example: You only had to administer part of a prefilled syringe of medication to treat the patient. Some of the medication remained in the syringe, but can not be used to treat a different patient.
-
-
-
 Specify when the medication was wasted.
-
Under Please record date and time of removal, indicate the date the medication was wasted, in one of these ways.
-
Click Today to use the current date.
-
For Date, click the calendar icon on the right end of the field and select the appropriate date from the calendar that appears.
-
-
Indicate the date the medication was wasted, in one of these ways.
-
Click Now to use the current time.
-
For Time, click the clock icon on the right end of the field and use the time increments arrows in the menu that appears to specify the time, in military time.
-
-
-
 Explain why and how the medication was removed.
-
For Please let us know why you are removing these items, select the option that describes the reason you need to discard the items.
Example: Someone dropped a box of vials and they smashed, and so can not be used. You would need to update the Inventory module because this box of vials has been swept up and discarded. In this type of situation, you would choose Damaged from the menu.
-
In How was the medication wasted, type a description of how the agency disposed of the medication.
Example: "By fire." or "Rinsed down drain with water."
-
In Location of where medication was wasted, type a description of where the agency disposed of the medication.
Example: "Agency incinerator," or "Down the sink at the Central Station."
-
In Include a brief description to support edit of item, type an explanation for why the item was discarded.
-
-
In the lower right corner of the dialog box, click Continue to crew verification.
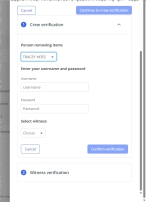
The Crew verification section appears, expanded, in the dialog box. Below it, the Witness verification section heading appears, but fields do not yet appear in that section.
-
 Identify the crew member and witness who removed the controlled substance from the inventory stock.
-
From Person removing items, choose the name of the person who removed the controlled medication from the inventory stock.
-
In Username and Password, ask the crew member to type their ESO Suite login credentials.
-
For Select witness, choose the name of the person who observed the disposal of the medication, and who can sign as a witness that the removal procedure was followed.
-
Click Confirm verification.
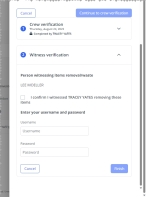
The Crew verification section contracts and locks, presenting a summary of the crew member who performed the controlled substance removal. The Witness verification section expands, displaying fields for verifying that they witnessed the removal.
-
Select I confirm I witnessed<crew member name>removing these items.
-
In Username and Password, ask the witnessing person to type their ESO Suite login credentials.
-
Click Finish.
A couple of success messages appear, and the dialog box closes.
-
-
 Update the item quantity.
-
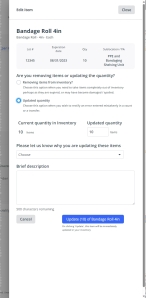
Under Are you removing items or updating the quantity?, choose Updated quantity.
Additional fields related to updating the quantity of the item appear in the right pane.
-
Depending on the item you are working with, do one of the following.
 Update an uncontrolled medication or medical supply item.
-
Under Updated quantity, in Items, type the correct quantity of the item in stock.
-
For Please let us know why you are updating these items, select the option that describes the reason you need to correct the quantity.
Example: During a stock count on a vehicle, a medic overlooked a bottle of acetaminophen that had fallen behind the bin it is normally stored in, and had entered an incorrect count at that time. In this type of situation, you would choose Due to a mistaken entry in a stock check from the menu.
-
In Brief description, type an explanation for why the item needs to be updated.
-
In the lower right corner of the dialog box, click Update (number) of item name.
The dialog box closes, and in the upper right corner of the page, a Success message briefly appears.
On the Inventory list page the item's row, the values in the Usable and All locations columns update to reflect the change to that item's available quantities.
 Update a controlled medication.
-
Under Updated quantity, in Items, type the correct quantity of the item in stock.
-
For Please let us know why you are updating these items, select the option that describes the reason you need to correct the quantity.
Example: During a stock count on a vehicle, a medic overlooked a bottle of acetaminophen that had fallen behind the bin it is normally stored in, and had entered an incorrect count at that time. In this type of situation, you would choose Due to a mistaken entry in a stock check from the menu.
-
In Brief description, type an explanation for why the item needs to be updated.
-
In the lower right corner of the dialog box, click Continue to crew verification.
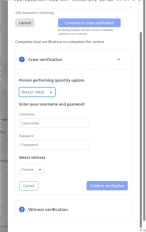
The Crew verification section appears, expanded, in the dialog box. Below it, the Witness verification section heading appears, but fields do not yet appear in that section.
-
 Identify the crew member and witness who updated the controlled substance in the inventory stock.
-
From Person performing quantity update, choose the name of the person who changed the item quantity of the controlled medication in the inventory stock.
-
In Username and Password, ask the crew member to type their ESO Suite login credentials.
-
For Select witness, choose the name of the person who observed the update of the medication, and who can sign as a witness that the update procedure was followed.
-
Click Confirm verification.
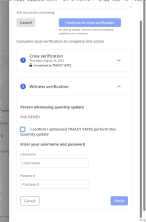
The Crew verification section contracts and locks, presenting a summary of the crew member who performed the controlled substance update. The Witness verification section expands, displaying fields for verifying that they witnessed the update.
-
Select I confirm I witnessed<crew member name>perform this quantity update.
-
In Username and Password, ask the witnessing person to type their ESO Suite login credentials.
-
Click Finish.
A couple of success messages appear, and the dialog box closes.
-
-
-
 (Controlled medications) Move the item to another location.
Due to storage reorganizations or remodeling expansions, sometimes you need to move an item with a to a new location or sublocation with the same hospital, agency, or vehicle. For controlled medications, you need to track these location changes, to make sure the medication moves to a secured location, and that a record of the move exists for audit trail purposes.
-
Under Are you removing items or updating the quantity?, choose Move item to another location.
Additional fields related to moving some quantity of the item appear in the right pane, and displaying the current location, sublocation, ad quantity of the medication in that location.
-
Under Quantity moving, in item, type the quantity of the item you want to move to another location.
-
Under Move to destination, for Select location and Select Sub location, choose the new location and sublocation you want to move the medication to.
-
In the lower right corner of the dialog box, click Continue to crew verification.
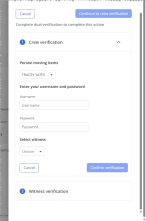
The Crew verification section appears, expanded, in the dialog box. Below it, the Witness verification section heading appears, but fields do not yet appear in that section.
-
 Identify the crew member and witness who moved the controlled substance in the inventory stock.
-
From Person moving items, choose the name of the person who moved the controlled medication to a new location.
-
In Username and Password, ask the crew member to type their ESO Suite login credentials.
-
For Select witness, choose the name of the person who observed the move of the medication, and who can sign as a witness that the moving procedure was followed.
-
Click Confirm verification.
The Crew verification section contracts and locks, presenting a summary of the crew member who performed the controlled substance move. The Witness verification section expands, displaying fields for verifying that they witnessed the move. s
-
Select I confirm I witnessed<crew member name>moving the items.
-
In Username and Password, ask the witnessing person to type their ESO Suite login credentials.
-
Click Finish.
A couple of success messages appear, and the dialog box closes.
-
 (Optional) Identify other locations that stocks the item.
It is useful to look up which of the agency's locations has an item in stock, so that you know which locations you can transfer stock from to replenish the item for the location you are working with. This capability is particularly useful for agencies that use a hub-and-spoke inventory model for restocking locations.
-
In the item row you want to work with, in the All locations column, click the numerical value.
A drop-down appears, listing all locations that currently have that item in stock.
-
In the drop-down, click Viewing and choose the location you want to look up, to see what its current stock of that item is.
The columns to the right of Viewing update to display information about the item at the selected location.
 (Uncontrolled medications and medical supplies) Add items to a transfer request between locations.
If a location is running low or completely out of a particular item, you can request to have more of that item transferred from another location which has some available to send. You can also request a transfer for an item that has inventory that is about to expire or which has already expired, or of which the location has an oversupply of. Items which are nearing their expiration date can be sent to other locations that use that item more frequently, and items that have already expired need to be sent to a location that can dispose of them correctly.
-
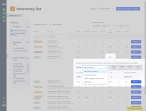
On the right end of the row for the item you want to work with, click Actions, then choose Add to transfer from the menu that appears.
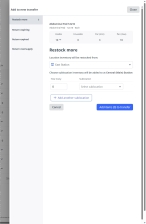
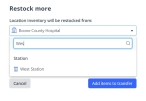
The Add to new transfer dialog box appears, with the Restock more bookmark selected in the left pane. In the right pane, the item name, and the number of usable, unusable, min, and max par currently available for the item at the location that will send the item.
-
Depending on what kind of transfer you want to perform, do any of the following.
 Restock the item.
-
From Location inventory will be restocked from, choose the location who the transfer will take the stock from.
-
In the right pane, in How many, type the number of the item you want to transfer from the providing location to the requesting location.
The Add items (number) to transfer button updates to confirm the number of items you specified to transfer
-
From Sublocation, choose the sublocation in within this location, where you want the transferred items to be stored.
-
(If you want to divide the item received up among multiple locations) Click Add another sublocation.
Example: You will restock 10 boxes of airway adhesive, and you want to stock five boxes in an ambulance, and the other five in a hospital store room.
A new row appears in the table.
-
Repeat the previous steps to specify the quantity of items you will stock in the additional location, and location/sublocation you will stock it in.
-
(If necessary) Click Remove to delete a row in the quantity and location table.
The Inventory module removes the row from the table.
-
Repeat the previous steps as many times as needed to divide the item you are restocking in different locations.
-
Click Add items (number) to transfer.
A small green circle with a check mark and a confirmation message appears in the right pane.
 Return items that will expire soon.
-
On the left, click the Return expiring bookmark.
The right pane updates to display fields for returning some quantity of the soon-to-expire item. The Inventory module automatically populates the Return number to field, and you can not change it in the dialog box.
-
For each row in the table, in the Return column, type the number for the quantity of the item you want to return.
The Add items (number) to transfer button updates to confirm the number of items you specified to transfer
-
Click Add items (number) to transfer.
A small green circle with a check mark and a confirmation message appears in the right pane.
 Return items that have already expired.
-
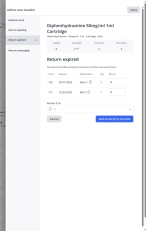
On the left, click the Return expired bookmark.
The right pane updates to display fields for returning some quantity of the item that has already expired. The Inventory module automatically populates the Return number to field, and you can not change it in the dialog box.
-
For each row in the table, in the Return column, type the number for the quantity of the item you want to return.
The Add items (number) to transfer button updates to confirm the number of items you specified to transfer
-
Click Add items (number) to transfer.
A small green circle with a check mark and a confirmation message appears in the right pane.
 Return oversupplied items.
-
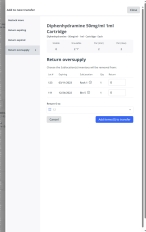
On the left, click the Return oversupply bookmark.
The right pane updates to display fields for returning some quantity of the overstocked item. The Inventory module automatically populates the Return number to field, and you can not change it in the dialog box.
-
For each row in the table, in the Return column, type the number for the quantity of the item you want to return.
The Add items (number) to transfer button updates to confirm the number of items you specified to transfer
-
Click Add items (number) to transfer.
A small green circle with a check mark and a confirmation message appears in the right pane.
-
-
In the upper right corner of the dialog box, click Close.
A confirmation message appears in the upper right corner of the page, and the number on the Items you have added tab increments by one to indicate that you have added an item from the Suggested items tab to the transfer you are drafting.
Note: Only the items listed on the Items you have added tab are included in the transfer when you submit it.
 (Optional) Add items to an order from a vendor.
If none of the other locations have items they can transfer to supply the location you are working with, you can order more new stock from an external vendor.
-
On the right end of the row for the item you want to work with, click Actions, then choose Add to order from the menu that appears.
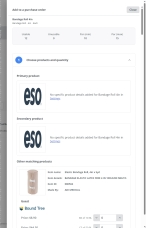
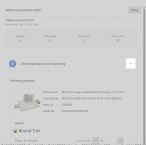
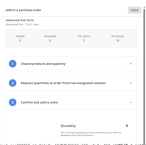
The Add to a purchase order dialog box appears. At the top of the dialog box, the item's name, and the number of usable, unusable, min, and max par currently available for the item at the location appears. In the rest of the dialog box, product details and matches among vendors integrated with your agency or department appear.
The contents that appear in the dialog box under Choose products and quantities depends on whether your agency or department is integrated with one or more vendors or not. If it is integrated, and if any of the vendors carries that item, information about the item, its price, available quantities, and (if available) a picture of the item appears in the dialog box. If your agency or department is not integrated with a vendor, or if the item is not carried by integrated vendors, the dialog box displays the ESO logo for the product image, and a short statement that no specific product details are available.
Information on setting up an integration with an external vendor is available in Integrate with vendors for ordering. Information on the item's settings page is available in Specify item details.
-
 (Integrated vendors) Specify how much of each item you want to order.
The vendor may carry competing brands for the same item, and in different quantities and at different prices.
Example: For 5” x 9” abdominal pads, the vendor Bound Tree offers pads made by Dukal, Medline Industries, Med Plus Services USA, Curaplex, Dynarex Corporation, Medsource International, and Honeywell Safety Production USA. Each of these manufacturers offer the pads in boxes, cases, packs, individually, and so forth, and the prices vary from manufacturer to manufacturer.
-
In the Choose products and quantity section, in the lower right corner of the listing for the manufacturer you want to order from, in the quantity fields, type how many of that quantity you want to order.
A small green circle with a check mark appears to the right of the field.
-
(Optional) On the right side of the Choose products and quantity section heading, click the collapse (^) icon to close the display of the section.
The icon changes to an expand (v) icon, and the section contracts to make it easier to see the remaining sections of the dialog box.
-
-
 (Non-integrated vendors) Specify how much of each item you want to order.
If an integrated vendor does not currently have stock in the item your agency or department needs, or if your department is not integrated with any vendors, you can order stock from non-integrated vendors.
-
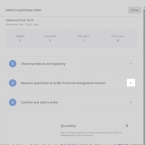
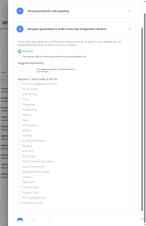
(If necessary) On the right side of the Request quantities to order from non-integrated vendors section heading, click the expand (v) icon, to open the display the section.
The section expands to display all the vendors your agency orders from, including the ones that are not integrated with the Inventory module.
-
Select Yes please, add this item and quantity to a downloadable list.
The fields and options in this section of the dialog box activate.
-
(If necessary) In Suggested quantity, change the value from the quantity calculated based on your max par.
-
Under Request <number> and create a list for, choose the name(s) of the vendors you want to order the item from.
-
(Optional) On the right side of the Request quantities to order from non-integrated vendors section heading, click the collapse (^) icon to close the display of the section.
-
-
 Confirm the addition to the order.
-
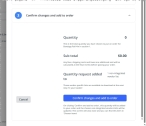
(If necessary) On the right side of the Confirm changes and add to order section heading, click the expand (v) icon, to open the display the section.
-
Review the order totals for quantity, sub-total, and any non-integrated vendors for accuracy.
-
Click Confirm changes and add to order.
The dialog closes and a Success message appears in the upper right corner of the screen.
The Inventory modules creates a draft order, or adds the item to an existing order, and the Action now page reappears.
Information on working with draft orders is available in Create, update, and place draft orders.
-
-

