Send an email message for the incident
You can send email messages to anyone logged into the same FH Mobile Response server you are using, and reference a specific incident.
-
(If you have not done so already) Log into the same FH Mobile Response server as the mobile computer you want to send the email message to is using.
Information on logging into an FH Mobile Response server is available in Log into an FH Mobile Response server.
- (If an incident is not already open) Open an incident, as described in Open an incident.
-
Click the incident's Messaging sub-tab.
The sub-tab appears, listing any emails you currently have related to the incident. To the right of the message list, the Message toolbar and the List filters also appear.
Note: If the Messaging sub-tab does not appear, it may be hidden through a configuration setting in FH Mobile Response. Information on displaying or hiding the Summary sub-tab is available in Display or hide incident sub-tabs.
-
In the Message toolbar on the right, click New.
A New Message tab appears, and for the Incident line, the number of the incident you started the email from is automatically filled in.
-
 (Optional) Change in incident the email is related to.
-
Click Incident.
The Select the Associated Incident dialog box appears.
-
Select the incident you want to associate with the message.
Tip: You can shorten the list of incidents displayed in the dialog box by typing part of the incident number or name into Filter.
-
Click OK.
In New Message tab, the number of the incident you selected appears to the right of Incident.
-
-
 Specify which clients (mobile computer) the message should go to.
-
Click To.
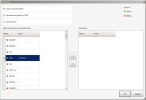
The Recipients dialog box appears, listing the clients (mobile computers) that are currently logged into the same FH Mobile Response server your mobile computer is logged into.
- (Optional) Select or clear All Resources to also indicate whether or not Select and add to the recipients list should also list clients that are currently logged off
- (Optional) Select or clear Users Currently Online and Resources assigned to to control the list of recipients displayed in the dialog box.
-
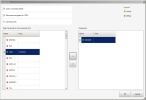
In Select and add to the recipients list, select the client to send a message to, and then click the right-pointing arrow between the lists.
The client name you selected moves from Select and add to the recipients list to Recipients.
Tip: If you add the wrong client, or if you change your mind about a client you added, select the client in the Recipients list and click the left-pointing arrow between the lists to move the client back to Select and add to the recipients list.
- Repeat the previous step as many times as needed to add other clients to the message.
-
Click OK.
In New Message tab, the To field populates with the client names you added to the Recipients list.
-
-
In Subject and the body of the message, enter the information you want to communicate to the other client.
Note: You can either type the message on a keyboard, our you touch the keyboard icon in the lower left corner of the tab and use the on-screen keyboard that appears to "write" or type text and insert it into the subject and body of the email.
This feature is designed for touch-screen devices.
-
In the lower left corner of the New Message tab, click Send.
The message is sent to the clients you selected, and the New Message tab closes.


