Record work information
You can record work information about an employee, such as their job title, assignment, employment dates, and so forth.
Note: You must have the full version of PM to include affiliation information when specifying work information, and to view a work change log for the person.
For information on upgrading to the full version of PM, go to https://www.eso.com/pm-demo/ and fill out the fields to request a demonstration and speak with a sales representative.
The menu options that appear for fields referenced in the steps below are defined in the Admin module, under the following.
-
General >
- Battalions
- Divisions
- Shifts
- Stations
- Units and Apparatus
-
PM > Work Lists >
- Qualifications
|
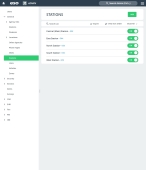
Example: In the PM module, for the Stations field, you may need options such as Central (Main) Station, East Station, North Station, South Station, and West Station. Your Admin administrator must add corresponding ADL items in the Admin module, under General > Stations, for these items to appear as menu choices in the PM module. |
If no options appear, or if the menu does not have an option that meets your needs, contact your ESO Suite administrator and ask them to add the necessary menu choices. You will need to work closely with your administrator to create and maintain these lists, as your department's needs evolve over time.
Information on defining these options is available in Configure shifts, Configure stations, Configure units and apparatus, and in Build work lists, respectively.
You can define and enable the menu options that appear for the following fields in the PM module, through the Settings > Work Lists screens.
- Ranks
- Titles
- Seating Positions
|
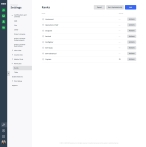
Example: When selecting, filtering, or creating ranks, you may need options such as Captain, Lieutenant, Operations Chief, Sergeant, Retired, and so forth. Your PM module administrator must add custom ADL items to the PM module, on the Settings > Work Lists > Ranks screens, for items to appear as menu choices. The administrator must also verify that the ADL items are enabled for them to appear; items that are disabled on the Settings > Work Lists > Ranks screen will not appear as options for the Rank field in the PM module. |
If no options appear, or if the menu does not have an option that meets your needs, contact your PM module administrator and ask them to add the necessary menu choices. You will need to work closely with your administrator to create and maintain these lists, as your department's needs evolve over time.
Information on creating the ranks and titles lists is available in Build the ranks list and Build the titles list.
-
 (If you have not done so already) Access the PM or PM Basic module in the ESO Suite.
Which version of the module opens depends on whether your agency or department has purchased the PM Basic or full version of the PM module.
-
Do one of the following.
-
(If you are already working in the ESO Suite) Click the Home icon in the upper left corner of the screen.
-
 (If you have not yet logged in) Log in to the ESO Suite.
-
In a web browser, go to https://www.esosuite.net/EsoSuite.
The ESO Suite login screen appears.
-
Enter your user name, password, and agency name, then click Let's Go.
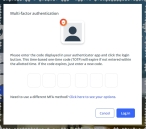
If MFA is enabled, the Multi-factor authentication dialog box appears, displaying one or more methods you can use to verify your login credentials. The number of methods that appear in the dialog box depends on what MFA methods your ESO Suite administrators enabled in the Admin module.

Click graphics
to open them.Information on enabling MFA and specific MFA methods is available in the Admin module online help, in Configure multiple-factor authentication.
Note: If your ESO Suite administrators have disabled MFA ("opted-out"), this dialog does not appear.
-
(If the Multi-factor authentication dialog box appears) Depending on which buttons appear in the dialog box, verify your login in one of the following ways.
 With an authenticator application.
-
Click MFA verification via authenticator app.
The dialog box updates with boxes for entering the numbers of the authentication code, and the ESO Suite sends an authentication code to the authenticator application installed on your device.
-
Open your authenticator application and note the authentication code currently displayed.
-
Enter the authentication code displayed in the authenticator application.
-
Click Log In.
 With a text message (SMS).
-
Click MFA verification via SMS.
The dialog box updates with boxes for entering the numbers of the authentication code, and the ESO Suite sends an authentication code to the phone number recorded in your PM records and identified with MFA codes.
-
Enter the authentication code sent to your MFA-registered phone number.
-
Click Log In.
 With an email message.
-
Click MFA verification via email.
The dialog box updates with boxes for entering the numbers of the authentication code, and the ESO Suite sends an authentication code to your agency or department email address, recorded in your PM records.
-
Enter the authentication code sent to your agency or department email address.
-
Click Log In.
-
-
The ESO Suite landing screen appears.

Click graphics
to open them.Note: If MFA is enabled, you can access and manage your MFA options through the PM module, on the Settings > Account page, as described in Manage a user account. If your agency or department has enabled MFA but has not purchased the full-featured version of the PM module, you can access your own MFA settings by clicking Change my Multi-Factor Authentication settings on the landing screen, then using the Settings > Account page that appears. If your agency has not enabled MFA, the Change my Multi-Factor Authentication settings link does not appear on the landing screen.
-
-
On the top side of the home screen, click PM.
Tip: If your screen or browser window is too narrow to display all your agency's ESO Suite module icons, an options icon appears on the right side of the icon bar. If you click the options icon, a menu appears containing additional module icons.
A list of all the personnel in the PM module appears, displayed in a grid format.
PM (full version) PM Basic Note: If you can access the full-featured PM module, you can view all your own information in it. The amount of information you can edit in the PM module depends on what roles and permissions your ESO Suite administrator assigned to your user account.
Information on user accounts, roles, and permissions is available in Manage a user account.
-
-
(If you have not done so already) Open the record of the person you want to work with, as described in Display, filter, and export personnel lists.
The personnel record opens and displays the page relevant to the list you were working with.
PM (full version) PM Basic -
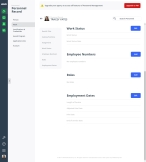
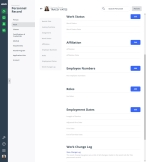
On the left, click the Work bookmark.
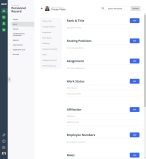
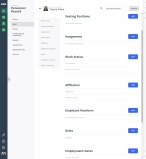
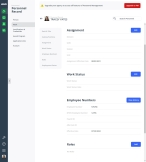
The contents of the Work page appear, with the Rank & Title section appearing at the top.
PM (full version) PM Basic -
Manage the person's work information in any of the following ways
 Work with ranks and titles for the person.
A rank is a role in your department or agency. Common ranks are Chief, Captain, Lieutenant, Firefighter, Engineer, and Paramedic.
A title is the current employment title of the person in the department or agency.
Note: Titles may be related to a rank, but do not necessarily fall within the defined organizational structure.
Example: Chief of Operations, and Administrative Coordinator.
For each category list choice, you can build a collection of individual records relevant to that item. A collection consists of the most-recent record and all the previous records for that item.
Example: In the Ranks category, if you add
Lieutenantas a rank the person has, the initial addition is the first record in their rank collection. Each time you update this rank for the person as they are promoted (or demoted), another record is added to their rank collection, creating a rank history for the person.Note: The rank itself is only listed once on the Work page, regardless of how many records exist in the rank collection.
To see all the records in the collection, you can view the collection's history. If necessary, you can edit or delete any of the individual records in a collection.
-
Do any of the following.
 Add a rank or title.
If a person had both a rank and a title when their record was initially added to the PM module, listings for their rank and title appear in the Rank & Title section, and the Add button does not appear. If no rank or title is already added, the Add button appears. If only a rank was entered when their record was added, the Add Title button appears on the Work page; if only a title was entered, the Add Rank button appears instead.
-
On the right side of the Rank & Title section, click Add, Add Title, or Add Rank.
The New Rank or Title, Add Title, or Add Rank dialog box appears.
-
(If it appears) Under Rank or Title, click either Rank or Title to identify what type of information you are adding for the person.
The buttons disappear and, depending on which button you clicked, either the Rank or Title field appears.
-
For Rank or Title, click the field or the list icon to the right of the field, then select the appropriate single option from the menu that appears.
-
For Effective Date and End Date, click the calendar icon on the right end of the field and select the appropriate date from the calendar that appears.
-
Click Save.
The information you entered appears as a summary in the Rank & Title section on the Work page.
 Add an additional rank or title.
If you want to add an additional rank or title for a person because they have been promoted, changed titles, or you want to add historical information, you can update the record collection to include the extra information.
-
In the listing for the rank or title you want to include additional information in, click Update.
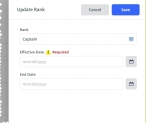
The Update Rank or Update Title dialog box appears, displaying the current rank or title.
-
For Rank or Title, click the field or the list icon to the right of the field, then select the appropriate single option from the menu that appears.
-
For Effective Date and End Date, click the calendar icon on the right end of the field and select the appropriate date from the calendar that appears.
-
Click Save.
The summary in the Rank & Title section on the Work page updates to list the-changes to the rank or title.
 View the history, edit, or delete a rank or title record.
-
In the listing for the rank or title you want to review the history for, click History.
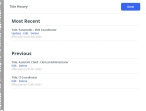
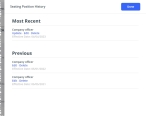
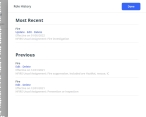
The Rank History or Title History dialog box appears.
- View the summary information under Most Recent and Previous.
-
Do any of the following.
 Edit a record in the rank or title collection.
-
In the listing for the rank or title record you want to edit, click Edit.
The Edit Rank or Edit Title dialog box appears, displaying the information already specified for the rank or title.
-
Change the information in the fields as needed.
- Click Save.
 Delete a record from the rank or title collection.
-
In the listing for the rank or title you want to delete, click Delete.
A confirmation dialog box appears.
-
Click Yes.
Note: Deleting a record from the Previous section of the dialog box deletes only that record. However, if there is only one record in the collection and you delete that record, then the module deletes the rank or title's listing from the Work page.
 Update the rank or title.
-
Under Most Recent, click Update.
The Update Rank or Update Title dialog box appears.
Renewing a rank or title from the Rank History or Title History dialog box is the same as renewing it from the Work page.
- Under step 4, Work with rank and title information for the person. (above), follow the directions in Update a rank or title for information on completing this process.
-
- Click Done.
-
 Record the person's seating positions in response vehicles.
Note: The Seating Positions section appears only if a PM administrator enables this add-on feature in the Settings pages.
Information on enabling this feature is available in Enable add-on features.
Seating positions lay out the expectation of each member in each seat in a response vehicle. Each seat on the truck has a well-defined role at each scene, and it is the responsibility of each rider to perform the task assigned to their seat. Seat assignments also provide crews with accountability.
Example: In a fire apparatus with four fighters, you have the driver's seat, the company officer's seat (the front passenger seat), the irons firefighter seat (directly behind the front passenger seat), and the hook-and-can firefighter seat (the seat directly behind the driver).
Seating positions in the PM module let you record which crew positions the personnel members are eligible to fulfill. Seating Positions can also integrate with either the Scheduling module, or with the roster feature in the Activities and Scheduling modules.
You can build a collection of records that correspond to each seating position a person has held. A collection consists of the most-recent record and all the previous records for that item.
Example: For the Driver seating position, the first time you add that position to the person's work history, that addition is the first record in their driver seating position collection. Each time you update the driver seating position for the person, another record is added to their driver seating position collection, creating a history for the person in that seating position.
Note: Each seating position is only listed once on the Work page, regardless of how many times the person has occupied that seat.
To see all the records in the collection, you can view the collection's history. If necessary, you can edit or delete any of the individual records in a collection.
-
On the left, click the Seating Positions bookmark.
The right side scrolls down to the Seating section of the Work page.
PM (full version) PM Basic -
Do any of the following.
 Add a different seating position.
-
On the right side of the Seating Position section, click Add.
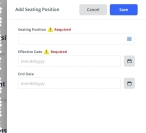
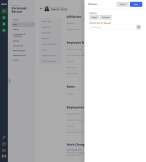
The Add Seating Position dialog box appears on the right.
-
From Seating Position, click the field or the list icon to the right of the field, then select the appropriate single option from the menu that appears.
-
For Effective Date and End Date, click the calendar icon on the right end of the field and select the appropriate date from the calendar that appears.
Note: If you do not specify an end date for a seating position, you can have multiple seating positions at a time.
-
Click Save.
The information you entered appears as a summary in the Seating Position section on the Work page.
 Update a seating position.
If you want to update an existing seating position listed for a person, such as needing to add another time frame for an existing seating position or to add historical information, you can update the record collection to include the extra information.
-
In the listing for the seating position you want to work with, click Update.
The Update Seating Position dialog box appears, displaying the current seating position. The selection for the Seating Position field is locked, but you can update the effective and end dates for this position as needed.
-
For Effective Date and End Date, click the calendar icon on the right end of the field and select the appropriate date from the calendar that appears.
Note: If you do not specify an end date for a seating position, you can have multiple seating positions at a time.
-
Click Save.
The summary in the Seating Position section on the Work page updates accordingly to list the-changes.
 View the history, edit, or delete a seating position record.
-
In the listing for the seating position you want to review the history for, click History.
The Seating Position History dialog box appears.
- View the summary information under Most Recent and Previous.
-
Do any of the following.
 Edit an record in the seating position collection.
Note: If you want to add another time frame for an existing seating position, use the Update option instead of Edit option.
-
In the listing for the seating position record you want to edit, click Edit.
The Edit Seating Position dialog box appears, displaying the information already specified for the seating position.
-
Change the information in the fields as needed.
- Click Save.
 Delete a record from the seating position collection.
-
In the listing for the seating position you want to delete, click Delete.
A confirmation dialog box appears.
-
Click Yes.
Note: Deleting a record from the Previous section of the dialog box deletes only that record. However, if there is only one record in the collection and you delete that record, then the module deletes the seating position's listing from the Work page.
 Update the seating position.
-
Under Most Recent, click Update.
The Update Seating Position dialog box appears.
Renewing a seating position from the Seating Position History dialog box is the same as renewing it from the Work page.
- Under step 4, Record the person's seating position in response vehicles. (above), follow the directions in Update a seating position for information on completing this process.
-
- Click Done.
-
 Describe the person's work assignment at the agency or department.
-
On the left, click the Assignment bookmark.
The right side scrolls down to the Assignment section of the Work page.
PM (full version) PM Basic -
Do any of the following.
 Add a work assignment for the person.
-
On the right side of the Assignment section, click Add.
The Assignment dialog box appears on the right.
-
For Assignment Effective Date and Assignment End Date, click the calendar icon on the right end of the field and select the appropriate date from the calendar that appears.
-
For the following fields, click the field or the list icon to the right of the field, then select the appropriate single option from the menu that appears.
Field Information needed Division
The organizational unit within the department or agency that the person belongs to. Common divisions are administration, training, operations, and so forth.
Battalion
Note: The Battalion field appears only if a PM administrator enables this add-on feature in the Settings pages.
Information on enabling this feature is available in Enable add-on features.
The larger fire department organizational unit the person belongs to. A battalion consists of several fire stations and multiple fire companies.
Shift
The named time span the person was working. A shift is one of two or more recurring periods in which different groups of personnel do the same jobs in relay.
Station
The name or location of the building the person was working from. A station is a place or building where a specific activity or service is based.
Unit
The apparatus or vehicle the person was assigned to.
Note: Units and apparatus are conceptually different from vehicles, particularly in the EMS industry. A unit may consist of one or more personnel, who can perform a particular level of service, and they may use one of any number of available vehicles. The concept of a unit captures both unit-identifying and equipment information.
-
(f applicable) Select Primary Assignment, to indicate that this work assignment is the one they typically perform when on the job.
-
Click Save.
The information you entered appears as a summary in the Assignment section on the Work page, and View History appears to the left of Add. If you selected Primary Assignment when you added the assignment, a corresponding label appears above the assignment summary.
PM (full version) PM Basic Note: You can identify only one assignment as the primary assignment, and that assignment always appears at the top of the list in the Assignment section.
 View the history, edit, or delete an assignment record.
-
To the right of the Assignment section heading, click View History.
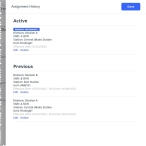
The Assignment History dialog box appears.
- View the summary information under Active and Previous.
-
Do any of the following.
 Edit a record in the assignment collection.
-
In the listing for the assignment record you want to edit, click Edit.
The Assignment dialog box appears, displaying the information already specified for the assignment.
-
Change the information in the fields as needed.
- Click Save.
 Delete a record from the assignment collection.
-
In the listing for the assignment you want to delete, click Delete.
A confirmation dialog box appears.
-
Click Yes.
Note: Deleting a record from the Previous section of the dialog box deletes only that record. However, if there is only one record in the collection and you delete that record, then the module deletes the assignment's listing from the Work page.
-
- Click Done.
-
 Identify the person's work status at the agency or department.
-
On the left, click the Work Status bookmark.
The right side scrolls down to the Work Status section of the Work page.
PM (full version) PM Basic -
On the right side of the Work Status section, click Edit.
The Work Status dialog box appears on the right.
-
For Work Status, click the field or the list icon to the right of the field, then select the appropriate single option from the menu that appears.
Work status indicates whether the person is a full-time or part-time, paid or unpaid member of the department or agency.
- For Work Status Date, click the calendar icon on the right end of the field and select the appropriate date from the calendar that appears.
-
Click Save.
The information you entered appears as a summary in the Work Status section on the Work tab.
 (PM full version only) Catalog the person's work affiliations.
-
On the left, click the Affiliation bookmark.
The right side scrolls down to the Affiliation section of the Work page.
-
On the right side of the Affiliation section, click Edit.
The Affiliation dialog box appears on the right.
-
For Affiliation, select either Career or Volunteer.
Affiliation indicates whether the person is a volunteer or career member of the department or agency.
- For Effective Date, click the calendar icon on the right end of the field and select the appropriate date from the calendar that appears.
-
Click Save.
The information you entered appears as a summary in the Affiliation section on the Work page.
 List the person's employee numbers.
-
On the left, click the Employee Numbers bookmark.
The right side scrolls down to the Employee Numbers section of the Work tab.
PM (full version) PM Basic -
Do any of the following.
 Add a new employee number.
-
To the right of the Employee Numbers heading, click Add.
The Add Employee Numbers dialog box appears.
-
In Employee Number and NFIRS Employee Number, type your agency or department's employee number and the NFIRS employee number for the person.
Note: An active employee number must be unique within an agency.
The NFIRS number is assigned by your agency or department, and can be no more than nine characters long.
Note: The NFIRS Employee Number is required if the person is identified as a person who can respond to a fire incident, or who is available in any of the fire modules. This number is used for reporting to FEMA for NFIRS.
Information on identifying an employee as a member of the Personnel List - ESO FIRE - Incidents list is available in Set application list visibility in other ESO Suite modules.
-
(If necessary) In Payroll ID, type the separate ID number for the person.
Note: This ID number is only needed if a payroll system requires a different number, or if the ESO Scheduling module uses it.
- (Optional) In Alternate ID, type any other relevant ID numbers used to look up employee information or the person.
-
For Effective Date, click the calendar icon on the right end of the field and select the appropriate date from the calendar that appears.
Employee numbers with the latest effective date are considered current.
-
Click Save.
The information you entered appears as a summary in the Employee Numbers section on the Work page, and the View History button appears to the right of the section heading.
 View the employee's ID number history, and add new ID information.
For employee ID numbers, you can build a collection of that person's employee number records as they change over time. A collection consists of the most-recent record and all the previous records for that item.
Example: If you add
4321532as an employee number for a person, that initial addition is the first record in their employee ID number collection. Each time you add an new ID number to their employee numbers, the PM module adds another to their employee ID number collection, creating an ID history for that person.Note: Only the most-recent employee numbers appear on the Work page, regardless of how many records exist in the employee's ID number collection.
To see all the records in the collection, you can view the collection's history. If necessary, you can edit or delete any of the individual records in a collection.
You can build and maintain a list of the various employee numbers the person has been assigned over their employment history with the agency or department.
-
To the right of the Employee Numbers heading, click View History.
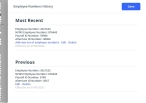
The Employee Numbers History dialog box appears.
- View the summary information under Most Recent and Previous.
-
(Optional) Do any of the following.
 Add a new set of employee numbers to the employee's ID number collection.
Adding new employee ID numbers generates a record that the PM module tracks as part of the employee's number history.
-
Under Most Recent, click Add new set of employee numbers.
The Add new Employee Numbers dialog box appears, displaying the most-current ID numbers for the employee.
-
Change or add to the information in the fields as needed.
-
Click Save.
The information from before the record addition appears under Previous in the Employee Numbers History dialog box.
 Edit a new set of employee numbers to the employee's ID number collection.
Note: Edit a record only to correct errors in an existing record. If one of the person’s ID number has changed, follow the steps under Add a new set of employee numbers to the employee's ID number collection. to add a new record with the correct effective date.
Editing employee ID numbers is a simple change to a specific record, and does not generate a new record in the employee's number history.
-
In the listing for the number record you want to edit, click Edit.
The Edit Employee Numbers dialog box appears, displaying the information already specified for the numbers.
-
Change the information in the fields as needed.
- Click Save.
 Delete a record from the employee's ID number collection.
-
In the listing for the employee number you want to delete, click Delete.
A confirmation dialog box appears.
-
Click Yes.
Note: Deleting a record from the Previous section of the dialog box deletes only that record. However, if there is only one record in the collection and you delete that record, then the module deletes the information from the Employee Numbers section of the Work page.
-
- Click Done.
-
 Identify the person's roles in the department.
A role is the job or category of work a person fills in the agency or department. You can identify the types of roles a person holds as either an EMS or a fire role. Each of these role types contains lists relevant to that role.
Example: The EMS role type includes lists for the primary job and other responsibilities, such as Patient Care Provider, Administrator or Manager, Driver or Pilot, Educator, and so forth. The fire role type includes a list for the NFIRS assignment, such as Prevention or inspection, Training, Maintenance, Communications, Investigation, and so forth.
For each role type, you can build a collection of individual records relevant to that role. A collection consists of the most-recent record and all the previous records for that role.
Example: In the EMS category, if you choose
Driver/Pilotas the primary job the person has, the initial addition is the first record in their EMS role collection. Each time you update the EMS role for the person, another record is added to their EMS role collection, creating a history for the role.Note: The EMS role itself is only listed once on the Work tab, regardless of how many records exist in the EMS role collection.
To see all the records in the collection, you can view the collection's history. If necessary, you can edit or delete any of the individual records in a collection.
-
On the left, click the Roles bookmark.
The right side scrolls down to the Roles section of the Work tab.
PM (full version) PM Basic -
Do any of the following.
 Add a role.
-
On the right side of the Roles section, click Add.
The Add Role dialog box appears on the right.
-
For Role Type, select either EMS or Fire.
Depending on your selection different fields appear in the dialog box.
-
Depending on your selection, do one of the following.
 EMS
EMS
Note: The same value cannot be selected for both the Primary Job and Other Responsibilities.
- For Primary Job, click the field or the list icon to the right of the field, then select the appropriate single option from the menu that appears to identify the primary job of the person at an incident.
- For Other Responsibilities, click the list icon to the right of the field, select all the appropriate options from the menu that appears, then click OK or click outside the menu, to list other responsibilities that person may take care of at an incident.
 Fire
Fire
-
For NFIRS Usual Assignment, click the field or the list icon to the right of the field, then select the appropriate single option from the menu that appears to identify the usual duty assignment of the person at an incident.
- For Effective Date and End Date, click the calendar icon on the right end of the field and select the appropriate date from the calendar that appears.
-
Click Save.
The information you entered appears as a summary in the Roles section on the Work tab.
Note: Once you add a role of each type to the section, the Add button disappears. Only the most-current EMS role and Fire roles appear in the Roles section of the Work tab. If only one role type appears in the section, and if you click the Add button again and add a second role of the same type, the new role becomes either the most-current information displayed in the section or is added to the role's history, based on the effective date. A second listing of the same role type does not appear in the section.
Example: An EMS role with an effective date of 11/04/2019 currently appears in the Roles section. Because no Fire role is listed, the Add button still appears to the right of the Roles section heading.
If you click Add, choose EMS as the role type, specify an effective date later than 11/04/2019, fill out the remaining fields, and click Save, the new EMS role information appears in the Roles section, replacing the role information from 11/04/2019. The earlier role information is added to the EMS role's history. If you had specified an effective date prior to 11/04/2019, the new role would have been added to the EMS role's history instead, and the information displayed in the Roles section would have remain unchanged.
 Update a role.
Note: You should update a role when a person changes their role or the primary job they perform within the role, not to make minor corrections such as to the effective date.
-
In the listing for the role you want to update, click Update.
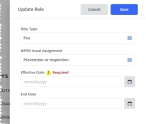
The Update Role dialog box appears. The values for Role Type and Primary Job are automatically set to the same values as the role you are updating.
- (If necessary) Change the values in Role Type, Primary Job, and Other Responsibilities as needed.
- For Effective Date and End Date, click the calendar icon on the right end of the field and select the appropriate date from the calendar that appears.
-
Click Save.
The module adds another record to the role's collection, using the new information you entered. The summary in the Roles section on the Work tab updates to list the most-recent effective and end dates.
Note: If you add the same role again, it does not appear as a repeated listing on the Work tab. Instead, it is added as another record in the collection for that role. To see the full record collection for the role, you need to view the role's history.
 View the history, edit, or delete a role's record.
-
In the listing for the role you want to review the history for, click History.
The Role History dialog box appears.
- View the summary information under Most Recent and Previous.
-
Do any of the following.
 Edit the information for a record in the role collection.
Note: You should edit a role to make minor corrections such as to the effective date. You should update a role when a person changes their role or the primary job they perform within the role.
-
In the listing for the role you want to edit, click Edit.
The Edit Role dialog box appears, displaying the information already specified for the role.
- Change the information in the fields as needed.
- Click Save.
 Delete a record from the role collection.
-
In the listing for the role you want to delete, click Delete.
A confirmation dialog box appears.
-
Click Yes.
Note: Deleting a record from the Previous section of the dialog box deletes only that record. However, if there is only one record in the collection and you delete that record, then the module deletes the role listing from the Work tab.
 Update the role.
- (If necessary) Change the values in Role Type, Primary Job, and Other Responsibilities as needed.
- For Effective Date and End Date, click the calendar icon on the right end of the field and select the appropriate date from the calendar that appears.
-
Click Save.
The module adds another record to the role's collection, using the new information you entered. The summary in the Roles section on the Work tab updates to list the most-recent effective and end dates.
Note: If you add the same role again, it does not appear as a repeated listing on the Work tab. Instead, it is added as another record in the collection for that role. To see the full record collection for the role, you need to view the role's history.
-
- Click Done.
-
 Record the person's employment dates.
The module automatically calculates the value in Length of Service, based on the values you enter in the fields in the Employment Dates section.
-
On the left, click the Employment Dates bookmark.
The right side scrolls down to the Employment Dates section of the Work tab.
PM (full version) PM Basic -
On the right side of the Employment Dates section, click Edit.
The Employment Dates dialog box appears on the right.
-
For the following fields, click the calendar icon on the right end of the field and select the appropriate date from the calendar that appears.
Field Information needed Adjusted Hire Date
The "back-dated" hire date for a person who has earlier employment time with your agency or department, or with another agency or department, that should be used when calculating length of service. This date can also be "forward-dated" to reflect a leave of absence or some other type of time away that does not get counted in the length of service.
Example: A Fire Chief with two years of experience from a department in a nearby city is hired by your agency. As part of the employment offer, the new Chief's previous employment time is to be included when calculating pension benefits at the end of his career. In this case, you should enter a date in Adjusted Hire Date that is two years prior to the date recorded in Hire Date.
Hire Date
For Hire Date, click the calendar icon on the right end of the field and select the appropriate date from the calendar that appears.
End of Service Date
The date the person leaves the employ of the agency or department.
-
Click Save.
The information you entered appears as a summary in the Employment Dates section on the Work tab.
 (PM full version only) View the change log for the person's work record.
-
On the left, click the Work Change Log bookmark.
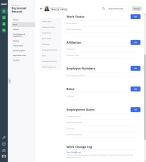
The right side scrolls down to the Work Change Log section of the Work page.
-
Click View Change Log.
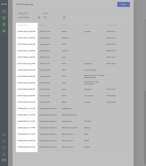
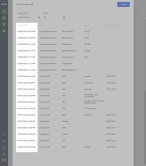
The Work Change Log dialog box appears.
-
For Change Date and Section, click the field or the list icon to the right of the field, then select the appropriate single option from the menu that appears.
Change Date identifies how many days back in time you want to view the log of changes to the Work page, and Section lets you filter the log to focus only on the section of the Work page (Rank & Title, Assignment, Work Status, and so forth) you are interested in viewing changes for.
When you change the values for either of these fields, the resulting list of records that still match the change date and section criteria updates accordingly.
Example: If you set Change Date to Last 30 Days and Section to Assignment, the resulting list contains only the assignment changes made in the last 30 days.
-
 Sort the list by date.
-
At the top of the Change Date column, click the column sort (
 ) icon.
The ascending values (
 ) icon appears, and the column sorts from the oldest to most-recent date.
 -
Click the ascending values icon to sort the list into descending order.
The descending values (
 ) icon appears, and the column sorts from the most-recent date to the oldest date.
-
- Click Close.
-
