Add records to multiple personnel at once
You can update the records for a number of existing personnel at once, instead of opening each individual's record and adding the same information multiple times. You can also add records for a number of new personnel at once.
|
Example:
|
-
The group actions feature only adds records or information; it does not remove records or information.
-
There is no "undo" capability for group actions. If you need to correct information added to the records for a group of personnel, you must open each person's record and make the correction manually.
-
You must have the
Group Actions Accesssecurity permission, and the edit permission for the area that you want to do the group action for, added to one of your user login roles. If you do not have the appropriate permissions, the area you want to perform the group action is not visible.Example: You must have the
Group Actions AccessandEdit Immunization Detailssecurity permissions before the Add Immunization option appears on the Group Actions screen.Information on user accounts, roles, and permissions is available in Manage a user account.
-
For PM Basic, group actions only include application lists, security roles, resetting passwords, and deleting personnel. You must upgrade to the full PM version to also add certifications, licenses, credentials, skills, and immunizations to a group of personnel.
For information on upgrading to the full version of PM, go to https://www.eso.com/pm-demo/ and fill out the fields to request a demonstration and speak with a sales representative.
-
 (If you have not done so already) Access the PM or PM Basic module in the ESO Suite.
Which version of the module opens depends on whether your agency or department has purchased the PM Basic or full version of the PM module.
-
Do one of the following.
-
(If you are already working in the ESO Suite) Click the Home icon in the upper left corner of the screen.
-
 (If you have not yet logged in) Log in to the ESO Suite.
-
In a web browser, go to https://www.esosuite.net/EsoSuite.
The ESO Suite login screen appears.
-
Enter your user name, password, and agency name, then click Let's Go.
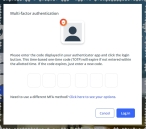
If MFA is enabled, the Multi-factor authentication dialog box appears, displaying one or more methods you can use to verify your login credentials. The number of methods that appear in the dialog box depends on what MFA methods your ESO Suite administrators enabled in the Admin module.

Click graphics
to open them.Information on enabling MFA and specific MFA methods is available in the Admin module online help, in Configure multiple-factor authentication.
Note: If your ESO Suite administrators have disabled MFA ("opted-out"), this dialog does not appear.
-
(If the Multi-factor authentication dialog box appears) Depending on which buttons appear in the dialog box, verify your login in one of the following ways.
 With an authenticator application.
-
Click MFA verification via authenticator app.
The dialog box updates with boxes for entering the numbers of the authentication code, and the ESO Suite sends an authentication code to the authenticator application installed on your device.
-
Open your authenticator application and note the authentication code currently displayed.
-
Enter the authentication code displayed in the authenticator application.
-
Click Log In.
 With a text message (SMS).
-
Click MFA verification via SMS.
The dialog box updates with boxes for entering the numbers of the authentication code, and the ESO Suite sends an authentication code to the phone number recorded in your PM records and identified with MFA codes.
-
Enter the authentication code sent to your MFA-registered phone number.
-
Click Log In.
 With an email message.
-
Click MFA verification via email.
The dialog box updates with boxes for entering the numbers of the authentication code, and the ESO Suite sends an authentication code to your agency or department email address, recorded in your PM records.
-
Enter the authentication code sent to your agency or department email address.
-
Click Log In.
-
-
The ESO Suite landing screen appears.

Click graphics
to open them.Note: If MFA is enabled, you can access and manage your MFA options through the PM module, on the Settings > Account page, as described in Manage a user account. If your agency or department has enabled MFA but has not purchased the full-featured version of the PM module, you can access your own MFA settings by clicking Change my Multi-Factor Authentication settings on the landing screen, then using the Settings > Account page that appears. If your agency has not enabled MFA, the Change my Multi-Factor Authentication settings link does not appear on the landing screen.
-
-
On the top side of the home screen, click PM.
Tip: If your screen or browser window is too narrow to display all your agency's ESO Suite module icons, an options icon appears on the right side of the icon bar. If you click the options icon, a menu appears containing additional module icons.
A list of all the personnel in the PM module appears, displayed in a grid format.
PM (full version) PM Basic Note: If you can access the full-featured PM module, you can view all your own information in it. The amount of information you can edit in the PM module depends on what roles and permissions your ESO Suite administrator assigned to your user account.
Information on user accounts, roles, and permissions is available in Manage a user account.
-
-
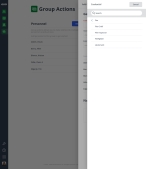
In the navigation bar on the left side of the screen, click the Group Actions (
 ) icon.
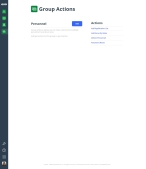
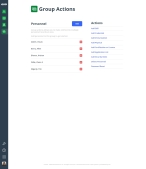
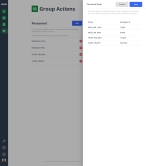
 The Group Actions screen appears.
Note: Click thumbnail graphics in the help to view the full-sized image.
PM (full version) PM Basic -
 Create a list of personnel whose records you want to update.
-
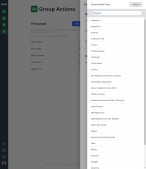
To the right of the Personnel heading, click Add.
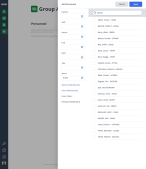
The Add Personnel dialog box appears.
-
(Optional) In the Search field above the list of names, begin typing characters in the name of the person you want to find.
As you type, the list of personnel names reduces to only those people whose names still match the characters you are entering.
-
For any of the following fields, click the list icon to the right of the field, then select all the appropriate options from the menu that appears, and click Done.
 Understand the link between the PM and Admin modules, when finding a personnel record.
The menu options that appear for fields referenced in the steps below are defined in the Admin module, under the following.
-
General >
- Battalions
- Divisions
- Shifts
- Stations
- Units and Apparatus
-
PM > Work Lists >
- Qualifications
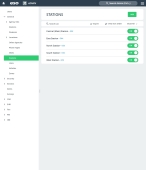
Example: In the PM module, for the Stations field, you may need options such as Central (Main) Station, East Station, North Station, South Station, and West Station. Your Admin administrator must add corresponding ADL items in the Admin module, under General > Stations, for these items to appear as menu choices in the PM module.
If no options appear, or if the menu does not have an option that meets your needs, contact your ESO Suite administrator and ask them to add the necessary menu choices. You will need to work closely with your administrator to create and maintain these lists, as your department's needs evolve over time.
Information on defining these options is available in Configure shifts, Configure stations, Configure units and apparatus, and in Build work lists, respectively.
Field Searches for this Division
The organizational unit within the department or agency that the person belongs to. Common divisions are administration, training, operations, and so forth.
Shift
The named time span the person was working. A shift is one of two or more recurring periods in which different groups of personnel do the same jobs in relay.
Station
The name or location of the building the person was working from. A station is a place or building where a specific activity or service is based.
Unit
The apparatus or vehicle the person was assigned to.
Note: Units and apparatus are conceptually different from vehicles, particularly in the EMS industry. A unit may consist of one or more personnel, who can perform a particular level of service, and they may use one of any number of available vehicles. The concept of a unit captures both unit-identifying and equipment information.
Rank
The position or role the person fulfills for the department or agency. Common ranks are Chief, Captain, Lieutenant, Firefighter, Engineer, and Paramedic.
Title
The current employment title of the person within the department or agency.
Note: Titles may be related to a rank, but do not necessarily fall within the defined organizational structure.
Example: Chief of Operations, and Administrative Coordinator.
Status
Personnel records that are active or deactivated in the ESO Suite.
As you select filters, the list of personnel names to the right reduces to display only the ones that match your choices.
Note: The filtering methods all work in conjunction, letting you build a logical expression.
Example: You can initially filter the list to find personnel who work at the Central (Main) Station, reduce the results further by filtering for shifts A or B, then search those results further yet by adding the unit FireEng01 filter. Only the personnel who work at the Central (Main) Station, on either the A or B shift, and who worked on unit FireEng01 during those shifts appear in the result.
-
-
(If necessary) Click Reset Filters to clear all your filter selections at once.
-
Choose the personnel whose record you want to add records to in one of the following ways.
To do this Do this Select all personnel currently listed.
- Below the list of filters, click Select All Results.
Manually select individual personnel.
- In the list of personnel on the right, select the names of the individuals.
The total number of personnel you select appears at the bottom left side of the dialog box.
Note: Once you select a person, they remain selected, even if you change the filter criteria and that person no longer appears in the filtered list. Check the number of attendees to verify how many personnel are actually selected.
-
(If necessary) Click Clear All Personnel to clear all your selections at once.
Caution: Verify the total number personnel selected in Personnel Selected, before clicking Clear All Personnel.
Example: If you only see two personnel selected in the list because you are filtering the list, and Personnel Selected indicates you have 4 personnel selected, clicking Clear All Personnel clears all 4 selected personnel.
-
Click Apply.
The personnel you selected appear under Personnel on the group actions screen.
- (If necessary) Click the red X button to the right of a person's name, to remove them from the list.
-
-
Do any of the following to the records of the listed personnel.
 PM (full version) Add skills.
A skill is the ability to carry out a task with determined results often within a given amount of time, energy, or both. Common skills include intubation, intravenous access, SCBA emergency don/doff procedures, and so forth. You can build a list of the various skills the person has demonstrated, and record the duration of each skill.
 Understand the link between the PM and Admin modules, when specifying skill information.
Before you begin adding skills, you may need to contact your ESO Suite administrator and ask them to add items to the ADLs in the Admin module, under PM > Skills. This list provides the menu options for the Skill field in the PM module.
Example: In the PM module, for the Skill Type field, you may need options such as 12 Lead ECG, Advanced Airway, Glucometer, Intubations, Transport Ventilator, and so forth. Your ESO Suite administrator must add corresponding ADL items in the Admin module, under PM > Skills, for these items to appear as menu choices in the PM module.
If no options appear, or if the menu does not have an option that meets your needs, contact your ESO Suite administrator and ask them to add the necessary menu choices. You will need to work closely with your administrator to create and maintain these lists, as your department's needs evolve over time.
Information on defining skill menu options is available in List skills.
-
Click Add Skill.
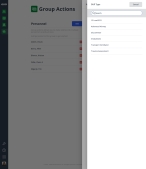
The Add Skill to Group dialog box appears.
- From Skill Type, click the field or the list icon to the right of the field, then select the appropriate single option from the menu that appears.
- For Earned Date and Expiration Date, click the calendar icon on the right end of the field and select the appropriate date from the calendar that appears.
-
Click Save.
The PM module updates the records for the personnel listed on the left with the selected skill and corresponding dates
 PM (full version) Add credentials.
A credential is granted locally to a person within an agency or department, allowing that person to perform duties aligned with a certain level of task. Credentials relate to conditions of employment within your agency.
Example: A medical director credentialing an EMS provider, or a physician being credentialed to practice in a hospital.
 Understand the link between the PM and Admin modules, when specifying credential information.
Before you begin adding credentials, you may need to contact your ESO Suite administrator and ask them to add items to the ADLs in the Admin module, under PM > Credentials. These lists provide the menu options for the Credential field in the PM module.
Example: In the PM module, for the Credential field, Fire menu extension, you may need options such as Fire Chief, Fire Inspector, Firefighter, Lieutenant, and so forth. Your ESO Suite administrator must add corresponding ADL items in the Admin module, under PM > Credentials, for these items to appear as menu choices in the PM module.
If no options appear, or if the menu does not have an option that meets your needs, contact your ESO Suite administrator and ask them to add the necessary menu choices. You will need to work closely with your administrator to create and maintain these lists, as your department's needs evolve over time.
Information on defining credential menu options is available in List credentials.
-
Click Add Credential.
The Add Credential to Group dialog box appears.
-
For Credential, click the field or the list icon to the right of the field.
A list of credential categories appears.
-
Click the right-pointing arrow for the category the credential you want to add would be in.
A list of credentials specific to that category appears.
Example: If you chose Fire as the category, a list of fire credentials selections appears.
-
Select the option corresponding to the credential you are adding.
The Add Credential to Group dialog box becomes visible again.
-
For Issued Date and Expiration Date, click the calendar icon on the right end of the field and select the appropriate date from the calendar that appears.
If a duration period was specified when the credential was defined, then the PM module automatically calculates the expiration date based on the duration period.
Information on defining a credential duration period is available in List credentials, under Add a credential.
-
For each person listed in the dialog box, in the Credential Number column, type the unique number on the credential documentation that identifies that person as having earned the credential.
Note: If one already exists, the credential number of the latest credential of that type for that person automatically populates into their Credential Number field. You may update or delete the pre-populated number if needed.
- In Notes, type any additional information regarding the credential.
-
Click Save.
The PM modules updates the records for the personnel listed on the left with the selected credential, credential number, corresponding dates, and notes.
Note: The credential type, dates, and notes are set the same for all selected personnel.
 PM (full version) Add immunizations.
Immunization is the process in which a person is made immune or resistant to an infectious disease, typically by the administration of a vaccine. Vaccines stimulate the body's own immune system to protect the person against subsequent infection or disease.
 Understand how immunizations defined on the Settings screen appear as menu options in the PM module.
Before you begin adding immunizations, you may need to contact your PM administrator and ask them to add items to the ADLs on the Settings screen, under Medical Lists > Immunizations. This list provides the menu options for the Immunization Type field in the PM module.
Example: When adding medical information to a person's record, you may need immunization options such as Hepatitis B, Hepatitis C, Influenza H1N1, Tetanus, Tuberculosis, and so forth. Your PM module administrator must add corresponding ADL items on the Settings screen, under Medical Lists > Immunizations, for these items to appear as menu choices in the Immunization Type menu extension.
If no options appear, or if the menu does not have an option that meets your needs, contact your PM administrator and ask them to add the necessary menu choices. You will need to work closely with your administrator to create and maintain these lists, as your department's needs evolve over time.
Information on building an immunization list is available in Build the immunizations list.
-
Click Add Immunization.
The Add Immunization to Group dialog box appears.
- For Immunization Type, click the field or the list icon to the right of the field, then select the appropriate single option from the menu that appears.
-
For Administered Date and Expiration Date, click the calendar icon on the right end of the field and select the appropriate date from the calendar that appears.
If a duration period was specified when the immunization was defined, then the PM module automatically calculates the expiration date based on the duration period.
Information on specifying an immunization's duration period is available in Build the immunizations list.
If an expiration date is not calculated for you, and if you do not manually enter one, the immunization does not appear in the Expiring Immunizations report in PM.
Note: For immunizations that require multiple doses of a vaccine, verify the amount of time between doses for your selected vaccine manufacturer, as the number of days between doses may vary between manufacturers. When adding the record for the first dose, set the expiration date for the appropriate time period for when the second dose should be administered.
Example: For the Pfizer COVID-19 vaccine, if the first dose is administered on 1/1/2021, you should set the expiration to 1/22/2021, because the second Pfizer dose should be administered 21 days after the first dose.
Setting the expiration date will trigger the inclusion of the immunization in the Expiring Immunizations report in PM. It will also trigger a reminder if you set one for the list value. If you set an expiration date for second doses, the immunization will appear in the expiring immunization report even though no action may need to be taken. In the Notes section of the immunization record, you can identify which dose this is.
Caution: For COVID-19 second doses, do not set an expiration date, because it is not yet known how long the vaccine provides immunity and if there will need to be a booster or additional dose later.
- In Notes, type any additional information regarding the immunization.
-
Click Save.
The PM modules updates the records for the personnel listed on the left with the selected immunization type, corresponding dates, and notes.
Note: The immunization type, dates, and notes are the same for all selected personnel.
 PM (full version) Add qualifications.
Qualifications are defined within the agency. Qualifications may be related to credentials or certifications, but are not necessarily tied to them. Qualifications are used to define the roles of individuals in the agency that may influence duty assignments and other operational roles, such as with Water Rescue Technician, Bike Medic, High-Angle Rescue Technician, Field Training Officer (FTO), and so forth.
 Understand the link between the PM and Admin modules, when specifying qualification information.
Before you begin adding qualifications, you may need to contact your ESO Suite administrator and ask them to add items to the ADLs in the Admin module, underPM > Work Lists > Qualifications. This list provides the menu options for the Qualification field in the PM module.
Example: In the PM module, for the Qualification field, you may need options such as Dive Rescue, Field Training Officer (FTO), Hazardous Material Technician, High-Angle Rescue Technician, Water Rescue Technician, and so forth. Your ESO Suite administrator must add corresponding ADL items in the Admin module, under PM > Work Lists > Qualifications, for these items to appear as menu choices in the PM module.
If no options appear, or if the menu does not have an option that meets your needs, contact your ESO Suite administrator and ask them to add the necessary menu choices. You will need to work closely with your administrator to create and maintain these lists, as your department's needs evolve over time.
Information on defining qualification menu options is available in Build a qualifications list.
-
Click Add Qualification.
The Add Qualification to Group dialog box appears.
- From Qualification Type, click the field or the list icon to the right of the field, then select the appropriate single option from the menu that appears.
- For Issued Date and Expiration Date, click the calendar icon on the right end of the field and select the appropriate date from the calendar that appears.
-
Click Save.
The PM module updates the records for the personnel listed on the left with the selected qualification and corresponding dates
 PM (full version) Add physicals.
A physical is a routine test in which a healthcare professional inspects, feels, or listens to different parts a person's body. A thorough physical examination covers head to toe and measures important vital signs (temperature, blood pressure, and heart rate). It also evaluates your body using observation, palpation (feeling body parts with the fingers or hands), percussion (tapping body parts with fingers, hands, or small instruments), and auscultation (listening to sounds from the heart, lungs, or other organs, typically with a stethoscope).
There are several different types of physical that a person can have, one or more of which may be required for a specific role or task the individuals in your agency or department perform, or license they hold.
 Understand how physical types defined on the Settings screen appear as menu options in the PM module.
Before you begin adding physicals, you may need to contact your PM administrator and ask them to add items to the ADLs on the Settings screen, under Medical Lists > Physicals. This list provides the menu options for the Physical Type field in the PM module.
Example: When adding medical information to a person's record, you may need physical type options such as Hazmat, NFPA 1580 Complete Annual, Annual, Return to Work, CDL/Driver, Firefighter, and so forth. Your PM module administrator must add corresponding ADL items on the Settings screen, under Medical Lists > Physical Types, for these items to appear as menu choices in the Physical Type menu extension.
If no options appear, or if the menu does not have an option that meets your needs, contact your PM administrator and ask them to add the necessary menu choices. You will need to work closely with your administrator to create and maintain these lists, as your department's needs evolve over time.
Information on building an immunization list is available in Build the physical types list.
-
Click Add Physical.
The Add Physical to Group dialog box appears.
- For Physical Type, click the field or the list icon to the right of the field, then select the appropriate single option from the menu that appears.
-
For Exam Date and Next Due Date, click the calendar icon on the right end of the field and select the appropriate date from the calendar that appears.
If a duration period was specified when the physical type was defined, then the PM module automatically calculates the next physical date, based on the duration period.
Information on specifying a physical's duration period is available in Build the physical types list.
If a next-due date is not calculated for you, and if you do not manually enter one, the physical does not appear in the Physicals Due report in the Personnel pages of the PM module.
-
 For each person listed in the dialog box, record the exam results and any pertinent notes.
-
For Results, click the field or the list icon to the right of the field, then select the appropriate single option from the menu that appears to indicate the examiner's decision on the individual's ability to work.
- In Notes, type any additional information regarding the physical.
-
-
Click Save.
The PM modules updates the records for the personnel listed on the left with the selected physical type, corresponding dates, exam results, and notes.
Note: The physical type and dates are the same for all selected personnel.
 PM (full version) Add certifications and licenses.
A certification or license is a document from an external entity, verifying that a person has the required skills and knowledge in a certain area, and allowing them to conduct activities that would otherwise be illegal without the certification or license.
Example: A state-issued driver's license, firefighter certification, or paramedic or EMT certification.
 Understand how certifications and licenses defined on the Settings screen appear as menu options in the PM module.
Before you begin adding certifications and licenses, you may need to contact your PM administrator and ask them to add items to the ADLs on the Settings screen, under Certifications and Licenses. The lists defined there provide the menu options for the Certification or License field elsewhere in the module.
Example: When adding a driver's license to a person's record, for the Certification or License field, Driver's License menu extension, you may need options such as Class A, Class B, Class C, Class D, Class R, and so forth. Your PM module administrator must add corresponding ADL items on the Settings screen, under Certifications and Licenses > Driver's License, for these items to appear as menu choices in the Driver's License menu extension.
If no options appear, or if the menu does not have an option that meets your needs, contact your PM module administrator and ask them to add the necessary menu choices. You will need to work closely with your administrator to create and maintain these lists, as your department's needs evolve over time.
Information on creating the certifications and licenses lists is available in Build certifications and licenses lists.
-
Click Add Certification or License.
The Add Certification to Group dialog box appears.
-
For Certification or License, click the field or the list icon to the right of the field.
A list of certification or license categories appears.
-
Click the right-pointing arrow for the category the certification or license you want to add would be in.
A list of certifications or licenses specific to that category appears.
Example: If you chose Driver's License as the category, a list of driver's license selections appears.
-
For Issue Date and Expiration Date, click the calendar icon on the right end of the field and select the appropriate date from the calendar that appears.
If a duration period was specified when the certification or license was defined, then the PM module automatically calculates the expiration date based on the duration period.
Information on defining a certification or license duration period is available in List certifications and licenses, under Add a certification.
-
 For each person listed in the dialog box, verify the initially issued date and certification or license number.
-
In the Initial Date column, either type the date the certification was initially issued to the person, or click the calendar icon on the right end of the field and select the appropriate date from the calendar that appears.
-
In Certification/License #, type the unique number of the certification or license.
Note:
-
The certification or license number follows the same uniqueness requirements for EMS certification or licenses, as if you added the certification or license in the person’s individual record.
-
For anyone in the group that already has a certification or license of the same type recorded in the PM module, their certification or license number and initial issue date pre-populates from their previous record. If there is no initial issue date already, you can add it for the person.
-
-
-
Click Save.
The PM modules updates the records for the personnel listed on the left with the specified certification or license number and appropriate dates
Note: The issue and expiration dates are set the same for all selected personnel.
 Add application lists.
These lists of personnel or staff members appear in several ESO Suite modules, such as the EHR, Fire Incidents, and Patient Registry modules. The roles and permissions your ESO Suite administrator assigned to your user account, determines what modules you can access as a user, and what actions you can perform with those modules. You must have the
Edit Application ListsandGroup Actions Accesssecurity permissions to add application lists to a group of personnel.Note: Adding an application list to members of a group only adds that list to each person in the group, and does not disable any application lists they are already in. If you do not select an application list displayed for a group action, that application list is not added for the members of that group.
Example: If a person already has Available in EHR Personnel List enabled for them, and then you add them to a group and select Available in Fire Apps Personnel List for the group, that person's Available in EHR Personnel List remains enabled, and Available in Fire Apps Personnel List also becomes enabled for them.
Being able to control application lists lets you limit the list of personnel that appear as options to only those qualified for a particular job.
Example: Your department or agency may have dozens of personnel, but only a handful of them are qualified as fire fighters and can respond to a fire incident. When you are filling out a fire incident report, it reduces potential error if only the qualified personnel, identified as available to appear in the Fire module appear, can be selected from personnel lists.
Information on user accounts, roles, and permissions is available in Manage a user account.
-
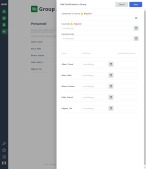
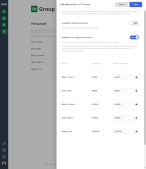
Click Add Application List.
The Add Application List to Group dialog box appears.
-
For each application you want the personnel chosen in the previous step to appear in as an option in lists, drag the button to the Yes or No position to indicate whether or not the person's name appears in the corresponding module.
Example: To have the names of the personnel appear as an option in lists in the Fire Incidents and Inspections modules, you would drag the slider for Available in Fire Apps Personnel List to the Yes position.
If you drag the slider for Available in Fire Apps Personnel List to the Yes position, a table of personnel names, employee numbers, and fields for NFIRS numbers appears in the dialog box.
-
(If necessary) In NFIRS Employee #, type the NFIRS employee number for the person.
If you had entered the NFIRS employee number when initially creating the individual's personnel record, or later on the Work tab of the individual's personnel record, that number automatically populates in NFIRS Employee # here. If you enter or change the NFIRS employee number in NFIRS Employee # now, the number on the Work tab updates to reflect the change.
Note:
-
The NFIRS Employee Number is required if the person is identified as a person who can respond to a fire incident, or who is available in any of the fire modules. This number is used for reporting to FEMA for NFIRS.
-
The NFIRS number is assigned by your agency or department, and can be no more than nine characters long.
-
-
For Enabled for Learning Academy, drag the button to the Yes or No position to indicate whether or not the person can log in to EMS1 Academy or FireRescue1 Academy, to work on training courses there.
Note: This option appears only if your agency or department has purchased integration with Lexipol's EMS1 Academy or FireRescue1 Academy. Enabling it allows the EMS1 and/or FireRescue1 Academy to send completed-class information back to the PM module.
For information on integrating with these Lexipol Academies, contact your ESO Suite sales representative.
- Click Save.
 Add security roles.
You can add specific security roles to selected personnel in your agency, department, or hospital who need access to features in the ESO Suite that not all personnel should access.
Example: General administration and security administration roles.
-
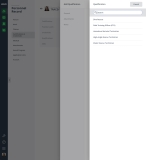
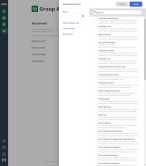
Click Add Security Roles.
The Add Security Roles dialog box appears.
Tip: If the list of permissions in a role is wider than can be displayed in the column, and ellipses (...) appears at the right edge of the column. If you hover your mouse pointer over the ellipses, the full information appears in a pop-up.
-
(Optional) In the Search field above the list of security roles, begin typing characters in the name of the security role you want to find.
As you type, the list of roles reduces to only those whose names still match the characters you are entering.
-
On the left, for Status, click the list icon to the right of the field, select all the appropriate options from the menu that appears, then click OK or click outside the menu.
The module searches for security roles with assigned or not-assigned statuses that match your selections, and the list of security roles on the right reduces to display only the ones that match.
-
(If necessary) Click Reset Filters to clear all your filter selections at once.
-
Choose the security roles you want to apply in one of the following ways.
To do this Do this Select all roles currently listed.
- Click Select All Roles.
Manually select individual roles.
- In the list of roles on the right, select the specific security roles.
Remove all roles from the user.
- Click Clear All Roles.
-
Click Apply.
 Delete personnel records.
If necessary, you can delete more than one personnel record at once.
Caution: You can not "undo" deleting a personnel record. You should only delete personnel who were accidentally entered twice, or whose records were imported incorrectly. After personnel records are deleted:
-
The personnel are unable to access the ESO Suite.
-
The personnel no longer appear in any lists in the ESO Suite, such as in the PM or Admin modules, or in crew member lists in the EHR or Fire Incidents modules.
-
Records such as certifications, classes, immunizations, and so forth are also deleted for the personnel.
You should deactivate a user is a person is no longer with your agency or department, rather than delete the personnel record from the PM module. You can also lock a person out of the ESO Suite instead of deleting their personnel record.
Information on deactivating and locking personnel records is available in Manage a user account.
Note:
- Use the deactivate functionality if a personnel member no longer works for the agency. The delete personnel functionality is intended only for correcting personnel that were erroneously added.
- The delete personnel functionality requires a specific security privilege that is not granted to any role by default, including administrative users. You must contact ESO support, discuss the ramifications of deleting personnel records with a support team member, and request the necessary security privilege before proceeding. Only after this security permission is granted will the Delete Personnel option to appear on the Group Actions screen.
-
Click Delete Personnel.
The Delete Personnel dialog box appears.
- Carefully read the warning information at the top of the dialog box, to understand the ramifications of deleting the personnel listed in the dialog box.
- In Agree to permanently delete the personnel above, type the word
Agree. -
Click Save.
Note: If you entered anything other than
Agreein the previous step, the module does not respond, and the Delete Personnel dialog box remains open.A confirmation dialog box appears.
-
Click Yes.
The personnel are deleted, and no longer appear in any applications lists for new fire incidents or EMS calls. The personnel are still listed in past incident or call records for historical purposes.
 Reset passwords.
If you have the necessary permissions, you can force the reset of ESO Suite login passwords for selected personnel in your agency or department for the .
-
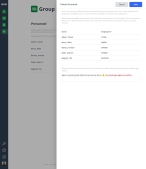
Click Password Reset.
The Password Reset dialog box appears.
-
Click Save.
In the lower right corner of the page, a confirmation dialog box appears.
-
Click Dismiss.
The PM module sends all users listed in the Password Reset dialog box an email from
notifications@esosolutions.com. -
Instruct the users to check their email for one from
notifications@esosolutions.com, and to follow the prompts in the dialog box as needed to create a new password when they log into the ESO Suite again.
-
-
(Optional) Verify the updates to personnel records.
 PM (full version) Verify certifications and licenses.
-
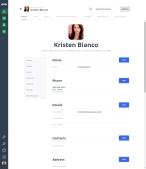
Find and open the record of the person you want to verify the certification and/or license addition for, as described in Display, filter, and export personnel lists.
The personnel record opens and displays the page relevant to the list you were working with.
-
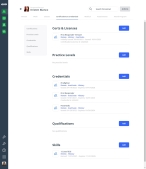
Click the Certifications & Credentials bookmark.
The contents of the Certifications & Credentials bookmark appear, set to the Certs & Licenses section at the top.
- Examine the person's list of certifications and licenses to verify that the certifications or licenses you added to the group appear in this person's record.
 PM (full version) Verify credentials.
-
Find and open the record of the person you want to verify the credentials addition for, as described in in Display, filter, and export personnel lists.
The personnel record opens and displays the page relevant to the list you were working with.
-
Click the Certifications & Credentials bookmark.
The contents of the Certifications & Credentials bookmark appear, set to the Certs & Licenses section at the top.
-
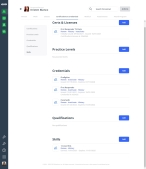
On the left, click the Credentials bookmark.
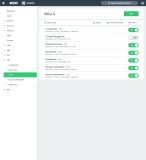
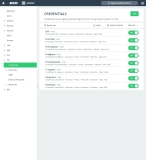
The right side scrolls down to the Credentials section of the Certifications & Credentials bookmark.
- Examine the person's list of credentials to verify that the credentials you added to the group appear in this person's record.
 PM (full version) Verify skills.
-
Find and open the record of the person you want to verify the skills addition for, as described in Display, filter, and export personnel lists.
The personnel record opens and displays the page relevant to the list you were working with.
-
Click the Certifications & Credentials bookmark.
The contents of the Certifications & Credentials bookmark appear, set to the Certs & Licenses section at the top.
-
On the left, click the Skills bookmark.
The right side scrolls down to the Skills section of the Certifications & Credentials bookmark.
- Examine the person's list of skills to verify that the skills you added to the group appear in this person's record.
 PM (full version) Verify qualifications.
-
Find and open the record of the person you want to verify the qualification addition for, as described in Display, filter, and export personnel lists.
The personnel record opens and displays the page relevant to the list you were working with.
-
Click the Certifications & Credentials bookmark.
The contents of the Certifications & Credentials bookmark appear, set to the Certs & Licenses section at the top.
-
On the left, click the Qualifications bookmark.
The right side scrolls down to the Qualifications section of the Certifications & Credentials bookmark.
- Examine the person's list of qualifications to verify that the qualification you added to the group appears in this person's record.
 PM (full version) Verify immunizations and physicals.
-
Find and open the record of the person you want to verify the immunization addition for, as described in Display, filter, and export personnel lists.
The personnel record opens and displays the page relevant to the list you were working with.
-
Click the Medical tab.
The contents of the Medical tab appear.
- Examine the person's list of immunizations and physicals to verify that the immunizations and/or physicals you added to the group appear in this person's record.
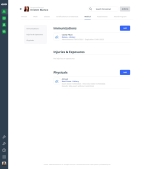
 Verify application list settings.
-
Find and open the record of the person you want to verify the application list settings for, as described in Display, filter, and export personnel lists.
The personnel record opens and displays the page relevant to the list you were working with.
-
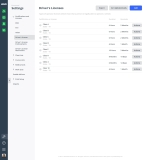
In the left pane, near the bottom, click the Settings icon.
The Personnel Settings screen appears, with the Application Lists tab selected on the left side.
- Examine the person's list of applications to verify that the applications you added to the group appear in this person's record.
 Verify security role assignments.
-
Find and open the record of the person you want to verify the immunization addition for, as described in Display, filter, and export personnel lists.
The personnel record opens and displays the page relevant to the list you were working with.
-
In the left pane, near the bottom, click the Person Settings icon.
Note: If your user login does not have the permissions to configure PM Basic or PM, only one icon (the Person Settings icon) appears near the bottom of the left pane.
The Personnel Settings screen appears, with the Application Lists tab selected on the left side.
-
In the left pane, click Account.
The Account page appears.
-
On the right side, under Security Roles section, scan the list of roles and verify that the roles you assigned through the group action appear in the list of roles for the individual.
-

