Add, view history for, print a report for, or delete award program participants
Participants are the people who can earn benefits from the award program, and you can add qualified participants to an award program. The PM module pulls data from the PM, Activities, Fire Incidents, and EHR modules, tracks each criteria a participant meets over time, and calculates the total number of points the participant has earned to-date in the award program.
|
Note:
|
-
 (If you have not done so already) Access the PM or PM Basic module in the ESO Suite.
Which version of the module opens depends on whether your agency or department has purchased the PM Basic or full version of the PM module.
-
Do one of the following.
-
(If you are already working in the ESO Suite) Click the Home icon in the upper left corner of the screen.
-
 (If you have not yet logged in) Log in to the ESO Suite.
-
In a web browser, go to https://www.esosuite.net/EsoSuite.
The ESO Suite login screen appears.
-
Enter your user name, password, and agency name, then click Let's Go.
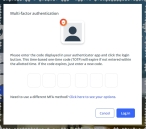
If MFA is enabled, the Multi-factor authentication dialog box appears, displaying one or more methods you can use to verify your login credentials. The number of methods that appear in the dialog box depends on what MFA methods your ESO Suite administrators enabled in the Admin module.

Click graphics
to open them.Information on enabling MFA and specific MFA methods is available in the Admin module online help, in Configure multiple-factor authentication.
Note: If your ESO Suite administrators have disabled MFA ("opted-out"), this dialog does not appear.
-
(If the Multi-factor authentication dialog box appears) Depending on which buttons appear in the dialog box, verify your login in one of the following ways.
 With an authenticator application.
-
Click MFA verification via authenticator app.
The dialog box updates with boxes for entering the numbers of the authentication code, and the ESO Suite sends an authentication code to the authenticator application installed on your device.
-
Open your authenticator application and note the authentication code currently displayed.
-
Enter the authentication code displayed in the authenticator application.
-
Click Log In.
 With a text message (SMS).
-
Click MFA verification via SMS.
The dialog box updates with boxes for entering the numbers of the authentication code, and the ESO Suite sends an authentication code to the phone number recorded in your PM records and identified with MFA codes.
-
Enter the authentication code sent to your MFA-registered phone number.
-
Click Log In.
 With an email message.
-
Click MFA verification via email.
The dialog box updates with boxes for entering the numbers of the authentication code, and the ESO Suite sends an authentication code to your agency or department email address, recorded in your PM records.
-
Enter the authentication code sent to your agency or department email address.
-
Click Log In.
-
-
The ESO Suite landing screen appears.

Click graphics
to open them.Note: If MFA is enabled, you can access and manage your MFA options through the PM module, on the Settings > Account page, as described in Manage a user account. If your agency or department has enabled MFA but has not purchased the full-featured version of the PM module, you can access your own MFA settings by clicking Change my Multi-Factor Authentication settings on the landing screen, then using the Settings > Account page that appears. If your agency has not enabled MFA, the Change my Multi-Factor Authentication settings link does not appear on the landing screen.
-
-
On the top side of the home screen, click PM.
Tip: If your screen or browser window is too narrow to display all your agency's ESO Suite module icons, an options icon appears on the right side of the icon bar. If you click the options icon, a menu appears containing additional module icons.
A list of all the personnel in the PM module appears, displayed in a grid format.
PM (full version) PM Basic Note: If you can access the full-featured PM module, you can view all your own information in it. The amount of information you can edit in the PM module depends on what roles and permissions your ESO Suite administrator assigned to your user account.
Information on user accounts, roles, and permissions is available in Manage a user account.
-
-
In the navigation bar on the left side of the screen, click the Award Programs (
 ) icon.
 The Award Programs screen appears, displaying a list of the active award programs currently in the PM module.
-
(If necessary) Filter the list of award programs to find the award program you want to work with, as described in Add, copy, edit, or delete an award program, under step 3, Use filters to find award programs.
-
Click the listing for the award program you want to specify details for.
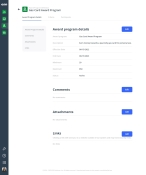
The award program record opens and displays the class details, set to the Award Program Details bookmark in the left pane.
-
Click the Participants tab.
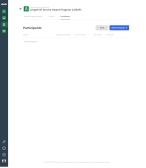
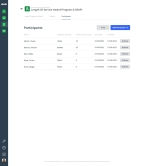
The Participants page appears, listing any participants already added to the award program.
-
Depending on what you want to do with the list of participants, do any of the following.
 Add a participant.
-
In the upper right corner of the page, click Add Participant.
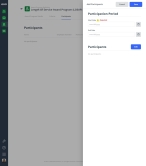
The Add Participants dialog box appears.
-
Under Participation Period, for Start Date and End Date, click the calendar icon on the right end of the field and select the appropriate date from the calendar that appears.
-
 Under Participants, select the participants for the award program.
-
To the right of the Participants heading, click Edit.
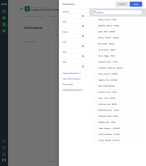
The Participants dialog box appears.
-
(Optional) In the Search field above the list of names, begin typing characters in the name of the person you want to find.
As you type, the list of personnel names reduces to only those people whose names still match the characters you are entering.
-
For any of the following fields, click the list icon to the right of the field, then select all the appropriate options from the menu that appears, and click Done.
Field Searches for this Division
The organizational unit within the department or agency that the person belongs to. Common divisions are administration, training, operations, and so forth.
Shift
The named time span the person was working. A shift is one of two or more recurring periods in which different groups of personnel do the same jobs in relay.
Station
The name or location of the building the person was working from. A station is a place or building where a specific activity or service is based.
Unit
The apparatus or vehicle the person was assigned to.
Note: Units and apparatus are conceptually different from vehicles, particularly in the EMS industry. A unit may consist of one or more personnel, who can perform a particular level of service, and they may use one of any number of available vehicles. The concept of a unit captures both unit-identifying and equipment information.
Rank
The position or role the person fulfills for the department or agency. Common ranks are Chief, Captain, Lieutenant, Firefighter, Engineer, and Paramedic.
Title
The current employment title of the person within the department or agency.
Note: Titles may be related to a rank, but do not necessarily fall within the defined organizational structure.
Example: Chief of Operations, and Administrative Coordinator.
As you select filters, the list of personnel names to the right reduces to display only the ones that match your choices.
Note: The filtering methods all work in conjunction, letting you build a logical expression.
Example: You can initially filter the list to find personnel who work at the Central (Main) Station, reduce the results further by filtering for shifts A or B, then search those results further yet by adding the unit FireEng01 filter. Only the personnel who work at the Central (Main) Station, on either the A or B shift, and who worked on unit FireEng01 during those shifts appear in the result.
-
(If necessary) Click Reset Filters to clear all your filter selections at once.
-
Choose the personnel whose record you want to add records to in one of the following ways.
To do this Do this Select all personnel currently listed.
- Below the list of filters, click Select All Results.
Manually select individual personnel.
- In the list of personnel on the right, select the names of the individuals.
The total number of personnel you select appears at the bottom left side of the dialog box.
Note: Once you select a person, they remain selected, even if you change the filter criteria and that person no longer appears in the filtered list. Check the number of attendees to verify how many personnel are actually selected.
-
(If necessary) Click Clear All Participants to clear all your selections at once.
Caution: Verify the total number participants selected in Participants Selected, before clicking Clear All Participants.
Example: If you only see two participants selected in the list because you are filtering the list, and Participants Selected indicates you have 4 participants selected, clicking Clear All Participants clears all 4 selected participants.
-
Click Apply,
The personnel you selected appear under Participants in the Add Participants dialog box.
-
-
Click Save.
The personnel you selected appear on the Participants tab.
-
(Optional) Click the left-pointing arrow beside the award program name to return to the list of all award programs.
 View the participant's history in the award program.
-
Open the participant's history record in one of these ways.
- Click the listing for the criteria.
-
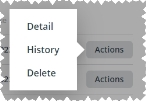
On the right side of the listing, click Actions, and choose History.
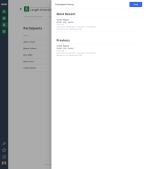
The Participant History dialog box appears.
- View the summary information under Most Recent and Previous.
-
(Optional) Do any of the following.
 View the items in the person's historical collection for the award program.
-
Under either Most Recent or Previous, click Detail.
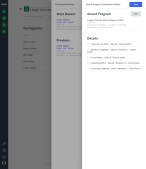
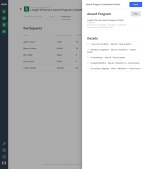
The Award Program Calculation Details dialog box appears. The Award Program section displays the name of and totals for the award program, the start and end date of the program, and the points range for the program. The Details section displays the criteria in the program, and the maximum and earned point totals for each one.
-
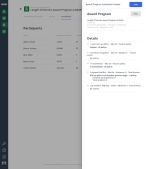
(Optional) Under Details, click each summary listing and view the breakdown of points earned under each criteria.
In the Details section, you will also be able to view the specific data the PM module is contributing toward the points calculation.
-
 (Optional) Print the participant's history in the award program.
-
To the right of the Award Program title, click Print.
Note: This is the history showing calculation details, and is specific for the participation period.
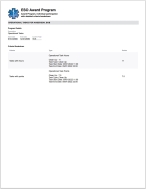
The PM module opens a new browser tab and generates a printer-friendly version of the award program and its criteria, how many points or hours the participant has earned in the program for each criteria.
-
-
Click Done.
 Edit the information for a record in the historical collection.
-
In the listing for the historical item you want to edit, click Edit.
The Edit Participant dialog box appears, displaying the participation period fields for the item.
- Change the information in the fields as needed.
- Click Save.
 Delete a record from the historical collection.
-
In the listing for the historical item you want to delete, click Delete.
A confirmation dialog box appears.
-
Click Yes.
Note: Deleting a record from the Previous section of the dialog box deletes only that record. However, if there is only one record in the collection and you delete that record, then the module deletes the person's listing from the Participants tab.
-
 Print an individual's participation in the award program.
-
On the right side of the listing, click Actions, and choose Detail .
The Award Program Calculation Details dialog box appears. The Award Program section displays the name of and totals for the award program, the start and end date of the program, and the points range for the program. The Details section displays the criteria in the program, and the maximum and earned point totals for each one.
-
(Optional) Under Details, click each summary listing and view the breakdown of points earned under each criteria.
In the Details section, you will also be able to view the specific data the PM module is contributing toward the points calculation.
Participants can view the points they have earned in award programs from their personnel record, as described in Review award programs.
-
To the right of the Award Program title, click Print.
Note: This is the history showing calculation details, and is specific for the participation period.
The PM module opens a new browser tab and generates a printer-friendly version of the award program and its criteria, and the number points or hours earned in the program for each criteria.
Note: If the award program includes a combined maximum criteria, the criteria combined for it appear in the printed report under the combined maximum criteria, and not as separate listings in the printed report.
-
Click Done.
 Print the award program results for all participants.
-
In the upper right corner of the screen, click Print.
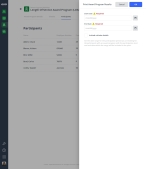
The Print Award Program Results dialog box appears.
A confirmation dialog box appears.
-
In Start Date and End Date, click the calendar icon on the right end of the field and select the appropriate date from the calendar that appears to indicate the date range you want to print the results in.
The PM module includes only the participants in the award program during your specified date range in the printed report.
Note: The start and end dates must encompass the participation start and end dates, or the print results will be blank.
Example: If the participation period for an award program is 1/1/2023 to 12/31/2023, and if you enter
1/1/2023to1/31/2023as the start and end dates for the print request, the results will be blank because there are no participation records in your specified date range. -
Select or clear Include criteria details, to indicate whether to include a breakdown of the points or hours each participant has earned in the program for each criteria.
-
Click OK.
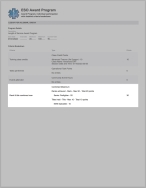
The PM module opens a new browser tab and generates a printer-friendly version of the award program, with or without its criteria, depending on your selection in the previous step.
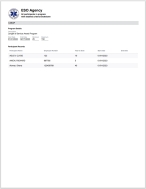
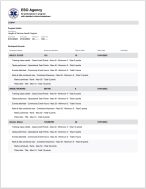
Without criteria details With criteria details Note: If the award program includes a combined maximum criteria, and if you print the program report with criteria details included, the criteria combined for it appear in the printed report under the combined maximum criteria (not as separate listings).
-

