Transfer oversupplied items to another location
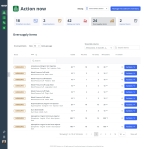
When you first access the Inventory module, the Action now page appears, displaying a summary of the processes and items in the inventory that require a higher level of attention from you. This includes items which are oversupplied at different locations, and which need to be transferred to other locations that need them.
An oversupplied item is one that exceeds the max par level for the item at that location. A maximum (max) par level is the highest (ideal) number or amount of an item that a location should have on hand at any time. If a location has more of an item than their max par level defines, the location should transfer the overage of that item to other locations that may need it. Not-exceeding the max par helps minimize waste from items with expiration dates, and redistributes medications and medical supplies to locations that need them the most.
Par levels were defined by your Inventory module administrator when the module was originally configured, and can be changed in the Settings section of the Inventory module.
Information on changing par levels is available in Change item min and max par levels.
You can review and manage these higher-priority items directly from the Action now page. You can also manage these and lower-priority items from the Inventory list page in the Inventory module, as described in Work with the inventory list.
-
(If you have not done so already) Access the Action now page in the Inventory module, select the location you want to work with, and manage the amount of data on the page, as described in Respond to action items.
-
Click the Oversupply items tab.
The Oversupplied stock list appears on the tab, displaying a summary of every item at the location that exceeds its max par level.
-
Work with oversupplied items in any of the following ways.
 Remove items or update an item quantity.
When inventory items become damaged, spoiled, or are past their expiration date, you need to discard them and update the quantity available in the Inventory module accordingly. This process lets you capture historic audit trail or reportable information. You can also update the count of an item quantity if an incorrect quantity was entered during stock checks, or when transferring items between locations.
-
In the item row you want to work with, in the Usable column, click the numerical value.
A drop-down appears, listing information about that item at this location, including lot number and expiration date (if applicable), the quantity of the item on hand, and what sublocation the item is stored in.

-
In the lower right corner of the drop-down, click Edit.
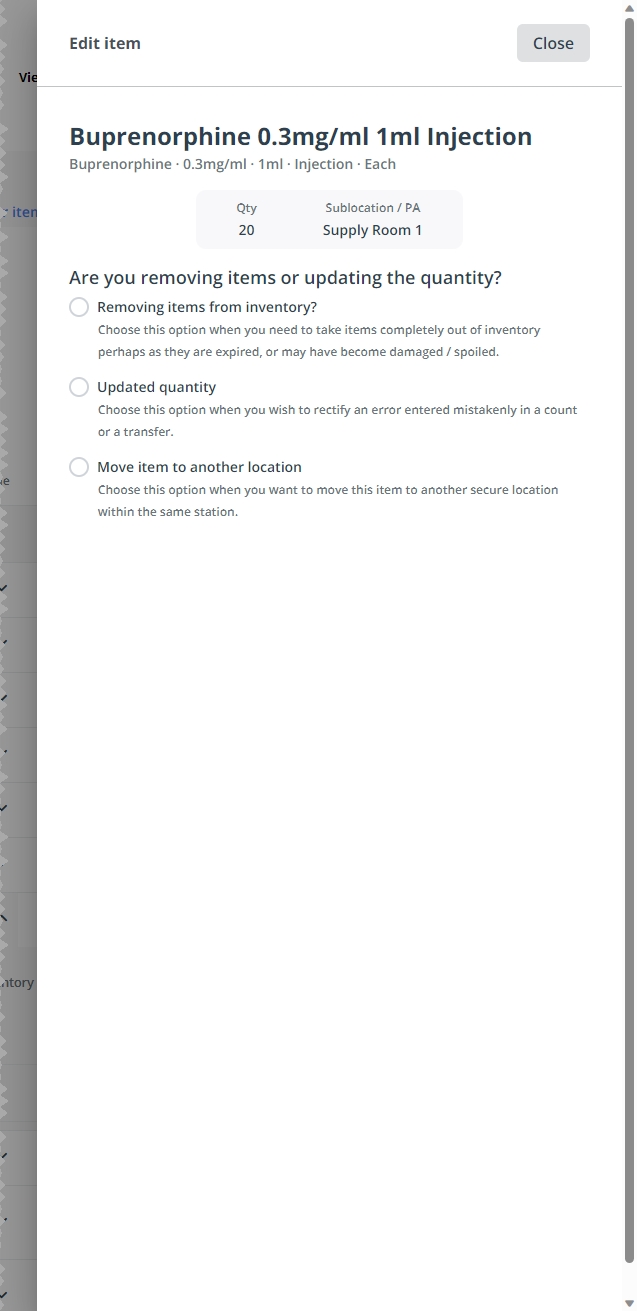
The Edit item dialog box appears, and information about the current item quantities appears at the top of the dialog box.

-
Depending on what you want to accomplish, do one of the following.
Remove items.
-
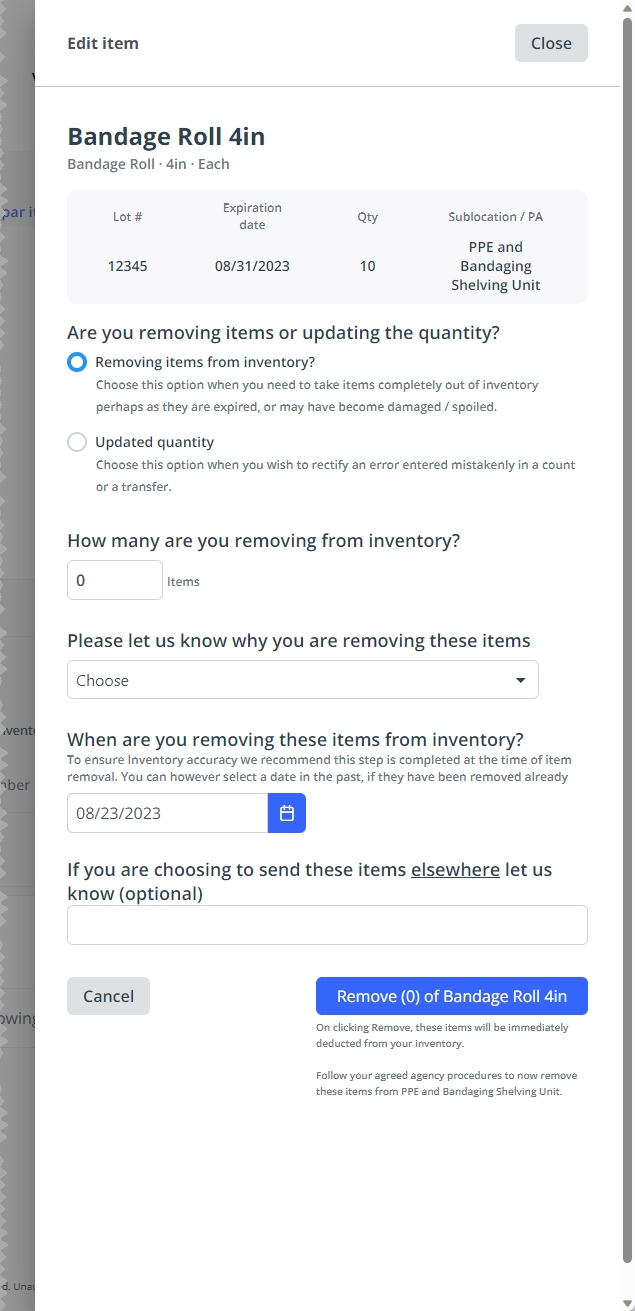
Under Are you removing items or updating the quantity?, choose Removing items from inventory.
Additional fields related to removing items from the inventory appear in the right pane. The number of fields that appear depend on whether or not you are removing a controlled medication, or an uncontrolled medication or medical supply item.


-
Depending on the item you are working with, do one of the following.
Remove an uncontrolled medication or medical supply item.
-
Under How many are you removing from inventory?, in Items, type the quantity of items you need to discard.
-
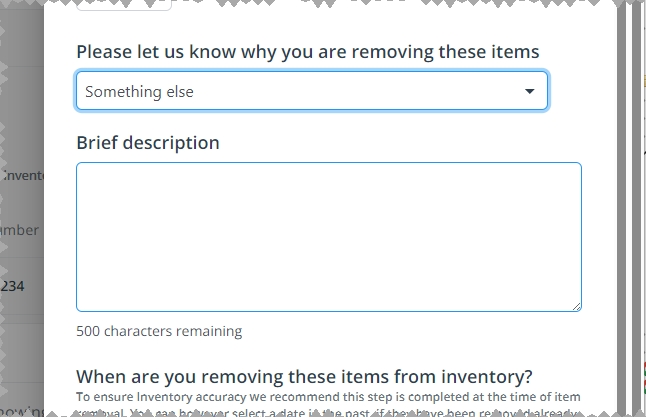
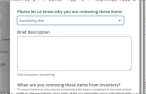
For Please let us know why you are removing these items, select the option that describes the reason you need to discard the items.
Example: Someone dropped a box of vials and they smashed, and so can not be used. You would need to update the Inventory module because this box of vials has been swept up and discarded. In this type of situation, you would choose Damaged from the menu.
If you choose Something else, the Brief description box appears in the dialog box.
-
In Brief description, type an explanation for why the item needs to be discarded.
-
Under When are you removing these items from inventory?, click the calendar icon on the right end of the field and select the appropriate date from the calendar that appears.
-
(If applicable) Include any donation information that may apply.
If it is a medical supply item, your agency may want to donate it to a training class or secondary school outside the agency. In this case, you should note this information for audit trail purposes.
Note: Uncontrolled medications are not donated, but may be transferred outside the agency for disposal.
-
In If you are choosing to send these items elsewhere let us know (optional), type the name of the person or organization the items were given or sent to.
-
-
In the lower right corner of the dialog box, click Remove (number) medication name.
The dialog box closes, and in the upper right corner of the page, a Success message briefly appears.
On the Inventory list page the item's row, the values in the Usable and All locations columns update to reflect the change to that item's available quantities.
Remove a controlled medication.
-
Record the medication's code number.
-
In National drug code number, type the NDC number for the medication.
The NDC is a unique 11- to 13-digit, three-segment number that serves as the FDA's identifier for human drugs in the United States. You can find this code on all non-prescription (over-the-counter) and prescription medication packages, and medication inserts in the U.S.
-
(If the NDC is not available) In DEA controlled substances code number, type the DEA controlled substances code number for the medication.
The DEA is a United States federal law enforcement agency under the U.S. Department of Justice, tasked with combating illicit drug trafficking and distribution within the U.S. The controlled substances code number is a number assigned to drugs listed on the schedules created by the US CSA.
Each chemical/drug on one of the schedules is assigned an ACSCN. The code number is used on various documents used in administration of the system mandated by the CSA. The CSA is the statute establishing federal U.S. drug policy under which the manufacture, importation, possession, use, and distribution of certain substances is regulated.
-
-
Indicate how many or the quantity of the items you are removing.
-
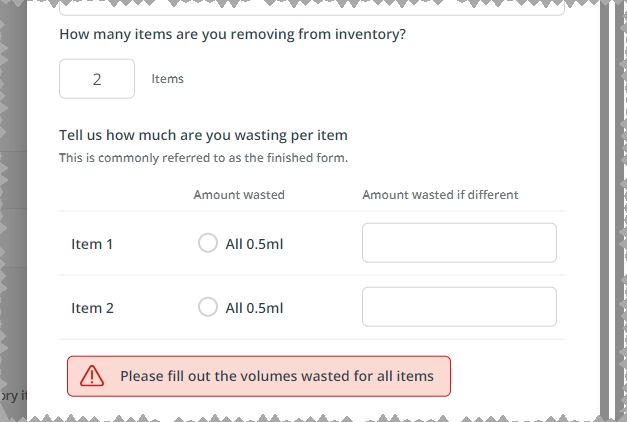
Under How many are you removing from inventory?, in Items, type the quantity of items you need to discard.
Under Tell us how much you are wasting per item, a table with the same number of rows as quantity of items appears.
Example: If you entered
2, a table of two rows appears.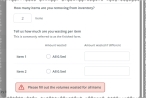
-
For each row in the table, do one of the following.
-
Choose All to indicate that all of the medication was wasted
-
In Amount wasted if different, type the volume that was actually wasted.
Example: You only had to administer part of a prefilled syringe of medication to treat the patient. Some of the medication remained in the syringe, but can not be used to treat a different patient.
-
-
-
Specify when the medication was wasted.
-
Under Please record date and time of removal, indicate the date the medication was wasted, in one of these ways.
-
Click Today to use the current date.
-
For Date, click the calendar icon on the right end of the field and select the appropriate date from the calendar that appears.
-
-
Indicate the date the medication was wasted, in one of these ways.
-
Click Now to use the current time.
-
For Time, click the clock icon on the right end of the field and use the time increments arrows in the menu that appears to specify the time, in military time.
-
-
-
Explain why and how the medication was removed.
-
For Please let us know why you are removing these items, select the option that describes the reason you need to discard the items.
Example: Someone dropped a box of vials and they smashed, and so can not be used. You would need to update the Inventory module because this box of vials has been swept up and discarded. In this type of situation, you would choose Damaged from the menu.
-
In How was the medication wasted, type a description of how the agency disposed of the medication.
Example: "By fire." or "Rinsed down drain with water."
-
In Location of where medication was wasted, type a description of where the agency disposed of the medication.
Example: "Agency incinerator," or "Down the sink at the Central Station."
-
In Include a brief description to support edit of item, type an explanation for why the item was discarded.
-
-
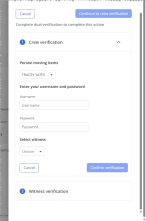
In the lower right corner of the dialog box, click Continue to crew verification.
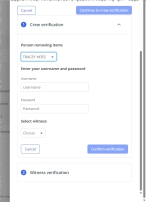
The Crew verification section appears, expanded, in the dialog box. Below it, the Witness verification section heading appears, but fields do not yet appear in that section.
-
Identify the crew member and witness who removed the controlled substance from the inventory stock.
-
From Person removing items, choose the name of the person who removed the controlled medication from the inventory stock.
-
In Username and Password, ask the crew member to type their ESO Suite login credentials.
-
For Select witness, choose the name of the person who observed the disposal of the medication, and who can sign as a witness that the removal procedure was followed.
-
Click Confirm verification.
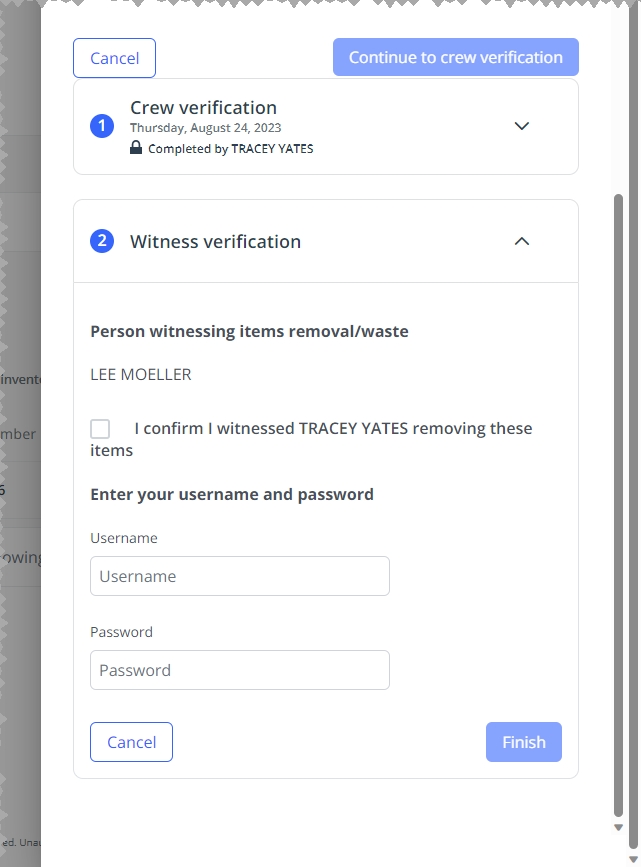
The Crew verification section contracts and locks, presenting a summary of the crew member who performed the controlled substance removal. The Witness verification section expands, displaying fields for verifying that they witnessed the removal.

-
Select I confirm I witnessed<crew member name>removing these items.
-
In Username and Password, ask the witnessing person to type their ESO Suite login credentials.
-
Click Finish.
A couple of success messages appear, and the dialog box closes.
-
-
Update the item quantity.
-
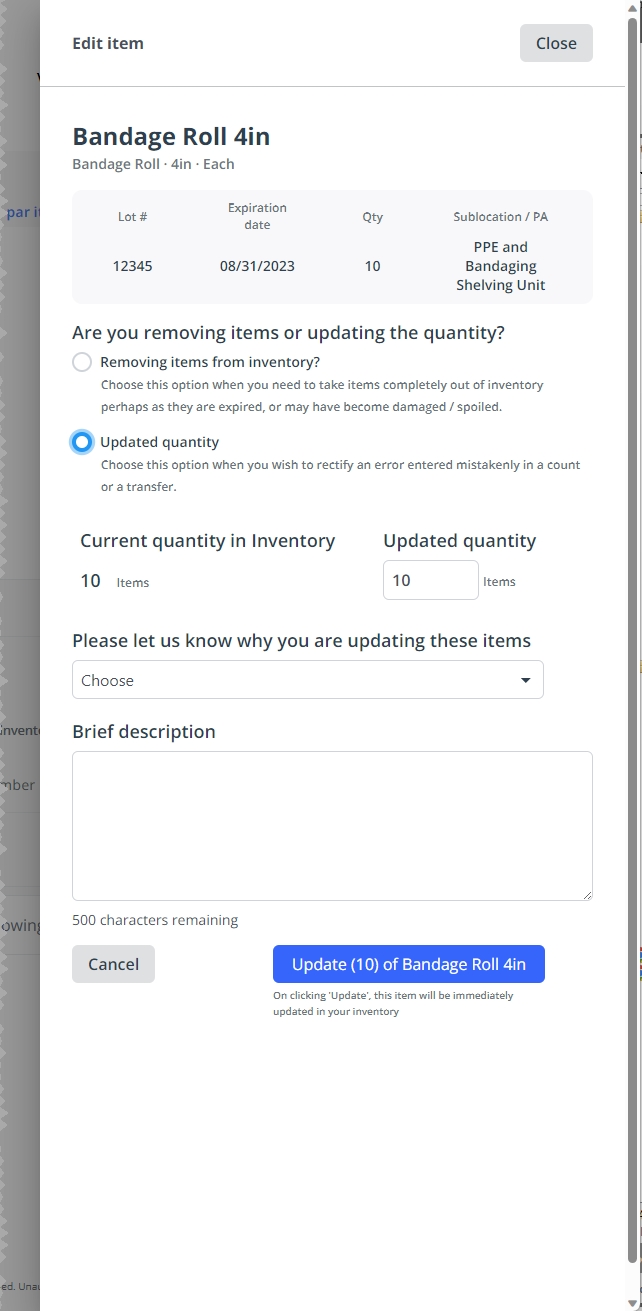
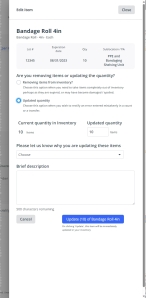
Under Are you removing items or updating the quantity?, choose Updated quantity.
Additional fields related to updating the quantity of the item appear in the right pane.
-
Depending on the item you are working with, do one of the following.
Update an uncontrolled medication or medical supply item.
-
Under Updated quantity, in Items, type the correct quantity of the item in stock.
-
For Please let us know why you are updating these items, select the option that describes the reason you need to correct the quantity.
Example: During a stock count on a vehicle, a medic overlooked a bottle of acetaminophen that had fallen behind the bin it is normally stored in, and had entered an incorrect count at that time. In this type of situation, you would choose Due to a mistaken entry in a stock check from the menu.
-
In Brief description, type an explanation for why the item needs to be updated.
-
In the lower right corner of the dialog box, click Update (number) of item name.
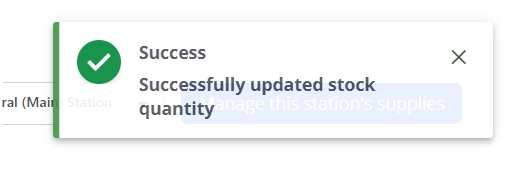
The dialog box closes, and in the upper right corner of the page, a Success message briefly appears.
On the Inventory list page the item's row, the values in the Usable and All locations columns update to reflect the change to that item's available quantities.
Update a controlled medication.
-
Under Updated quantity, in Items, type the correct quantity of the item in stock.
-
For Please let us know why you are updating these items, select the option that describes the reason you need to correct the quantity.
Example: During a stock count on a vehicle, a medic overlooked a bottle of acetaminophen that had fallen behind the bin it is normally stored in, and had entered an incorrect count at that time. In this type of situation, you would choose Due to a mistaken entry in a stock check from the menu.
-
In Brief description, type an explanation for why the item needs to be updated.
-
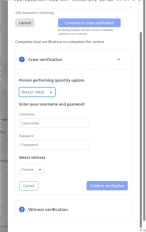
In the lower right corner of the dialog box, click Continue to crew verification.
The Crew verification section appears, expanded, in the dialog box. Below it, the Witness verification section heading appears, but fields do not yet appear in that section.
-
Identify the crew member and witness who updated the controlled substance in the inventory stock.
-
From Person performing quantity update, choose the name of the person who changed the item quantity of the controlled medication in the inventory stock.
-
In Username and Password, ask the crew member to type their ESO Suite login credentials.
-
For Select witness, choose the name of the person who observed the update of the medication, and who can sign as a witness that the update procedure was followed.
-
Click Confirm verification.
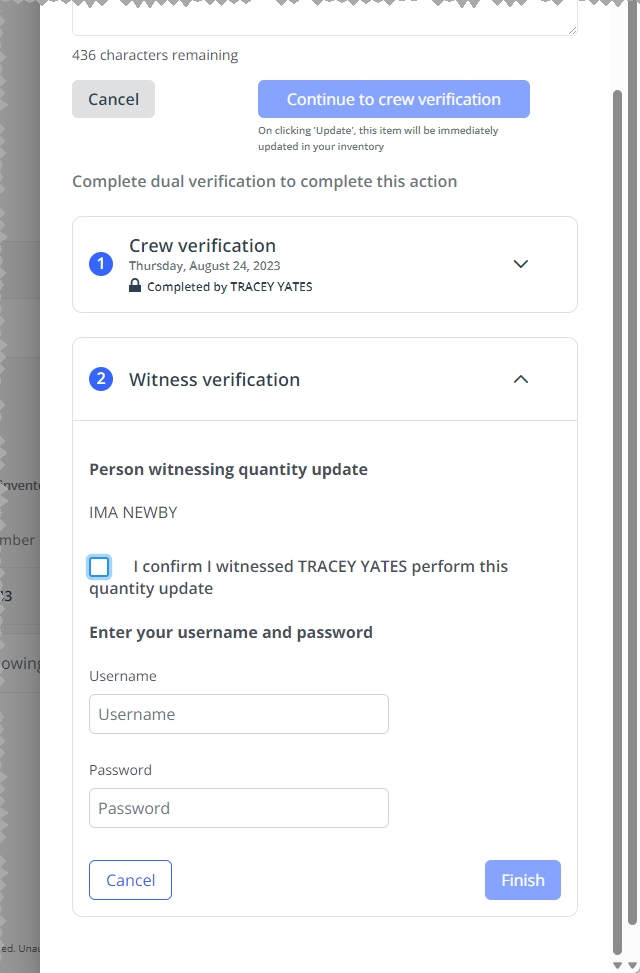
The Crew verification section contracts and locks, presenting a summary of the crew member who performed the controlled substance update. The Witness verification section expands, displaying fields for verifying that they witnessed the update.

-
Select I confirm I witnessed<crew member name>perform this quantity update.
-
In Username and Password, ask the witnessing person to type their ESO Suite login credentials.
-
Click Finish.
A couple of success messages appear, and the dialog box closes.
-
-
-
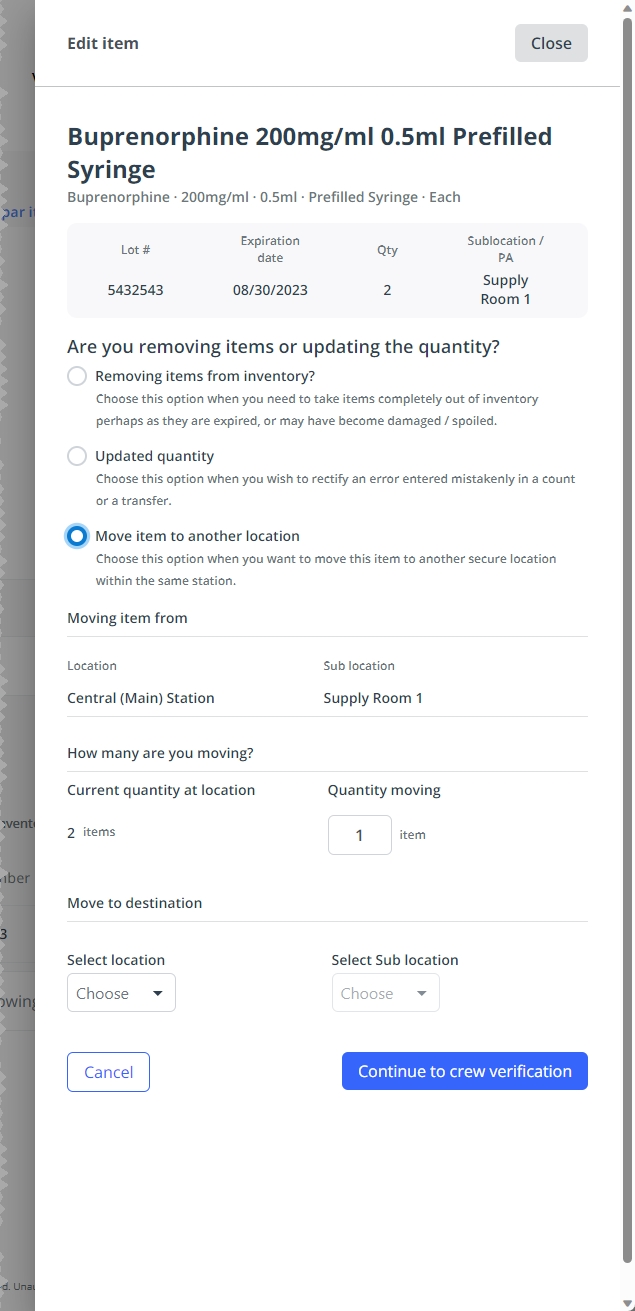
(Controlled medications) Move the item to another location.
Due to storage reorganizations or remodeling expansions, sometimes you need to move an item with a to a new location or sublocation with the same hospital, agency, or vehicle. For controlled medications, you need to track these location changes, to make sure the medication moves to a secured location, and that a record of the move exists for audit trail purposes.
-
Under Are you removing items or updating the quantity?, choose Move item to another location.
Additional fields related to moving some quantity of the item appear in the right pane, and displaying the current location, sublocation, ad quantity of the medication in that location.

-
Under Quantity moving, in item, type the quantity of the item you want to move to another location.
-
Under Move to destination, for Select location and Select Sub location, choose the new location and sublocation you want to move the medication to.
-
In the lower right corner of the dialog box, click Continue to crew verification.
The Crew verification section appears, expanded, in the dialog box. Below it, the Witness verification section heading appears, but fields do not yet appear in that section.
-
Identify the crew member and witness who moved the controlled substance in the inventory stock.
-
From Person moving items, choose the name of the person who moved the controlled medication to a new location.
-
In Username and Password, ask the crew member to type their ESO Suite login credentials.
-
For Select witness, choose the name of the person who observed the move of the medication, and who can sign as a witness that the moving procedure was followed.
-
Click Confirm verification.
The Crew verification section contracts and locks, presenting a summary of the crew member who performed the controlled substance move. The Witness verification section expands, displaying fields for verifying that they witnessed the move. s

-
Select I confirm I witnessed<crew member name>moving the items.
-
In Username and Password, ask the witnessing person to type their ESO Suite login credentials.
-
Click Finish.
A couple of success messages appear, and the dialog box closes.
-
(Optional) Identify other locations that stocks the item.
It is useful to look up which of the agency's locations has an item in stock, so that you know which locations you can transfer stock from to replenish the item for the location you are working with. This capability is particularly useful for agencies that use a hub-and-spoke inventory model for restocking locations.
-
In the item row you want to work with, in the All locations column, click the numerical value.
A drop-down appears, listing all locations that currently have that item in stock.

-
In the drop-down, click Viewing and choose the location you want to look up, to see what its current stock of that item is.
The columns to the right of Viewing update to display information about the item at the selected location.
(Uncontrolled medications and medical supplies) Transfer oversupplied items to another location to meet max par.
You can transfer oversupplied items from the current location, so the current location does not exceed its maximum par levels.
-
On the right end of the row for the item you want to work with, click Actions, then choose Add to transfer from the menu that appears.
The Add to new transfer dialog box appears, with the Return oversupply bookmark selected in the left pane. In the right pane, the item name, and the number of usable, unusable, min, and max par currently available for the item at the location appear. The right pane also displays fields for returning some quantity of the oversupplied item, and where it should be transferred to.

-
For each row in the table, in the Return column, type the number for the quantity of the item you want to return.
The Add items (number) to transfer button updates to confirm the number of items you specified to transfer
-
In the right pane, for To, choose the name of the location you want to send the items to.
-
Click Add items (number) to transfer.
A small green circle with a check mark and a confirmation message appears in the right pane.

-
In the upper right corner of the dialog box, click Close.
A confirmation message appears in the upper right corner of the page.
-