Acquire and delete signatures
Depending on the outcome you select for a patient, the label on any button representing a required signature is red, to indicate that the signature is required.
-
(If you have not done so already) Add a new incident, or open an existing incident, as described Add or edit an incident.
By default, the Scene tab appears.
-
At the bottom of the screen, touch Signature.
Buttons appear for different types of signatures that you may need.
-
Do one of the following.
 A signature can be acquired
-
Touch the signature name button.
A menu appears, containing fields for specifying and capturing a signature. For most signatures, the menu contains a place to type the name of the person making the signature, the space for the signature itself, and some buttons along the bottom.
If you touched Person/Entity Recieving Patient and Other, the Signature Type field also appears in the menu.
-
(For Person/Entity Receiving Patient and Other) Touch Signature Type, and then choose a role description for the person making the signature.
Example: Doctor, nurse, spouse, power of attorney, and so forth.
- For Type Name, touch the field, and then use the iPad keyboard that appears to type the name of the person whose signature you are capturing.
-
In the large blank signature box, have the person whose signature you are capturing use their finger to "write" their signature in the box.
Tip: If the signature is not satisfactory, touch Clear Signature and have the individual sign the form again.
-
Touch Save Signature.
The dialog box closes, and a small image of the signature appears in the button.
-
-
(Optional) Clear one or all of the signatures.
 Clear one signature
- Touch the button displaying the signature you want to clear.
-
Touch Clear Selected.
The signature displayed on the button is cleared.
 Clear all signatures
-
Touch Clear All.
All signatures displayed on all the buttons are cleared.
-
(If necessary) Indicate patient refusal or unable to sign.
 Multiple-refusal checklist
-
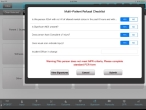
Touch Multi-Refusal Checklist.
A menu appears, containing fields for recording the reasons that patient may have refused to sign.
- For each of the question fields, touch Yes or No as appropriate.
- For Incident Officer in charge, touch the field, and then use the iPad keyboard that appears to type the name of the person whose signature you are capturing.
- Touch Close.
 The patient is unable or unwilling to sign
-
Touch Patient unable/unwilling to sign.
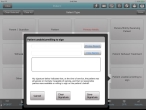
The Patient Unable / Unwilling to Sign Reason dialog box appears.
A menu appears, containing fields for recording the reason the patient can not or will not sign, and the crew member who verify it.
-
Touch Choose Reason, and then choose the option that applies to the patient's situation from the menu that appears.
- Touch Crew Names, and then choose the name of the crew member recording the patient's inability or unwilling to sign.
-
In the large blank signature box, have the crew member you chose in the previous step use their finger to "write" their signature in the box.
Tip: If the signature is not satisfactory, touch Clear Signature and have the individual sign the form again.
-
Touch Save Signature.
The dialog box closes, and a small image of the signature appears in the button.
-


