Add, edit, or deactivate administrator accounts
- (If you have not done so already) Access the Configurations -> Web Portal page, as described in Configure the administration web site.
-
Click Admin Users.
The Configurations -> Admin Users page appears.
- (Optional) From Filter View By, choose an option to filter the list of users to only those meeting a specific criteria.
-
Do any of the following.
 Add a new administrator
-
Click Add new user.
 Edit or delete an existing administrator's information
- On the left side of the row listing the user account you want to edit or delete, click Edit.
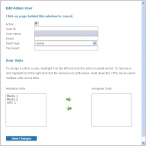
The Edit Admin User dialog box appears over the Configurations -> Admin Users page. For new users, the fields in this dialog box are blank. For existing users, the fields populate with existing information for the user.
-
-
Do one of the following.
 Add a new administrator, or an edit an existing administrator's information
- Under Edit Admin User, type information for a new user into the fields, or edit the information already in the field.
-
Under User Units, follow the directions in the dialog box to assign units to the administrator.
The administrator is responsible for tracking any incidents these units are involved in.
 Deactivate an administrator account
- Under Edit Admin User, clear Active.
-
Click Save Changes.
If you made changes to an existing user, or deactivate a user, the Configurations -> Admin Users page reappears. If you deactivated a user, the row for the user no longer appears in the table on the page.
If you added a new user, the Configurations -> User Security Settings page appears, so that you can specify the new administrator's portal security settings.
- (If you added a new user) Continue with Specify administrator security settings.

