Specify personal information
You can record personal information about an employee, such as their name, phone number, contacts, human resource information, and more.
Note: You must have the full version of PM to include contact information when specifying personal information.
For information on upgrading to the full version of PM, go to https://www.eso.com/pm-demo/ and fill out the fields to request a demonstration and speak with a sales representative.
-
 (If you have not done so already) Access the PM or PM Basic module in the ESO Suite.
Which version of the module opens depends on whether your agency or department has purchased the PM Basic or full version of the PM module.
-
Do one of the following.
-
(If you are already working in the ESO Suite) Click the Home icon in the upper left corner of the screen.
-
 (If you have not yet logged in) Log in to the ESO Suite.
-
In a web browser, go to https://www.esosuite.net/EsoSuite.
The ESO Suite login screen appears.
-
Enter your user name, password, and agency name, then click Let's Go.
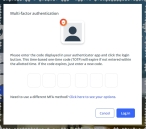
If MFA is enabled, the Multi-factor authentication dialog box appears, displaying one or more methods you can use to verify your login credentials. The number of methods that appear in the dialog box depends on what MFA methods your ESO Suite administrators enabled in the Admin module.

Click graphics
to open them.Information on enabling MFA and specific MFA methods is available in the Admin module online help, in Configure multiple-factor authentication.
Note: If your ESO Suite administrators have disabled MFA ("opted-out"), this dialog does not appear.
-
(If the Multi-factor authentication dialog box appears) Depending on which buttons appear in the dialog box, verify your login in one of the following ways.
 With an authenticator application.
-
Click MFA verification via authenticator app.
The dialog box updates with boxes for entering the numbers of the authentication code, and the ESO Suite sends an authentication code to the authenticator application installed on your device.
-
Open your authenticator application and note the authentication code currently displayed.
-
Enter the authentication code displayed in the authenticator application.
-
Click Log In.
 With a text message (SMS).
-
Click MFA verification via SMS.
The dialog box updates with boxes for entering the numbers of the authentication code, and the ESO Suite sends an authentication code to the phone number recorded in your PM records and identified with MFA codes.
-
Enter the authentication code sent to your MFA-registered phone number.
-
Click Log In.
 With an email message.
-
Click MFA verification via email.
The dialog box updates with boxes for entering the numbers of the authentication code, and the ESO Suite sends an authentication code to your agency or department email address, recorded in your PM records.
-
Enter the authentication code sent to your agency or department email address.
-
Click Log In.
-
-
The ESO Suite landing screen appears.

Click graphics
to open them.Note: If MFA is enabled, you can access and manage your MFA options through the PM module, on the Settings > Account page, as described in Manage a user account. If your agency or department has enabled MFA but has not purchased the full-featured version of the PM module, you can access your own MFA settings by clicking Change my Multi-Factor Authentication settings on the landing screen, then using the Settings > Account page that appears. If your agency has not enabled MFA, the Change my Multi-Factor Authentication settings link does not appear on the landing screen.
-
-
On the top side of the home screen, click PM.
Tip: If your screen or browser window is too narrow to display all your agency's ESO Suite module icons, an options icon appears on the right side of the icon bar. If you click the options icon, a menu appears containing additional module icons.
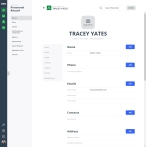
A list of all the personnel in the PM module appears, displayed in a grid format.
PM (full version) PM Basic Note: If you can access the full-featured PM module, you can view all your own information in it. The amount of information you can edit in the PM module depends on what roles and permissions your ESO Suite administrator assigned to your user account.
Information on user accounts, roles, and permissions is available in Manage a user account.
-
-
(If you have not done so already) Open the record of the person you want to work with, as described in Display, filter, and export personnel lists.
The personnel record opens and displays the page relevant to the list you were working with.
PM (full version) PM Basic -
Do any of the following.
 Work with the picture of the person.
-
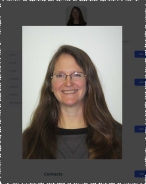
At the top of the screen, click the picture of the person.
A large preview screen appears, displaying the person's picture.
-
Work with the picture in any of the following ways.
 Print the picture.
-
In the upper right corner of the viewer, click the three-dot menu icon, then choose Print.
A new browser tab appears, displaying the standard Windows browser printing capabilities.
- Continue with the print process in the new browser tab.
-
In the upper right corner of the viewer, click the close (X) icon.
-
 Enter the full name of the person.
-
On the right side of the Name section, click Edit.
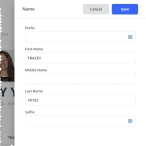
The Name dialog box appears on the right.
-
(Optional) For Prefix, click the field or the list icon to the right of the field, then select the appropriate single option from the menu that appears.
Example: Dr., Mrs., Rev., and so forth.
- In First Name, Middle Name, and Last Name, type as much of the person's name as known.
-
(Optional) For Suffix, click the field or the list icon to the right of the field, then select the appropriate single option from the menu that appears.
Example: Jr., Sr., and so forth.
-
Click Save.
The information you entered appears as a summary in the Name section on the Person tab.
 Add, edit, delete, or de-register phone numbers associated with the person.
You can include multiple phone numbers for a person, and identify those phone numbers by type (mobile, home, FAX, and so forth). If your ESO Suite administrator enabled sending MFA codes through text messages (SMS) in the Admin module, and if you registered a phone number to receive authentication codes, you can also de-register that phone number to stop receiving the codes.
The phone number you registered to receive MFA codes appears in the PM module in the following places:
-
On the Person page, in the Phone and Emails sections.
-
On the Account page, in the Multi-factor Authentication section.
Information on de-registering your authentication methods on the Person page is available below. Information on resetting your authentication methods on the Account page is available in Manage a user account.
Information on enabling MFA and specific MFA methods is available in the Admin module online help, in Configure multiple-factor authentication.
 Add a phone number
-
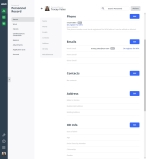
On the left, click the Phone bookmark.
The right side scrolls down to the Phone section of the Person tab.
PM (full version) PM Basic -
On the right side of the Phone section, click Add.
The Phone dialog box appears on the right.
- For Phone Type, click the field or the list icon to the right of the field, then select the appropriate single option from the menu that appears.
-
(For any phone numbers outside the US) To the right of Phone Number, select International.
Any phone number entered before selecting International is cleared. Similarly, if you had selected International and entered a phone number, then cleared International, the phone number previously entered is cleared.
- In Phone Number, type the phone number corresponding to the phone type you selected earlier.
-
Click Save.
The information you entered appears as a summary in the Phone section on the Person tab.
 Edit a phone number
-
Below the phone number listing you want to edit, click Edit.
The Phone dialog box appears.
- Change the information in the fields as needed.
-
Click Save.
 Delete a phone number
-
Below the phone number listing you want to delete, click Delete.
A confirmation dialog box appears.
-
Click Yes.
The phone number listing disappears from Phone section.
 De-register the MFA phone number
Note: If you de-register the phone number registered for MFA, you can not re-register it (or a different phone number) until the next time you log in to the ESO Suite.
-
Below the phone number listing you want to de-register, click De-register for MFA.
A confirmation dialog box appears.
-
Click Yes.
The De-register for MFA option below the phone number disappears, and the Edit and Delete options appear instead.
 Specify and de-register email addresses associated with the person.
If your ESO Suite administrator enabled sending MFA codes through email messages in the Admin module, and if you registered to receive authentication codes to your agency or department email address, you can also de-register that address to stop receiving the codes.
The email address you registered to receive MFA codes appears in the PM module in the following places:
-
On the Person page, in the Phone and Emails sections.
-
On the Account page, in the Multi-factor Authentication section.
Information on de-registering your authentication methods on the Person page is available below. Information on resetting your authentication methods on the Account page is available in Manage a user account.
Note: If you de-register an email address, you can not re-register it until the next time you log in to the ESO Suite.
Information on enabling MFA and specific MFA methods is available in the Admin module online help, in Configure multiple-factor authentication.
-
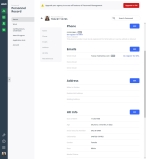
On the left, click the Emails bookmark.
The right side scrolls down to the Emails section of the Person tab.
PM (full version) PM Basic -
Do any of the following.
 Add or edit email addresses.
-
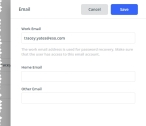
On the right side of the Emails section, click Edit.
The Email dialog box appears on the right.
-
In Work Email, Home Email, and Other Email, type the respective email addresses that apply for the person.
Email addresses must be in the
name@domain.suffixformat.Example:
YourName@eso.com -
Click Save.
The information you entered appears as a summary in the Emails section on the Person tab.
 De-register MFA from your work email address.
Note: If you de-register the agency or department email address, you can not re-register it until the next time you log in to the ESO Suite.
-
For Work Email, click De-register for MFA.
A confirmation dialog box appears.
-
Click Yes.
The De-register for MFA option disappears.
-
 (PM full version only) Add, edit, or delete contact information for the person.
It is a good idea to list at least one individual as a contact person for the personnel member. This contact person may be someone to call in case of an emergency involving the personnel member, or another person who can reach the primary contact person if they are not responding through their normal channels of communication.
-
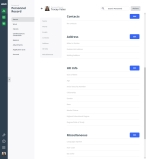
On the left, click the Contacts bookmark.
The right side scrolls down to the Contacts section of the Person tab.
-
Do any of the following.
 Add a new contact.
-
On the right side of the Contacts section, click Add.
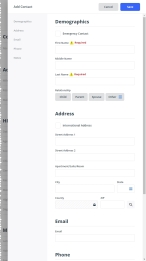
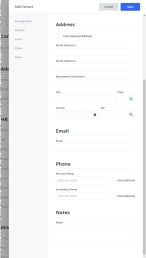
The Contacts dialog box appears on the right, set to the Demographics section.
-
 Identify the contact person and their relationship to the personnel member.
- Select or clear Emergency Contact, to indicate whether or not the contact person you are adding should be contacted in the case of emergency for the personnel member.
- In First Name, Middle Name, and Last Name, type as much of the person's name as known.
-
For Relationship, identify the relationship between the personnel member and the contact person in one of these ways.
- (If appropriate) Click Child, Parent, or Spouse.
- Click Other, then select the appropriate single option from the menu that appears.
-
 Specify the address of the contact person.
-
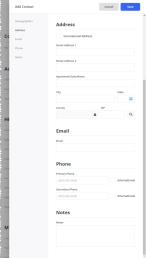
On the left, click the Address bookmark.
The right side scrolls down to the Address section of the dialog box.
-
Under Address, select or clear International Address to indicate whether or not the address in this section is outside the United States.
When selected, the Province, Country, and Postal Code fields appear. When cleared, the State, County, and Zip fields appear.
-
In Street Address 1 and Street Address 2, type the building number and street information for the person.
- (If necessary) In Apartment/Suite/Room, type any additional address information needed within the building.
-
Depending on whether you selected International Address, do one of the following.
 (Inside the U.S.) Specify the city, state, county, and zip code.
-
Identify the city where the person lives in one of these ways.
- In City, type the full name of the city into the field.
-
 Search for the city.
-
In City, type the first three (or more) characters of the city name, then click the search icon (magnifying glass).
A list of cities, states, or zip codes matching what you entered appears.
Example: In City, type
Ame, then click the search icon.A list of cities beginning with
Ameappears on the right. -
Select the entry that corresponds to the rest of the address you are entering.
The rest of the information from that match automatically populates the City, State, and County fields.
-
-
In Zip, type the zip code for the location, then click the search icon (magnifying glass).
A list of cities, states, or zip codes matching what you entered appears.
Example: In Zip, type
50248, then click the search icon.A list of zip codes matching
50248appears on the right. -
Select the entry that corresponds to the rest of the address you are entering.
The rest of the information from that match automatically populates the City, State, and County fields.
 (International) Specify the country, province, and postal information.
- In City, type the name of city for the person's address.
- In Province, type the name of the major subdivision of the country the city is in.
- For Country, click the field or the list icon to the right of the field, then select the appropriate single option from the menu that appears
-
In Postal Code, type the numeric or alpha-numeric code denoting that country.
This code may also contain spaces or a hyphen.
Example: A postal code for Denmark could be
DK-9000, a UK postal code could beEC1A 1BB, and a German postal code could be30851.
-
-
-
 Specify the contact person's phone numbers.
-
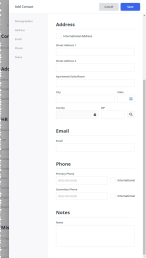
On the left, click the Phone bookmark.
The right side scrolls down to the Phone section of the dialog box.
- In each of the phone type fields that apply to the person, type the corresponding phone number.
- (For any phone numbers outside the U.S.) To the right of the phone number you entered, select International.
-
-
Click Save.
The information you entered appears as a summary in the Contacts section on the Person tab.
 Edit an existing contact.
-
In the listing for the contact you want to edit, click Edit.
The Edit Contact dialog box appears, displaying the information already specified for the contact.
- Change the information in the fields as needed.
- Click Save.
 Delete a contact.
-
In the listing for the contact you want to delete, click Delete.
A confirmation dialog box appears.
- Click Yes.
-
 Specify the address of the person.
-
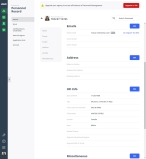
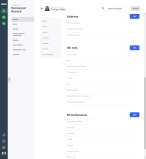
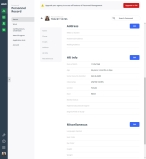
On the left, click the Address bookmark.
The right side scrolls down to the Address section of the Person tab.
PM (full version) PM Basic -
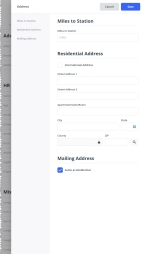
On the right side of the Address section, click Edit.
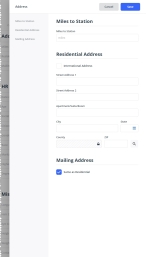
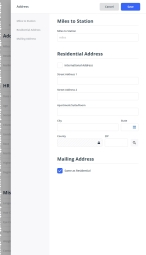
The Address dialog box appears on the right, set to the Miles to Station section.
-
 Record the distance from the address to the station.
- In Miles to Station, type number of miles, in decimal form, from the person's residential address to the station or agency where they work.
-
 Identify the person's residential address.
-
On the left, click the Residential Address bookmark.
The right side scrolls down to the Residential Address section of the dialog box.
-
Select or clear International Address to indicate whether or not the address in this section is outside the United States.
When selected, the Province, Country, and Postal Code fields appear. When cleared, the State, County, and Zip fields appear.
-
In Street Address 1 and Street Address 2, type the building number and street information for the person.
- (If necessary) In Apartment/Suite/Room, type any additional address information needed within the building.
-
Depending on whether you selected International Address, do one of the following.
 (Inside the U.S.) Specify the city, state, county, and zip code.
-
Identify the city where the person lives in one of these ways.
- In City, type the full name of the city into the field.
-
 Search for the city.
-
In City, type the first three (or more) characters of the city name, then click the search icon (magnifying glass).
A list of cities, states, or zip codes matching what you entered appears.
Example: In City, type
Ame, then click the search icon.A list of cities beginning with
Ameappears on the right. -
Select the entry that corresponds to the rest of the address you are entering.
The rest of the information from that match automatically populates the City, State, and County fields.
-
-
In Zip, type the zip code for the location, then click the search icon (magnifying glass).
A list of cities, states, or zip codes matching what you entered appears.
Example: In Zip, type
50248, then click the search icon.A list of zip codes matching
50248appears on the right. -
Select the entry that corresponds to the rest of the address you are entering.
The rest of the information from that match automatically populates the City, State, and County fields.
 (International) Specify the country, province, and postal information.
- In City, type the name of city for the person's address.
- In Province, type the name of the major subdivision of the country the city is in.
- For Country, click the field or the list icon to the right of the field, then select the appropriate single option from the menu that appears
-
In Postal Code, type the numeric or alpha-numeric code denoting that country.
This code may also contain spaces or a hyphen.
Example: A postal code for Denmark could be
DK-9000, a UK postal code could beEC1A 1BB, and a German postal code could be30851.
-
-
-
 Identify the person's mailing address.
-
On the left, click the Mailing Address bookmark.
The right side scrolls down to the Mailing Address section of the dialog box.
-
Select or clear Same as Residential to indicate whether the address you entered under Residential Address is the same as the person's mailing address.
If you clear Same as Residential, field appear for specifying the person's mailing address.
- (If you clear Same as Residential) Fill out the fields under Mailing Address the same way as under Residential Address, but entering the different mailing address instead.
-
-
Click Save.
The information you entered appears as a summary in the Address section on the Person tab.
 Record human resource information.
-
On the left, click the HR Info bookmark.
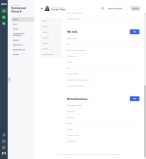
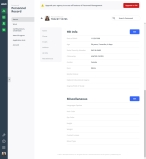
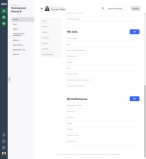
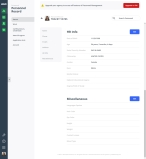
The right side scrolls down to the HR Info section of the Person tab.
PM (full version) PM Basic -
On the right side of the HR Info section, click Edit.
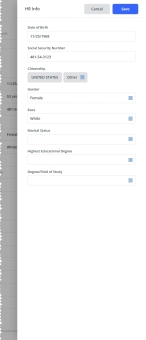
The HR Info dialog box appears on the right.
-
In Date of Birth, type the person's birth date.
The module calculates the person's current age based on their birth date.
- In Social Security Number, type the person's government-issued social security number.
-
For Citizenship, do one of the following.
- Choose UNITED STATES.
-
For Other, click the field or the list icon to the right of the field, then select the appropriate single option from the menu that appears.
- For Gender, choose one of Male, Female, or Unknown.
-
For any of the following fields, click the field or the list icon to the right of the field, then select the appropriate single option from the menu that appears.
Field Information needed Race
The identification of the race of the personnel member, based on U.S. Office of Management and Budget (OMB) designations.
Note: For NEMSIS 3-compliant agencies, you can select more than a single race option.
Ethnicity
Ethnicity is an ethnic classification or affiliation. Ethnicity designates a population subgroup having a common cultural heritage, as distinguished by customs, characteristics, language, common history, and so forth. Currently, Hispanic/Latino is the only OMB designation for ethnicity.
Note: This field appears only for agencies that are NEMSIS 2-compliant.
Marital Status
The person's state of being single, married, separated, divorced, or widowed.
Highest Educational Degree
The highest level of education the person has completed. An academic degree is a qualification awarded upon successful completion of a course of study in higher education, usually at a college or university.
-
For Degree/Field of Study, click the list icon to the right of the field, select all the appropriate options from the menu that appears, then click OK or click outside the menu.
This indicates the person's area of academic concentration; a discipline.
-
Click Save.
The information you entered appears as a summary in the HR Info section on the Person tab.
 Collect other useful miscellaneous information necessary about the person.
-
On the left, click the Miscellaneous bookmark.
The right side scrolls down to the Miscellaneous section of the Person tab.
PM (full version) PM Basic -
On the right side of the Miscellaneous section, click Edit.
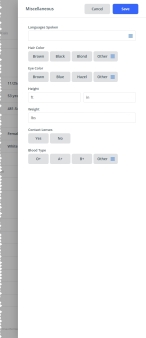
The Miscellaneous dialog box appears on the right.
- For Languages Spoken, click the list icon to the right of the field, select all the appropriate options from the menu that appears, then click Close or click outside the menu.
-
For Hair Color and Eye Color, do one of the following.
- Click the button for the color that best-describes the person's hair or eye color.
-
For Other, click the field or the list icon to the right of the field, then select the appropriate single option from the menu that appears.
- For Height, type the person's body height in feet and inches.
- In Weight, type the person's body weight in pounds.
-
For Contact Lenses, click Yes or No to indicate whether the person wears contact lenses.
Contact lenses are a thin, curved lens placed on the film of tears that covers the surface of the eye.
-
For Blood Type, do one of the following.
- Click the button for the identifier that best-describes the person's blood type.
-
For Other, click the field or the list icon to the right of the field, then select the appropriate single option from the menu that appears.
Blood types are determined by the presence or absence of certain antigens, which can trigger an immune response if they are foreign to the body.
-
Click Save.
The information you entered appears as a summary in the Miscellaneous section on the Person tab.
-

