Add, edit, or delete award program criteria
The criteria for an awards program is the set of requirements a person must meet to earn the award associated with the program. Criteria may include the number of meetings an individual attends, the number of incidents they respond to, specific trainings they complete, ranks achieved, and so forth. The criteria for various award programs can vary between cities and states, and can change over time.
A point system may be associated with the criteria of the award program, with a minimum number of points required to get credit towards the award program for that year, and a maximum number of points an individual can earn that year.
You can specify the criteria for each award program, and the number of points associated with each criteria. The PM module pulls data from the PM, Activities, Fire Incidents, and EHR modules, tracks each criteria a participant meets over time, and calculates the total number of points the participant has earned to-date in the award program.
|
Note:
|
You can define and enable the menu options that appear for the following fields in the PM module, through the Settings > Work Lists screens.
- Ranks
- Titles
- Seating Positions
|
Example: When selecting, filtering, or creating ranks, you may need options such as Captain, Lieutenant, Operations Chief, Sergeant, Retired, and so forth. Your PM module administrator must add custom ADL items to the PM module, on the Settings > Work Lists > Ranks screens, for items to appear as menu choices. The administrator must also verify that the ADL items are enabled for them to appear; items that are disabled on the Settings > Work Lists > Ranks screen will not appear as options for the Rank field in the PM module. |
If no options appear, or if the menu does not have an option that meets your needs, contact your PM module administrator and ask them to add the necessary menu choices. You will need to work closely with your administrator to create and maintain these lists, as your department's needs evolve over time.
Information on creating the ranks and titles lists is available in Build the ranks list and Build the titles list.
If your department or agency has purchased the Activities module, the operational tasks and community events menu options defined in the Activities module on the Settings > Event Types and Settings > Task Types screens appear when you click the Event Type and Task Type field in the PM module.
|
Example: When selecting task types, you may need options such as Cleaning station/agency, Building maintenance, Apparatus maintenance, Apparatus cleaning, Apparatus inventory/restocking, and so forth. Your ESO Suite or Activities module administrator must add custom ADL items to the module, on the Settings > Task Types screen, for items to appear as menu choices. The administrator must also verify that the ADL items are enabled for them to appear; items that are disabled on the Settings > Task Types screen will not appear as options for the Task Type field in the PM module. |
If no options appear, or if the menu does not have an option that meets your needs, contact your ESO Suite or Activities module administrator and ask them to add the necessary menu choices. You will need to work closely with your administrator to create and maintain these lists, as your department's needs evolve over time.
Information on creating the operational tasks and community events lists is available in Configure activity settings.
-
 (If you have not done so already) Access the PM or PM Basic module in the ESO Suite.
Which version of the module opens depends on whether your agency or department has purchased the PM Basic or full version of the PM module.
-
Do one of the following.
-
(If you are already working in the ESO Suite) Click the Home icon in the upper left corner of the screen.
-
 (If you have not yet logged in) Log in to the ESO Suite.
-
In a web browser, go to https://www.esosuite.net/EsoSuite.
The ESO Suite login screen appears.
-
Enter your user name, password, and agency name, then click Let's Go.
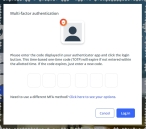
If MFA is enabled, the Multi-factor authentication dialog box appears, displaying one or more methods you can use to verify your login credentials. The number of methods that appear in the dialog box depends on what MFA methods your ESO Suite administrators enabled in the Admin module.

Click graphics
to open them.Information on enabling MFA and specific MFA methods is available in the Admin module online help, in Configure multiple-factor authentication.
Note: If your ESO Suite administrators have disabled MFA ("opted-out"), this dialog does not appear.
-
(If the Multi-factor authentication dialog box appears) Depending on which buttons appear in the dialog box, verify your login in one of the following ways.
 With an authenticator application.
-
Click MFA verification via authenticator app.
The dialog box updates with boxes for entering the numbers of the authentication code, and the ESO Suite sends an authentication code to the authenticator application installed on your device.
-
Open your authenticator application and note the authentication code currently displayed.
-
Enter the authentication code displayed in the authenticator application.
-
Click Log In.
 With a text message (SMS).
-
Click MFA verification via SMS.
The dialog box updates with boxes for entering the numbers of the authentication code, and the ESO Suite sends an authentication code to the phone number recorded in your PM records and identified with MFA codes.
-
Enter the authentication code sent to your MFA-registered phone number.
-
Click Log In.
 With an email message.
-
Click MFA verification via email.
The dialog box updates with boxes for entering the numbers of the authentication code, and the ESO Suite sends an authentication code to your agency or department email address, recorded in your PM records.
-
Enter the authentication code sent to your agency or department email address.
-
Click Log In.
-
-
The ESO Suite landing screen appears.

Click graphics
to open them.Note: If MFA is enabled, you can access and manage your MFA options through the PM module, on the Settings > Account page, as described in Manage a user account. If your agency or department has enabled MFA but has not purchased the full-featured version of the PM module, you can access your own MFA settings by clicking Change my Multi-Factor Authentication settings on the landing screen, then using the Settings > Account page that appears. If your agency has not enabled MFA, the Change my Multi-Factor Authentication settings link does not appear on the landing screen.
-
-
On the top side of the home screen, click PM.
Tip: If your screen or browser window is too narrow to display all your agency's ESO Suite module icons, an options icon appears on the right side of the icon bar. If you click the options icon, a menu appears containing additional module icons.
A list of all the personnel in the PM module appears, displayed in a grid format.
PM (full version) PM Basic Note: If you can access the full-featured PM module, you can view all your own information in it. The amount of information you can edit in the PM module depends on what roles and permissions your ESO Suite administrator assigned to your user account.
Information on user accounts, roles, and permissions is available in Manage a user account.
-
-
In the navigation bar on the left side of the screen, click the Award Programs (
 ) icon.
 The Award Programs screen appears, displaying a list of the active award programs currently in the PM module.
-
(If necessary) Filter the list of award programs to find the award program you want to work with, as described in Add, copy, edit, or delete an award program, under step 3, Use filters to find award programs.
-
Click the listing for the award program you want to specify details for.
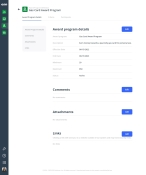
The award program record opens and displays the class details, set to the Award Program Details bookmark in the left pane.
-
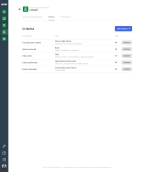
Click the Criteria tab.
The Criteria page appears, providing a summary listing of any criteria already added to the criteria for the award program.
-
Depending on what you want to do with the program criteria, do any of the following.
 Add a new criteria.
-
In the upper right corner of the page, click Add Criteria.
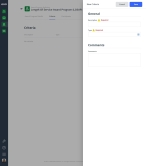
The New Criteria dialog box appears.
-
In Description, type a short description for the criteria you are adding to the award criteria.
Example: Meetings, Training, Incident Responses, EMS Responses, Fire Responses, Drills, Position
-
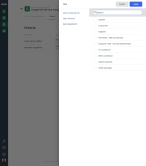
For Type, click the field or the list icon to the right of the field, then select the appropriate single option from the menu that appears to indicate where in the ESO Suite the award program is drawing data from for its calculations.
 Calculation information for each type.
 Class credit
For the training class credits you select in the next step, the calculation includes all credits earned by the participant during the time frame from any class.
 Rank
Rank
For the ranks you select in the next step, if a participant holds a rank during the time frame for the award program, the points count towards the calculation for the award program.
Information on setting the points earned for each rank is available in Build the ranks list.
 Title
Title
For the titles you select in the next step, if a participant holds a title during the time frame for the award program, the points count towards the calculation for the award program.
A participant can hold multiple titles during the same time frame, and the PM module includes the points for all applicable titles in the calculation. You can include titles for elected positions or other positions in your award program.
Information on setting the points earned for each title is available in Build the titles list.
 Incidents
You can choose from several calculations for Incidents, and they can cover either EHR Incidents or Fire Incidents, or both.
Note:
-
Only options relevant for the modules your agency or department has purchased for the ESO Suite appear for this type.
If your agency or department does has not purchased the EHR module, then the EHR Run Types field does not appear. Similarly, if your agency or department does has not purchased the Fire module, then the Fire Incident Types field does not appear.
If neither the EHR module, nor Fire module has been purchased, then the Incident option does not appear as a menu option
-
If you select calculations for both NFIRS Incident Types, and EHR Run Types, the incidents may be double-counted.
The PM module includes incidents in the calculation based on the incident start date.
 Operational Task or Community Event
For the task type or community event you select in the next step, if a participant performs the task during the time frame for the award program, the points or hours count towards the calculation for the award program.
Note: Your agency must have purchased and configured the Activities module for these options to appear.
 Combined Maximum
For the criteria you select in the next step, the PM module adds together any hours or points the participant earns, up to the individual criteria’s maximum, if one was specified, during the time frame for the award program.
Note:
-
The participant does not have meet a minimum hours or points number in the individual criteria for the PM module to count those hours or points for the combined maximum criteria.
-
The PM module combines criteria only in the calculations, results, and print reports. All criteria continue to be listed, even after you a dd a combined maximum criteria to the criteria list.
 Cross Validation
For the criteria you select in the next few steps, the PM module lets the participant earn a maximum number of points or hours for that criteria, then limits the number of points or hours the participant can earn in a different criteria. This prevents participants from being over-awarded points or hours in the second criteria, particularly if the second criteria can be logically included in the first criteria.
Example: Your agency offers a LOSAP that includes a criteria which awards points for receiving a specific title, and a criteria that awards points for attending meetings. Participants who receive the title are expected to attend a number of meetings as part of their title duties. Letting the participants earn the maximum number of points for both the title and for attending meetings over-awards points to the participants.
The total number of points or hours the participant can earn for the cross-validation criteria is the sum of:
-
The limiting criteria’s total, or the limiting maximum, whichever is lower.
-
The limited criteria's total, unless the limiting criteria's maximum was reached. In which case, the total sum is the limited maximum.
Depending on the type you choose, additional buttons and fields relevant to that type appear.
-
-
Depending on the type you chose, do one of the following.
 Specify class credit information.
Note: Credits with points and/or hours must be included on classes entered through Training, through the Classes tab in individual records, or imported to be counted in the calculation. The classes must also completed within the participation period time frame.
The Training Credit field, and the Points and Hours buttons appear. For the training class credits you select in the steps below, the award program calculation includes all credits earned by the participant during the time frame for any class.
-
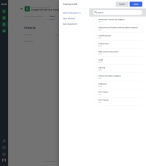
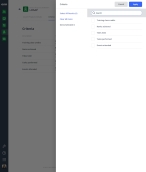
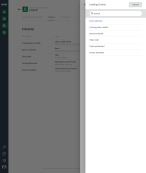
For Training Credit, click the list icon to the right of the field, then choose the credit types that apply to this criteria in the dialog box that appears.
To do this Do this Select all credits currently listed.
- In the upper left corner of the dialog box, click Select All Results.
Manually select individual credits.
- In the list of credits on the right, select the types of credits that correspond to this criteria.
The total number of items you selected appears on the left side of the dialog box, in Items Selected.
Note: Once you select an item, it remains selected, even if you change the filter and a selected item no longer appears in the filtered list.
-
(If necessary) In the upper left corner of the dialog box, click Clear All Items to clear all your selections at once.
Caution: Verify the total number items selected in Items Selected, before clicking Clear All Items.
Example: If you only see two items selected in the list because you are filtering the list, and Items Selected indicates you have more than two items selected, clicking Clear All Items clears all selected items.
-
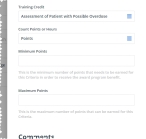
For Count Points or Hours, click either Points or Hours to select the unit you want the PM module to use for this criteria when tracking progress toward the award program.
The PM module replaces both buttons with a field, and the option selected in that field corresponds to whichever of the Points or Hours buttons you clicked. The Minimum Points and Maximum Points or Minimum Hours and Maximum Hours fields also appear.
-
(If you clicked Points) In Minimum Points and Maximum Points, type lowest number of points you must earn for the criteria, to receive the award program benefit, and the highest number of points you can earn for the criteria, respectively.
-
(If you clicked Hours) In Minimum Hours and Maximum Hours, type lowest number of hours you must earn for the criteria, to receive the award program benefit, and the highest number of hours you can earn for the criteria, respectively.
-
Click Save.
 Specify rank information.
The Rank and Maximum Points fields appear.
Note: A maximum value is not required, and should only be entered if it is relevant to the award program. If you specify a maximum value, that caps the number or points or hours applied to the award program total.
-
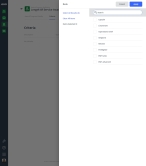
For Rank, click the list icon to the right of the field, then choose the ranks that apply to this criteria in the dialog box that appears.
To do this Do this Select all ranks currently listed.
- In the upper left corner of the dialog box, click Select All Results.
Manually select individual ranks.
- In the list of titles on the right, select the types of rank that correspond to this criteria.
The total number of items you selected appears on the left side of the dialog box, in Items Selected.
Note: Once you select an item, it remains selected, even if you change the filter and a selected item no longer appears in the filtered list.
-
(If necessary) In the upper left corner of the dialog box, click Clear All Items to clear all your selections at once.
Caution: Verify the total number items selected in Items Selected, before clicking Clear All Items.
Example: If you only see two items selected in the list because you are filtering the list, and Items Selected indicates you have more than two items selected, clicking Clear All Items clears all selected items.
-
Click Apply.
 Specify title information.
The Title and Maximum Points fields appear.
Note: A maximum value is not required, and should only be entered if it is relevant to the award program. If you specify a maximum value, that caps the number or points or hours applied to the award program total.
-
For Title, click the list icon to the right of the field, then choose the ranks that apply to this criteria in the dialog box that appears.
To do this Do this Select all titles currently listed.
- In the upper left corner of the dialog box, click Select All Results.
Manually select individual titles.
- In the list of titles on the right, select the types of title that correspond to this criteria.
The total number of items you selected appears on the left side of the dialog box, in Items Selected.
Note: Once you select an item, it remains selected, even if you change the filter and a selected item no longer appears in the filtered list.
-
(If necessary) In the upper left corner of the dialog box, click Clear All Items to clear all your selections at once.
Caution: Verify the total number items selected in Items Selected, before clicking Clear All Items.
Example: If you only see two items selected in the list because you are filtering the list, and Items Selected indicates you have more than two items selected, clicking Clear All Items clears all selected items.
-
Click Apply.
 Specify incident information.
Depending on whether your agency or department has purchased the EHR and Fire modules, the Fire Incident Types, EHR Run Types, and Incident Calculation Type fields can appear.
Note:
-
The PM module only counts locked incidents in the award program calculations.
-
For incident hours calculations, the PM module uses the following times to calculate hours.
-
Fire Incidents:
-
Percentage calculations: Only the main incident counts towards the total number of incidents and the amount of incidents participated in.
Example: if there is an incident with three exposures and the person participants in the main incident and one exposure, the incident as a whole counts as
1, and the person receives credit for participating in one incident.Note: Percentages will not be final until the end of the participation period because it is a running calculation.
-
Hourly calculations: Picks up all time on all exposures for an incident that the person was recorded on. The PM module uses the Dispatch to Clear time to calculate the length of time on the incident.
-
-
EHR: The PM module uses the Dispatch to Call Closed time to calculate the length of time on the incident.
-
-
Depending on the type of incident you want to make a criteria, for Fire Incident Types or EHR Run Types, click the list icon to the right of the field, then choose the fire or run types that apply to this criteria in the dialog box that appears.
To do this Do this Select all incident or run types currently listed.
- In the upper left corner of the dialog box, click Select All Results.
Manually select individual incident or run types.
- In the list of incident or run types on the right, select the types of title that correspond to this criteria.
The total number of items you selected appears on the left side of the dialog box, in Items Selected.
Note: Once you select an item, it remains selected, even if you change the filter and a selected item no longer appears in the filtered list.
-
(If necessary) In the upper left corner of the dialog box, click Clear All Items to clear all your selections at once.
Caution: Verify the total number items selected in Items Selected, before clicking Clear All Items.
Example: If you only see two items selected in the list because you are filtering the list, and Items Selected indicates you have more than two items selected, clicking Clear All Items clears all selected items.
-
Click Apply.
-
For Incident Calculation Type, click the field or the list icon to the right of the field, then select the appropriate single option from the menu that appears.
Depending on the type you choose, additional buttons and sections relevant to that type appear.
-
Depending on the calculation type you chose, determine criteria points based one of the following.
 Points for each incident attended.
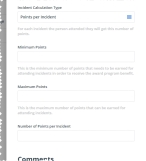
If you choose Points per Incident, you can determine the number of points the person can receive per incident attended, and the Minimum Points, Maximum Points, and Number of Points per Incident fields appear.
Note: Minimum and maximum values are not required, and should only be entered if they are relevant to the award program. If you specify a maximum value, that caps the number or points or hours applied to the award program total.
-
In Minimum Points and Maximum Points, type the minimum number of points required and the maximum number of points possible a person can earn with the criteria, toward the award program.
-
In Number of Points per Incident, type the number of points a person earns toward the award program with each incident they attend.
 Points for each hour spent at incidents.
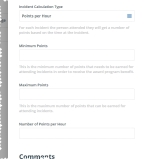
If you choose Points per Hour, you can determine the number of points the person can receive when they attend an incident (based on time spent at the incident), and the Minimum Points, Maximum Points, and Number of Points per Hour fields appear.
Note: Minimum and maximum values are not required, and should only be entered if they are relevant to the award program. If you specify a maximum value, that caps the number or points or hours applied to the award program total.
-
In Minimum Hours and Maximum Hours, type the minimum number of hours required and the maximum number of hours possible a person can earn with the criteria, toward the award program.
-
In Number of Points per Hour, type the number of points a person earns toward the award program with each hour they are at an incident.
 The percentage of qualifying incidents attended.
If you choose Percentage Range, you can determine which incident types qualify for the award program, the range of incident responses and number of points per range, and the range of points the person receives when they attend a qualifying incident.
Note: The percentages are calculated in real time, and will change throughout the participation period. They are not finalized until the participation period ends.
The Minimum Points and Maximum Points fields, and the Call Percentage Range section, appear.
Note: Minimum and maximum values are not required, and should only be entered if they are relevant to the award program. If you specify a maximum value, that caps the number or points or hours applied to the award program total.
-
In Minimum Points and Maximum Points, type the minimum number of points required and the maximum number of points possible a person can earn with the criteria, toward the award program.
-
In Number of Points per Incident, type the number of points a person earns toward the award program with each incident they attend.
-
 Specify which incident types qualify, and the percentage range for that type.
You can specify which incident types qualify for the award program, and the percentage range for each of these.
-
In the Call Percentage Range section, click Add.
The Percentage dialog box appears.
-
In Minimum % and Maximum %, type the lower and upper percentage thresholds of the range that you are defining (using decimal places), to determine how many points participants may earn.
Example: 0–20 % earns 0 points, 21–40% earns 5 points, 41–60% earns 10 points, and 61–100% earns 20 points.
Note: Percentages entered as 20.01–20.99 do count, as they are greater than 20.00 and less than 21. The same principal would apply to 40.01–40.99, and so forthNote: Minimum and maximum values are not required, and should only be entered if they are relevant to the award program. If you specify a maximum value, that caps the number or points or hours applied to the award program total.
-
In Points, type the number of points a person earns toward the award program if the incident falls within the percentage range.
-
Click Save.
The PM module adds a call percentage range to the criteria's range record collection. The summary in the Call Percentage Range section updates to list the new listing.
-
(If necessary) Work with the call percentage range in any of the following ways.
 Edit a call percentage range.
-
In the listing for the call percentage range you want to edit, click Edit.
The Percentage dialog box appears, displaying the information already specified for the call percentage range.
-
Change the information in the fields as needed.
- Click Save.
 Delete a call percentage range.
-
In the listing for the call percentage range you want to delete, click Delete.
The listing for the call percentage range disappears from the section.
-
-
Repeat the previous steps to add more call percentage ranges to criteria as needed.
Each new percentage range appears as a new listing in the Call Percentage Range section.
-
 The percentage of points for qualifying incidents attended.
If you choose Percentage Points, you can determine which incident and run types qualify for the award program, and the specific number of points awarded based on the percentage of incidents that the person receives when they attend a qualifying incident.
Note: The percentages are calculated in real time, and will change throughout the participation period. They are not finalized until the participation period ends.
The Minimum Points, Maximum Points, and Number of Points Per Percentage Point fields appear.
Note: Minimum and maximum values are not required, and should only be entered if they are relevant to the award program. If you specify a maximum value, that caps the number or points or hours applied to the award program total.
-
In Minimum Points and Maximum Points, type the minimum number of points required and the maximum number of points possible a person can earn with the criteria, toward the award program.
-
In Number of Points per Percentage Point, type the number of points a person earns for the award program, based on the percentage of incidents that person attended.
-
 Specify which incident types qualify, and the percentage range for that type.
You can specify which incident types qualify for the award program, and the percentage range for each of these.
-
In the Call Percentage Range section, click Add.
The Percentage dialog box appears.
-
In Minimum % and Maximum %, type the lower and upper percentage thresholds of the range that you are defining, to determine how many points participants may earn.
Example: 0–20 % earns 0 points, 21–40% earns 5 points, 41–60% earns 10 points, and 61–100% earns 20 points.
-
In Points, type the number of points a person earns toward the award program if the incident falls within the percentage range.
-
Click Save.
The PM module adds a call percentage range to the criteria's range record collection. The summary in the Call Percentage Range section updates to list the new listing.
-
(If necessary) Work with the call percentage range in any of the following ways.
 Edit a call percentage range.
-
In the listing for the call percentage range you want to edit, click Edit.
The Percentage dialog box appears, displaying the information already specified for the call percentage range.
-
Change the information in the fields as needed.
- Click Save.
 Delete a call percentage range.
-
In the listing for the call percentage range you want to delete, click Delete.
The listing for the call percentage range disappears from the section.
-
-
Repeat the previous steps to add more call percentage ranges to criteria as needed.
Each new percentage range appears as a new listing in the Call Percentage Range section.
-
 The number of hours spent at each incident.
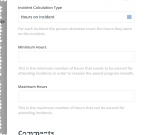
If you choose Hours on Incident, you can determine the total of hours from the incidents that participants participated in for the specified Fire Incidents types or EHR run types, and the Minimum Hours and Maximum Hours fields appear.
-
In Minimum Hours and Maximum Hours, type the minimum number of hours required and the maximum number of hours possible a person can earn with the criteria, toward the award program.
-
 Specify operational task or community event information.
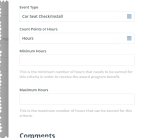
Note: The PM module includes only tasks and events marked as
Completedin the Activities module, in award program calculations. The hours and/or points used in the award program calculation are those entered in the Activities module, in the task or event's Completed By section for the personnel member who performed the task or attended the event.The Task Type or Event Type field, and the Points and Hours buttons appear.
-
For Task Type or Event Type, click the list icon to the right of the field, then choose the credit types that apply to this criteria in the dialog box that appears.
To do this Do this Select all tasks or events currently listed.
- In the upper left corner of the dialog box, click Select All Results.
Manually select individual tasks or events.
- In the list of credits on the right, select the types of tasks or events that correspond to this criteria.
The total number of items you selected appears on the left side of the dialog box, in Items Selected.
Note: Once you select an item, it remains selected, even if you change the filter and a selected item no longer appears in the filtered list.
-
(If necessary) In the upper left corner of the dialog box, click Clear All Items to clear all your selections at once.
Caution: Verify the total number items selected in Items Selected, before clicking Clear All Items.
Example: If you only see two items selected in the list because you are filtering the list, and Items Selected indicates you have more than two items selected, clicking Clear All Items clears all selected items.
-
For Count Points or Hours, click either Points or Hours to select the unit you want the PM module to use for this criteria when tracking progress toward the award program.
The PM module replaces both buttons with a field, and the option selected in that field corresponds to whichever of the Points or Hours buttons you clicked. The Minimum Points and Maximum Points or Minimum Hours and Maximum Hours fields also appear.
-
(If you clicked Points) In Minimum Points and Maximum Points, type lowest number of points you must earn for the criteria, to receive the award program benefit, and the highest number of points you can earn for the criteria, respectively.
-
(If you clicked Hours) In Minimum Hours and Maximum Hours, type lowest number of hours you must earn for the criteria, to receive the award program benefit, and the highest number of hours you can earn for the criteria, respectively.
-
Click Save.
 Specify combined maximum criteria information.
The Criteria, Total Minimum, and Total Maximum fields appear.
-
For Criteria, click the list icon to the right of the field, then choose the criteria whose points or hours you want to count toward the combined minimum and maximum totals.
 Understand how criteria already defined for this award program appear as menu options for the combined maximum criteria type.
With the exceptions of the combined maximum and cross validation criteria, any criteria you add to the award program you are currently working with appear when you click the Criteria field.
Example: When defining other criteria for the award program, you have already added criteria called Training class credits, Ranks achieved, Titles held, Tasks performed, Events attended, and so forth. These criteria appear as menu choices for the Criteria button, when you define the combined maximum criteria.
To do this Do this Select all criteria currently listed.
- In the upper left corner of the dialog box, click Select All Results.
Manually select individual criteria.
- In the list of titles on the right, select the types of rank that correspond to this criteria.
The total number of items you selected appears on the left side of the dialog box, in Items Selected.
Note: Once you select an item, it remains selected, even if you change the filter and a selected item no longer appears in the filtered list.
-
(If necessary) In the upper left corner of the dialog box, click Clear All Items to clear all your selections at once.
Caution: Verify the total number items selected in Items Selected, before clicking Clear All Items.
Example: If you only see two items selected in the list because you are filtering the list, and Items Selected indicates you have more than two items selected, clicking Clear All Items clears all selected items.
-
Click Apply.
-
(Optional) In Total Minimum, type the minimum number of points and/or hours required by the combined maximum criteria to qualify for the award program.
The PM module adds together all the points and/or hours earned in the criteria you selected in the previous step. If the sum of these points equals or exceeds the number you specified in Total Minimum, the participant meets the minimum requirement for the combined maximum criteria, and can participate in the award program.
Example: For the combined maximum criteria, you choose rank and title as the criteria to combine, and set the Total Minimum value at
5. A participant has earned 25 points for a promotion to a specific rank, and another 5 points for a title they have in the agency. The PM module adds the points earned through the rank and title criteria (30), compares that sum to the value in Total Minimum, and determines that the participant meets the minimum required for the combined maximum criteria. -
(Optional) In Total Maximum, type the maximum number of points and/or hours a participant can earn for the combined maximum criteria.
This value "caps" the number of points allowed by the combined maximum criteria. The PM module adds together all the points and/or hours earned in the criteria you selected in the previous step, and ignores any points and/or hours exceeding the number in Total Maximum.
Example: For the combined maximum criteria, you chose rank and title as the criteria to combine, and set the Total Maximum value at
50. A participant has earned 40 points for a promotion to a specific rank, and another 20 points for a title they have in the agency. The PM module adds the points earned through the rank and title criteria (60), compares that sum to the value in Total Maximum, awards the participant 50 points for the combined maximum criteria, and ignores the remaining points. - In Comments, type any observations or remarks relevant to the criteria.
- Click Save.
 Specify cross-validation criteria information.
The Limiting Criteria, Maximum, Limited Criteria, and Conditional Maximum fields appear.
These four fields work together to prevent over-awarding points and/or hours by establishing a criteria that, once its maximum is reached, enforces a different maximum for a second criteria.
Example: Because attending meetings is part of the job of an elected official, you do not want a participant who has met this title criteria to also earn points and/or hours for attending meetings when they are already earning points or hours for the title. You do want to allow some earning flexibility for attending meetings, though, as a participant also needs to attend regular agency meetings not related to their title. You can set a maximum for points and/or hours that the participant can still earn for attending meetings, on the condition that the participant first reaches the maximum and/or or hours awarded through the title criteria.
 Cross-validation examples with numbers
In your agency's LOSAP, there is a title criteria named
Elected Officials, with a maximum of25for the points that the criteria can earn. There is also an operational task criteria namedMeetings, with a maximum of20points.To prevent over-awarding between the
Elected OfficialsandMeetingscriteria, you added a cross-validation criteria calledMeeting limit for Officers. For Limiting Criteria, you selectedElected Officials, and for Maximum, you specified25. For Limited Criteria, you selectedMeetings, and for Conditional Maximum, you specified10. With this cross-validation, the maximum points or hours a participant can earn is 35.Participant cases using these limits and maximums:
-
Jennifer has earned 10 points from being an elected official, and 15 points for attending meetings. Because she has not yet reached the maximum number of points for the limiting criteria (
Elected Officials), Jennifer has a total of 25 points between the two criteria. -
William has earned 25 points from being an elected official, and 15 points for attending meetings. Because he has reached the maximum (25) for the limiting criteria (
Elected Officials), the PM module enforces the conditional maximum (10) for the limited criteria (Meetings). James has a total of 35 points between the two criteria. -
James has earned 50 points from holding multiple elected positions, and 25 points for attending meetings. Because he has reached the maximum (25) for the limiting criteria (
Elected Officials), the PM module enforces the conditional maximum (10) for the limited criteria (Meetings). James has a total of 35 points between the two criteria. -
Alicia has earned 10 points from being an elected official, and 35 points for attending meetings. Because she has not yet reached the maximum (25) for the limiting criteria (
Elected Officials), she can still earn points for attending meetings, up to the meetings maximum of 20. Alicia has a total of 30 points (20 for reaching the meetings maximum, and 10 more for being an elected official).
-
 Choose the limiting criteria and the maximum it can earn.
-
For Limiting Criteria, click the list icon to the right of the field, then choose the criteria to use for establishing the maximum number of points and/or hours the participant must reach before a maximum is enforced on a different criteria.
Example: You may choose a title criteria as the criteria whose maximum must be met before an additional limit is enforced on another criteria.
 Understand how criteria already defined for this award program appear as menu options for the cross validation criteria type.
With the exceptions of the combined maximum and cross validation criteria, any criteria you add to the award program you are currently working with appear when you click the Criteria field.
Example: When defining other criteria for the award program, you have already added criteria called Training class credits, Ranks achieved, Titles held, Tasks performed, Events attended, and so forth. These criteria appear as menu choices for the Limiting Criteria button, when you define the cross-validation criteria.
-
(Optional) In Maximum, type the maximum number of points and/or hours the participant can earn before a maximum is also enforced on a different criteria.
Once the participant reaches this maximum number of points and/or hours, the PM enforces the conditional maximum you specify in the next step.
-
-
 Choose the limited criteria and the maximum it can earn.
-
For Limited Criteria, click the list icon to the right of the field, then choose the criteria whose points and/or hours accrual becomes limited to a different maximum when the participant reaches the limiting criteria's maximum.
Example: You may choose an operational criteria as the criteria whose maximum accrual becomes limited when the participant reaches the title criteria's maximum number of points and/or hours.
Note: As in the previous step, with the exceptions of the combined maximum and cross validation criteria, any criteria already in the award program appear when you click Limited Criteria.
-
(Optional) In Conditional Maximum, type the maximum number of points and/or hours the participant can earn on this criteria, once the maximum is reached for the Limiting Criteria.
-
- In Comments, type any observations or remarks relevant to the criteria.
- Click Save.
-
-
Repeat the previous steps to add more criteria to the award program, as needed.
-
Optional) Click the left-pointing arrow beside the award program name to return to the list of all award programs.
 Edit an existing criteria.
-
Open the criteria you want to edit in one of these ways.
- Click the listing for the criteria.
-
On the right side of the listing, click Actions, and choose Edit.
The Edit Criteria dialog box appears, displaying all the information currently entered for the criteria.
- Change the information in the fields as needed.
- Click Save.
-
