Specify award program details
The details of an award program include the effective dates for the award program.
Example: Your agency or department's award program has been in effect since 2000. Each year it calculates what the firefighters did to participate, to see if they qualify for the benefit.
The details of an award program also include the maximum and minimum number of points the participants must and can earn, attachments containing supporting documents and other program information, links to web sites and other resources relevant to the program, additional comments for clarifying the award program purpose and expectations, and so forth.
|
Note:
|
-
 (If you have not done so already) Access the PM or PM Basic module in the ESO Suite.
Which version of the module opens depends on whether your agency or department has purchased the PM Basic or full version of the PM module.
-
Do one of the following.
-
(If you are already working in the ESO Suite) Click the Home icon in the upper left corner of the screen.
-
 (If you have not yet logged in) Log in to the ESO Suite.
-
In a web browser, go to https://www.esosuite.net/EsoSuite.
The ESO Suite login screen appears.
-
Enter your user name, password, and agency name, then click Let's Go.
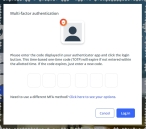
If MFA is enabled, the Multi-factor authentication dialog box appears, displaying one or more methods you can use to verify your login credentials. The number of methods that appear in the dialog box depends on what MFA methods your ESO Suite administrators enabled in the Admin module.

Click graphics
to open them.Information on enabling MFA and specific MFA methods is available in the Admin module online help, in Configure multiple-factor authentication.
Note: If your ESO Suite administrators have disabled MFA ("opted-out"), this dialog does not appear.
-
(If the Multi-factor authentication dialog box appears) Depending on which buttons appear in the dialog box, verify your login in one of the following ways.
 With an authenticator application.
-
Click MFA verification via authenticator app.
The dialog box updates with boxes for entering the numbers of the authentication code, and the ESO Suite sends an authentication code to the authenticator application installed on your device.
-
Open your authenticator application and note the authentication code currently displayed.
-
Enter the authentication code displayed in the authenticator application.
-
Click Log In.
 With a text message (SMS).
-
Click MFA verification via SMS.
The dialog box updates with boxes for entering the numbers of the authentication code, and the ESO Suite sends an authentication code to the phone number recorded in your PM records and identified with MFA codes.
-
Enter the authentication code sent to your MFA-registered phone number.
-
Click Log In.
 With an email message.
-
Click MFA verification via email.
The dialog box updates with boxes for entering the numbers of the authentication code, and the ESO Suite sends an authentication code to your agency or department email address, recorded in your PM records.
-
Enter the authentication code sent to your agency or department email address.
-
Click Log In.
-
-
The ESO Suite landing screen appears.

Click graphics
to open them.Note: If MFA is enabled, you can access and manage your MFA options through the PM module, on the Settings > Account page, as described in Manage a user account. If your agency or department has enabled MFA but has not purchased the full-featured version of the PM module, you can access your own MFA settings by clicking Change my Multi-Factor Authentication settings on the landing screen, then using the Settings > Account page that appears. If your agency has not enabled MFA, the Change my Multi-Factor Authentication settings link does not appear on the landing screen.
-
-
On the top side of the home screen, click PM.
Tip: If your screen or browser window is too narrow to display all your agency's ESO Suite module icons, an options icon appears on the right side of the icon bar. If you click the options icon, a menu appears containing additional module icons.
A list of all the personnel in the PM module appears, displayed in a grid format.
PM (full version) PM Basic Note: If you can access the full-featured PM module, you can view all your own information in it. The amount of information you can edit in the PM module depends on what roles and permissions your ESO Suite administrator assigned to your user account.
Information on user accounts, roles, and permissions is available in Manage a user account.
-
-
In the navigation bar on the left side of the screen, click the Award Programs (
 ) icon.
 The Award Programs screen appears, displaying a list of the active award programs currently in the PM module.
-
(If necessary) Filter the list of award programs to find the award program you want to work with, as described in Add, copy, edit, or delete an award program, under step 3, Use filters to find award programs.
-
Click the listing for the award program you want to specify details for.
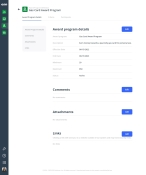
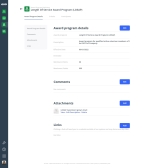
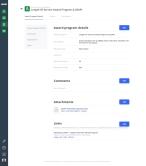
The award program record opens and displays the class details, set to the Award Program Details bookmark in the left pane.
-
 Identify the award program, its effective and end dates, and points or hours limits.
-
On the right side of the Award program details section, click Edit.
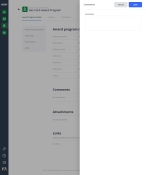
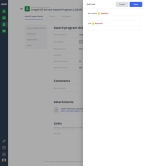
The Edit Award Program Definition dialog box appears on the right. By default, the PM module populates the fields with the information provided when you created the program. You can still edit these fields if they are not populated, or if you need to update the information in them.
- In Award Program Name, type a short name for the program you are creating.
- In Description, type a longer description of the award program.
-
For Effective Date, click the calendar icon on the right end of the field and select the appropriate date from the calendar that appears and specify the date the award program was adopted.
Note: This is not the date of the participation period for the participants.
- (If applicable) For End Date, click the calendar icon on the right end of the field and select the appropriate date from the calendar that appears and specify the date the award program ended.
- (If applicable) In Minimum, type the lowest total number of hours or points a participant can earn during the participation period, to obtain credit for the award program.
- (If applicable) In Maximum, type highest total number of hours or points a participant can earn during the participation period for the award program.
-
(If necessary) For Archived, drag the slider either to the right until the slider turns blue and Yes appears to indicate that the award program is archived, or to the left until the slider turns gray and No appears, to indicate that the award is active.
The slider position you choose appears in the Status field on the Award Program Details tab.
Note: The PM module preserves all records relevant to the award program when you archive it, and participation information for the archived program still appears in the personnel records for individual participants.
- Click Save.
-
-
 Provide comments about the award program.
-
On the left, click the Comments bookmark.
The right side scrolls down to the Comments section of the Award Program Details tab.
-
On the right side of the Comments section, click Edit.
The Comments dialog box appears.
- In Comments, type any observations or remarks relevant to all the criteria, participants, or to the award program in general.
-
Click Save.
-
-
 Add and work with attachments for the award program.
You can add and then work with attachments for the award program as needed. Attachments may include images used in the program, PDF files, and so forth.
Example: You may want to attach a PDF file containing the requirements of the award program.
-
On the left, click the Attachments bookmark.
The right side scrolls down to the Attachments section of the Award Program Details tab.
-
Do any of the following.
 Add a new attachment.
-
On the right side of the Attachments section, click Add.
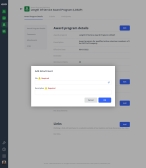
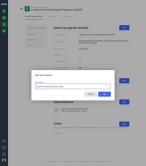
The Add Attachment dialog box appears.
- For File, click the field, then use the file browser that appears to navigate to and select the attachment you want to add.
- In Description, type a description of the attachment, or any other information that should accompany it.
-
Click OK.
The attachment appears as a list item in the Attachments section of the Award Program Details tab.
 View an attachment.
-
In the listing of the attachment, do one of the following.
- Click the thumbnail image or icon for the attachment.
- To the right of the attachment file name, click View.
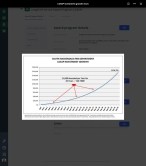
The attachments viewer opens. If the attachment is an image or PDF file, the image or PDF appears; if the file is of some other type, a message that this type of file can not be previewed appears.
Tip: (Optional, if there are multiple attachments) In the upper left corner of the attachment viewer, in the attachments counter, click the left- and right-pointing arrows to scroll through and view the attached files.
-
In the upper right corner of the viewer, click the close (X) icon.
 View information about an attachment.
-
In the listing of the attachment, do one of the following.
- Click the thumbnail image or icon for the attachment.
- To the right of the attachment file name, click View.
The attachments viewer opens. If the attachment is an image or PDF file, the image or PDF appears; if the file is of some other type, a message that this type of file can not be previewed appears.
Tip: (Optional, if there are multiple attachments) In the upper left corner of the attachment viewer, in the attachments counter, click the left- and right-pointing arrows to scroll through and view the attached files.
-
In the upper right corner of the viewer, click the information icon (an i in a circle), then read the information in the menu that appears.
-
In the upper right corner of the viewer, click the close (X) icon.
 Edit the description of an attachment.
-
In the listing of the attachment you want to edit the description for, do one of the following.
 View the attachment before editing the description.
-
In the listing of the attachment, do one of the following.
- Click the thumbnail image or icon for the attachment.
- To the right of the attachment file name, click View.
The attachments viewer opens. If the attachment is an image or PDF file, the image or PDF appears; if the file is of some other type, a message that this type of file can not be previewed appears.
Tip: (Optional, if there are multiple attachments) In the upper left corner of the attachment viewer, in the attachments counter, click the left- and right-pointing arrows to scroll through and view the attached files.
-
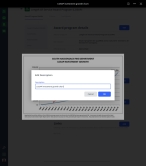
In the upper right corner of the viewer, click the three-dot menu icon, then choose Edit Description.
The Edit Description dialog box appears.
- In Description, edit the text describing the attachment as needed.
-
Click OK.
The attachment's description updates in the center of the attachment viewer's top black bar.
-
In the upper right corner of the viewer, click the close (X) icon.
-
 Download an attachment.
-
In the listing of the attachment, do one of the following.
- Click the thumbnail image or icon for the attachment.
- To the right of the attachment file name, click View.
The attachments viewer opens. If the attachment is an image or PDF file, the image or PDF appears; if the file is of some other type, a message that this type of file can not be previewed appears.
Tip: (Optional, if there are multiple attachments) In the upper left corner of the attachment viewer, in the attachments counter, click the left- and right-pointing arrows to scroll through and view the attached files.
-
In the upper right corner of the viewer, click the three-dot menu icon, then choose Download.
The file downloads to the default download location on your computer.
-
In the upper right corner of the viewer, click the close (X) icon.
 Print an attachment.
-
In the listing of the attachment, do one of the following.
- Click the thumbnail image or icon for the attachment.
- To the right of the attachment file name, click View.
The attachments viewer opens. If the attachment is an image or PDF file, the image or PDF appears; if the file is of some other type, a message that this type of file can not be previewed appears.
Tip: (Optional, if there are multiple attachments) In the upper left corner of the attachment viewer, in the attachments counter, click the left- and right-pointing arrows to scroll through and view the attached files.
-
In the upper right corner of the viewer, click the three-dot menu icon, then choose Print.
A new browser tab appears, displaying the standard Windows browser printing capabilities.
- Continue with the print process in the new browser tab.
-
In the upper right corner of the viewer, click the close (X) icon.
 Delete an attachment.
-
In the listing of the attachment you want to delete, do one of the following.
 View the attachment before deleting it.
-
In the listing of the attachment, do one of the following.
- Click the thumbnail image or icon for the attachment.
- To the right of the attachment file name, click View.
The attachments viewer opens. If the attachment is an image or PDF file, the image or PDF appears; if the file is of some other type, a message that this type of file can not be previewed appears.
Tip: (Optional, if there are multiple attachments) In the upper left corner of the attachment viewer, in the attachments counter, click the left- and right-pointing arrows to scroll through and view the attached files.
-
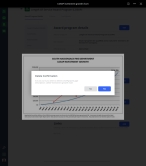
In the upper right corner of the viewer, click the three-dot menu icon, then choose Delete.
The Delete Confirmation dialog box appears.
-
Click Yes.
The module deletes the file and closes the viewer.
-
-
-
-
 Add, copy, edit, or delete links for the award program.
You can add links to an award program, to provide reference material, state or local program requirements, and other resources available online.
-
On the left, click the Links bookmark.
The right side scrolls down to the Links section of the Award Program Details tab.
-
Do any of the following.
 Add a new link.
-
On the right side of the Links section, click Add.
The Add Link dialog box appears.
- In Description, type a description of the online material the link going to.
- In Link, type or paste the URL for the web site you are linking to.
-
Click Done.
The information you entered appears as a summary in the Links section of the Award Program Details tab.
 Edit an existing link.
-
In the listing for the link you want to edit, click Edit.
The Edit Link dialog box appears, displaying the information already specified for the link.
- Change the information in the fields as needed.
- Click Done.
 Delete a link.
-
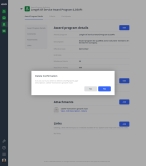
In the listing for the link you want to delete, click Delete.
A confirmation dialog box appears.
- Click Yes.
-
-
-
(Optional) Click the left-pointing arrow beside the award program name to return to the list of all award programs.

