Map inventory items to treatments
The Inventory module provides a list of common treatments medical personnel routinely perform. For each of the treatments, an Inventory module administrator can build a list of the inventory items typically used during the treatment, and map those items to the treatment. This list can include item variants (pediatric sizes instead of adult sizes, different needle gauges, and so forth). These item-to-treatment mappings appear as suggested inventory items for restocking a vehicle after it returns from a call, or at the end or beginning of a shift, and helps the medic remember what they used during a call.
For an IV therapy treatment, your agency anticipates that a medic would use an IV start kit, an IV catheter (20 gauge), an IV extension set, and a sodium chloride NaCl 0.9% 10 mL/12 mL IV prefilled syringe. On the Settings > Mappings screen, an Inventory administrator can map these inventory items as the default items needed for an IV therapy treatment. The administrator can also add variant items to the individual default items, such as 16 and 18 gauge IV catheters, sodium chloride NaCl 0.9% in a 1000 mL IV bag, and so forth.
When a medic performs an IV therapy, they later need to restock the used inventory items. On the Inventory list screen, when the medic clicks Manage this vehicle's supplies, clicks View details of this call, and scrolls down to Inventory items used during this call section, the list of items the Inventory module administrator mapped to the IV therapy treatment automatically appears as the used inventory items. If a default item has variants defined for it, a menu field appears with the default item selected. If the medic used something other than the default item during the call, they can click that item's field and choose one of the variant menu options as the item actually used on the call.
Note: The medic can override the default items and quantities for a treatment on any call as needed.
-
 If you have not done so already) Access the Inventory module in the ESO Suite.
-
Do one of the following.
-
(If you are already working in the ESO Suite) Click the Home icon in the upper left corner of the screen.
-
 (If you have not yet logged in) Log in to the ESO Suite.
-
In a web browser, go to https://www.esosuite.net/EsoSuite.
The ESO Suite login screen appears.
-
Enter your user name, password, and agency name, then click Let's Go.
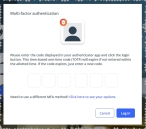
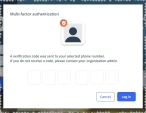
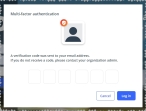
If MFA is enabled, the Multi-factor authentication dialog box appears, displaying one or more methods you can use to verify your login credentials. The number of methods that appear in the dialog box depends on what MFA methods your ESO Suite administrators enabled in the Admin module.
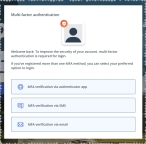
Click graphics
to open them.Information on enabling MFA and specific MFA methods is available in the Admin module online help, in Configure multiple-factor authentication.
Note: If your ESO Suite administrators have disabled MFA ("opted-out"), this dialog does not appear.
-
(If the Multi-factor authentication dialog box appears) Depending on which buttons appear in the dialog box, verify your login in one of the following ways.
 With an authenticator application.
-
Click MFA verification via authenticator app.
The dialog box updates with boxes for entering the numbers of the authentication code, and the ESO Suite sends an authentication code to the authenticator application installed on your device.
-
Open your authenticator application and note the authentication code currently displayed.
-
Enter the authentication code displayed in the authenticator application.
-
Click Log In.
 With a text message (SMS).
-
Click MFA verification via SMS.
The dialog box updates with boxes for entering the numbers of the authentication code, and the ESO Suite sends an authentication code to the phone number recorded in your PM records and identified with MFA codes.
-
Enter the authentication code sent to your MFA-registered phone number.
-
Click Log In.
 With an email message.
-
Click MFA verification via email.
The dialog box updates with boxes for entering the numbers of the authentication code, and the ESO Suite sends an authentication code to your agency or department email address, recorded in your PM records.
-
Enter the authentication code sent to your agency or department email address.
-
Click Log In.
-
-
The ESO Suite landing screen appears.

Click graphics
to open them.Note: If MFA is enabled, you can access and manage your MFA options through the PM module, on the Settings > Account page, as described in Manage a user account. If your agency or department has enabled MFA but has not purchased the full-featured version of the PM module, you can access your own MFA settings by clicking Change my Multi-Factor Authentication settings on the landing screen, then using the Settings > Account page that appears. If your agency has not enabled MFA, the Change my Multi-Factor Authentication settings link does not appear on the landing screen.
-
-
-
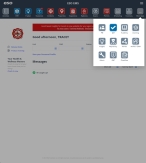
On the top side of the home screen, click Inventory.

The Inventory module opens, displaying the Action now page and the Welcome to Inventory! message.
Click graphics
to open them. -
In Step 5: Map your agency treatments to items (optional), click Map treatments.
The Inventory module takes you to the Settings pages, and the Mapped treatments page appears on the right. From this page, you can choose treatments frequently performed by your agency's medical personnel, and you can link the medications and medical supplies normally used from the agency's inventory during those treatments.
-
 Find the treatment you want to map inventory items to.
-
Scroll down the page until the Mapped treatments section of the page is visible.
This section contains three columns, letting you filter the treatments into more manageable units of information.
-
(Optional) From Viewing, choose the number of treatments you want to display on the page.
-
On the left side of the section, in the Treatment category column, click the filter button and choose the category of treatments you want to work with.
The treatments listed in the Treatments column update to correspond to the treatments in the selected category. For each treatment in the Treatments column, the right column reflects any inventory items already identified as items used when that type of treatment is performed on a call.
-
(Optional) In the Treatments column, in the Search treatments field, type the name of the treatment you want to define default inventory items for.
As you type each character, the list of treatments in the column reduces to only those containing that set of characters.
-
 (Optional) Specify a local or preferred name for a treatment.
Your agency may perform blood draws using a particular gauge and length of needle, and local paramedics refer to it as doing a "Mosquito Draw." If this is a name all the personnel instantly recognize, you can use this local reference as the preferred name for the Blood Draw treatment.
-
In the Treatments column, for any treatment you want to use a "local" or preferred name for a treatment, click Add a preferred name.
A menu containing an explanation of what a preferred name is appears, with a name field at the bottom.
-
In the name field, replace the existing treatment name with the local or preferred name your agency would like to use.
-
Click Save.
This preferred name appears instead of the standard treatment name when a medic is choosing treatments as part of adding items used in a call.
-
-
-
 Add default and variant items to the treatment.
-
For the treatment you want to add default inventory items for, in the third column, click Add treatment item for treatment name.
The Treatment item box appears in the third column.
-
In the upper right corner of the box, in the Search to add items field, begin typing the characters in the name of inventory items you want to automatically link to this treatment.
As you type each character, a list of items containing that set of characters appears in the drop-down menu that appeared when you began typing.
-
In the menu, click the item you want to add to the treatment.
The item appears in the top portion of the Treatment item box.
-
(If you need variations of the newly added item) In the Search to add items field, search for and select the next item you want to add to this item's list.
The next item appears in the Multiple variations section in the Treatment item box. Any additional items you add in the same Treatment item box appear under Multiple variations.
-
Repeat the previous step as many times as necessary to add the variants you want to the default item.
-
(Optional, to remove an item variant) To the right of the variant item listed, click Remove.
The variant disappears from the Multiple variations section.
-
Repeat steps a–f as many times as needed to map additional items and their variations as needed to the treatment.
-
 (Optional) Remove a default item from the treatment.
-
Depending on how much of the default item you want to remove, do one of the following.
 Remove only the default item.
-
At the top of the Treatment item box, to the right of the item name, click Remove.
If there were variants listed the Treatment item box, the default item disappears and the first variant item moves up from the Multiple variations section to become the new default item. If no variants were listed, the entire Treatment item box disappears from the left column.
 Remove the default item and all its variants.
-
At the bottom of the Treatment item box, click Remove treatment items.
The entire Treatment item box disappears from the left column.
-
-
-
-
For each treatment you want to map inventory items to, repeat steps 4–5.
-
 Mark the task as completed, and proceed to the next onboarding task.
-
Scroll back up to the top of the page and, in the Treatment mappings section, select I have confirmed the items I wish to map to my treatments.
The completion bar in the upper right corner of the section updates to reflect your progress, and the I am finished button appears below the check box.
-
Click I am finished.
The section updates to confirm that the task is marked as completed, and by whom.
-
Return to the Action now page in one of these ways.
If you are here Do this On the Treatment mappings page
-
At the top of the page, below the confirmation message indicating that the task is marked as completed, click View all onboarding steps.
On any page
-
In the upper left corner of the screen, click the Action now icon.

The Action now page appears. In the Welcome to Inventory! section, the Step 5: Map your agency treatments to items (Optional) now has a check mark in front of it to indicate that you completed all the sub-tasks within this step, the word Complete now appears below Step 5, and the drop-down for the section is closed. The progress bar at the top of the Welcome to Inventory! section, reflects your current progress through the onboarding tasks, and Step 6: Allocating user roles (optional) has automatically opened to guide you to the next set of tasks in the onboarding process.
Tip: If you want to review the completed onboarding tasks in the Welcome to Inventory! section, on the right side of the section, click Open. The task expands, and you can see all the text and buttons related to completing this task.
-
-
Continue to the next step in agency's onboarding tasks, as described in Add users and assign inventory roles.
-


