Add, edit, or delete vitals information
Before beginning treatment, you need to check and record the patient's vitals, to provide a snapshot of the patient's basic bodily functions at a specific moment in time. It may also be necessary to check and record their vitals multiple times during treatment, particularly if the patient is unstable or has sustained significant injuries. Multiple vitals checks also show progress toward recovery.
-
 (If you have not done so already) Access the EHR module in the ESO Suite.
-
Do one of the following.
-
(If you are already working in the ESO Suite) Click the Home icon in the upper left corner of the screen.
-
 (If you have not yet logged in) Log in to the ESO Suite.
-
In a web browser, go to https://www.esosuite.net/EsoSuite.
The ESO Suite login screen appears.
-
Enter your user name, password, and agency name, then click Let's Go.
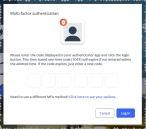
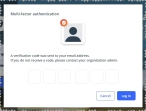
If MFA is enabled, the Multi-factor authentication dialog box appears, displaying one or more methods you can use to verify your login credentials. The number of methods that appear in the dialog box depends on what MFA methods your ESO Suite administrators enabled in the Admin module.

Click graphics
to open them.Information on enabling MFA and specific MFA methods is available in the Admin module online help, in Configure multiple-factor authentication.
Note: If your ESO Suite administrators have disabled MFA ("opted-out"), this dialog does not appear.
-
(If the Multi-factor authentication dialog box appears) Depending on which buttons appear in the dialog box, verify your login in one of the following ways.
 With an authenticator application.
-
Click MFA verification via authenticator app.
The dialog box updates with boxes for entering the numbers of the authentication code, and the ESO Suite sends an authentication code to the authenticator application installed on your device.
-
Open your authenticator application and note the authentication code currently displayed.
-
Enter the authentication code displayed in the authenticator application.
-
Click Log In.
 With a text message (SMS).
-
Click MFA verification via SMS.
The dialog box updates with boxes for entering the numbers of the authentication code, and the ESO Suite sends an authentication code to the phone number recorded in your PM records and identified with MFA codes.
-
Enter the authentication code sent to your MFA-registered phone number.
-
Click Log In.
 With an email message.
-
Click MFA verification via email.
The dialog box updates with boxes for entering the numbers of the authentication code, and the ESO Suite sends an authentication code to your agency or department email address, recorded in your PM records.
-
Enter the authentication code sent to your agency or department email address.
-
Click Log In.
-
-
The ESO Suite landing screen appears.

Click graphics
to open them.Note: If MFA is enabled, you can access and manage your MFA options through the PM module, on the Settings > Account page, as described in Manage a user account. If your agency or department has enabled MFA but has not purchased the full-featured version of the PM module, you can access your own MFA settings by clicking Change my Multi-Factor Authentication settings on the landing screen, then using the Settings > Account page that appears. If your agency has not enabled MFA, the Change my Multi-Factor Authentication settings link does not appear on the landing screen.
-
-
On the top side of the home screen, click EHR.
Tip: If your screen or browser window is too narrow to display all your agency's ESO Suite module icons, an options icon appears on the right side of the icon bar. If you click the options icon, a menu appears containing additional module icons.
The EHR screen appears, displaying a list of patient records in the EHR module. The most-recent records appear at the top of the list.
Different record status icons can appear in the list.
Icon Status Unlocked/DraftThe patient record exists in the ESO Suite database, and all crew members listed in the patient record may edit all fields in the record. ESO Suite administrators and personnel with security roles of either
EHR SupervisororEHR Managercan edit non-clinical fields.MobileThe patient record exists on the mobile device, and has not been synchronized with the ESO Suite database. ESO Suite administrators, personnel with security roles of either
EHR SupervisororEHR Manager, and all crew members listed in the patient record can only access a print view of the record.Once the Mobile record synchronizes with the ESO Suite database. the record reflects its current status.
LockedThe patient record exists in the ESO Suite database, and is locked. Only non-clinical fields can be edited by crew members listed in the patient record, ESO Suite administrators and personnel with security roles of either
EHR SupervisororEHR Manager.
-
-
 (If you have not done so already) Add a new patient record, or search for the existing patient record you want to work with.
Information on adding or opening a patient record is available in Add a patient record and Search for a patient record.
The patient record opens and displays the Incident tab, with the Response bookmark selected in the left pane. Fields appear in the right pane for specifying basic information about the incident
If you manually created a new patient record, the Incident Number and State Tracking Number fields populate automatically with ESO Suite-assigned values. You must enter data in all other required fields.
If you imported data from a CAD system, the Incident Number field populates with the data from that source. Other fields in the EHR module may also populate from these sources, depending on what data was recorded in them before the data was imported into the EHR module.
-
At the top of the page, click the Vitals tab.
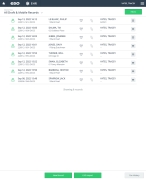
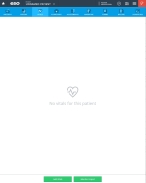
The contents of the Vitals tab appear, listing any vitals recordings that have already been performed on the patient.
-
Depending on whether or not you use a cardiac monitoring device on the patient to record vitals information, do one of the following.
 Import vitals data from a cardiac monitoring device.
The EHR module supports integration with both cardiac monitors that have a Cloud component to them, and those that use a direct cable plug-in or WiFi transfer for importing cardiac data files into the EHR module. If EMS uses a monitoring device on the patient to record vitals information, you can import that data into the EHR module instead of entering it manually.
Note: Before the EHR module can import files from a cardiac monitoring device, an ESO Suite administrator must configure the integration between the EHR module and the cardiac monitoring devices your agency uses.
Information on configuring these integrations is available in Configure cardiac monitors.
-
At the bottom of the page, click Monitor Import.
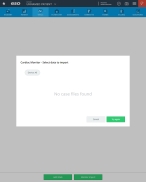
The Cardiac Monitor dialog box appears, listing the case files you can import for the patient.
-
(Optional) For Device, choose the specific brand of cardiac monitor files you want to filter the list by.
-
From the list of available files, choose the one containing the vitals data you want to import.
-
Click Import.
 Manually start a new vitals record.
-
At the bottom of the page, click Add Vitals.
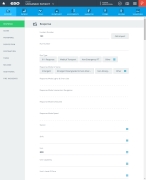
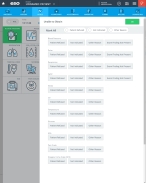
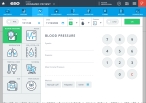
A vitals-recording dialog box appears, with a series of fields displayed across the top, the Blood Pressure icon selected in the left pane, and fields and a number pad appearing in the right pane. The current time and date defaults into the Time and Date fields.
Whether you import data into a new vitals record or start a vitals record manually, you can still add to and update the information as needed.
-
-
Add or edit vitals information to the patient's record in one of these ways.
 Unable to obtain vitals measurements for the patient
 (If applicable) Record PTA vitals.
PTA vitals are obtained prior to the documenting EMS unit's care.
-
On the left end of the fields across the top of the dialog box, click PTA to record times prior to EMS unit's arrival.
The current values in Time and Date clear.
-
For Time, click the number pad icon to the right of the field, then enter the appropriate numerical values from the number pad dialog box that appears to indicate the time the vitals were obtained.
-
For Date, click the calendar icon on the right end of the field and select the appropriate date from the calendar that appears to indicate the date the vitals were obtained.
-
Complete the AVPU, Side, and Pressure fields as described in Record AVPU, side, and position information.
 Record AVPU, side, and position information.
You can use AVPU to record a quick and simple assessment of an individual's level of consciousness, especially in an emergency situation.
-
For each of the fields below, click the field or the list icon to the right of the field, then select the appropriate single option from the menu that appears.
Field Information needed AVPU
The patient's level of consciousness and responsiveness.
Side
The side of the patient's body on which you assessed the vital signs.
Position
The position patient was in when you assessed the vital signs.
 Record the blood pressure.
Blood pressure measures the force in which blood is pushed against artery walls when your heart contracts and relaxes. The EHR module calculates the value in Mean Arterial Pressure based on the systolic and diastolic values you enter.
-
(If it is not selected already) In the left pane, select the Blood Pressure icon.
The right pane updates to display fields and tools for recording the patient's blood pressure.
-
For Method, choose Manual Cuff, Palpated, or click Other and select the appropriate single option from the menu that appears.
The method describes how the blood pressure measurement was obtained.
Note: If you choose Palpated or Doppler, the Diastolic and Mean Arterial Pressure fields disappear.
-
In Systolic, type or use the number pad to enter the patient's systolic blood pressure.
Systolic blood pressure (the top number) is the pressure inside the artery when the heart pumps blood to the body. Normal systolic blood pressure is less than 120.
-
In Diastolic, type or use the number pad to enter the patient's diastolic blood pressure.
Diastolic blood pressure (the bottom number) is the pressure inside the artery when the heart is at rest. Normal diastolic blood pressure is less than 80.
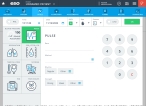
 Record the pulse.
A pulse measures how many times the heart beats per minute.
-
In the left pane, select the Pulse icon.
The right pane updates to display fields and tools for recording a pulse.
-
In Rate, type or use the number pad to enter the patient's pulse rate.
A healthy resting heart rate is between 60 and 100 beats per minute.
-
For Method, choose Manual Cuff, Palpated, or click Other and select the appropriate single option from the menu that appears.
The method describes how the pulse was obtained.
Note: This field appears only if it was enabled in the ESO Admin module by an ESO Suite user with the necessary permissions to configure the EHR module.
Information on enabling EHR fields is available in the Admin module online help, in Configure tabs.
-
For Rhythm, choose Regular, or click Other and select the appropriate single option from the menu that appears.
Rhythm is the pattern at which your heart beats. An arrhythmia is an irregular heartbeat.
-
For Strength, choose Strong, Weak, or click Other and select the appropriate single option from the menu that appears.
Pulse strength is the amount of blood pumped with each heartbeat, or the force associated with each contraction.
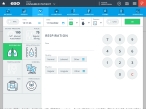
 Record the respiration.
Breathing, or respiration, is the process of drawing into the body oxygen and expelling carbon dioxide from the body. The respiration rate is the number of breaths a person takes per minute.
-
In the left pane, select the Respiration icon.
The right pane updates to display fields and tools for recording the patient's respiration.
-
In Rate, type or use the number pad to enter the patient's respiration rate.
Normal respiration rates for adults range from 12 to 20 breaths a minute.
-
For Quality, choose Normal, Labored, or click Other and select the appropriate single option from the menu that appears.
The quality of a person's breathing is normally relaxed and silent.
-
For Rhythm, choose Regular, Irregular, or click Other and select the appropriate single option from the menu that appears.
Rhythm is the pattern at which you breathe.
-
For Strength, choose Strong, Weak, or click Other and select the appropriate single option from the menu that appears.
Respiration strength is the amount of air you inhale and carbon dioxide you exhale with each breath, or the force associated with each breath.
 Record the oxygen saturation, carbon dioxide, and carbon monoxide.
SPO2 (oxygen saturation) is a measurement of how much oxygen your blood is carrying as a percentage of the maximum it could carry. EtCO2 (carbon dioxide) is the exhaled end-tidal carbon dioxide at the end of an exhaled breath.
CO (carbon monoxide) is an odorless, colorless gas that can cause sudden illness and death, and occurs in structures, vehicles, gasoline engines, camp stoves, lanterns, burning charcoal and wood, gas ranges, heating systems and poorly vented chimney. Carbon monoxide poisoning occurs when carbon monoxide builds up in your bloodstream.
-
In the left pane, select the SPO2/ETCO2/CO icon.
The right pane updates to display fields and tools for recording carbon monoxide, carbon dioxide, and oxygen saturation.
-
In SpO2, type or use the number pad to enter the patient's oxygen saturation.
For a healthy individual, the normal value should be between 96% to 99%.
-
Below SpO2, select either Oxygen or Room Air to indicate whether the patient is breathing unmodified, ambient air in the room, or whether their respiration is being supplemented with oxygen therapy.
-
In EtCO2, type or use the number pad to enter the patient's end-tidal carbon dioxide level.
The normal values are 5% to 6% CO2, which is equivalent to 35-45 mmHg.
-
In CO, type or use the number pad to enter the patient's carbon monoxide level.
If carboxyhemoglobin levels exceed 5% for non-smokers and 10% for smokers, they should be considered as having some level of CO poisoning. Treatment is indicated when the carboxyhemoglobin levels exceed 10-12%.
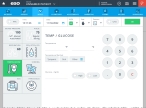
 Record the temperature and glucose readings.
Temperature is a measure of the body's ability to generate and dissipate heat. Glucose, or blood sugar, is the main sugar found in your blood. It comes from the food you eat, and is your body's main source of energy.
-
In the left pane, select the Temp/Glucose icon.
The right pane updates to display fields and tools for recording the patient's temperature and glucose level.
-
For Temperature, in either the F or C field, type or use the number pad to enter the patient's current temperature.
The EHR module automatically calculates the equivalent temperature in the field you did not enter the temperature in.
The average body temperature is 98.6 F (37 C), but can range between 97 F (36.1 C) and 99 F (37.2 C) or more. Older people generally have lower body temperatures than younger people have.
-
For Temperature Method, choose Tympanic, Oral, or click Other and select the appropriate single option from the menu that appears.
The temperature method indicates how EMS took the patient's temperature.
-
In Glucose, type or use the number pad to enter the amount of sugar found in the patient's blood stream.
Normal blood glucose level (while fasting) ranges within 70 to 99 mg/dL (3.9 to 5.5 mmol/L). Higher ranges could indicate pre-diabetes or diabetes.
-
To the right of Glucose, select either High or Low, to indicate whether the glucose value indicates whether the patient's glucose level is too high (hyperglycemia) or too low (hypoglycemia).
 Record the GCS and RTS scores.
The GCS describes the extent of impaired consciousness in all types of acute medical and trauma patients, according to three aspects of responsiveness: eye-opening, motor, and verbal responses.
The RTS is a physiologic scoring system based on the initial vital signs of a patient. A lower score indicates a higher severity of injury. The RTS has three variables—respiratory rate, systolic blood pressure, and GCS.
Pediatric trauma is injury to the brain or head during birth, infancy, or childhood.
-
In the left pane, select the Scoring icon.
The right pane updates to display fields and tools for recording the patient's GCS, RTS, and (if applicable) pediatric trauma scores.
-
(If it is not selected already) At the top of the right pane, click the Glascow Coma tab.
Fields specific to determining the GCS appear in the right pane.
-
(If appropriate) click either Min (3) or Max (15), to set all three of the Eyes, Verbal, and Motor fields to a value of
1or15, respectively. -
For Eyes, Verbal, and Motor, click the field or the list icon to the right of the field, then select the appropriate single option from the menu that appears to choose a value for that part of the score.
The EHR module calculates the GCS for you, based on the values you chose, and displays it in the GCS box.
-
At the top of the right pane, click the Revised Trauma tab.
The components specific to determining the RTS appear in the right pane, displaying the values you entered in other parts of the EHR module, and the calculated RTS score appears in the RTS box.
-
 (If the patient is a child) Record pediatric trauma information.
The goal of the pediatric patient assessment process is similar to that of the adult patient. However, the physiology of children is significantly different from adults, and it is critical to measure and record pediatric vitals correctly.
-
At the top of the right pane, click the Pediatric Trauma tab.
The components specific to recording trauma in pediatric patients appears in the right pane.
-
For each of the fields below, click the field or the list icon to the right of the field, then select the appropriate single option from the menu that appears.
Field Information needed Airway
An indication as to how clear the child's airway is.
Pediatric airways can be vastly different from the adult airways, due to anatomical differences that predispose the patient to airway obstructions.
CNS
An indication as to the child's alertness and coherency, to help assess the child's CNS.
The CNS is the brain and spinal cord, which branches into the peripheral nervous system. The peripheral nervous system entails the sensory division that brings information to the brain, and the motor division that sends information from the brain to the body.
Wounds
An indication of weather the child has wounds, and if they do, the seriousness of the wounds.
Wounds are injuries that break the skin or other body tissues. They include cuts, scrapes, scratches, and punctured skin.
Size An indication of the chest tube size used on the child.
BP An indication as to the child's blood pressure.
Blood pressure measures the force in which blood is pushed against artery walls when your heart contracts and relaxes.
Note: It is important to use the correct cuff size. A cuff that is too small falsely elevates the blood pressure reading.
The width should be approximately 40% of the circumference of the upper arm. The length should encircle 100% of the circumference of the upper arm.
Skeletal An indication of whether the child has any fractures or breaks to their bones.
A bone fracture happens when something hits your bone with enough force not only to damage it, but to break it in at least one place.
-
 Record the ECG data.
An ECG is an instrument that records the electrical signal from the heart to check for different heart conditions, using a line graph that shows changes in the electrical activity of the heart over time.
-
In the left pane, select the ECG icon.
The right pane updates to display fields and tools for recording the patient's electrocardiogram information.
-
For Type, choose 3-Lead, 4-Lead, 12L-Lead, or click Other and select the appropriate single option from the menu that appears.
An ECG lead is a graphical description of the electrical activity of the heart, created by analyzing several electrodes. Each ECG lead is computed by analyzing the electrical currents detected by several electrodes.
 Understand the link between the EHR and Admin modules when selecting an ECG type.
The menu options that appear in the Type dialog box are defined in the Admin module, under EHR > Vitals Tab > Configurable Lists > ECG Type.
Example: In the EHR module, for the Type field, you may need options such as 3-Lead, 4-Lead, Multi-use pads, Other (AED, Not Listed), and so forth.
Your ESO Suite administrator must enable the corresponding ADL items in the Admin module, under EHR > Vitals Tab > Configurable Lists > ECG Type, for these items to appear as menu choices in the EHR module.
If no options appear, or if the menu does not have an option that meets your needs, contact your ESO Suite administrator and ask them to add the necessary menu choices. You will need to work closely with your administrator to create and maintain these lists, as your department's needs evolve over time.
Information on building ADL lists for the EHR module is available in the Admin module online help, in Configure tabs.
-
For Rhythm, click the list icon to the right of the field, select all the appropriate options from the menu that appears, then click OK or click outside the menu to indicate the pattern at which the patient's heart beat.
-
For Method of ECG Interpretation, click the list icon to the right of the field, select all the appropriate options from the menu that appears, then click OK or click outside the menu to indicate whether the ECG was interpreted, and by a human or a computer.
-
In Notes, type any additional ECG-related information pertinent to treating the patient.
-
For MI Suspected, choose Yes or No to indicate whether you think the patient is having a myocardial infarction (heart attack).
 Indicate pain level.
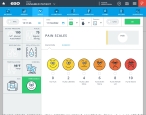
The 0 to 10 pain scale has become the most widely utilized and accepted measure of pain in all settings.
-
In the left pane, select the Pain Scales icon.
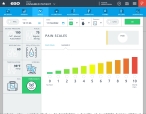
The right pane updates to display fields and tools for recording the patient's level of pain on a scale of 0–10. By default, the Face Pain tab is selected, displaying a series of faces with pain-related expressions and colors.
-
(Optional) Click the Numeric tab to change to a bar chart with pain-related heights and colors.
-
Under the face or bar chart, choose the corresponding number in the 0–10 range for the pain the patient reports.
-
-
In the upper right corner of the dialog box, click OK.
The Vitals tab reappears, with the General sub-tab selected at the top, and a summary of the vitals information you recorded appearing below.
-
 (If applicable) View and restore deleted vitals records.
If you had deleted a vitals listing at some point, that vitals information still exists in the EHR module until you lock the PCR.
-
In the upper left corner of the Vitals tab, click View Deleted Vitals.
The Deleted Vitals dialog box appears, with the General sub-tab selected at the top, and a summary of the deleted vitals information appearing below.
-
 (Optional) Restore a deleted vitals record.
-
On the far right side of any deleted vitals record you want to restore, click the selection box.
A check mark appears in the selected boxes, and the Restore button appears in the upper right corner of the sub-tab.
-
Click Restore.
The Vitals tab reappears, and the deleted vitals records you selected now also appear on the three sub-tabs. .
-
-
-
At the top of the Vitals tab, click the Scoring, then ECG sub-tabs.
A summary of the scoring and ECG information you recorded earlier appears on the respective sub-tabs below.

