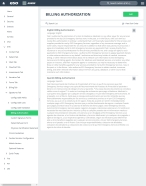
Collect a billing authorization signature
Billing authorizations contain your agency's billing legal authorization verbiage, and billing authorization signatures are necessary when billing Medicare for ambulance services. Billing authorizations require a signature from the patient, the patient's parent or guardian (if the patient is a minor), an authorized representative, or EMS and facility personnel, depending on the circumstances. You can add billing authorizations and patient refusal forms in up to three languages (English, Spanish, and French).
As you collect the required information and signatures for each signature category, a green triangle appears in the upper right corner of the category button. If the triangle does not appear, you have not yet met one or more requirements for that category.

|
Click graphics to open them. |
-
 (If you have not done so already) Access the EHR module in the ESO Suite.
-
Do one of the following.
-
(If you are already working in the ESO Suite) Click the Home icon in the upper left corner of the screen.
-
 (If you have not yet logged in) Log in to the ESO Suite.
-
In a web browser, go to https://www.esosuite.net/EsoSuite.
The ESO Suite login screen appears.
-
Enter your user name, password, and agency name, then click Let's Go.
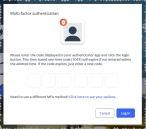
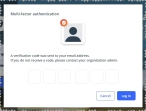
If MFA is enabled, the Multi-factor authentication dialog box appears, displaying one or more methods you can use to verify your login credentials. The number of methods that appear in the dialog box depends on what MFA methods your ESO Suite administrators enabled in the Admin module.

Click graphics
to open them.Information on enabling MFA and specific MFA methods is available in the Admin module online help, in Configure multiple-factor authentication.
Note: If your ESO Suite administrators have disabled MFA ("opted-out"), this dialog does not appear.
-
(If the Multi-factor authentication dialog box appears) Depending on which buttons appear in the dialog box, verify your login in one of the following ways.
 With an authenticator application.
-
Click MFA verification via authenticator app.
The dialog box updates with boxes for entering the numbers of the authentication code, and the ESO Suite sends an authentication code to the authenticator application installed on your device.
-
Open your authenticator application and note the authentication code currently displayed.
-
Enter the authentication code displayed in the authenticator application.
-
Click Log In.
 With a text message (SMS).
-
Click MFA verification via SMS.
The dialog box updates with boxes for entering the numbers of the authentication code, and the ESO Suite sends an authentication code to the phone number recorded in your PM records and identified with MFA codes.
-
Enter the authentication code sent to your MFA-registered phone number.
-
Click Log In.
 With an email message.
-
Click MFA verification via email.
The dialog box updates with boxes for entering the numbers of the authentication code, and the ESO Suite sends an authentication code to your agency or department email address, recorded in your PM records.
-
Enter the authentication code sent to your agency or department email address.
-
Click Log In.
-
-
The ESO Suite landing screen appears.

Click graphics
to open them.Note: If MFA is enabled, you can access and manage your MFA options through the PM module, on the Settings > Account page, as described in Manage a user account. If your agency or department has enabled MFA but has not purchased the full-featured version of the PM module, you can access your own MFA settings by clicking Change my Multi-Factor Authentication settings on the landing screen, then using the Settings > Account page that appears. If your agency has not enabled MFA, the Change my Multi-Factor Authentication settings link does not appear on the landing screen.
-
-
On the top side of the home screen, click EHR.
Tip: If your screen or browser window is too narrow to display all your agency's ESO Suite module icons, an options icon appears on the right side of the icon bar. If you click the options icon, a menu appears containing additional module icons.
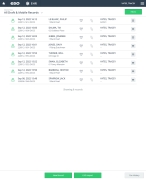
The EHR screen appears, displaying a list of patient records in the EHR module. The most-recent records appear at the top of the list.
Different record status icons can appear in the list.
Icon Status Unlocked/DraftThe patient record exists in the ESO Suite database, and all crew members listed in the patient record may edit all fields in the record. ESO Suite administrators and personnel with security roles of either
EHR SupervisororEHR Managercan edit non-clinical fields.MobileThe patient record exists on the mobile device, and has not been synchronized with the ESO Suite database. ESO Suite administrators, personnel with security roles of either
EHR SupervisororEHR Manager, and all crew members listed in the patient record can only access a print view of the record.Once the Mobile record synchronizes with the ESO Suite database. the record reflects its current status.
LockedThe patient record exists in the ESO Suite database, and is locked. Only non-clinical fields can be edited by crew members listed in the patient record, ESO Suite administrators and personnel with security roles of either
EHR SupervisororEHR Manager.
-
-
 (If you have not done so already) Add a new patient record, or search for the existing patient record you want to work with.
Information on adding or opening a patient record is available in Add a patient record and Search for a patient record.
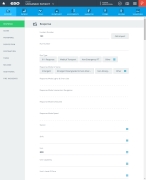
The patient record opens and displays the Incident tab, with the Response bookmark selected in the left pane. Fields appear in the right pane for specifying basic information about the incident
If you manually created a new patient record, the Incident Number and State Tracking Number fields populate automatically with ESO Suite-assigned values. You must enter data in all other required fields.
If you imported data from a CAD system, the Incident Number field populates with the data from that source. Other fields in the EHR module may also populate from these sources, depending on what data was recorded in them before the data was imported into the EHR module.
-
At the top of the page, click the Signatures tab.
The contents of the Signatures tab appear. The tab is organized three types of signatures needed for the ePCR: signatures to authorize billing, signatures frequently needed based on the patient's needs and cooperation, and any signatures needed on custom forms specific to your agency.
-
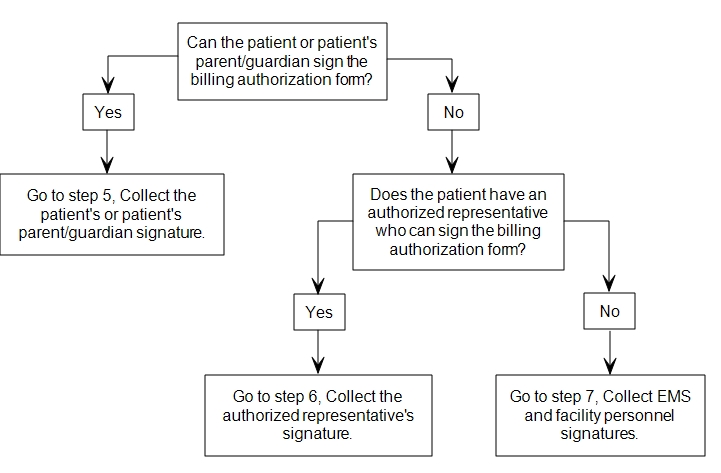
Determine who can sign the billing authorization.
-
 Collect the patient's or patient's parent/guardian signature.
Choose this billing authorization if the patient is an adult and is in a condition that they can sign for themselves, or if the patient is a minor and a parent or guardian can sign for them.
-
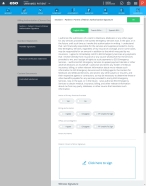
Under Billing Authorization, click Section I - Patient / Parent of Minor Authorization Signature.
The Section I - Patient / Parent of Minor Authorization Signature dialog box appears.
 Understand the link between the EHR and Admin modules, and any specific billing authorization text that appears in the dialog box.
Any billing authorization text that appears at the top of the dialog box is defined in the Admin module, under EHR > Signatures Tab > Billing Authorization. Your ESO Suite administrator can add authorization text in up to three languages in the Admin module, and you can choose which language to display in the dialog box in the EHR module.
Example: In the EHR module, for the Section I - Patient / Parent of Minor Authorization Signature dialog box , you may need to display billing authorization text in English and Spanish.
Your ESO Suite administrator must add the authorization text in each language in the Admin module, under EHR > Signatures Tab > Billing Authorization, for these versions of the text to appear as choices in the EHR module. Buttons corresponding to the language choices appear across the top of the dialog box in the EHR module, and depending on which button you click, the billing authorization in the corresponding language appears.
If no billing authorization text appears, or if the there is not a language option that you need for the text, contact your ESO Suite administrator and ask them to add the necessary text.
Information on adding billing authorization text for the EHR module is available in the Admin module online help, in Configure tabs.
-
(If language buttons appear across the top of the dialog box) Click the button corresponding the language you want to display the billing authorization text in.
The text below the language buttons and before the first field updates to correspond to your choice of language.
-
For Notice of Privacy Practices Provided, click Yes or No to indicate whether or not the patient was given a copy of the agency's privacy policy.
A privacy policy describes how the agency and its affiliates may use and disclose your confidential health information, known as PHI, in the course of treatment, payment, or other health care operations and for other purposes authorized or required by law. The policy also describes the patient's rights with respect to their PHI, and explains how they may exercise those rights.
-
For Billing Authorization, click I Agree, I disagree, or PT Unable To Sign, to indicate whether or not the patient or patient's parent acknowledges the billing statement, or if the patient is not able to sign for some reason.
-
 Capture the necessary electronic signatures.
-
 Capture the patient's or parent's name and signature.
-
(If the patient is a minor) In Parent Full Name, type the first and last name of the patient's parent.
-
In Patient / Parent of Minor Signature, click in the box with Click here to sign.
The Patient / Parent of Minor Signature dialog box appears.
-
Click in the box, and hold down the mouse button (or place the finger or a stylus on a mobile device), and move the mouse (or finger or stylus) through the motions of writing the signature, to "sign" the name in the box.
-
Click OK.
The dialog box closes and the electronic signature appears in the main dialog box.
-
-
 Under Witness Signature, capture the information and signature of the person who witnessed the patient or patient's parent's signature.
-
In Printed Name, type the first and last name of the person who witnessed the patient or patient's parent signing the billing authorization.
-
In Address, type the street address, city, state, and zip code of the address of the person who witnessed the patient or patient's parent signing the billing authorization.
-
Under Signature, click in the box with Click here to sign.
The Billing Authorization Witness Signature dialog box appears.
-
Click in the box, and hold down the mouse button (or place the finger or a stylus on a mobile device), and move the mouse (or finger or stylus) through the motions of writing the signature, to "sign" the name in the box.
-
Click OK.
The dialog box closes and the electronic signature appears in the main dialog box.
- Click OK.
-
-
- Click OK.
-
-
 (If necessary) Collect the authorized representative's signature.
Choose this billing authorization if the patient is an adult and cannot physically or mentally sign for themselves, and if there is another adult who has the appropriate authority to sign the billing authorization for the patient.
Example: An elderly patient with dementia may need to have an adult son or daughter with medical power of attorney, or someone who arranges treatment and handles the patient's affairs, sign the billing authorization on the patient's behalf.
This type of authorization lets you identify the authorized representative, the reason the patient is unable to sign, and to obtain the representative’s signature.
-
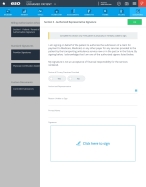
Under Billing Authorization, click Section II - Authorized Representative Signature.
The Section II - Authorized Representative Signature dialog box appears.
-
For Notice of Privacy Practices Provided, click Yes or No to indicate whether or not the patient was given a copy of the agency's privacy policy.
A privacy policy describes how the agency and its affiliates may use and disclose your confidential health information, known as PHI, in the course of treatment, payment, or other health care operations and for other purposes authorized or required by law. The policy also describes the patient's rights with respect to their PHI, and explains how they may exercise those rights.
-
For Authorized Representative, click the field or the list icon to the right of the field, then select the appropriate single option from the menu that appears to indicate the category of the authorized representative.
Example: A relative or other person who arranges treatment or handles the patient's affairs.
An authorized representative is someone the patient has given access to their PHI. An authorized representative can be family members, friends, or any other individual the patient choose.
-
In Reason Unable to Sign, type a description of why the patient is not able to sign the billing authorization themselves.
Example: The patient is unconscious, has a high fever and is experiencing delirium, or has suffered an injury to their writing hand.
-
 Capture the necessary electronic signature.
-
Under Signature, click Click here to sign.
-
In Printed Name, type the first and last name of the person signing the billing authorization.
-
In Signature, click in the box with Click here to sign.
The Authorized Representative dialog box appears.
-
Click in the box, and hold down the mouse button (or place the finger or a stylus on a mobile device), and move the mouse (or finger or stylus) through the motions of writing the signature, to "sign" the name in the box.
-
Click OK.
The dialog box closes and the electronic signature appears in the main dialog box.
-
-
Click OK.
-
-
 (If necessary) Collect EMS and facility personnel signatures.
Choose this billing authorization if the patient is an adult and is mentally or physically incapable of signing for themselves, and there is no authorized representative for the patient available or willing to sign on behalf of the patient at the time of the service.
-
Under Billing Authorization, click Section II - Authorized Representative Signature.
The Section II - Authorized Representative Signature dialog box appears.
-
 Under EMS Personnel Signature, capture the EMS personnel's information and signature.
-
In Reason Unable to Sign, type a description of why the patient is not able to sign the billing authorization themselves.
Example: The patient is unconscious, has a high fever and is experiencing delirium, or has suffered an injury to their writing hand.
-
In Printed Name, type the first and last name of the EMS personnel signing the billing authorization.
-
Under Signature, click Click here to sign.
The EMS Personnel dialog box appears.
-
Click in the box, and hold down the mouse button (or place the finger or a stylus on a mobile device), and move the mouse (or finger or stylus) through the motions of writing the signature, to "sign" the name in the box.
-
Click OK.
The dialog box closes and the electronic signature appears in the main dialog box.
-
-
 Under Facility Representative Signature, capture the facility representative's information and signature.
-
For Notice of Privacy Practices Provided, click Yes or No to indicate whether or not the patient was given a copy of the agency's privacy policy.
A privacy policy describes how the agency and its affiliates may use and disclose your confidential health information, known as PHI, in the course of treatment, payment, or other health care operations and for other purposes authorized or required by law. The policy also describes the patient's rights with respect to their PHI, and explains how they may exercise those rights.
-
In Title of Representative, type the medical title of the facility representative signing the billing authorization.
-
In Printed Name, type the first and last name of the facility representative signing the billing authorization.
-
In Address, type the street address, city, state, and zip code of the address of the person who witnessed the patient or patient's parent signing the billing authorization.
-
Under Signature, click in the box with Click here to sign.
The Facility Representative dialog box appears.
-
Click in the box, and hold down the mouse button (or place the finger or a stylus on a mobile device), and move the mouse (or finger or stylus) through the motions of writing the signature, to "sign" the name in the box.
-
Click OK.
The dialog box closes and the electronic signature appears in the main dialog box.
- Click OK.
-
- Click OK.
-
-
(Optional) Click any billing authorization button with a green triangle in the upper right corner to open the corresponding dialog box, for viewing and editing the information and signatures in it.

