Record contact information
An EMS incident is any event that necessitates a ground or air response to a call for emergency medical services by a public or private emergency medical service organization. You need to record information about how to contact the patient when they are no longer receiving EMS or other medical care related to this incident.
-
 (If you have not done so already) Access the EHR module in the ESO Suite.
-
Do one of the following.
-
(If you are already working in the ESO Suite) Click the Home icon in the upper left corner of the screen.
-
 (If you have not yet logged in) Log in to the ESO Suite.
-
In a web browser, go to https://www.esosuite.net/EsoSuite.
The ESO Suite login screen appears.
-
Enter your user name, password, and agency name, then click Let's Go.
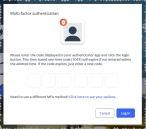
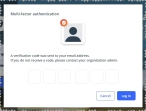
If MFA is enabled, the Multi-factor authentication dialog box appears, displaying one or more methods you can use to verify your login credentials. The number of methods that appear in the dialog box depends on what MFA methods your ESO Suite administrators enabled in the Admin module.

Click graphics
to open them.Information on enabling MFA and specific MFA methods is available in the Admin module online help, in Configure multiple-factor authentication.
Note: If your ESO Suite administrators have disabled MFA ("opted-out"), this dialog does not appear.
-
(If the Multi-factor authentication dialog box appears) Depending on which buttons appear in the dialog box, verify your login in one of the following ways.
 With an authenticator application.
-
Click MFA verification via authenticator app.
The dialog box updates with boxes for entering the numbers of the authentication code, and the ESO Suite sends an authentication code to the authenticator application installed on your device.
-
Open your authenticator application and note the authentication code currently displayed.
-
Enter the authentication code displayed in the authenticator application.
-
Click Log In.
 With a text message (SMS).
-
Click MFA verification via SMS.
The dialog box updates with boxes for entering the numbers of the authentication code, and the ESO Suite sends an authentication code to the phone number recorded in your PM records and identified with MFA codes.
-
Enter the authentication code sent to your MFA-registered phone number.
-
Click Log In.
 With an email message.
-
Click MFA verification via email.
The dialog box updates with boxes for entering the numbers of the authentication code, and the ESO Suite sends an authentication code to your agency or department email address, recorded in your PM records.
-
Enter the authentication code sent to your agency or department email address.
-
Click Log In.
-
-
The ESO Suite landing screen appears.

Click graphics
to open them.Note: If MFA is enabled, you can access and manage your MFA options through the PM module, on the Settings > Account page, as described in Manage a user account. If your agency or department has enabled MFA but has not purchased the full-featured version of the PM module, you can access your own MFA settings by clicking Change my Multi-Factor Authentication settings on the landing screen, then using the Settings > Account page that appears. If your agency has not enabled MFA, the Change my Multi-Factor Authentication settings link does not appear on the landing screen.
-
-
On the top side of the home screen, click EHR.
Tip: If your screen or browser window is too narrow to display all your agency's ESO Suite module icons, an options icon appears on the right side of the icon bar. If you click the options icon, a menu appears containing additional module icons.
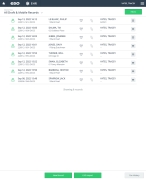
The EHR screen appears, displaying a list of patient records in the EHR module. The most-recent records appear at the top of the list.
Different record status icons can appear in the list.
Icon Status Unlocked/DraftThe patient record exists in the ESO Suite database, and all crew members listed in the patient record may edit all fields in the record. ESO Suite administrators and personnel with security roles of either
EHR SupervisororEHR Managercan edit non-clinical fields.MobileThe patient record exists on the mobile device, and has not been synchronized with the ESO Suite database. ESO Suite administrators, personnel with security roles of either
EHR SupervisororEHR Manager, and all crew members listed in the patient record can only access a print view of the record.Once the Mobile record synchronizes with the ESO Suite database. the record reflects its current status.
LockedThe patient record exists in the ESO Suite database, and is locked. Only non-clinical fields can be edited by crew members listed in the patient record, ESO Suite administrators and personnel with security roles of either
EHR SupervisororEHR Manager.
-
-
 (If you have not done so already) Add a new patient record, or search for the existing patient record you want to work with.
Information on adding or opening a patient record is available in Add a patient record and Search for a patient record.
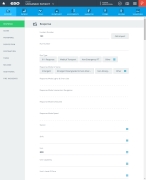
The patient record opens and displays the Incident tab, with the Response bookmark selected in the left pane. Fields appear in the right pane for specifying basic information about the incident
If you manually created a new patient record, the Incident Number and State Tracking Number fields populate automatically with ESO Suite-assigned values. You must enter data in all other required fields.
If you imported data from a CAD system, the Incident Number field populates with the data from that source. Other fields in the EHR module may also populate from these sources, depending on what data was recorded in them before the data was imported into the EHR module.
-
At the top of the page, click the Patient tab.
The contents of the Patient tab appear, set to the Demographics bookmark in the left pane.
-
In the left pane, click the Contact bookmark.
The right pane scrolls down to the top of the Contact section of the page.
-
 Capture the patient's contract address and residence information.
-
Capture the patient's contact address in one of these ways.
 Unable to obtain a contact address for the patient
If the patient refuses, is unable to respond, or if language barriers exist between the patient and EMS crew, you can mark contact information as UTO.
Unable to obtain a contact address for the patient
If the patient refuses, is unable to respond, or if language barriers exist between the patient and EMS crew, you can mark contact information as UTO.On the right side of the Contact section heading bar, click UTO, then select the appropriate single option from the menu that appears.
The address-related fields disappear from the Contact section, and the option you selected appears in their place.
 Use the incident scene address as the contact address.
-
On the right side of the section, under the Contact section heading bar, click Copy Scene.
The address-related fields in the section populate with address information already specified on Incident tab, in the Scene section.
 Manually enter the contact address for the patient.
-
For Country, click the field or the list icon to the right of the field, then select the country where the patient was found or to which the unit responded.
Note: This field appears in the EHR module only if your ESO Suite administrator enabled it in the Admin module, under EHR > Patients Tab > Configurable fields.
Information on enabling EHR fields is available in the Admin module online help, in Configure tabs.
-
In Address and Apt/Suite/Room, type the street address where the patient can be reached, regarding payment for the medical treatment the patient receives for this incident.
-
In Zip, type the zip code for the location, then click the search icon (magnifying glass).
A list of cities, states, or zip codes matching what you entered appears.
Example: In Zip, type
50248, then click the search icon.A list of zip codes matching
50248appears on the right.
-
 Specify residence information.
These fields appear in the EHR module only if your ESO Suite administrator enabled it in the Admin module, under
Specify residence information.
These fields appear in the EHR module only if your ESO Suite administrator enabled it in the Admin module, underNote: Each of these fields appears in the EHR module only if your ESO Suite administrator enabled it in the Admin module, under EHR > Patients Tab > Configurable fields.
Information on enabling EHR fields is available in the Admin module online help, in Configure tabs.
For Temporary Residence Type, click the field or the list icon to the right of the field, then select the appropriate single option from the menu that appears
Example: A homeless person, a migrant worker, or an international visitor.
For Patient Resides in Service Area, click Yes or No to indicate whether or not the patient lives with the geographical area the EMS crew services.
For Resident Status, click the field or the list icon to the right of the field, then select the appropriate single option from the menu that appears identify the patient's residency in the community.
 Understand the link between the Incidents and Admin modules when selecting a resident status.
 The menu options that appear for the Residence Status field are defined in the Admin module, under EHR > Patient Tab > Configurable Lists > Resident Status.
Example: In the Incidents module, for the Residence Status field, you may need options such as City resident, Rural resident, Migrant worker, In-state Student, and so forth.
Your ESO Suite administrator must add corresponding +1 ADL items in the Admin module, under EHR > Patient Tab > Configurable Lists > Resident Status, for these items to appear as menu choices in the Incidents module.
If no options appear, or if the menu does not have an option that meets your needs, contact your ESO Suite administrator and ask them to add the necessary menu choices. You will need to work closely with your administrator to create and maintain these lists, as your department's needs evolve over time.
Information on building ADL lists for the EHR module is available in the Admin module online help, in Configure tabs.
-
-
 Capture the patient's contact phone numbers, email address, driver's license information, and veteran's status.
Note: Each of these fields appears in the EHR module only if your ESO Suite administrator enabled it in the Admin module, under EHR > Patients Tab > Configurable fields.
Information on enabling EHR fields is available in the Admin module online help, in Configure tabs.
-
Capture the patient's contact phone numbers in one of these ways.
 Unable to obtain contact phone number for the patient
If the patient refuses, is unable to respond, or if language barriers exist between the patient and EMS crew, you can mark contact information as UTO.
Unable to obtain contact phone number for the patient
If the patient refuses, is unable to respond, or if language barriers exist between the patient and EMS crew, you can mark contact information as UTO.On the right side of the Phone Numbers bar, click UTO, then select the appropriate single option from the menu that appears.
The Add Phone Numbers button disappears from below the Phone Numbers bar, and the option you selected appears in its place.
 Manually add, edit, and delete phone numbers for the patient.
-
Click Add Phone Numbers.
The Add Phone Numbers dialog box appears.
-
For Phone Type, click the field or the list icon to the right of the field, then select the appropriate single option from the menu that appears.
Example: Answer service, home, mobile, work, and so forth.
-
For Number, click the number pad icon to the right of the field, then enter the appropriate numerical values from the number pad dialog box that appears.
-
Click OK.
A listing for the phone number appears below the Phone Numbers bar.
-
Repeat the previous steps to add additional phone numbers as necessary.
-
 (If necessary) Edit a contact phone number.
-
On the right side of the listing for the phone number you need to edit, click Details.
The Edit Phone Numbers dialog box appears, containing fields populated with the information currently entered for the phone number.
- Change the information in the fields as needed.
- Click OK.
-
-
 (If necessary) Delete a contact phone number.
-
On the right side of the listing for the phone number, click the delete (
 ) icon.
 The listing for the phone number disappears from below the Phone Numbers bar.
-
-
In Personal Email and Work Email, type the email addresses that apply for the patient.
Email addresses must be in the
name@domain.suffixformat.Example:
YourName@eso.com -
 Specify driver's license information.
-
In Driver's License, type the identification number on the patient's state-issued driver's license.
-
For State, click the field or the list icon to the right of the field, then select the appropriate single option from the menu that appears to identify the state that issued the driver's license.
-
-
For Is Patient a Veteran, click Yes, No, or Unknown/Unable to Determine, to indicate whether or not the patient served in any of the branches of the military.
-
-
 Specify the patient's doctor, advance directives, and ICE information.
-
In Physician Last Name, Physician First Name, and Physician Middle Name, type as much of the patient's physician’s name as known.
-
For Advance Directives, click None, or click the list icon to the right of the field, select all the appropriate options from the menu that appears, then click OK or click outside the menu.
An advance directive is a written statement of a person's wishes regarding medical treatment, often including a living will, made to ensure those wishes are carried out should the person be unable to communicate them to a doctor.
-
For Presence of Emergency Form, click Yes or No to indicate whether or not the patient has an ICE form posted in the vicinity.
An ICE form identifies contacts and medical providers for someone who is suffering a health emergency. These forms are typically posted on refrigerators, in lockers, or in your vehicle to assist first responders during a call.
Note: This field appears in the EHR module only if your ESO Suite administrator enabled it in the Admin module, under EHR > Patients Tab > Configurable fields.
Information on enabling EHR fields is available in the Admin module online help, in Configure tabs.
-

