Include fire incident information
When EMS responds to an incident involving fire, additional information about the fire incident can be useful in the PCR.
-
 (If you have not done so already) Access the EHR module in the ESO Suite.
-
Do one of the following.
-
(If you are already working in the ESO Suite) Click the Home icon in the upper left corner of the screen.
-
 (If you have not yet logged in) Log in to the ESO Suite.
-
In a web browser, go to https://www.esosuite.net/EsoSuite.
The ESO Suite login screen appears.
-
Enter your user name, password, and agency name, then click Let's Go.
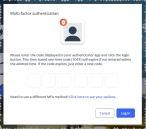
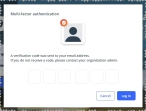
If MFA is enabled, the Multi-factor authentication dialog box appears, displaying one or more methods you can use to verify your login credentials. The number of methods that appear in the dialog box depends on what MFA methods your ESO Suite administrators enabled in the Admin module.

Click graphics
to open them.Information on enabling MFA and specific MFA methods is available in the Admin module online help, in Configure multiple-factor authentication.
Note: If your ESO Suite administrators have disabled MFA ("opted-out"), this dialog does not appear.
-
(If the Multi-factor authentication dialog box appears) Depending on which buttons appear in the dialog box, verify your login in one of the following ways.
 With an authenticator application.
-
Click MFA verification via authenticator app.
The dialog box updates with boxes for entering the numbers of the authentication code, and the ESO Suite sends an authentication code to the authenticator application installed on your device.
-
Open your authenticator application and note the authentication code currently displayed.
-
Enter the authentication code displayed in the authenticator application.
-
Click Log In.
 With a text message (SMS).
-
Click MFA verification via SMS.
The dialog box updates with boxes for entering the numbers of the authentication code, and the ESO Suite sends an authentication code to the phone number recorded in your PM records and identified with MFA codes.
-
Enter the authentication code sent to your MFA-registered phone number.
-
Click Log In.
 With an email message.
-
Click MFA verification via email.
The dialog box updates with boxes for entering the numbers of the authentication code, and the ESO Suite sends an authentication code to your agency or department email address, recorded in your PM records.
-
Enter the authentication code sent to your agency or department email address.
-
Click Log In.
-
-
The ESO Suite landing screen appears.

Click graphics
to open them.Note: If MFA is enabled, you can access and manage your MFA options through the PM module, on the Settings > Account page, as described in Manage a user account. If your agency or department has enabled MFA but has not purchased the full-featured version of the PM module, you can access your own MFA settings by clicking Change my Multi-Factor Authentication settings on the landing screen, then using the Settings > Account page that appears. If your agency has not enabled MFA, the Change my Multi-Factor Authentication settings link does not appear on the landing screen.
-
-
On the top side of the home screen, click EHR.
Tip: If your screen or browser window is too narrow to display all your agency's ESO Suite module icons, an options icon appears on the right side of the icon bar. If you click the options icon, a menu appears containing additional module icons.
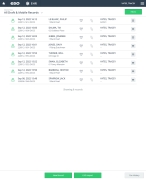
The EHR screen appears, displaying a list of patient records in the EHR module. The most-recent records appear at the top of the list.
Different record status icons can appear in the list.
Icon Status Unlocked/DraftThe patient record exists in the ESO Suite database, and all crew members listed in the patient record may edit all fields in the record. ESO Suite administrators and personnel with security roles of either
EHR SupervisororEHR Managercan edit non-clinical fields.MobileThe patient record exists on the mobile device, and has not been synchronized with the ESO Suite database. ESO Suite administrators, personnel with security roles of either
EHR SupervisororEHR Manager, and all crew members listed in the patient record can only access a print view of the record.Once the Mobile record synchronizes with the ESO Suite database. the record reflects its current status.
LockedThe patient record exists in the ESO Suite database, and is locked. Only non-clinical fields can be edited by crew members listed in the patient record, ESO Suite administrators and personnel with security roles of either
EHR SupervisororEHR Manager.
-
-
 (If you have not done so already) Add a new patient record, or search for the existing patient record you want to work with.
Information on adding or opening a patient record is available in Add a patient record and Search for a patient record.
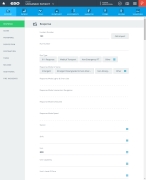
The patient record opens and displays the Incident tab, with the Response bookmark selected in the left pane. Fields appear in the right pane for specifying basic information about the incident
If you manually created a new patient record, the Incident Number and State Tracking Number fields populate automatically with ESO Suite-assigned values. You must enter data in all other required fields.
If you imported data from a CAD system, the Incident Number field populates with the data from that source. Other fields in the EHR module may also populate from these sources, depending on what data was recorded in them before the data was imported into the EHR module.
-
In the left pane, click the Fire Incidents bookmark.
The right pane scrolls down to the top of the Fire Incidents section of the page.
-
For each of the following fields, click the field or the list icon to the right of the field, then select the appropriate single option from the menu that appears
 Incident Type
The incident type describes what the firefighters responded to at the incident.
Example: An EMS medical assist, a building fire, a hazardous condition, a natural disaster, and so forth.
 Understand the link between the Incidents and Admin modules when selecting an incident type.
The menu options that appear for the Incident Type field are defined in the Admin module, under Fire > Incidents > NFIRS Code Configuration. The default list of menu options are the basic NFIRS codes. If you need more incident type codes than the basic codes, you can add them as +1 codes under the existing NFIRS codes.
Example: In the Incidents module, for the Incident Type field, you may need more-specific structure fire options such as Tiny house on trailer.
Your ESO Suite administrator must add corresponding +1 ADL items in the Admin module, under Fire > Incidents > NFIRS Code Configuration > Incident Type > (1) Fire > (11) Structure Fire > (111) Building fire, for this item to appear as a menu choice in the Incidents module.
If no options appear, or if the menu does not have an option that meets your needs, contact your ESO Suite administrator and ask them to add the necessary menu choices. You will need to work closely with your administrator to create and maintain these lists, as your department's needs evolve over time.
Information on defining NFIRS +1 codes is available in Activate NFIRS codes and add +1 codes.
 Injury or Death
An indication of whether injury or death happened to civilians, fire service personnel, or both.
 Property Use
An indication of how the property is used (assembly, educational, residential, mercantile, and so forth).
 Understand the link between the Incidents and Admin modules when identifying how a property is used.
The menu options that appear for the Property Use fields are defined in the Admin module, under Fire > Incidents > NFIRS Code Configuration. The default list of menu options are the basic NFIRS codes. If you need more property-use codes than the basic codes, you can add them as +1 codes under the existing NFIRS codes.
Example: In the Incidents module, for the Property Use field, you may need more-specific other-education options, such as Performance Arts and Vocational training, welding.
Your ESO Suite administrator must add corresponding +1 ADL items in the Admin module, under Fire > Incidents > NFIRS Code Configuration > Property Use > (2) Educational > (200) Education, other for these items to appear as a menu choice in the Incidents module.
If no options appear, or if the menu does not have an option that meets your needs, contact your ESO Suite administrator and ask them to add the necessary menu choices. You will need to work closely with your administrator to create and maintain these lists, as your department's needs evolve over time.
Information on defining NFIRS +1 codes is available in Activate NFIRS codes and add +1 codes.
 Aid Given/Received
Aid given or aid received refers to the giving or receiving of assistance from another fire department to help resolve an incident. That assistance can be in the form of personnel or equipment from one or more departments.
 Understand the link between the Incidents and Admin modules when recording aid-given or aid-received information.
The menu options that appear for the Aid Given / Received field defined in the Admin module, under Fire > Incidents > NFIRS Code Configuration. The default list of menu options are the basic NFIRS codes. If you need more aid given or received codes than the basic codes, you can add them as +1 codes under the existing NFIRS codes.
Example: In the Incidents module, for the Aid Given / Received field, you may need more-specific aid options such as Ladder truck for tall structure fires, or Additional pumper truck for crop fires.
Your ESO Suite administrator must add corresponding +1 ADL items in the Admin module, under Fire > Incidents > NFIRS Code Configuration > Aid Given or Received > (1) Mutual aid received, for these items to appear as menu choices in the Incidents module.
If no options appear, or if the menu does not have an option that meets your needs, contact your ESO Suite administrator and ask them to add the necessary menu choices. You will need to work closely with your administrator to create and maintain these lists, as your department's needs evolve over time.
Information on defining NFIRS +1 codes is available in Activate NFIRS codes and add +1 codes.
 Definitions for aid given or received actions.
- Aid received (automatic or mutual): A fire department handles an incident within its jurisdiction with additional manpower or equipment from one or more fire departments outside its jurisdiction. Aid received can be either mutual or automatic aid.
- Aid given (automatic or mutual): A fire department responds into another fire department’s jurisdiction to provide assistance at an incident or to cover a vacated station while the receiving fire department is busy at an incident. Aid received can be either mutual or automatic aid.
- Other aid given: A fire department covers and responds to another jurisdiction or locale that has no fire department.
- No aid: A fire department handles an incident within its jurisdiction without help from adjacent or outside fire departments.
Aid information can be used to study response levels necessary to control various fire and emergency situations. It can be used to determine the adequacy of resources at the local level and the need for adjusting cooperative agreements. The aid given or received entry serves as data control to ensure that the same incident is not counted more than once while still giving credit for activity performed by outside departments.
Depending on which option you chose for Aid Given / Received, different fields below Aid activate.
-
(If it activates) For Aided Agency, click the list icon to the right of the field, select all the appropriate options from the menu that appears, then click OK or click outside the menu.
 Understand the link between the Incidents and Admin modules when recording mutual aid agency information.
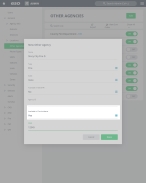
The menu options that appear for fields referenced in the steps below are defined in the Admin module, under General > Other Agencies.
Example: In the Incidents module, for the Aided Agency field, you may need options such as County Fire Department, Glendale Fire Department, New York Fire Department, and The Woodlands Fire Department. Your ESO Suite administrator must add corresponding ADL items in the Admin module, under General > Other Agencies, for these items to appear as menu choices in the Incidents module.
Note: Only agencies marked as Yes in the Available in Fire-Incidents field appear in the Incidents module as options for the Other Agencies field.
If no options appear, or if the menu does not have an option that meets your needs, contact your ESO Suite administrator and ask them to add the necessary menu choices. You will need to work closely with your administrator to create and maintain these lists, as your department's needs evolve over time.
Information on defining these menu options is available in Configure other agencies.
- (If it activates) In Their Incident #, type the incident number the department that was aided assigned to the incident.
 Action Taken 1, Action Taken 2, and Action Taken 3
The actions taken are the duties performed at the incident scene by the responding unit personnel.
 Understand the link between the Incidents and Admin modules when selecting actions taken.
The menu options that appear for the Action Taken fields are defined in the Admin module, under Fire > Incidents > NFIRS Code Configuration. The default list of menu options are the basic NFIRS codes. If you need more action-taken codes than the basic codes, you can add them as +1 codes under the existing NFIRS codes.
Example: In the Incidents module, for the Action Taken fields, you may need more-specific search-and-rescue options, such as Canine-assisted search.
Your ESO Suite administrator must add corresponding +1 ADL items in the Admin module, under Fire > Incidents > NFIRS Code Configuration > Actions Taken > (21) Search for these items to appear as a menu choice in the Incidents module.
If no options appear, or if the menu does not have an option that meets your needs, contact your ESO Suite administrator and ask them to add the necessary menu choices. You will need to work closely with your administrator to create and maintain these lists, as your department's needs evolve over time.
Information on defining NFIRS +1 codes is available in Activate NFIRS codes and add +1 codes.

