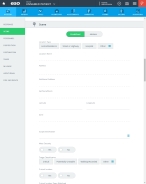
Describe the incident scene
The incident scene is the physical location where an event occurred, such as an accident, a fire, an illness, a mass casualty event, and so forth. You need to identify the location and the type of event, and provide information about the urgency of medical attention for victims, the medical teams involved, whether it is a mass casualty event, and more.
-
 (If you have not done so already) Access the EHR module in the ESO Suite.
-
Do one of the following.
-
(If you are already working in the ESO Suite) Click the Home icon in the upper left corner of the screen.
-
 (If you have not yet logged in) Log in to the ESO Suite.
-
In a web browser, go to https://www.esosuite.net/EsoSuite.
The ESO Suite login screen appears.
-
Enter your user name, password, and agency name, then click Let's Go.
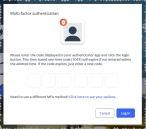
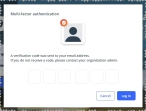
If MFA is enabled, the Multi-factor authentication dialog box appears, displaying one or more methods you can use to verify your login credentials. The number of methods that appear in the dialog box depends on what MFA methods your ESO Suite administrators enabled in the Admin module.

Click graphics
to open them.Information on enabling MFA and specific MFA methods is available in the Admin module online help, in Configure multiple-factor authentication.
Note: If your ESO Suite administrators have disabled MFA ("opted-out"), this dialog does not appear.
-
(If the Multi-factor authentication dialog box appears) Depending on which buttons appear in the dialog box, verify your login in one of the following ways.
 With an authenticator application.
-
Click MFA verification via authenticator app.
The dialog box updates with boxes for entering the numbers of the authentication code, and the ESO Suite sends an authentication code to the authenticator application installed on your device.
-
Open your authenticator application and note the authentication code currently displayed.
-
Enter the authentication code displayed in the authenticator application.
-
Click Log In.
 With a text message (SMS).
-
Click MFA verification via SMS.
The dialog box updates with boxes for entering the numbers of the authentication code, and the ESO Suite sends an authentication code to the phone number recorded in your PM records and identified with MFA codes.
-
Enter the authentication code sent to your MFA-registered phone number.
-
Click Log In.
 With an email message.
-
Click MFA verification via email.
The dialog box updates with boxes for entering the numbers of the authentication code, and the ESO Suite sends an authentication code to your agency or department email address, recorded in your PM records.
-
Enter the authentication code sent to your agency or department email address.
-
Click Log In.
-
-
The ESO Suite landing screen appears.

Click graphics
to open them.Note: If MFA is enabled, you can access and manage your MFA options through the PM module, on the Settings > Account page, as described in Manage a user account. If your agency or department has enabled MFA but has not purchased the full-featured version of the PM module, you can access your own MFA settings by clicking Change my Multi-Factor Authentication settings on the landing screen, then using the Settings > Account page that appears. If your agency has not enabled MFA, the Change my Multi-Factor Authentication settings link does not appear on the landing screen.
-
-
On the top side of the home screen, click EHR.
Tip: If your screen or browser window is too narrow to display all your agency's ESO Suite module icons, an options icon appears on the right side of the icon bar. If you click the options icon, a menu appears containing additional module icons.
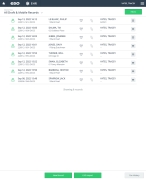
The EHR screen appears, displaying a list of patient records in the EHR module. The most-recent records appear at the top of the list.
Different record status icons can appear in the list.
Icon Status Unlocked/DraftThe patient record exists in the ESO Suite database, and all crew members listed in the patient record may edit all fields in the record. ESO Suite administrators and personnel with security roles of either
EHR SupervisororEHR Managercan edit non-clinical fields.MobileThe patient record exists on the mobile device, and has not been synchronized with the ESO Suite database. ESO Suite administrators, personnel with security roles of either
EHR SupervisororEHR Manager, and all crew members listed in the patient record can only access a print view of the record.Once the Mobile record synchronizes with the ESO Suite database. the record reflects its current status.
LockedThe patient record exists in the ESO Suite database, and is locked. Only non-clinical fields can be edited by crew members listed in the patient record, ESO Suite administrators and personnel with security roles of either
EHR SupervisororEHR Manager.
-
-
 (If you have not done so already) Add a new patient record, or search for the existing patient record you want to work with.
Information on adding or opening a patient record is available in Add a patient record and Search for a patient record.
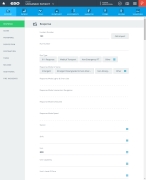
The patient record opens and displays the Incident tab, with the Response bookmark selected in the left pane. Fields appear in the right pane for specifying basic information about the incident
If you manually created a new patient record, the Incident Number and State Tracking Number fields populate automatically with ESO Suite-assigned values. You must enter data in all other required fields.
If you imported data from a CAD system, the Incident Number field populates with the data from that source. Other fields in the EHR module may also populate from these sources, depending on what data was recorded in them before the data was imported into the EHR module.
-
In the left pane, click the Scene bookmark.
The right pane scrolls down to the top of the Scene section of the page.
-
Specify the location of the incident scene in one of these ways.
 Use a predefined location.
Predefined locations are locations where incidents commonly occur for your agency, that your ESO Suite administrators have defined in the Admin module with addresses, GPS coordinates, and so forth. With these locations already defined, you can save time at an incident by selecting a location type and then selecting one of its pre-defined locations, instead of manually entering the address each time there is an incident at that location.
Example: A predefined location might be a local mine or quarry, where injuries happen with some regularity because of the dangerous nature of the work, and to which your agency travels in response to incidents there.
Information on defining incident locations is available in Configure location information.
You can still edit some components of the pre-defined location information in the EHR module when you identify an incident location.
-
At the top of the Scene section, choose Predefined.
Fields relevant to a pre-defined location appear.
-
From Location Type choose Home/Residence, Street or Highway, Hospital, or click Other and select the appropriate single option from the menu that appears.
The location type is the kind of location where the incident happened.
For many of these selections, the Location Type Detail field may appear below Location Type.
-
For Location Type Detail, click the field or the list icon to the right of the field, then select the appropriate single option from the menu that appears.
This field indicates more-specifically where on the scene the incident occurred; it is the subtype of location within the overall location category.
Example: For a hospital location, this field might present options for a cafeteria, a corridor, an operating room, a patient room, and so forth.
Note: This field appears in the EHR module only if your ESO Suite administrator enabled it in the Admin module, under EHR > Incidents Tab > Configurable fields.
Information on enabling EHR fields is available in the Admin module online help, in Configure tabs.
-
For Location Name, click the field or the list icon to the right of the field, then select the appropriate single option from the menu that appears to choose the name of the facility, business, building, and so forth associated with the scene of the EMS event.
The locations that appear in the menu are those that your ESO Suite administrator defined, in the Admin module, for that location type.
Information on defining incident locations is available in Configure location information.
The Address and Zone fields populate with the selected location's information, as your ESO Suite administrator entered it in the Admin module, and cannot be edited in the EHR module.
The Additional Address and Apt/Suite/Room also populate with information in the Admin module, if it exists. The and Latitude, and Longitude fields may appear, and will also populate with information in the Admin module, if it exists. You can enter or edit the data in any of these fields in the EHR module as needed.
-
(If necessary) Add or edit information in the Additional Address, Apt/Suite/Room.
-
 (Optional, if the fields appear) Specify the location using latitude and longitude coordinates.
When looking at a map, latitude lines (parallels) run horizontally. Each degree of latitude is approximately 69 miles (111 km) apart; there is a variation due to the fact that the earth is an oblate ellipsoid (slightly egg-shaped). Degrees latitude are numbered from 0° to 90° north and south. Zero degrees is the equator, the imaginary line which divides our planet into the northern and southern hemispheres. 90° north is the North Pole and 90° south is the South Pole.
The vertical longitude lines (meridians) converge at the poles and are widest at the equator (about 69 miles or 111 km apart). Zero degrees longitude is located at Greenwich, England (0°, the Prime Meridian). The degrees continue 180° east and 180° west where they meet and form the International Date Line in the Pacific Ocean. Greenwich is the site of the Prime Meridian.
Note: The Latitude and Longitude fields appear in the EHR module only if your ESO Suite administrator enabled Scene GPS Location in the Admin module, under EHR > Incidents Tab > Configurable fields.
Information on enabling EHR fields is available in the Admin module online help, in Configure tabs.
-
Specify the latitude and longitude values in one of these formats.
 In DMS
-
In Latitude and Longitude, type the number of degrees from 0° (the equator or the Prime Meridian, respectively), minutes from the degree to the location, and seconds from the minute to the location.
There are 60 minutes in each degree, and 60 seconds in each minute.
Example: The United States capitol is located at 38°53'23"N , 77°00'27"W (38 degrees, 53 minutes, and 23 seconds north of the equator and 77 degrees, no minutes and 27 seconds west of the meridian passing through Greenwich, England).
 In DD
In DD
Decimal degrees are an alternative to using DMS. Decimal degrees express latitude and longitude geographic coordinates as decimal fractions and are used in many GIS, web mapping applications such as Google Maps, and GPS devices. As with latitude and longitude, the values are bounded by ±90° and ±180° respectively.
Positive latitudes are north of the equator, negative latitudes are south of the equator. Positive longitudes are east of Prime Meridian, negative longitudes are west of the Prime Meridian.
-
In Latitude and Longitude, type the decimal fraction of the latitude and longitude portions of the geographic coordinates of the location, respectively).
Example: The United States capitol is located at 38.889722°, -77.008889°.
-
-
 Manually enter the location address information.
If an incident occurred somewhere other than a predefined location, you can manually enter the address and additional location information, to pinpoint the incident scene.
-
At the top of the Scene section, choose Address.
Fields relevant to specifying the location of an incident scene appear.
-
From Location Type choose Home/Residence, Street or Highway, Hospital, or click Other and select the appropriate single option from the menu that appears.
The location type is the kind of location where the incident happened.
For many of these selections, the Location Type Detail field may appear below Location Type.
-
For Location Type Detail, click the field or the list icon to the right of the field, then select the appropriate single option from the menu that appears.
This field indicates more-specifically where on the scene the incident occurred; it is the subtype of location within the overall location category.
Example: For a hospital location, this field might present options for a cafeteria, a corridor, an operating room, a patient room, and so forth.
Note: This field appears in the EHR module only if your ESO Suite administrator enabled it in the Admin module, under EHR > Incidents Tab > Configurable fields.
Information on enabling EHR fields is available in the Admin module online help, in Configure tabs.
-
In Location Name, type the name of the location the incident is occurring at.
Example: Joe's Bar & Grill
-
In Cross Street or Directions, type the nearest cross street to the incident address or directions from a recognized landmark, or the second street name of an intersection.
Specify a cross street if no street address is available at or near the incident scene, and the incident location is at the intersection of two or more streets or roads, where there is no normal street address.
Provide directions if no street address is available at or near the incident scene, and base them from a recognized landmark.
Example: A car accident that occurs in a remote area, or on or near an interstate highway.
Caution: Use directions only if the location cannot otherwise be identified.
Note: This field appears in the EHR module only if your ESO Suite administrator enabled it in the Admin module, under EHR > Incidents Tab > Configurable fields.
Information on enabling EHR fields is available in the Admin module online help, in Configure tabs.
-
In Mile Marker, type the mile number on the mile marker sign post closest to the incident scene.
Note: This field appears only if:
-
In the EHR module, for Location Type, you chose Street or Highway.
-
In the Admin module, your ESO Suite administrator enabled Scene - Mile Post under EHR > Incidents Tab > Configurable fields.
Information on enabling EHR fields is available in the Admin module online help, in Configure tabs.
-
-
(If known) In US National Grid Coordinates, type the incident location according to the U.S. National Grid.
The USNG is a point reference system of grid references commonly used in the United States. This system uses a "read right and then up" convention, where you measure to the East and then North in linear increments. The coordinates translate to distance in meters.
 More information about the USNG.
A USNG spatial address is broken down into three parts:
-
The grid zone designation, for a world-wide unique address.
-
The 100,000-meter square identification, for regional areas.
-
The grid coordinates, for local areas.
A complete USNG spatial address provides a unique value and is necessary for use with GPS receivers and GIS.
Grid coordinates are used to define point features, such as a neighborhood, soccer field, a particular house, or even a parking place. These require different levels of granularity.
Example:
Number of digits Example Locates with precision 4 2306 A neighborhood-size area 6 234064 A soccer field-size area 8 23480647 The size of a modest home 10 2348306479 One meter (within a parking spot) Note: This field appears in the EHR module only if your ESO Suite administrator enabled it in the Admin module, under EHR > Incidents Tab > Configurable fields.
Information on enabling EHR fields is available in the Admin module online help, in Configure tabs.
-
-
In Census Tract, type the census tract number of the location.
Note: Not all jurisdictions have census tract numbers.
A census tract number is a 6- to 11-digit number, assigned by the U.S. Census Bureau, that identifies an area of land within the United States.
Example:
48453045400Note: This field appears in the EHR module only if your ESO Suite administrator enabled it in the Admin module, under EHR > Incidents Tab > Configurable fields.
Information on enabling EHR fields is available in the Admin module online help, in Configure tabs.
-
For Country, click the field or the list icon to the right of the field, then select the country where the patient was found or to which the unit responded.
Note: This field appears in the EHR module only if your ESO Suite administrator enabled it in the Admin module, under EHR > Incidents Tab > Configurable fields.
Information on enabling EHR fields is available in the Admin module online help, in Configure tabs.
-
In Address, Additional Address, and Apt/Suite/Room, type the street address where the patient was found, or, if no patient, the address to which the unit responded.
-
In Zip, type the zip code for the location, then click the search icon (magnifying glass).
A list of cities, states, or zip codes matching what you entered appears.
Example: In Zip, type
50248, then click the search icon.A list of zip codes matching
50248appears on the right. -
Select the entry that corresponds to the rest of the address you are entering.
The rest of the information from that match automatically populates the City, State, and County fields.
-
 (Optional) Specify the location using latitude and longitude coordinates.
When looking at a map, latitude lines (parallels) run horizontally. Each degree of latitude is approximately 69 miles (111 km) apart; there is a variation due to the fact that the earth is an oblate ellipsoid (slightly egg-shaped). Degrees latitude are numbered from 0° to 90° north and south. Zero degrees is the equator, the imaginary line which divides our planet into the northern and southern hemispheres. 90° north is the North Pole and 90° south is the South Pole.
The vertical longitude lines (meridians) converge at the poles and are widest at the equator (about 69 miles or 111 km apart). Zero degrees longitude is located at Greenwich, England (0°, the Prime Meridian). The degrees continue 180° east and 180° west where they meet and form the International Date Line in the Pacific Ocean. Greenwich is the site of the Prime Meridian.
Note: The Latitude and Longitude fields appear in the EHR module only if your ESO Suite administrator enabled Scene GPS Location in the Admin module, under EHR > Incidents Tab > Configurable fields.
Information on enabling EHR fields is available in the Admin module online help, in Configure tabs.
-
Specify the latitude and longitude values in one of these formats.
 In DMS
-
In Latitude and Longitude, type the number of degrees from 0° (the equator or the Prime Meridian, respectively), minutes from the degree to the location, and seconds from the minute to the location.
There are 60 minutes in each degree, and 60 seconds in each minute.
Example: The United States capitol is located at 38°53'23"N , 77°00'27"W (38 degrees, 53 minutes, and 23 seconds north of the equator and 77 degrees, no minutes and 27 seconds west of the meridian passing through Greenwich, England).
 In DD
In DD
Decimal degrees are an alternative to using DMS. Decimal degrees express latitude and longitude geographic coordinates as decimal fractions and are used in many GIS, web mapping applications such as Google Maps, and GPS devices. As with latitude and longitude, the values are bounded by ±90° and ±180° respectively.
Positive latitudes are north of the equator, negative latitudes are south of the equator. Positive longitudes are east of Prime Meridian, negative longitudes are west of the Prime Meridian.
-
In Latitude and Longitude, type the decimal fraction of the latitude and longitude portions of the geographic coordinates of the location, respectively).
Example: The United States capitol is located at 38.889722°, -77.008889°.
-
-
-
For Zone, click the field or the list icon to the right of the field, then select the appropriate single option from the menu that appears.
The response zone label from agency. A zone is a geographical area where the incident scene is located.
 Understand the link between the EHR and Admin module, when selecting a zone.
The options that appear in the dialog box are defined by the Admin module, by your ESO Suite administrator, under General > Zones.
The menu options that appear for fields referenced in the steps below are defined in the Admin module, under the following.
Example: In the EHR module, for the Zone field, you may need options such as Zone 1, Zone 2, Zone 3, and Zone 4. Your Admin module administrator must add corresponding ADL items in the Admin module, under General > Zones, for these items to appear as menu choices in the EHR module.
If no options appear, or if the menu does not have an option that meets your needs, contact your ESO Suite administrator and ask them to add the necessary menu choices. You will need to work closely with your administrator to create and maintain these lists, as your department's needs evolve over time.
Information on defining these options is available in the Admin module help, in Configure zones.
-
-
For Suspected Disaster, click the list icon to the right of the field, select all the appropriate options from the menu that appears, then click OK or click outside the menu.
A suspected disaster is an event with any suspicion of multiple-casualty or domestic terrorism causes.
Example: Building failure, explosive device, hostage event, and so forth.
Note: This field appears in the EHR module only if your ESO Suite administrator enabled it in the Admin module, under EHR > Incidents Tab > Configurable fields.
Information on enabling EHR fields is available in the Admin module online help, in Configure tabs.
-
 (If applicable) Provide mass casualty information.
-
For Mass Casualty, choose Yes or No to indicate whether or not EMS resources (personnel and equipment) were overwhelmed by the number and severity of casualties.
If you choose Yes, the Disaster Tag field may appear.
Note: The Disaster Tag and Triage Classification fields appear in the EHR module only if your ESO Suite administrator enabled them in the Admin module, under EHR > Incidents Tab > Configurable fields.
Information on enabling EHR fields is available in the Admin module online help, in Configure tabs.
-
In Disaster Tag, type information about the triage tag applied to the patient.
A triage (disaster) tag is a tool first responders and medical personnel use during a mass casualty incident. These tags are placed near the head and are used to better separate the victims so that when more help arrives, the first-arriving personnel are able to effectively and efficiently distribute the limited resources and provide the necessary immediate care for the victims until more help arrives.
-
For Triage Classification, choose Critical, Potentially Unstable, Walking Wounded, or click Other and select the appropriate single option from the menu that appears.
This is the color associated with the initial triage assessment/classification of the MCI patient.
Triage is the sorting of patient's treatment based on the severity of their condition. This is an essential part of responding to a mass casualty incident, when limited resources need to be allocated to maximize the number of survivors.
Triage color classification Indicates Treatment Black Death has occurred No treatment of the patient is required. Gray Death is expected Dispense pain medication only, until death occurs. Red (critical) Death may be Immediate Treat life-threatening injuries. Yellow (potentially unstable) Risk of death is delayed Treat non-life-threatening injuries. Green (walking wounded) Risk of death is minimal Treat minor injuries.
-
-
 Include critical-incident information.
Note: Each of these fields appears in the EHR module only if your ESO Suite administrator enabled it in the Admin module, under EHR > Incidents Tab > Configurable fields.
Information on enabling EHR fields is available in the Admin module online help, in Configure tabs.
-
For Critical Incident, choose Yes or No to indicate whether or not the incident may cause acute emotional distress to EMS providers at the incident, and/or be emotionally impactful.
Critical incidents are stressful workplace incidents that evoke acute distress, and which may overwhelm the usually effective emotional coping skills of either an individual or a group of individuals. These incidents can have a strong emotional effect even on trained, experienced individuals. If the incident is extreme, it has the potential to cause PTSD.
If you choose Yes, the Critical Incident Circumstances field may appear.
-
For Critical Incident Circumstances, click the list icon to the right of the field, select all the appropriate options from the menu that appears, then click OK or click outside the menu.
Identifying these circumstances help agencies identify incidents which may cause responder stress and be emotionally impactful. It also provides valuable information in how mental health programs and interventions can effectively assist emergency responders in managing and recovering from the stress of the incident.
-
For Critical Incident Team Mobilized, choose Yes or No to indicate whether or not a critical incident team was mobilized.
A critical incident team is a group of volunteer mental health professionals, clergy, and peer support personnel who have received special training to intervene with individuals who have experienced a critical incident or traumatic event.
-
-
(Michigan only) For Medical Control Authority (MCA), click the field or the list icon to the right of the field, then select the appropriate single option from the menu that appears.
An MCA is an organization designated by the department for the purpose of supervising and coordinating an EMS system, as prescribed, adopted, and enforced through department-approved protocols for a particular geographic region.
Note: This field appears in the EHR module only if your ESO Suite administrator enabled it in the Admin module, under EHR > Incidents Tab > Configurable fields.
Information on enabling EHR fields is available in the Admin module online help, in Configure tabs.

