Trauma criteria
Trauma is a tissue injury that occurs as a as a result of violence or an accident, which may result in wounds, broken bones, or internal organ damage.Triage is an assessment of the physiology and anatomy of the patient's injury, the mechanism of the injury, and special patient considerations.
You can use trauma criteria to identify patients with actual or potential serious injuries, based on physiological changes, altered anatomy, mechanism of injury and risk factors. A three-tier response to trauma maximizes resource utilization and assures timely, organized, and appropriate patient care.
-
 (If you have not done so already) Access the EHR module in the ESO Suite.
-
Do one of the following.
-
(If you are already working in the ESO Suite) Click the Home icon in the upper left corner of the screen.
-
 (If you have not yet logged in) Log in to the ESO Suite.
-
In a web browser, go to https://www.esosuite.net/EsoSuite.
The ESO Suite login screen appears.
-
Enter your user name, password, and agency name, then click Let's Go.
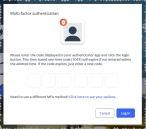
If MFA is enabled, the Multi-factor authentication dialog box appears, displaying one or more methods you can use to verify your login credentials. The number of methods that appear in the dialog box depends on what MFA methods your ESO Suite administrators enabled in the Admin module.

Click graphics
to open them.Information on enabling MFA and specific MFA methods is available in the Admin module online help, in Configure multiple-factor authentication.
Note: If your ESO Suite administrators have disabled MFA ("opted-out"), this dialog does not appear.
-
(If the Multi-factor authentication dialog box appears) Depending on which buttons appear in the dialog box, verify your login in one of the following ways.
 With an authenticator application.
-
Click MFA verification via authenticator app.
The dialog box updates with boxes for entering the numbers of the authentication code, and the ESO Suite sends an authentication code to the authenticator application installed on your device.
-
Open your authenticator application and note the authentication code currently displayed.
-
Enter the authentication code displayed in the authenticator application.
-
Click Log In.
 With a text message (SMS).
-
Click MFA verification via SMS.
The dialog box updates with boxes for entering the numbers of the authentication code, and the ESO Suite sends an authentication code to the phone number recorded in your PM records and identified with MFA codes.
-
Enter the authentication code sent to your MFA-registered phone number.
-
Click Log In.
 With an email message.
-
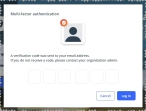
Click MFA verification via email.
The dialog box updates with boxes for entering the numbers of the authentication code, and the ESO Suite sends an authentication code to your agency or department email address, recorded in your PM records.
-
Enter the authentication code sent to your agency or department email address.
-
Click Log In.
-
-
The ESO Suite landing screen appears.

Click graphics
to open them.Note: If MFA is enabled, you can access and manage your MFA options through the PM module, on the Settings > Account page, as described in Manage a user account. If your agency or department has enabled MFA but has not purchased the full-featured version of the PM module, you can access your own MFA settings by clicking Change my Multi-Factor Authentication settings on the landing screen, then using the Settings > Account page that appears. If your agency has not enabled MFA, the Change my Multi-Factor Authentication settings link does not appear on the landing screen.
-
-
On the top side of the home screen, click EHR.
Tip: If your screen or browser window is too narrow to display all your agency's ESO Suite module icons, an options icon appears on the right side of the icon bar. If you click the options icon, a menu appears containing additional module icons.
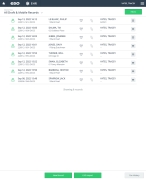
The EHR screen appears, displaying a list of patient records in the EHR module. The most-recent records appear at the top of the list.
Different record status icons can appear in the list.
Icon Status Unlocked/DraftThe patient record exists in the ESO Suite database, and all crew members listed in the patient record may edit all fields in the record. ESO Suite administrators and personnel with security roles of either
EHR SupervisororEHR Managercan edit non-clinical fields.MobileThe patient record exists on the mobile device, and has not been synchronized with the ESO Suite database. ESO Suite administrators, personnel with security roles of either
EHR SupervisororEHR Manager, and all crew members listed in the patient record can only access a print view of the record.Once the Mobile record synchronizes with the ESO Suite database. the record reflects its current status.
LockedThe patient record exists in the ESO Suite database, and is locked. Only non-clinical fields can be edited by crew members listed in the patient record, ESO Suite administrators and personnel with security roles of either
EHR SupervisororEHR Manager.
-
-
 (If you have not done so already) Add a new patient record, or search for the existing patient record you want to work with.
Information on adding or opening a patient record is available in Add a patient record and Search for a patient record.
The patient record opens and displays the Incident tab, with the Response bookmark selected in the left pane. Fields appear in the right pane for specifying basic information about the incident
If you manually created a new patient record, the Incident Number and State Tracking Number fields populate automatically with ESO Suite-assigned values. You must enter data in all other required fields.
If you imported data from a CAD system, the Incident Number field populates with the data from that source. Other fields in the EHR module may also populate from these sources, depending on what data was recorded in them before the data was imported into the EHR module.
-
At the top of the page, click the Forms tab.
The contents of the Forms tab appear, listing all the forms your ESO Suite administrator has enabled in the Admin module.
-
Click Trauma Criteria.
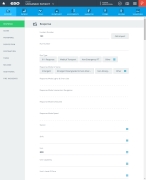
The Trauma Criteria dialog box appears.
-
For the following fields, click None, or click the list icon to the right of the field, select all the appropriate options from the menu that appears, then click OK or click outside the menu, based on the screening criteria below.
Field Information needed Anatomical
A general description of the injury type and part of the body that sustained the injury.
Example: Penetrating injuries to the torso, fractures to proximal long-bones, open or depressed fractures to the skull, deformity of the chest wall
Mechanical
How the trauma and its associated forces directly or indirectly impacted the patient.
Example: Falls, motor vehicle intrusion or ejection
Physiologic
How the trauma affected the normal function of the patient's body.
Example: Elevated hear rate, low systolic blood pressure, a poor Glascow Coma Scale rating, respiration rate too slow or too fast.
Other Risk Factors
Any extenuating patient conditions, injuries, or contraindications the EMS personnel must consider when treating the patient for trauma.
Example: Pediatric or advanced age, pregnancy greater than three months, bleeding disorders, environmental factors
-
For Trauma Level, click the field or the list icon to the right of the field, then select the appropriate single option from the menu that appears to indicate the life-threatening level of the patient's injuries.
-
Level I (life-threatening): The patient meets mechanism of injury criteria, with unstable vital signs or potential life threatening injuries.
-
Level II (potentially life-threatening): The patient meets mechanism of injury criteria with stable vital signs, pre-hospital and upon arrival.
-
Level III (no obvious life-threatening injuries): The patient meets mechanism of injury criteria with stable vital signs and no obvious life threatening injuries.
-
-
 (If necessary) Activate a trauma team and request a referral.
-
For Trauma Activation, click Yes or No to indicate whether or not the EMS personnel requested that the trauma team be notified at the destination facility, to be on standby for the incoming patient.
If you click Yes, the Activation Time and Date fields appear.
-
(If it appears) For Activation Time, click the number pad icon to the right of the field, then enter the appropriate numerical values from the number pad dialog box that appears to record what time the EMS personnel requested a trauma team activation.
-
(If it appears) For Date, click the calendar icon on the right end of the field and select the appropriate date from the calendar that appears to record the date the EM personnel requested a trauma team activation.
-
For Trauma Referral Center Notified, click Yes or No to indicate whether or not the EMS personnel determined that the patient needed a trauma center destination, and requested a trauma center referral for the patient.
-
Note: This field appears in the EHR module only if your ESO Suite administrator enabled it in the Admin module, under EHR > Forms Tab > Configurable fields.
-
For Trauma Referral Center Destination Recommendation, click the field or the list icon to the right of the field, then select the appropriate single option from the menu that appears to indicate which trauma center the patient was directed to by the trauma referral center.
-
-
Click OK.
The dialog box closes, and a green triangle appears in the upper right corner of the form button, to indicate that data exists in this form.


