Obstetrical
Obstetrical refers to anything relating to childbirth and the processes associated with it, such as pregnancy, labor, deliver, and APGAR score for newly delivered infants.
-
 (If you have not done so already) Access the EHR module in the ESO Suite.
-
Do one of the following.
-
(If you are already working in the ESO Suite) Click the Home icon in the upper left corner of the screen.
-
 (If you have not yet logged in) Log in to the ESO Suite.
-
In a web browser, go to https://www.esosuite.net/EsoSuite.
The ESO Suite login screen appears.
-
Enter your user name, password, and agency name, then click Let's Go.
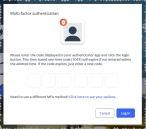
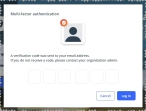
If MFA is enabled, the Multi-factor authentication dialog box appears, displaying one or more methods you can use to verify your login credentials. The number of methods that appear in the dialog box depends on what MFA methods your ESO Suite administrators enabled in the Admin module.

Click graphics
to open them.Information on enabling MFA and specific MFA methods is available in the Admin module online help, in Configure multiple-factor authentication.
Note: If your ESO Suite administrators have disabled MFA ("opted-out"), this dialog does not appear.
-
(If the Multi-factor authentication dialog box appears) Depending on which buttons appear in the dialog box, verify your login in one of the following ways.
 With an authenticator application.
-
Click MFA verification via authenticator app.
The dialog box updates with boxes for entering the numbers of the authentication code, and the ESO Suite sends an authentication code to the authenticator application installed on your device.
-
Open your authenticator application and note the authentication code currently displayed.
-
Enter the authentication code displayed in the authenticator application.
-
Click Log In.
 With a text message (SMS).
-
Click MFA verification via SMS.
The dialog box updates with boxes for entering the numbers of the authentication code, and the ESO Suite sends an authentication code to the phone number recorded in your PM records and identified with MFA codes.
-
Enter the authentication code sent to your MFA-registered phone number.
-
Click Log In.
 With an email message.
-
Click MFA verification via email.
The dialog box updates with boxes for entering the numbers of the authentication code, and the ESO Suite sends an authentication code to your agency or department email address, recorded in your PM records.
-
Enter the authentication code sent to your agency or department email address.
-
Click Log In.
-
-
The ESO Suite landing screen appears.

Click graphics
to open them.Note: If MFA is enabled, you can access and manage your MFA options through the PM module, on the Settings > Account page, as described in Manage a user account. If your agency or department has enabled MFA but has not purchased the full-featured version of the PM module, you can access your own MFA settings by clicking Change my Multi-Factor Authentication settings on the landing screen, then using the Settings > Account page that appears. If your agency has not enabled MFA, the Change my Multi-Factor Authentication settings link does not appear on the landing screen.
-
-
On the top side of the home screen, click EHR.
Tip: If your screen or browser window is too narrow to display all your agency's ESO Suite module icons, an options icon appears on the right side of the icon bar. If you click the options icon, a menu appears containing additional module icons.
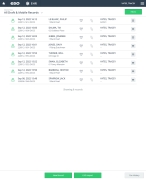
The EHR screen appears, displaying a list of patient records in the EHR module. The most-recent records appear at the top of the list.
Different record status icons can appear in the list.
Icon Status Unlocked/DraftThe patient record exists in the ESO Suite database, and all crew members listed in the patient record may edit all fields in the record. ESO Suite administrators and personnel with security roles of either
EHR SupervisororEHR Managercan edit non-clinical fields.MobileThe patient record exists on the mobile device, and has not been synchronized with the ESO Suite database. ESO Suite administrators, personnel with security roles of either
EHR SupervisororEHR Manager, and all crew members listed in the patient record can only access a print view of the record.Once the Mobile record synchronizes with the ESO Suite database. the record reflects its current status.
LockedThe patient record exists in the ESO Suite database, and is locked. Only non-clinical fields can be edited by crew members listed in the patient record, ESO Suite administrators and personnel with security roles of either
EHR SupervisororEHR Manager.
-
-
 (If you have not done so already) Add a new patient record, or search for the existing patient record you want to work with.
Information on adding or opening a patient record is available in Add a patient record and Search for a patient record.
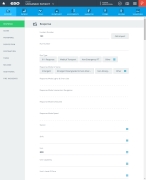
The patient record opens and displays the Incident tab, with the Response bookmark selected in the left pane. Fields appear in the right pane for specifying basic information about the incident
If you manually created a new patient record, the Incident Number and State Tracking Number fields populate automatically with ESO Suite-assigned values. You must enter data in all other required fields.
If you imported data from a CAD system, the Incident Number field populates with the data from that source. Other fields in the EHR module may also populate from these sources, depending on what data was recorded in them before the data was imported into the EHR module.
-
At the top of the page, click the Forms tab.
The contents of the Forms tab appear, listing all the forms your ESO Suite administrator has enabled in the Admin module.
-
Click Obstetrical.
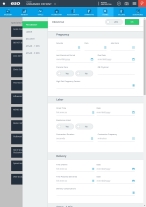
The Obstetrical dialog box appears, with the Pregnancy bookmark selected in the left pane.
-
Record the treatment data in one of these ways.
 Record the obstetrical data.
-
 Collect pregnancy data.
Pregnancy is the time during which a fetus (or multiple fetuses) develops (gestates) inside a woman's uterus (womb).
-
For the following fields, click the number pad icon to the right of the field, then enter the appropriate numerical values from the number pad dialog box that appears.
Field Information needed Gravida
The number of times the patient has been pregnant.
Para
The number of times the patient has carried a fetus (or multiple fetuses) to a viable stage.
Abortions
The number of times the patient has had a procedure to end a pregnancy, either by taking medicines or having a surgical procedure.
-
For the following fields, click the calendar icon on the right end of the field and select the appropriate date from the calendar that appears.
Field Information needed Last Menstrual Period
The date the last time the patient had a pre-pregnancy menstruation.
The menstrual cycle is the monthly series of changes a woman's body goes through in preparation for the possibility of pregnancy. If the woman does not become pregnant during this cycle, the lining of the uterus sheds through the vagina. This is a menstrual period.
Due Date
The due date is the date that spontaneous onset of labor is expected to occur, based on a 38-week gestation process.
Note: A due date is an anticipated date, but is not a hard-and-fast date. A pregnancy is considered full term anywhere from 37 and 42 weeks.
-
For Prenatal Care, click Yes or No to indicate whether or not the patient was having regular checkups from a doctor, nurse, or midwife throughout the pregnancy.
-
In OB Physician, type the name of the obstetrician the patient was seeing as part of their prenatal care.
An obstetrician is a physician that specializes in caring for women during pregnancy, delivering babies, and caring for women after they give birth. They treat medical conditions unique to pregnancy, and perform surgeries related to labor and delivery.
-
For High Risk Pregnancy Factors, click the list icon to the right of the field, select all the appropriate options from the menu that appears, then click OK or click outside the menu to list any health conditions the patient has that may cause the current pregnancy to be of higher risk than normal.
Example: Gestational diabetes, advanced maternal age, vaginal bleeding
-
-
 Provide labor information.
Labor is a series of continuous, progressive contractions of the uterus that help the cervix dilate and efface (thin out). These contractions slowly pushes the fetus through the birth canal.
-
In the left pane, click the Labor bookmark.
The right pane scrolls down to the top of the Labor section of the page.
-
For Onset Time, click the number pad icon to the right of the field, then enter the appropriate numerical values from the number pad dialog box that appears for the time the patient or EMS personnel notice contractions are occurring.
-
For Date, click the calendar icon on the right end of the field and select the appropriate date from the calendar that appears for the date the patient or EMS personnel notice contractions are occurring.
-
For Membrane Intact, click Yes or No to indicate whether the patient's fetal membranes are intact or have ruptured.
The fetal membranes line the internal surface of the pregnant uterus and are critically important for maintaining the conditions needed for fetal health. When a hole or tear forms in these membranes, it's called a rupture of the membranes. Most women describe this by saying their "water broke."
-
For the following fields, click the number pad icon to the right of the field, then enter the appropriate numerical values from the number pad dialog box that appears.
Field Information needed Contraction Duration
The length of time from when the patient first feels a contraction until it is over, measured in seconds.
Contraction Frequency
The length of time from the start of one contraction to the start of the next, measured in minutes.
Frequency includes the contraction as well as the rest period until the next contraction begins.
-
-
 Document delivery of the infant..
-
In the left pane, click the Delivery bookmark.
The right pane scrolls down to the top of the Delivery section of the page.
-
For Time of Birth, click the number pad icon to the right of the field, then enter the appropriate numerical values from the number pad dialog box that appears for the time the infant was born.
-
For Date, click the calendar icon on the right end of the field and select the appropriate date from the calendar that appears for the date the infant was born.
-
For Time of Placenta Delivered, click the number pad icon to the right of the field, then enter the appropriate numerical values from the number pad dialog box that appears for the time the placenta was expelled.
The placenta is a temporary organ that forms in your uterus during pregnancy. It attaches to your uterine wall and provides nutrients and oxygen to your baby through the umbilical cord. If the baby is delivered vaginally, the uterus continues to contract to expel the placenta. The placenta is usually delivered between five and 30 minutes after the baby is born. This is called the afterbirth, or the third stage of labor.
-
For Date, click the calendar icon on the right end of the field and select the appropriate date from the calendar that appears for the date the placenta was expelled.
-
For Delivery Complications, click the list icon to the right of the field, select all the appropriate options from the menu that appears, then click OK or click outside the menu to list any challenges that occurred during the delivery process.
Example: Breech presentation, prolapsed umbilical cord, uncontrolled bleeding
-
-
 Record the infant's APGAR scores at one minute from birth.
-
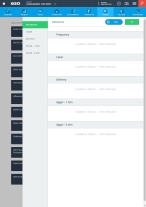
In the left pane, click the APGAR - 1 Min bookmark.
Note: This bookmark and section appears in the dialog box only if your ESO Suite administrator enabled it in the Admin module, underEHR > Forms Tab > Configurable fields.
APGAR is a quick test performed on a baby at 1 and 5 minutes after birth. The 1-minute score determines how well the baby tolerated the birthing process.
The right pane scrolls down to the top of the APGAR - 1 Min section of the page.
APGAR scores range from zero to two for each measured condition, with a maximum final total score of ten. A 1-minute score between seven and ten indicates that the baby will need only routine post-delivery care. Scores between four and six indicate that the baby may need some breathing some assistance.
As you select scores for each component of the APGAR test, the numerical counter in the 1 Minute - Score box at the bottom of the section updates accordingly.
-
For Time Performed, click the number pad icon to the right of the field, then enter the appropriate numerical values from the number pad dialog box that appears for the time you performed the APGAR test.
-
For Date, click the calendar icon on the right end of the field and select the appropriate date from the calendar that appears for the date you performed the APGAR test.
-
For Activity, click No Response, Some Motion, or Cry to indicate the infant's muscle tone and physical response to their new environment.
-
For the following fields, click the field or the list icon to the right of the field, then select the appropriate single option from the menu that appears.
Field Information needed Pulse
The number of beats per minute in by infant's heart rate.
Grimace
The infant's response to stimulation (their "reflex irritability"), which may include. sneezing, coughing, facial movement, crying, or pulling away from
Appearance
The color of the infant's skin across their body, hands, and feet.
Respiration
The infant's breathing rate and effort, often including crying.
-
-
 Record the infant's APGAR scores at five minutes from birth.
-
In the left pane, click the APGAR - 5 Min bookmark.
Note: This bookmark and section appears in the dialog box only if your ESO Suite administrator enabled it in the Admin module, underEHR > Forms Tab > Configurable fields.
The right pane scrolls down to the top of the APGAR - 5 Min section of the page.
APGAR is a quick test performed on a baby at 1 and 5 minutes after birth. The 5-minute score tells the health care provider how well the baby is doing outside the mother's womb.
As you select scores for each component of the APGAR test, the numerical counter in the 5 Minute - Score box at the bottom of the section updates accordingly.
-
For Time Performed, click the number pad icon to the right of the field, then enter the appropriate numerical values from the number pad dialog box that appears for the time you performed the APGAR test.
-
For Date, click the calendar icon on the right end of the field and select the appropriate date from the calendar that appears for the date you performed the APGAR test.
-
For Activity, click No Response, Some Motion, or Cry to indicate the infant's muscle tone and physical response to their new environment.
-
For the following fields, click the field or the list icon to the right of the field, then select the appropriate single option from the menu that appears.
Field Information needed Pulse
The number of beats per minute in by infant's heart rate.
Grimace
The infant's response to stimulation (their "reflex irritability"), which may include. sneezing, coughing, facial movement, crying, or pulling away from
Appearance
The color of the infant's skin across their body, hands, and feet.
Respiration
The infant's breathing rate and effort, often including crying.
-
-
-
Click OK.
The dialog box closes, and a green triangle appears in the upper right corner of the form button, to indicate that data exists in this form.

