MEND stroke exam
The MEND stroke exam provides a baseline exam in the pre-hospital setting, and is used in subsequent exams in the ED, ICU, or on the hospital floor. The MEND exam incorporates all three components of the CPSS, and six additional components from the NIHSS (level of consciousness, orientation, commands, visual fields, gaze, leg motor, limb ataxia, sensation).
-
 (If you have not done so already) Access the EHR module in the ESO Suite.
-
Do one of the following.
-
(If you are already working in the ESO Suite) Click the Home icon in the upper left corner of the screen.
-
 (If you have not yet logged in) Log in to the ESO Suite.
-
In a web browser, go to https://www.esosuite.net/EsoSuite.
The ESO Suite login screen appears.
-
Enter your user name, password, and agency name, then click Let's Go.
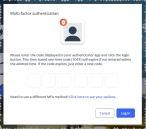
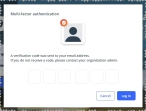
If MFA is enabled, the Multi-factor authentication dialog box appears, displaying one or more methods you can use to verify your login credentials. The number of methods that appear in the dialog box depends on what MFA methods your ESO Suite administrators enabled in the Admin module.

Click graphics
to open them.Information on enabling MFA and specific MFA methods is available in the Admin module online help, in Configure multiple-factor authentication.
Note: If your ESO Suite administrators have disabled MFA ("opted-out"), this dialog does not appear.
-
(If the Multi-factor authentication dialog box appears) Depending on which buttons appear in the dialog box, verify your login in one of the following ways.
 With an authenticator application.
-
Click MFA verification via authenticator app.
The dialog box updates with boxes for entering the numbers of the authentication code, and the ESO Suite sends an authentication code to the authenticator application installed on your device.
-
Open your authenticator application and note the authentication code currently displayed.
-
Enter the authentication code displayed in the authenticator application.
-
Click Log In.
 With a text message (SMS).
-
Click MFA verification via SMS.
The dialog box updates with boxes for entering the numbers of the authentication code, and the ESO Suite sends an authentication code to the phone number recorded in your PM records and identified with MFA codes.
-
Enter the authentication code sent to your MFA-registered phone number.
-
Click Log In.
 With an email message.
-
Click MFA verification via email.
The dialog box updates with boxes for entering the numbers of the authentication code, and the ESO Suite sends an authentication code to your agency or department email address, recorded in your PM records.
-
Enter the authentication code sent to your agency or department email address.
-
Click Log In.
-
-
The ESO Suite landing screen appears.

Click graphics
to open them.Note: If MFA is enabled, you can access and manage your MFA options through the PM module, on the Settings > Account page, as described in Manage a user account. If your agency or department has enabled MFA but has not purchased the full-featured version of the PM module, you can access your own MFA settings by clicking Change my Multi-Factor Authentication settings on the landing screen, then using the Settings > Account page that appears. If your agency has not enabled MFA, the Change my Multi-Factor Authentication settings link does not appear on the landing screen.
-
-
On the top side of the home screen, click EHR.
Tip: If your screen or browser window is too narrow to display all your agency's ESO Suite module icons, an options icon appears on the right side of the icon bar. If you click the options icon, a menu appears containing additional module icons.
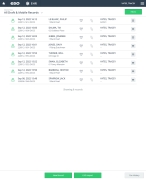
The EHR screen appears, displaying a list of patient records in the EHR module. The most-recent records appear at the top of the list.
Different record status icons can appear in the list.
Icon Status Unlocked/DraftThe patient record exists in the ESO Suite database, and all crew members listed in the patient record may edit all fields in the record. ESO Suite administrators and personnel with security roles of either
EHR SupervisororEHR Managercan edit non-clinical fields.MobileThe patient record exists on the mobile device, and has not been synchronized with the ESO Suite database. ESO Suite administrators, personnel with security roles of either
EHR SupervisororEHR Manager, and all crew members listed in the patient record can only access a print view of the record.Once the Mobile record synchronizes with the ESO Suite database. the record reflects its current status.
LockedThe patient record exists in the ESO Suite database, and is locked. Only non-clinical fields can be edited by crew members listed in the patient record, ESO Suite administrators and personnel with security roles of either
EHR SupervisororEHR Manager.
-
-
 (If you have not done so already) Add a new patient record, or search for the existing patient record you want to work with.
Information on adding or opening a patient record is available in Add a patient record and Search for a patient record.
The patient record opens and displays the Incident tab, with the Response bookmark selected in the left pane. Fields appear in the right pane for specifying basic information about the incident
If you manually created a new patient record, the Incident Number and State Tracking Number fields populate automatically with ESO Suite-assigned values. You must enter data in all other required fields.
If you imported data from a CAD system, the Incident Number field populates with the data from that source. Other fields in the EHR module may also populate from these sources, depending on what data was recorded in them before the data was imported into the EHR module.
-
At the top of the page, click the Forms tab.
The contents of the Forms tab appear, listing all the forms your ESO Suite administrator has enabled in the Admin module.
-
Click MEND Stroke Exam.
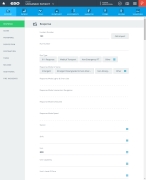
The MEND Stroke Exam dialog box appears, with the Onset bookmark selected in the left pane.
-
Record the MEND stroke exam findings in one of these ways.
 Record the MEND stroke exam data.
-
For Time Performed, click the number pad icon to the right of the field, then enter the appropriate numerical values from the number pad dialog box that appears for the time you evaluated the patient using the MEND stroke scale.
Note: This field appears in the EHR module only if your ESO Suite administrator enabled it in the Admin module, under EHR > Forms Tab > Configurable fields.
Information on enabling EHR fields is available in the Admin module online help, in Configure tabs.
-
For Date, click the calendar icon on the right end of the field and select the appropriate date from the calendar that appears for the date you evaluated the patient using the MEND stroke scale.
Note: This field appears in the EHR module only if your ESO Suite administrator enabled the Time Performed field in the Admin module, under EHR > Forms Tab > Configurable fields.
-
 Record stroke onset information.
-
For Onset Time, click the number pad icon to the right of the field, then enter the appropriate numerical values from the number pad dialog box that appears for the time someone noticed the patient experiencing stroke symptoms.
-
For Date, click the calendar icon on the right end of the field and select the appropriate date from the calendar that appears for the date someone noticed the patient experiencing stroke symptoms.
-
For Last Known Well, click the number pad icon to the right of the field, then enter the appropriate numerical values from the number pad dialog box that appears for the time someone last knew the patient was well, before the stroke occurred.
Note: This field appears in the EHR module only if your ESO Suite administrator enabled it in the Admin module, under EHR > Forms Tab > Configurable fields.
Information on enabling EHR fields is available in the Admin module online help, in Configure tabs.
-
For Date, click the calendar icon on the right end of the field and select the appropriate date from the calendar that appears for the date someone last knew the patient was well, before the stroke occurred.
Note: This field appears in the EHR module only if your ESO Suite administrator enabled the Last Known Well field in the Admin module, under EHR > Forms Tab > Configurable fields.
-
-
 Note the mental status of the patient
The mental status examination is an assessment of the patient's current mental capacity through evaluation of consciousness, behavior, and cerebral function.
-
In the left pane, click the Mental Status bookmark.
The right pane scrolls down to the top of the Mental Status section of the page.
-
For Level of Consciousness, click the field or the list icon to the right of the field, then select the appropriate single option from the menu that appears to indicate the degree of consciousness the patient exhibits.
Example: Patient alert, responds to voice, responds to pain, does not respond
-
For the following fields, click Normal or Abnormal to indicate the patient's cognitive abilities.
Field Information needed Questions
The patient's ability to understand questions without confusion.
Commands
The patient's ability to follow directions without confusion.
Speech
The patient's ability to speak and articulate words clearly.
-
-
 Catalog any facial or eye changes.
The cranial nerves are a set of 12 paired nerves in the back of the brain. Cranial nerves send electrical signals between the brain, face, neck, and torso, helping you taste, smell, hear and feel sensations. They also help you make facial expressions, blink your eyes and move your tongue.
-
In the left pane, click the Cranial Nerves bookmark.
The right pane scrolls down to the top of the Cranial Nerves section of the page.
-
For the following fields, click Normal, or click the list icon to the right of the field, select all the appropriate options from the menu that appears, then click OK or click outside the menu to indicate any malfunctioning of the cranial nerves.
Field Criteria for Normal Facial Droop
The patient's face moves symmetrically on both sides when they smile.
Visual Fields
The patient has not lost an area of vision in their visual field. Vision field loss usually occurs on the same side as any weakness in the face, arms or legs.
Horizontal Gaze
The patient's eyes can follow an object from side to side, equally well in both directions, without turning their head.
-
-
 Analyze the patient's limb functions.
The cerebellum is located behind the brain stem and is responsible for fine motor movement, balance, and the brain’s ability to determine limb position. A stroke in this area of the brain can lead to paralysis or “jerky” muscle movements.
-
In the left pane, click the Limbs bookmark.
The right pane scrolls down to the top of the Limbs section of the page.
-
For the following fields, click Normal, or click the list icon to the right of the field, select all the appropriate options from the menu that appears, then click OK or click outside the menu to indicate any malfunctioning of the cranial nerves.
Field Criteria for Normal Arm Drift
The patient can close their eyes and hold both arms out with palms up for 10 seconds, or whether one arm drifts down compared to the other arm.
Leg Drift
The patient can stand on one leg, then the other, for five seconds, without the raised leg drifting downwards.
Sensory
The patient has full tactile sensation (touch) or proprioception (awareness of body position). Sensory deficits can include the reduced ability to feel touch, pain, temperature, position, balance, weight bearing and load detection.
This in turns affects the ability to recognize objects you are holding. It can also reduce the ability to discriminate textures, weights, shapes, and sizes, to grasp and manipulate objects without vision. It can also affect gait symmetry, particularly in the push-off phase, which influences variance in stride length, gait speed, and walking endurance.
Coordination
The patient has full bi-manual grip forces, can hold objects with both hands, and can exchange an object between the hands without the object falling or slipping from the hands. The patient also has full bi-manual weight support, stride length, gait speed, and symmetrical gait pattern and cadence.
-
-
 Indicate whether the stroke symptoms resolved.
-
In the left pane, click the Resolution bookmark.
Note: This bookmark and section appears in the dialog box only if your ESO Suite administrator enabled it in the Admin module, under EHR > Forms Tab > Configurable fields.
The right pane scrolls down to the top of the Resolution section of the page.
-
For Stroke Symptoms Resolved, click the field or the list icon to the right of the field, then select the appropriate single option from the menu that appears to indicate if the patient stopped experiencing stroke symptoms.
-
-
-
Click OK.
The dialog box closes, and a green triangle appears in the upper right corner of the form button, to indicate that data exists in this form.


