CPR - cardiopulmonary resuscitation
Cardiopulmonary resuscitation is an emergency procedure consisting of chest compressions, performed in an attempt to restore the blood circulation, and often combined with artificial ventilation in an effort to manually preserve intact brain function until further measures are taken to restore spontaneous blood circulation and breathing in a person who is in cardiac arrest.
-
 (If you have not done so already) Access the EHR module in the ESO Suite.
-
Do one of the following.
-
(If you are already working in the ESO Suite) Click the Home icon in the upper left corner of the screen.
-
 (If you have not yet logged in) Log in to the ESO Suite.
-
In a web browser, go to https://www.esosuite.net/EsoSuite.
The ESO Suite login screen appears.
-
Enter your user name, password, and agency name, then click Let's Go.
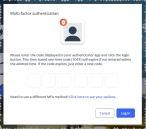
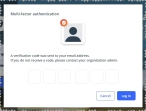
If MFA is enabled, the Multi-factor authentication dialog box appears, displaying one or more methods you can use to verify your login credentials. The number of methods that appear in the dialog box depends on what MFA methods your ESO Suite administrators enabled in the Admin module.

Click graphics
to open them.Information on enabling MFA and specific MFA methods is available in the Admin module online help, in Configure multiple-factor authentication.
Note: If your ESO Suite administrators have disabled MFA ("opted-out"), this dialog does not appear.
-
(If the Multi-factor authentication dialog box appears) Depending on which buttons appear in the dialog box, verify your login in one of the following ways.
 With an authenticator application.
-
Click MFA verification via authenticator app.
The dialog box updates with boxes for entering the numbers of the authentication code, and the ESO Suite sends an authentication code to the authenticator application installed on your device.
-
Open your authenticator application and note the authentication code currently displayed.
-
Enter the authentication code displayed in the authenticator application.
-
Click Log In.
 With a text message (SMS).
-
Click MFA verification via SMS.
The dialog box updates with boxes for entering the numbers of the authentication code, and the ESO Suite sends an authentication code to the phone number recorded in your PM records and identified with MFA codes.
-
Enter the authentication code sent to your MFA-registered phone number.
-
Click Log In.
 With an email message.
-
Click MFA verification via email.
The dialog box updates with boxes for entering the numbers of the authentication code, and the ESO Suite sends an authentication code to your agency or department email address, recorded in your PM records.
-
Enter the authentication code sent to your agency or department email address.
-
Click Log In.
-
-
The ESO Suite landing screen appears.

Click graphics
to open them.Note: If MFA is enabled, you can access and manage your MFA options through the PM module, on the Settings > Account page, as described in Manage a user account. If your agency or department has enabled MFA but has not purchased the full-featured version of the PM module, you can access your own MFA settings by clicking Change my Multi-Factor Authentication settings on the landing screen, then using the Settings > Account page that appears. If your agency has not enabled MFA, the Change my Multi-Factor Authentication settings link does not appear on the landing screen.
-
-
On the top side of the home screen, click EHR.
Tip: If your screen or browser window is too narrow to display all your agency's ESO Suite module icons, an options icon appears on the right side of the icon bar. If you click the options icon, a menu appears containing additional module icons.
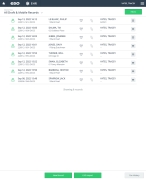
The EHR screen appears, displaying a list of patient records in the EHR module. The most-recent records appear at the top of the list.
Different record status icons can appear in the list.
Icon Status Unlocked/DraftThe patient record exists in the ESO Suite database, and all crew members listed in the patient record may edit all fields in the record. ESO Suite administrators and personnel with security roles of either
EHR SupervisororEHR Managercan edit non-clinical fields.MobileThe patient record exists on the mobile device, and has not been synchronized with the ESO Suite database. ESO Suite administrators, personnel with security roles of either
EHR SupervisororEHR Manager, and all crew members listed in the patient record can only access a print view of the record.Once the Mobile record synchronizes with the ESO Suite database. the record reflects its current status.
LockedThe patient record exists in the ESO Suite database, and is locked. Only non-clinical fields can be edited by crew members listed in the patient record, ESO Suite administrators and personnel with security roles of either
EHR SupervisororEHR Manager.
-
-
 (If you have not done so already) Add a new patient record, or search for the existing patient record you want to work with.
Information on adding or opening a patient record is available in Add a patient record and Search for a patient record.
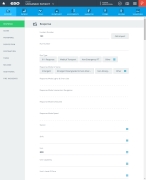
The patient record opens and displays the Incident tab, with the Response bookmark selected in the left pane. Fields appear in the right pane for specifying basic information about the incident
If you manually created a new patient record, the Incident Number and State Tracking Number fields populate automatically with ESO Suite-assigned values. You must enter data in all other required fields.
If you imported data from a CAD system, the Incident Number field populates with the data from that source. Other fields in the EHR module may also populate from these sources, depending on what data was recorded in them before the data was imported into the EHR module.
-
At the top of the page, click the Forms tab.
The contents of the Forms tab appear, listing all the forms your ESO Suite administrator has enabled in the Admin module.
-
Click CPR - Cardiopulmonary Resuscitation.
The CPR - Cardiopulmonary Resuscitation dialog box appears, with the Arrest bookmark selected in the left pane.
-
Record the CPR data in one of these ways.
 Record the cardiac arrest and CPR data.
Cardiac arrest is the abrupt loss of heart function, breathing, and consciousness. The condition usually results from a problem with the heart's electrical system, which disrupts the heart's pumping action and stops blood flow to your body. If not treated immediately, sudden cardiac arrest can lead to death. Survival is possible with fast, appropriate medical care. CPR, using a defibrillator, or simple chest compressions can improve the chances of survival until emergency workers arrive.
-
 Record cardiac arrest information.
-
For Was there a cardiac arrest, click Yes, Prior to EMS Arrival or Yes, Prior to EMS Arrival, depending on when the cardiac rest occurred.
All sections of the CPR - Cardiopulmonary Resuscitation dialog box update to fields and buttons for capturing the patient's arrest and CPR data.
-
For Cardiac Arrest Etiology, click Cardiac (Presumed), Respiratory/Asphyxia, Trauma, or click Other and click the field or the list icon to the right of the field, then select the appropriate single option from the menu that appears to describe the cause of the cardiac arrest.
-
For Estimated Time of Arrest, click 4-6 minutes, 6-8 minutes, 8-10 minutes, or click Other and click the field or the list icon to the right of the field, then select the appropriate single option from the menu that appears to indicate how much time has elapsed since the arrest began.
-
For Pre-arrival CPR Instructions, click Yes, No, or click Unknown to indicate how much time has elapsed since the arrest began.
Pre-arrival instructions are specific instructions or guidance provided by 911 dispatchers or public safety, answering point call-takers to the individuals making the emergency call.
-
For Estimated Time Collapse to 911, click the number pad icon to the right of the field, then enter the appropriate numerical values from the number pad dialog box that appears to specify the amount of time from the patient's collapse from cardiac arrest to someone calling 911.
-
For Estimated Time Collapse to CPR, click the number pad icon to the right of the field, then enter the appropriate numerical values from the number pad dialog box that appears to specify the amount of time from the patient's collapse from cardiac arrest to someone beginning to administer CPR.
-
For Arrest Witnessed By, click Not Witnessed, or click the list icon to the right of the field, select all the appropriate options from the menu that appears, then click OK or click outside the menu. or to list any person who saw the person experiencing cardiac arrest.
Example: Family member, healthcare provider, lay person
-
-
 Capture AED information.
An AED is a medical device that can analyze the heart's rhythm and, if necessary, deliver an electrical shock, or defibrillation, to help the heart re-establish an effective rhythm.
-
In the left pane, click the AED bookmark.
The right pane scrolls down to the top of the Automated External Defibrillator (AED) section of the page.
-
For Applied AED, click Yes or No to indicate whether or not an AED was used on the patient.
-
(If you chose Yes) For Applied By, click Bystander, 1st Responder, other EMS Professional, or click Other and click the field or the list icon to the right of the field, then select the appropriate single option from the menu that appears to identify the person who used the AED on the patient.
-
For Defibrillated, click Yes or No to indicate whether or not the AED application successfully ended the cardiac arrest, and the patient's heart returns to its normal rhythm.
-
-
 Record CPR efforts and results.
CPR is an emergency lifesaving procedure performed when the heart stops beating. Immediate CPR can double or triple chances of survival after cardiac arrest by keeping the blood flow active and extending the opportunity for a successful resuscitation.
-
In the left pane, click the CPR bookmark.
The right pane scrolls down to the top of the Cardiopulmonary Resuscitation (CPR) section of the page.
-
For Resuscitation Attempted, click the list icon to the right of the field, select all the appropriate options from the menu that appears, then click OK or click outside the menu to indicate whether or not someone attempted resuscitation on the patient, and if so, what kind of resuscitation was performed.
Example: Initiated chest compressions, attempted defibrillation, considered futile
-
For Type of CPR, click the list icon to the right of the field, select all the appropriate options from the menu that appears, then click OK or click outside the menu to identify the specific type of CPR performed on the patient.
Example: Continuous compressions, compressions with intermittent ventilation, ventilation mouth to mouth
Note: This field appears in the EHR module only if your ESO Suite administrator enabled it in the Admin module, under EHR > Forms Tab > Configurable fields.
Information on enabling EHR fields is available in the Admin module online help, in Configure tabs.
-
 Specify information about the first CPR attempt.
-
For CPR Initiated By, click 1st Responder, EMS, or click Other and click the field or the list icon to the right of the field, then select the appropriate single option from the menu that appears to identify the person who began CPR on the patient.
-
For Time of 1st CPR, click the number pad icon to the right of the field, then enter the appropriate numerical values from the number pad dialog box that appears for the time the first person began performing CPR on the patient.
-
For Date, click the calendar icon on the right end of the field and select the appropriate date from the calendar that appears for the date the first person began performing CPR on the patient.
-
-
 Include device information.
-
For CPR Feedback, click Yes or No to indicate whether or not the AED provided feedback to the person performing CPR, to improve the CPR being administered in real time.
A CPR feedback device monitors the quality of resuscitation and informs the rescuer about the basic parameters of the manual chest compressions being performed, including chest compression rate and depth, and full chest recoil. The goal of the CPR feedback is to prompt, guide and provide confidence to the rescuer.
-
For Impedance Threshold Device (ITD) Used, click Yes or No to indicate whether or not and the rescuer used an ITD during the CPR.
An inspiratory impedance threshold device is a valve used to decrease intrathoracic pressure and improve venous return to the heart. The valve is a part of a mask or other breathing device, such as an endotracheal tube, and may open at high or low "cracking" pressures.
-
-
 Record when and why resuscitation was stopped.
-
For Resuscitation Discontinued, click the number pad icon to the right of the field, then enter the appropriate numerical values from the number pad dialog box that appears for the time the rescuer stopped trying to resuscitate the patient.
-
For Date, click the calendar icon on the right end of the field and select the appropriate date from the calendar that appears for the date the rescuer stopped trying to resuscitate the patient.
-
For Discontinue Reason, click Protocol Completed, Obvious Signs of Death, DNR, or click Other and click the field or the list icon to the right of the field, then select the appropriate single option from the menu that appears to indicate why CPR resuscitation efforts were stopped.
-
-
-
 Document EMS actions.
Trained EMS providers can provide or take over CPR begun by family members, bystanders, or law enforcement, and continue patient resuscitation with additional equipment and monitoring devices.
-
In the left pane, click the EMS bookmark.
The right pane scrolls down to the top of the Emergency Medical Services (EMS) section of the page.
-
For First Defibrillation By, click Bystander, First Responder, EMS, or click Other and click the field or the list icon to the right of the field, then select the appropriate single option from the menu that appears to indicate who used an AED device to deliver an electrical shock to help the heart re-establish an effective rhythm.
-
For Initial ECG Rhythm, click Asystole, Ventricular Fibrillation, Ventricular Tachycardia, or click Other and click the field or the list icon to the right of the field, then select the appropriate single option from the menu that appears to indicate what type of heartbeat rhythm the patient was experiencing when initially connected to the ECG device.
The rhythm on an ECG refers to what is driving the ventricular rate. Initial ECG rhythm is a predictor of outcomes in cardiac arrest in patients receiving CPR.
-
For Rhythm at Destination, click the list icon to the right of the field, select all the appropriate options from the menu that appears, then click OK or click outside the menu to identify the heartbeat rhythms the patient was experienced while traveling to and when arriving at the destination facility.
-
For Hypothermia Provided, click Yes or No to indicate whether or not mild therapeutic hypothermia was administered if the patient was resuscitated but remained unresponsive.
Therapeutic hypothermia is the intentional use of hypothermia in post-cardiac arrest patients to optimize neurological recovery. Hypothermia is commonly defined as a core temperature that’s less than 95 degrees F (35 degrees C).
-
For End of Event, click Ongoing Resuscitation in ED, Field Pronouncement, Field ROSC, or click Other and click the field or the list icon to the right of the field, then select the appropriate single option from the menu that appears to indicate the patient's condition when EMS turned the patient over to the destination, or why treatment was stopped.
-
-
 (If applicable) Declare ROSC for the patient.
ROSC is the resumption of a sustained heart rhythm that perfuses the body after cardiac arrest, when circulation persists and CPR has ceased for at least 20 consecutive minutes.
-
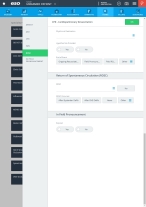
In the left pane, click the ROSC bookmark.
The right pane scrolls down to the top of the Return of Spontaneous Circulation (ROSC) section of the page.
-
For ROSC, click No, or click the list icon to the right of the field, select all the appropriate options from the menu that appears, then click OK or click outside the menu to indicate when ROSC occurred for the patient.
If you selected Yes, At Arrival at the ED or Yes, Prior to ED Arrival, the ROSC Time and Date fields appear. if you selected Yes, Sustained for 20 Consecutive Minutes, the Pulse Present at ER field also appears.
-
(If it appears) For ROSC Time, click the number pad icon to the right of the field, then enter the appropriate numerical values from the number pad dialog box that appears for the time the patient's blood pressure and pulse rate returned to normal.
-
(If it appears) For Date, click the calendar icon on the right end of the field and select the appropriate date from the calendar that appears for the date the patient's blood pressure and pulse rate returned to normal.
-
(If it appears) For Pulse Present at ER, click Yes or No to indicate whether or not the patient had a pulse when the EMS providers transferred the patient to the facility emergency department.
-
For ROSC Occurred, click After Bystander Defib, After EMS Defib, Never, or click Other and click the field or the list icon to the right of the field, then select the appropriate single option from the menu that appears to indicate what triggered the patient's blood pressure and pulse rate returned to normal.
-
-
 Make the in-field pronouncement.
A field pronouncement is the decision made by EMS in the field, that a patient is deceased and either no resuscitative measures will be initiated, or any resuscitation in progress will be stopped.
-
In the left pane, click the In Field Pronouncement bookmark.
The right pane scrolls down to the top of the In Field Pronouncement section of the page.
-
For Expired, click Yes or No to indicate whether or not the patient died before reaching the destination facility.
If you clicked Yes, the Time, Date, an Physician fields appear.
-
(If it appears) For Time, click the number pad icon to the right of the field, then enter the appropriate numerical values from the number pad dialog box that appears for the time the patient is pronounced dead in the field.
-
(If it appears) For Date, click the calendar icon on the right end of the field and select the appropriate date from the calendar that appears for the date the patient is pronounced dead in the field.
-
(If it appears) In Physician, type the name of the doctor or qualified EMS personnel who made the field pronouncement that he patient had expired.
-
-
-
Click OK.
The dialog box closes, and a green triangle appears in the upper right corner of the form button, to indicate that data exists in this form.

