Advanced airway
Airway management is the assessment, planning, and series of medical procedures required to maintain or restore an individual’s ventilation, or breathing. By maintaining an open airway, air can flow from the nose and mouth into the lungs.
Advanced airway management is the subset of airway management that involves advanced training, skill, medical equipment, and invasiveness. It encompasses various techniques performed to create an open or patent airway—a clear path between a patient's lungs and the outside world. Obstructions can be caused by many things, including the patient's own tongue or other anatomical components of the airway, foreign bodies, excessive amounts of blood and body fluids, or aspiration of food particles.
-
 (If you have not done so already) Access the EHR module in the ESO Suite.
-
Do one of the following.
-
(If you are already working in the ESO Suite) Click the Home icon in the upper left corner of the screen.
-
 (If you have not yet logged in) Log in to the ESO Suite.
-
In a web browser, go to https://www.esosuite.net/EsoSuite.
The ESO Suite login screen appears.
-
Enter your user name, password, and agency name, then click Let's Go.
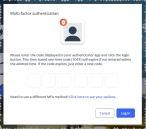
If MFA is enabled, the Multi-factor authentication dialog box appears, displaying one or more methods you can use to verify your login credentials. The number of methods that appear in the dialog box depends on what MFA methods your ESO Suite administrators enabled in the Admin module.

Click graphics
to open them.Information on enabling MFA and specific MFA methods is available in the Admin module online help, in Configure multiple-factor authentication.
Note: If your ESO Suite administrators have disabled MFA ("opted-out"), this dialog does not appear.
-
(If the Multi-factor authentication dialog box appears) Depending on which buttons appear in the dialog box, verify your login in one of the following ways.
 With an authenticator application.
-
Click MFA verification via authenticator app.
The dialog box updates with boxes for entering the numbers of the authentication code, and the ESO Suite sends an authentication code to the authenticator application installed on your device.
-
Open your authenticator application and note the authentication code currently displayed.
-
Enter the authentication code displayed in the authenticator application.
-
Click Log In.
 With a text message (SMS).
-
Click MFA verification via SMS.
The dialog box updates with boxes for entering the numbers of the authentication code, and the ESO Suite sends an authentication code to the phone number recorded in your PM records and identified with MFA codes.
-
Enter the authentication code sent to your MFA-registered phone number.
-
Click Log In.
 With an email message.
-
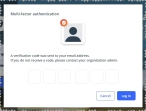
Click MFA verification via email.
The dialog box updates with boxes for entering the numbers of the authentication code, and the ESO Suite sends an authentication code to your agency or department email address, recorded in your PM records.
-
Enter the authentication code sent to your agency or department email address.
-
Click Log In.
-
-
The ESO Suite landing screen appears.

Click graphics
to open them.Note: If MFA is enabled, you can access and manage your MFA options through the PM module, on the Settings > Account page, as described in Manage a user account. If your agency or department has enabled MFA but has not purchased the full-featured version of the PM module, you can access your own MFA settings by clicking Change my Multi-Factor Authentication settings on the landing screen, then using the Settings > Account page that appears. If your agency has not enabled MFA, the Change my Multi-Factor Authentication settings link does not appear on the landing screen.
-
-
On the top side of the home screen, click EHR.
Tip: If your screen or browser window is too narrow to display all your agency's ESO Suite module icons, an options icon appears on the right side of the icon bar. If you click the options icon, a menu appears containing additional module icons.
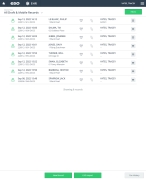
The EHR screen appears, displaying a list of patient records in the EHR module. The most-recent records appear at the top of the list.
Different record status icons can appear in the list.
Icon Status Unlocked/DraftThe patient record exists in the ESO Suite database, and all crew members listed in the patient record may edit all fields in the record. ESO Suite administrators and personnel with security roles of either
EHR SupervisororEHR Managercan edit non-clinical fields.MobileThe patient record exists on the mobile device, and has not been synchronized with the ESO Suite database. ESO Suite administrators, personnel with security roles of either
EHR SupervisororEHR Manager, and all crew members listed in the patient record can only access a print view of the record.Once the Mobile record synchronizes with the ESO Suite database. the record reflects its current status.
LockedThe patient record exists in the ESO Suite database, and is locked. Only non-clinical fields can be edited by crew members listed in the patient record, ESO Suite administrators and personnel with security roles of either
EHR SupervisororEHR Manager.
-
-
 (If you have not done so already) Add a new patient record, or search for the existing patient record you want to work with.
Information on adding or opening a patient record is available in Add a patient record and Search for a patient record.
The patient record opens and displays the Incident tab, with the Response bookmark selected in the left pane. Fields appear in the right pane for specifying basic information about the incident
If you manually created a new patient record, the Incident Number and State Tracking Number fields populate automatically with ESO Suite-assigned values. You must enter data in all other required fields.
If you imported data from a CAD system, the Incident Number field populates with the data from that source. Other fields in the EHR module may also populate from these sources, depending on what data was recorded in them before the data was imported into the EHR module.
-
At the top of the page, click the Forms tab.
The contents of the Forms tab appear, listing all the forms your ESO Suite administrator has enabled in the Admin module.
-
Click Advanced Airway.
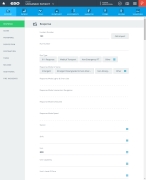
The Advanced Airway dialog box appears, with the Details bookmark selected in the left pane.
-
 Collect airway details.
-
For Time Intubation Abandoned, click the number pad icon to the right of the field, then enter the appropriate numerical values from the number pad dialog box that appears for the time you stopped trying to intubate the patient.
Intubation the insertion of a breathing tube into the trachea (windpipe).
Note: This field appears in the EHR module only if your ESO Suite administrator enabled it in the Admin module, under EHR > Forms Tab > Configurable fields.
Information on enabling EHR fields is available in the Admin module online help, in Configure tabs.
-
For Date, click the calendar icon on the right end of the field and select the appropriate date from the calendar that appears for the date you stopped trying to intubate the patient.
Note: This field appears in the EHR module only if your ESO Suite administrator enabled the Time Intubation Abandoned field in the Admin module, under EHR > Forms Tab > Configurable fields.
-
For the following fields, click the list icon to the right of the field, select all the appropriate options from the menu that appears, then click OK or click outside the menu.
Field Information needed Indications
A list of indications that the patient needs a surgical management technique for their airway assistance.
Example: Injury involving the airway, apnea/agonal respirations, ventilatory effort is compromised
Monitoring Devices
A list of any devices used on the patient to monitor their condition.
Example: Airflow monitor, ECG monitor, EtCO2 monitor
Rescue Devices
A list of any airway equipment used when other airway management methods fail, or as the initial method when the patient is too ill and iatrogenic injury will occur due to further delays in oxygenation and ventilation.
Example: Needle jet ventilation, cricothyroidotomy, combitude/King airway
Reasons for Failed Intubation
A list of reasons why intubation was not successful and you needed to use advanced airway techniques on the patient.
Example: Equipment failure, jaw clenched, facial or oral trauma
-
-
 Determine the Mallampati classification of the patient's airway.
The Mallampati classification predicts the ease of endotracheal intubation, using a visual assessment of the distance from the tongue base to the roof of the mouth, and the amount of space in which there is to work. It is an indirect assessment of the intubation difficulty. A high Mallampati score (class 3 or 4) is associated with more difficult intubation.
-
In the left pane, click the Mallampati bookmark.
The right pane scrolls down to the top of the Mallampati section of the page.
-
Assess the patient's oral cavity, then click Class 1, Class 2, Class 3, or Class 4 to correspond with your assessment.
-
Class 1: The soft palate, uvula, fauces, and pillars are visible.
-
Class 2: The soft palate, major part of uvula, and fauces are visible.
-
Class 3: The soft palate and the base of uvula are visible.
-
Class 4: Only the hard palate is visible.
-
-
-
 Grade the patient's airway opening.
Airway grading is assessing what you see in the posterior pharynx with a laryngoscope. It is a more accurate measure of how much trouble you will passing a tube, and is evaluated with a Cormack-Lehane Score. I is regarded as a more accurate way of predicting the actual difficulty of intubating a patient, and helps document how tough the airway really is.
-
In the left pane, click the Mallampati bookmark.
The right pane scrolls down to the top of the Mallampati section of the page.
-
Position the laryngoscope and assess the patient's oral cavity, then click Grade 1, Grade 2, Grade 3, or Grade 4 to correspond with your assessment.
-
Grade 1: The entire glottis is visible.
-
Grade 2: Part of the glottis is visible.
-
Grade 3: Only the epiglottis is visible.
-
Grade 4: The epiglottis is not visible.
-
-
-
Click OK.
The dialog box closes, and a green triangle appears in the upper right corner of the form button, to indicate that data exists in this form.


