Add, edit, or delete treatments
ESO flowcharts are interventions (treatments) performed on the patient, through ether procedures or medications. It is important to track the treatments performed on the patient, to keep a complete medical history and prevent negative medication interactions.
-
 (If you have not done so already) Access the EHR module in the ESO Suite.
-
Do one of the following.
-
(If you are already working in the ESO Suite) Click the Home icon in the upper left corner of the screen.
-
 (If you have not yet logged in) Log in to the ESO Suite.
-
In a web browser, go to https://www.esosuite.net/EsoSuite.
The ESO Suite login screen appears.
-
Enter your user name, password, and agency name, then click Let's Go.
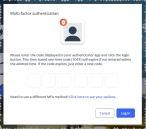
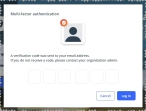
If MFA is enabled, the Multi-factor authentication dialog box appears, displaying one or more methods you can use to verify your login credentials. The number of methods that appear in the dialog box depends on what MFA methods your ESO Suite administrators enabled in the Admin module.

Click graphics
to open them.Information on enabling MFA and specific MFA methods is available in the Admin module online help, in Configure multiple-factor authentication.
Note: If your ESO Suite administrators have disabled MFA ("opted-out"), this dialog does not appear.
-
(If the Multi-factor authentication dialog box appears) Depending on which buttons appear in the dialog box, verify your login in one of the following ways.
 With an authenticator application.
-
Click MFA verification via authenticator app.
The dialog box updates with boxes for entering the numbers of the authentication code, and the ESO Suite sends an authentication code to the authenticator application installed on your device.
-
Open your authenticator application and note the authentication code currently displayed.
-
Enter the authentication code displayed in the authenticator application.
-
Click Log In.
 With a text message (SMS).
-
Click MFA verification via SMS.
The dialog box updates with boxes for entering the numbers of the authentication code, and the ESO Suite sends an authentication code to the phone number recorded in your PM records and identified with MFA codes.
-
Enter the authentication code sent to your MFA-registered phone number.
-
Click Log In.
 With an email message.
-
Click MFA verification via email.
The dialog box updates with boxes for entering the numbers of the authentication code, and the ESO Suite sends an authentication code to your agency or department email address, recorded in your PM records.
-
Enter the authentication code sent to your agency or department email address.
-
Click Log In.
-
-
The ESO Suite landing screen appears.

Click graphics
to open them.Note: If MFA is enabled, you can access and manage your MFA options through the PM module, on the Settings > Account page, as described in Manage a user account. If your agency or department has enabled MFA but has not purchased the full-featured version of the PM module, you can access your own MFA settings by clicking Change my Multi-Factor Authentication settings on the landing screen, then using the Settings > Account page that appears. If your agency has not enabled MFA, the Change my Multi-Factor Authentication settings link does not appear on the landing screen.
-
-
On the top side of the home screen, click EHR.
Tip: If your screen or browser window is too narrow to display all your agency's ESO Suite module icons, an options icon appears on the right side of the icon bar. If you click the options icon, a menu appears containing additional module icons.
The EHR screen appears, displaying a list of patient records in the EHR module. The most-recent records appear at the top of the list.
Different record status icons can appear in the list.
Icon Status Unlocked/DraftThe patient record exists in the ESO Suite database, and all crew members listed in the patient record may edit all fields in the record. ESO Suite administrators and personnel with security roles of either
EHR SupervisororEHR Managercan edit non-clinical fields.MobileThe patient record exists on the mobile device, and has not been synchronized with the ESO Suite database. ESO Suite administrators, personnel with security roles of either
EHR SupervisororEHR Manager, and all crew members listed in the patient record can only access a print view of the record.Once the Mobile record synchronizes with the ESO Suite database. the record reflects its current status.
LockedThe patient record exists in the ESO Suite database, and is locked. Only non-clinical fields can be edited by crew members listed in the patient record, ESO Suite administrators and personnel with security roles of either
EHR SupervisororEHR Manager.
-
-
 (If you have not done so already) Add a new patient record, or search for the existing patient record you want to work with.
Information on adding or opening a patient record is available in Add a patient record and Search for a patient record.
The patient record opens and displays the Incident tab, with the Response bookmark selected in the left pane. Fields appear in the right pane for specifying basic information about the incident
If you manually created a new patient record, the Incident Number and State Tracking Number fields populate automatically with ESO Suite-assigned values. You must enter data in all other required fields.
If you imported data from a CAD system, the Incident Number field populates with the data from that source. Other fields in the EHR module may also populate from these sources, depending on what data was recorded in them before the data was imported into the EHR module.
-
At the top of the page, click the Flowchart tab.
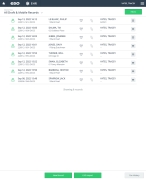
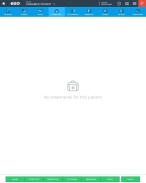
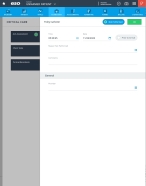
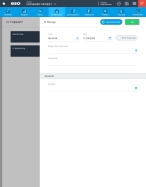
The contents of the Flowchart tab appears, listing any treatments that have already been performed on the patient.
-
Depending on whether or not you use an advance-notification system to alert a hospital about an incoming patient and any pre-arrival treatments performed on the patient, do one of the following.
Example: ESO Alerting or Handtevy Pediatric Resuscitation System
 Import pre-arrival treatment data from an advance-notification system.
The EHR module supports integration with both ESO Alerting and Handtevy Pediatric Resuscitation System. If EMS is able to use one of these advance-notification systems at the incident scene, you can import that data into the EHR module instead of entering it manually.
Note: Before the EHR module can import files from an advance-notification system, an ESO Suite administrator must configure the integration between the EHR module and the systems your agency uses.
Information on configuring these integrations is available in Activate optional features.
-
In the lower right corner of the page, click Import.
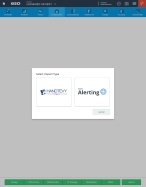
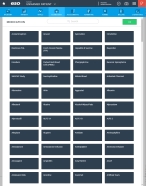
The Select Import Type dialog box appears, listing the systems you can import date from for the patient.
-
Click the button displaying the logo of the advance-notification system you want to import data from.
The Import Treatments dialog box appears, listing any treatment data available for import from the selected system.
-
From the list of available files, choose the one containing the treatment data you want to import.
-
Click Import.
 Manually start a treatment record.
-
At the bottom of the page, click Airway, Critical Care, Defrib/Cardio, IV Therapy, Medication, or Other to choose the category of treatments you want to enter data for.
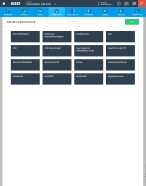
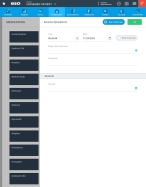
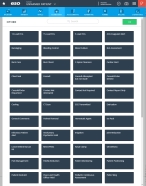
A list of the treatments your agency supports in that category appears.
Example: If you click the Airway category, the Airway dialog box appears, listing the different airway treatments your agency's EMS personnel can perform.
-
Continue with the steps below to enter data for the treatment category you selected.
Whether you import data into a new treatment record or start a treatment record manually, you can still add to and update the information as needed.
-
-
Add treatments to the patient's record.
 Airway treatments
Airway management is the set of procedures and techniques medical professionals use to ensure that a patient's breathing pathway does not become obstructed if at risk, or to clear the airway if already obstructed.
-
(If you have not done so already) At the bottom of the page, click Airway.
The Airway dialog box appears.
-
Click the treatment you want to add information to for the patient.
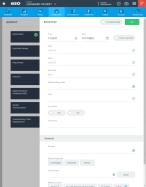
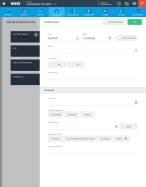
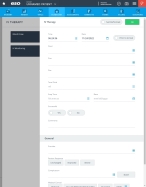
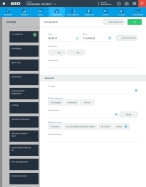
A dialog box with the treatment name appears. The fields and options at the top of the dialog box are specific to the type of treatment you selected, and the General section at the bottom of the dialog box contains fields that are the same for all categories of treatments.
-
 (If applicable) Indicate the treatment was not actually performed.
On occasion, a treatment may be started but not completed, due to patient refusal, a contraindication, an higher-ranking crew member ordering the treatment to be stopped, and so forth.
-
At the top of the dialog box, click Not Performed.
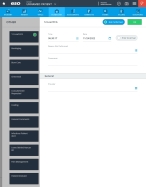
The dialog box updates to display fewer fields in the treatment-specific fields section and the General section of the dialog box.
The dialog box updates to display only the fields necessary to record information about why the treatment was not performed, or stopped before it was completed.
-
(If applicable) Click Prior to Arrival to record a time and date prior to the EMS unit's arrival.
The current values in Time and Date clear, and under General, the Other button appears.
-
For Time, click the number pad icon to the right of the field, then enter the appropriate numerical values from the number pad dialog box that appears to indicate the time the treatment was started, or was decided not to perform it.
-
For Date, click the calendar icon on the right end of the field and select the appropriate date from the calendar that appears to indicate the date the treatment was started, or was decided not to perform it.
-
For Reason Not Performed, click the list icon to the right of the field, select all the appropriate options from the menu that appears, then click OK or click outside the menu, to record the reason for a treatment or intervention not being performed by the clinician
-
In Comments, type any additional information about the why the treatment was stopped or not-performed, that might be useful for other providers or for incident reporting.
-
 Provide general treatment information.
-
Under General, for Provider, click the field or the list icon to the right of the field, then select the appropriate single option from the menu that appears to identify the crew member who stopped the treatment or did not perform it, or (if it appears) click Other.
Other appears only if you selected Prior to Arrival in the previous steps. If you select Other, the Treatment By and Agency fields appear below Provider.
-
(If you selected Other) For each of the fields below, click the field or the list icon to the right of the field, then select the appropriate single option from the menu that appears.
Field Information needed Treatment by
The type of provider treated the patient prior to the arrival of your agency.
Agency
The name of the agency or department that performed the treatment.
-
Note: If the treatment was not performed, skip steps d–f.
-
-
 Specify basic treatment information.
-
(If applicable) Click Prior to Arrival to record a time and date prior to the EMS unit's arrival.
The current values in Time and Date clear, and under General, the Other button appears.
-
For Time, click the number pad icon to the right of the field, then enter the appropriate numerical values from the number pad dialog box that appears to specify when the treatment was performed.
-
For Date, click the calendar icon on the right end of the field and select the appropriate date from the calendar that appears to specify the date the treatment was performed.
-
(If it appears) For Successful, click Yes or No to indicate whether the treatment was successfully administered to the patient.
-
In Comments, type any additional information about the treatment for other providers or for incident reporting.
-
-
 Add airway-specific information.
The top portion of the dialog box contains a mix of standard fields (covered above under Specify routine information for any treatment) for any treatment, and field specific to the treatment you selected.
Note: The steps below contain all treatment-specific fields that might appear in this section. Ignore steps below for fields that do not appear on the screen for the treatment you selected.
-
For each of the fields below, click the number pad icon to the right of the field, then enter the appropriate numerical values from the number pad dialog box that appears.
Field Information needed IPAP
The inspiratory positive airway pressure.
EPAP
The lower, expiratory positive airway pressure.
PIP
The peak inspiratory pressure.
FiO2 Rate
The fraction of inspired oxygen concentration of oxygen in gas mix.
Flow Rate
The rate of inspiratory flow required to overcome the resistance of the circuit to deliver the inspiratory breath.
Pressure
The continuous positive airway pressure.
Placed At
The depth at which the equipment was placed.
Amount
The amount of contents suctioned out.
-
For each of the fields below, click the field or the list icon to the right of the field, then select the appropriate single option from the menu that appears.
Field Information needed Mode
The mode the ventilator mode is set to.
Example: AC/Vol, AC/PC, CPAP, ViPAP
Modified Borg Scale,
The Modified Borg Scale is used to assess symptoms of breathlessness (dyspnea), as reported by the patient.
Size
The size of the tube used during the airway treatment.
Assisting Device
The type of device use during the insertion of another implement or applicator for the treatment.
Example: Bougie, Stylet, Video Laryngoscope
Size
The size of the equipment used in the procedure on the patient.
Device
The type of device used for the treatment.
Moved To
Where patient was moved to.
Example: Stretcher, ambulance, hospital
Site
The vascular access location.
Content
The type of content suctioned out.
Example: Blood, vomit, bile
CWF
The chest wiggle factor.
Speciality Gas
The type of high-purity specialty gas used.
Example: Heliox 70/30, Nitrogen
-
For each of the fields below, click the list icon to the right of the field, select all the appropriate options from the menu that appears, then click OK or click outside the menu.
Field Information needed Placement Verification
Any methods used to verify that equipment was placed correctly in or on the patient.
Complications
Any complications (abnormal effect on the patient) associated with the performance of the procedure on the patient.
-
For Stop Time, click the number pad icon to the right of the field, then enter the appropriate numerical values from the number pad dialog box that appears to specify the time that the procedure ended.
-
For Date, click the calendar icon on the right end of the field and select the appropriate date from the calendar that appears to specify the time that the procedure ended.
-
For each of the fields below, type the necessary information.
Field Information needed Rate
The setting of the ventilator for respiration rate.
Peep
The pressure above atmospheric pressure measured in the alveoli at the end of expiration.
Vt
The volume of air delivered to the lungs with each breath by the mechanical ventilator.
PIP
The peak inspiratory pressure.
I-Time
The inspiratory time, expressed in seconds, is the amount of time spent in inspiration during the total respiratory cycle.
Hz
A numeric value In hertz.
Map
The mean airway pressure.
Nitric Oxide
The value for nitric oxide.
Inhaled nitric oxide results in preferential pulmonary vasodilatation and lowers pulmonary vascular resistance.
LPM
The flow rate in liters per minute.
NO2
The value for nitrogen dioxide,
NO2 is generated when nitrix oxide is diluted with oxygen-enriched air before delivery to the patient.
Measured FiO2
The fraction of inspired oxygen concentration of oxygen in gas mix.
Tank Start TimeTank Stop Time
The date and time the ventilator tank was started and stopped, respectively, in the
DD:MM:YYYY HH:MM:SSformat.
-
-
 Include general treatment information.
-
Under General, for Provider, click the field or the list icon to the right of the field, then select the appropriate single option from the menu that appears to identify the crew member who administered the treatment to the patiend, or (if it appears) click Other.
Other appears only if you selected Prior to Arrival in the previous steps. If you select Other, the Treatment By and Agency fields appear below Provider.
-
(If you selected Other) For each of the fields below, click the field or the list icon to the right of the field, then select the appropriate single option from the menu that appears.
Field Information needed Treatment by
The type of provider treated the patient prior to the arrival of your agency.
Agency
The name of the agency or department that performed the treatment.
-
For Patient Response, click Unchanged, Improved, or Worse to indicate whether the treatment helped the patient or not.
-
For Complication, click None or click the list icon to the right of the field, select all the appropriate options from the menu that appears, then click OK or click outside the menu to record any complications (abnormal effect on the patient) associated with the performance of the procedure on the patient.
-
For Medical Control, click Protocol, On-Line (Remote Verbal Order), On-Scene, or click Other and click the field or the list icon to the right of the field, then select the appropriate single option from the menu that appears to indicate the type of treatment authorization obtained.
Medical control is consultation between EMS providers and a physician, to guide care for an individual patient or EMS incident.
-
In Physician/Ref #, type the name or reference number of the authorizing physician ordering the procedure, if the order was provided by any manner other than protocol (standing order).
-
-
In the upper right corner of the dialog box, click OK.
The Flowchart tab reappears, listing the airway treatment you added.
 Critical care treatments
Critical care management is the set of procedures and techniques medical professionals use to meet the needs of critically ill patients during transport, often from one medical facility to another. Critical care incidents require intensive care and monitoring that requires constant treatment with drugs and equipment to sustain life.
-
(If you have not done so already) At the bottom of the page, click Critical Care.
The Critical Care dialog box appears.
-
Click the treatment you want to add information to for the patient.
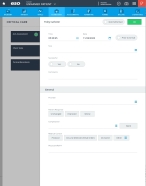
A dialog box with the treatment name appears. The fields and options at the top of the dialog box are specific to the type of treatment you selected, and the General section at the bottom of the dialog box contains fields that are the same for all categories of treatments.
-
 (If applicable) Indicate the treatment was not actually performed.
On occasion, a treatment may be started but not completed, due to patient refusal, a contraindication, an higher-ranking crew member ordering the treatment to be stopped, and so forth.
-
At the top of the dialog box, click Not Performed.
The dialog box updates to display fewer fields in the treatment-specific fields section and the General section of the dialog box.
The dialog box updates to display only the fields necessary to record information about why the treatment was not performed, or stopped before it was completed.
-
(If applicable) Click Prior to Arrival to record a time and date prior to the EMS unit's arrival.
The current values in Time and Date clear, and under General, the Other button appears.
-
For Time, click the number pad icon to the right of the field, then enter the appropriate numerical values from the number pad dialog box that appears to indicate the time the treatment was started, or was decided not to perform it.
-
For Date, click the calendar icon on the right end of the field and select the appropriate date from the calendar that appears to indicate the date the treatment was started, or was decided not to perform it.
-
For Reason Not Performed, click the list icon to the right of the field, select all the appropriate options from the menu that appears, then click OK or click outside the menu, to record the reason for a treatment or intervention not being performed by the clinician
-
In Comments, type any additional information about the why the treatment was stopped or not-performed, that might be useful for other providers or for incident reporting.
-
 Provide general treatment information.
-
Under General, for Provider, click the field or the list icon to the right of the field, then select the appropriate single option from the menu that appears to identify the crew member who stopped the treatment or did not perform it, or (if it appears) click Other.
Other appears only if you selected Prior to Arrival in the previous steps. If you select Other, the Treatment By and Agency fields appear below Provider.
-
(If you selected Other) For each of the fields below, click the field or the list icon to the right of the field, then select the appropriate single option from the menu that appears.
Field Information needed Treatment by
The type of provider treated the patient prior to the arrival of your agency.
Agency
The name of the agency or department that performed the treatment.
-
Note: If the treatment was not performed, skip steps d–f.
-
-
 Specify basic treatment information.
-
(If applicable) Click Prior to Arrival to record a time and date prior to the EMS unit's arrival.
The current values in Time and Date clear, and under General, the Other button appears.
-
For Time, click the number pad icon to the right of the field, then enter the appropriate numerical values from the number pad dialog box that appears to specify when the treatment was performed.
-
For Date, click the calendar icon on the right end of the field and select the appropriate date from the calendar that appears to specify the date the treatment was performed.
-
(If it appears) For Successful, click Yes or No to indicate whether the treatment was successfully administered to the patient.
-
In Comments, type any additional information about the treatment for other providers or for incident reporting.
-
-
 Add critical care-specific information.
The top portion of the dialog box contains a mix of standard fields (covered above under Specify routine information for any treatment) for any treatment, and field specific to the treatment you selected.
Note: The steps below contain all treatment-specific fields that might appear in this section. Ignore steps below for fields that do not appear on the screen for the treatment you selected.
-
For each of the fields below, click the number pad icon to the right of the field, then enter the appropriate numerical values from the number pad dialog box that appears.
Field Information needed Placed At
The depth at which the equipment was placed.
Volume
The amount of fluid removed from the patient.
Example: The amount of fluid built removed from the sac around the heart (pericardium) during a pericardiocentesis.
-
For each of the fields below, click the field or the list icon to the right of the field, then select the appropriate single option from the menu that appears.
Field Information needed Size
The size of the equipment used in the procedure on the patient.
Site
The vascular access location.
Reason
The reason for the procedure.
Example: The fluid sac around the heart (pericardium) had filled with fluid, requiring a pericardiocentesis.
-
For ROSC, select Yes or No to indicate whether a reason a ROSC occurred for the patient.
-
For each of the fields below, type the necessary information.
Field Information needed pH
The arterial blood gas pH range in the blood.
pCO2
The partial pressure of carbon dioxide in the blood.
pO2
The oxygen pressure in the blood.
HCO3
The amount of bicarbonate in the blood.
BE
The base excess or base deficit blood lab value.
Ca
The amount of calcium in the blood.
K
The amount of potassium in the blood.
Na
The lab value for sodium.
HgB
The amount of hemoglobin in the blood.
Hct
The amount of hematocrit in the blood, as a percentage.
-
-
 Include general treatment information.
-
Under General, for Provider, click the field or the list icon to the right of the field, then select the appropriate single option from the menu that appears to identify the crew member who administered the treatment to the patiend, or (if it appears) click Other.
Other appears only if you selected Prior to Arrival in the previous steps. If you select Other, the Treatment By and Agency fields appear below Provider.
-
(If you selected Other) For each of the fields below, click the field or the list icon to the right of the field, then select the appropriate single option from the menu that appears.
Field Information needed Treatment by
The type of provider treated the patient prior to the arrival of your agency.
Agency
The name of the agency or department that performed the treatment.
-
For Patient Response, click Unchanged, Improved, or Worse to indicate whether the treatment helped the patient or not.
-
For Complication, click None or click the list icon to the right of the field, select all the appropriate options from the menu that appears, then click OK or click outside the menu to record any complications (abnormal effect on the patient) associated with the performance of the procedure on the patient.
-
For Medical Control, click Protocol, On-Line (Remote Verbal Order), On-Scene, or click Other and click the field or the list icon to the right of the field, then select the appropriate single option from the menu that appears to indicate the type of treatment authorization obtained.
Medical control is consultation between EMS providers and a physician, to guide care for an individual patient or EMS incident.
-
In Physician/Ref #, type the name or reference number of the authorizing physician ordering the procedure, if the order was provided by any manner other than protocol (standing order).
-
-
In the upper right corner of the dialog box, click OK.
The Flowchart tab reappears, listing the airway treatment you added.
 Defibrillator, cardiovascular, and pacing treatments
Defibrillator, cardiovascular, and pacing management is the set of procedures and techniques medical professionals use to respond to problems that can occur with the cardiovascular system.
An implantable cardiac defibrillator is a device that monitors your heart rate and delivers a strong electrical shock to restore the heartbeat to normal in the event of tachycardia.
During the pacing process, EMS uses their defibrillator to select a healthier heart rate and the level of energy to deliver along with the shock. This guides the patient's heart to beat at that particular rate. When successful, pacing helps a patient's heart resume a healthy rhythm.
-
(If you have not done so already) At the bottom of the page, click Defib/Cardio.
The Defib/Cardio/Pace dialog box appears.
-
Click the treatment you want to add information to for the patient.
A dialog box with the treatment name appears. The fields and options at the top of the dialog box are specific to the type of treatment you selected, and the General section at the bottom of the dialog box contains fields that are the same for all categories of treatments.
-
 (If applicable) Indicate the treatment was not actually performed.
On occasion, a treatment may be started but not completed, due to patient refusal, a contraindication, an higher-ranking crew member ordering the treatment to be stopped, and so forth.
-
At the top of the dialog box, click Not Performed.
The dialog box updates to display fewer fields in the treatment-specific fields section and the General section of the dialog box.
The dialog box updates to display only the fields necessary to record information about why the treatment was not performed, or stopped before it was completed.
-
(If applicable) Click Prior to Arrival to record a time and date prior to the EMS unit's arrival.
The current values in Time and Date clear, and under General, the Other button appears.
-
For Time, click the number pad icon to the right of the field, then enter the appropriate numerical values from the number pad dialog box that appears to indicate the time the treatment was started, or was decided not to perform it.
-
For Date, click the calendar icon on the right end of the field and select the appropriate date from the calendar that appears to indicate the date the treatment was started, or was decided not to perform it.
-
For Reason Not Performed, click the list icon to the right of the field, select all the appropriate options from the menu that appears, then click OK or click outside the menu, to record the reason for a treatment or intervention not being performed by the clinician
-
In Comments, type any additional information about the why the treatment was stopped or not-performed, that might be useful for other providers or for incident reporting.
-
 Provide general treatment information.
-
Under General, for Provider, click the field or the list icon to the right of the field, then select the appropriate single option from the menu that appears to identify the crew member who stopped the treatment or did not perform it, or (if it appears) click Other.
Other appears only if you selected Prior to Arrival in the previous steps. If you select Other, the Treatment By and Agency fields appear below Provider.
-
(If you selected Other) For each of the fields below, click the field or the list icon to the right of the field, then select the appropriate single option from the menu that appears.
Field Information needed Treatment by
The type of provider treated the patient prior to the arrival of your agency.
Agency
The name of the agency or department that performed the treatment.
-
Note: If the treatment was not performed, skip steps d–f.
-
-
 Specify basic treatment information.
-
(If applicable) Click Prior to Arrival to record a time and date prior to the EMS unit's arrival.
The current values in Time and Date clear, and under General, the Other button appears.
-
For Time, click the number pad icon to the right of the field, then enter the appropriate numerical values from the number pad dialog box that appears to specify when the treatment was performed.
-
For Date, click the calendar icon on the right end of the field and select the appropriate date from the calendar that appears to specify the date the treatment was performed.
-
(If it appears) For Successful, click Yes or No to indicate whether the treatment was successfully administered to the patient.
-
In Comments, type any additional information about the treatment for other providers or for incident reporting.
-
-
 Add defibrillator, cardiovascular, or pacing-specific information.
The top portion of the dialog box contains a mix of standard fields (covered above under Specify routine information for any treatment) for any treatment, and field specific to the treatment you selected.
Note: The steps below contain all treatment-specific fields that might appear in this section. Ignore steps below for fields that do not appear on the screen for the treatment you selected.
-
For each of the fields below, click the number pad icon to the right of the field, then enter the appropriate numerical values from the number pad dialog box that appears.
Field Information needed Joules
The amount of electricity needed for an AED to defibrillate the patient.
Milliamps
The amount of the applied electrical pulse needed to stimulate a contraction of the heart.
Rate
The speed at which the electrical pulses occur for the treatment.
-
For Method, click the field or the list icon to the right of the field, then select the appropriate single option from the menu that appears to indicate the method chosen to make the vagus nerve act on the heart's natural pacemaker, slowing down its electrical impulses.
-
For Cardiac Alert Reason Not Performed, click the list icon to the right of the field, select all the appropriate options from the menu that appears, then click OK or click outside the menu to identify the reasons a cardiac alert was not completed.
A cardiac alert is the link between the condition of the patient's heart while being transported to the ER, and the physician that will treat him immediately.
-
For Capture, select Yes or No to indicate whether a QRS complex was recorded by a cardiac device.
The QRS is combination of the Q wave, R wave and S wave, (the “QRS complex”), and it represents ventricular depolarization. The QRS complex is the combination of three of the graphical deflections seen on a typical electrocardiogram. It is usually the central and most visually obvious part of the tracing.
-
-
 Include general treatment information.
-
Under General, for Provider, click the field or the list icon to the right of the field, then select the appropriate single option from the menu that appears to identify the crew member who administered the treatment to the patiend, or (if it appears) click Other.
Other appears only if you selected Prior to Arrival in the previous steps. If you select Other, the Treatment By and Agency fields appear below Provider.
-
(If you selected Other) For each of the fields below, click the field or the list icon to the right of the field, then select the appropriate single option from the menu that appears.
Field Information needed Treatment by
The type of provider treated the patient prior to the arrival of your agency.
Agency
The name of the agency or department that performed the treatment.
-
For Patient Response, click Unchanged, Improved, or Worse to indicate whether the treatment helped the patient or not.
-
For Complication, click None or click the list icon to the right of the field, select all the appropriate options from the menu that appears, then click OK or click outside the menu to record any complications (abnormal effect on the patient) associated with the performance of the procedure on the patient.
-
For Medical Control, click Protocol, On-Line (Remote Verbal Order), On-Scene, or click Other and click the field or the list icon to the right of the field, then select the appropriate single option from the menu that appears to indicate the type of treatment authorization obtained.
Medical control is consultation between EMS providers and a physician, to guide care for an individual patient or EMS incident.
-
In Physician/Ref #, type the name or reference number of the authorizing physician ordering the procedure, if the order was provided by any manner other than protocol (standing order).
-
-
In the upper right corner of the dialog box, click OK.
The Flowchart tab reappears, listing the airway treatment you added.
 IV therapy treatments
IV therapy treatments use an injection with a syringe or via infusion, often referred to as a drip. IV therapy is the fastest way to deliver medications, blood products and more into the bloodstream to help with various health conditions, dehydration and blood transfusions.
-
(If you have not done so already) At the bottom of the page, click IV Therapy.
The IV Therapy dialog box appears.
-
Click the treatment you want to add information to for the patient.
A dialog box with the treatment name appears. The fields and options at the top of the dialog box are specific to the type of treatment you selected, and the General section at the bottom of the dialog box contains fields that are the same for all categories of treatments.
-
 (If applicable) Indicate the treatment was not actually performed.
On occasion, a treatment may be started but not completed, due to patient refusal, a contraindication, an higher-ranking crew member ordering the treatment to be stopped, and so forth.
-
At the top of the dialog box, click Not Performed.
The dialog box updates to display fewer fields in the treatment-specific fields section and the General section of the dialog box.
The dialog box updates to display only the fields necessary to record information about why the treatment was not performed, or stopped before it was completed.
-
(If applicable) Click Prior to Arrival to record a time and date prior to the EMS unit's arrival.
The current values in Time and Date clear, and under General, the Other button appears.
-
For Time, click the number pad icon to the right of the field, then enter the appropriate numerical values from the number pad dialog box that appears to indicate the time the treatment was started, or was decided not to perform it.
-
For Date, click the calendar icon on the right end of the field and select the appropriate date from the calendar that appears to indicate the date the treatment was started, or was decided not to perform it.
-
For Reason Not Performed, click the list icon to the right of the field, select all the appropriate options from the menu that appears, then click OK or click outside the menu, to record the reason for a treatment or intervention not being performed by the clinician
-
In Comments, type any additional information about the why the treatment was stopped or not-performed, that might be useful for other providers or for incident reporting.
-
 Provide general treatment information.
-
Under General, for Provider, click the field or the list icon to the right of the field, then select the appropriate single option from the menu that appears to identify the crew member who stopped the treatment or did not perform it, or (if it appears) click Other.
Other appears only if you selected Prior to Arrival in the previous steps. If you select Other, the Treatment By and Agency fields appear below Provider.
-
(If you selected Other) For each of the fields below, click the field or the list icon to the right of the field, then select the appropriate single option from the menu that appears.
Field Information needed Treatment by
The type of provider treated the patient prior to the arrival of your agency.
Agency
The name of the agency or department that performed the treatment.
-
Note: If the treatment was not performed, skip steps d–f.
-
-
 Specify basic treatment information.
-
(If applicable) Click Prior to Arrival to record a time and date prior to the EMS unit's arrival.
The current values in Time and Date clear, and under General, the Other button appears.
-
For Time, click the number pad icon to the right of the field, then enter the appropriate numerical values from the number pad dialog box that appears to specify when the treatment was performed.
-
For Date, click the calendar icon on the right end of the field and select the appropriate date from the calendar that appears to specify the date the treatment was performed.
-
(If it appears) For Successful, click Yes or No to indicate whether the treatment was successfully administered to the patient.
-
In Comments, type any additional information about the treatment for other providers or for incident reporting.
-
-
 Add IV therapy-specific information.
The top portion of the dialog box contains a mix of standard fields (covered above under Specify routine information for any treatment) for any treatment, and field specific to the treatment you selected.
Note: The steps below contain all treatment-specific fields that might appear in this section. Ignore steps below for fields that do not appear on the screen for the treatment you selected.
-
For each of the fields below, click the number pad icon to the right of the field, then enter the appropriate numerical values from the number pad dialog box that appears.
Field Information needed Total Fluid
The amount of fluid supplied to the patient through the IV therapy.
Stop Time
The time the treatment is stopped.
-
For each of the fields below, click the field or the list icon to the right of the field, then select the appropriate single option from the menu that appears.
Field Information needed Size
The size of the equipment used in the procedure on the patient.
Site
The vascular access location.
Fluid
The type of fluid administered during IV therapy or bolus D5W
-
For Date, click the calendar icon on the right end of the field and select the appropriate date from the calendar that appears to specify the date the treatment was stopped.
-
-
 Include general treatment information.
-
Under General, for Provider, click the field or the list icon to the right of the field, then select the appropriate single option from the menu that appears to identify the crew member who administered the treatment to the patiend, or (if it appears) click Other.
Other appears only if you selected Prior to Arrival in the previous steps. If you select Other, the Treatment By and Agency fields appear below Provider.
-
(If you selected Other) For each of the fields below, click the field or the list icon to the right of the field, then select the appropriate single option from the menu that appears.
Field Information needed Treatment by
The type of provider treated the patient prior to the arrival of your agency.
Agency
The name of the agency or department that performed the treatment.
-
For Patient Response, click Unchanged, Improved, or Worse to indicate whether the treatment helped the patient or not.
-
For Complication, click None or click the list icon to the right of the field, select all the appropriate options from the menu that appears, then click OK or click outside the menu to record any complications (abnormal effect on the patient) associated with the performance of the procedure on the patient.
-
For Medical Control, click Protocol, On-Line (Remote Verbal Order), On-Scene, or click Other and click the field or the list icon to the right of the field, then select the appropriate single option from the menu that appears to indicate the type of treatment authorization obtained.
Medical control is consultation between EMS providers and a physician, to guide care for an individual patient or EMS incident.
-
In Physician/Ref #, type the name or reference number of the authorizing physician ordering the procedure, if the order was provided by any manner other than protocol (standing order).
-
-
In the upper right corner of the dialog box, click OK.
The Flowchart tab reappears, listing the airway treatment you added.
 Medication treatments
A medication treatment consist for the EMS personnel administering any substance, other than food, to prevent, diagnose, treat, or relieve symptoms of a disease or abnormal condition.
-
(If you have not done so already) At the bottom of the page, click Medication.
The Medication dialog box appears.
-
Click the treatment you want to add information to for the patient.
A dialog box with the treatment name appears. The fields and options at the top of the dialog box are specific to the type of treatment you selected, and the General section at the bottom of the dialog box contains fields that are the same for all categories of treatments.
-
 (If applicable) Indicate the treatment was not actually performed.
On occasion, a treatment may be started but not completed, due to patient refusal, a contraindication, an higher-ranking crew member ordering the treatment to be stopped, and so forth.
-
At the top of the dialog box, click Not Performed.
The dialog box updates to display fewer fields in the treatment-specific fields section and the General section of the dialog box.
The dialog box updates to display only the fields necessary to record information about why the treatment was not performed, or stopped before it was completed.
-
(If applicable) Click Prior to Arrival to record a time and date prior to the EMS unit's arrival.
The current values in Time and Date clear, and under General, the Other button appears.
-
For Time, click the number pad icon to the right of the field, then enter the appropriate numerical values from the number pad dialog box that appears to indicate the time the treatment was started, or was decided not to perform it.
-
For Date, click the calendar icon on the right end of the field and select the appropriate date from the calendar that appears to indicate the date the treatment was started, or was decided not to perform it.
-
For Reason Not Performed, click the list icon to the right of the field, select all the appropriate options from the menu that appears, then click OK or click outside the menu, to record the reason for a treatment or intervention not being performed by the clinician
-
In Comments, type any additional information about the why the treatment was stopped or not-performed, that might be useful for other providers or for incident reporting.
-
 Provide general treatment information.
-
Under General, for Provider, click the field or the list icon to the right of the field, then select the appropriate single option from the menu that appears to identify the crew member who stopped the treatment or did not perform it, or (if it appears) click Other.
Other appears only if you selected Prior to Arrival in the previous steps. If you select Other, the Treatment By and Agency fields appear below Provider.
-
(If you selected Other) For each of the fields below, click the field or the list icon to the right of the field, then select the appropriate single option from the menu that appears.
Field Information needed Treatment by
The type of provider treated the patient prior to the arrival of your agency.
Agency
The name of the agency or department that performed the treatment.
-
Note: If the treatment was not performed, skip steps d–f.
-
-
 Specify basic treatment information.
-
(If applicable) Click Prior to Arrival to record a time and date prior to the EMS unit's arrival.
The current values in Time and Date clear, and under General, the Other button appears.
-
For Time, click the number pad icon to the right of the field, then enter the appropriate numerical values from the number pad dialog box that appears to specify when the treatment was performed.
-
For Date, click the calendar icon on the right end of the field and select the appropriate date from the calendar that appears to specify the date the treatment was performed.
-
(If it appears) For Successful, click Yes or No to indicate whether the treatment was successfully administered to the patient.
-
In Comments, type any additional information about the treatment for other providers or for incident reporting.
-
-
 Add medication-specific information.
The top portion of the dialog box contains a mix of standard fields (covered above under Specify routine information for any treatment) for any treatment, and field specific to the treatment you selected.
Note: The steps below contain all treatment-specific fields that might appear in this section. Ignore steps below for fields that do not appear on the screen for the treatment you selected.
-
For Dose, click the number pad icon to the right of the field, then enter the appropriate numerical values from the number pad dialog box that appears to specify the amount of a medication administered at one specific time.
-
For each of the fields below, click the field or the list icon to the right of the field, then select the appropriate single option from the menu that appears.
Field Information needed Measure
The dosage unit of the patient's current medication.
Route
The path by which a drug is taken into the body.
-
-
 Include general treatment information.
-
Under General, for Provider, click the field or the list icon to the right of the field, then select the appropriate single option from the menu that appears to identify the crew member who administered the treatment to the patiend, or (if it appears) click Other.
Other appears only if you selected Prior to Arrival in the previous steps. If you select Other, the Treatment By and Agency fields appear below Provider.
-
(If you selected Other) For each of the fields below, click the field or the list icon to the right of the field, then select the appropriate single option from the menu that appears.
Field Information needed Treatment by
The type of provider treated the patient prior to the arrival of your agency.
Agency
The name of the agency or department that performed the treatment.
-
For Patient Response, click Unchanged, Improved, or Worse to indicate whether the treatment helped the patient or not.
-
For Complication, click None or click the list icon to the right of the field, select all the appropriate options from the menu that appears, then click OK or click outside the menu to record any complications (abnormal effect on the patient) associated with the performance of the procedure on the patient.
-
For Medical Control, click Protocol, On-Line (Remote Verbal Order), On-Scene, or click Other and click the field or the list icon to the right of the field, then select the appropriate single option from the menu that appears to indicate the type of treatment authorization obtained.
Medical control is consultation between EMS providers and a physician, to guide care for an individual patient or EMS incident.
-
In Physician/Ref #, type the name or reference number of the authorizing physician ordering the procedure, if the order was provided by any manner other than protocol (standing order).
-
-
In the upper right corner of the dialog box, click OK.
The Flowchart tab reappears, listing the airway treatment you added.
 Other treatments
Other treatments that do not fit easily in the previous treatment categories, such as burn care, cooling, bandaging, wound care, obstetrics delivery, and more.
-
(If you have not done so already) At the bottom of the page, click Other.
The Other dialog box appears.
-
Click the treatment you want to add information to for the patient.
A dialog box with the treatment name appears. The fields and options at the top of the dialog box are specific to the type of treatment you selected, and the General section at the bottom of the dialog box contains fields that are the same for all categories of treatments.
-
 (If applicable) Indicate the treatment was not actually performed.
On occasion, a treatment may be started but not completed, due to patient refusal, a contraindication, an higher-ranking crew member ordering the treatment to be stopped, and so forth.
-
At the top of the dialog box, click Not Performed.
The dialog box updates to display fewer fields in the treatment-specific fields section and the General section of the dialog box.
The dialog box updates to display only the fields necessary to record information about why the treatment was not performed, or stopped before it was completed.
-
(If applicable) Click Prior to Arrival to record a time and date prior to the EMS unit's arrival.
The current values in Time and Date clear, and under General, the Other button appears.
-
For Time, click the number pad icon to the right of the field, then enter the appropriate numerical values from the number pad dialog box that appears to indicate the time the treatment was started, or was decided not to perform it.
-
For Date, click the calendar icon on the right end of the field and select the appropriate date from the calendar that appears to indicate the date the treatment was started, or was decided not to perform it.
-
For Reason Not Performed, click the list icon to the right of the field, select all the appropriate options from the menu that appears, then click OK or click outside the menu, to record the reason for a treatment or intervention not being performed by the clinician
-
In Comments, type any additional information about the why the treatment was stopped or not-performed, that might be useful for other providers or for incident reporting.
-
 Provide general treatment information.
-
Under General, for Provider, click the field or the list icon to the right of the field, then select the appropriate single option from the menu that appears to identify the crew member who stopped the treatment or did not perform it, or (if it appears) click Other.
Other appears only if you selected Prior to Arrival in the previous steps. If you select Other, the Treatment By and Agency fields appear below Provider.
-
(If you selected Other) For each of the fields below, click the field or the list icon to the right of the field, then select the appropriate single option from the menu that appears.
Field Information needed Treatment by
The type of provider treated the patient prior to the arrival of your agency.
Agency
The name of the agency or department that performed the treatment.
-
Note: If the treatment was not performed, skip steps d–f.
-
-
 Specify basic treatment information.
-
(If applicable) Click Prior to Arrival to record a time and date prior to the EMS unit's arrival.
The current values in Time and Date clear, and under General, the Other button appears.
-
For Time, click the number pad icon to the right of the field, then enter the appropriate numerical values from the number pad dialog box that appears to specify when the treatment was performed.
-
For Date, click the calendar icon on the right end of the field and select the appropriate date from the calendar that appears to specify the date the treatment was performed.
-
(If it appears) For Successful, click Yes or No to indicate whether the treatment was successfully administered to the patient.
-
In Comments, type any additional information about the treatment for other providers or for incident reporting.
-
-
 Add other treatment-specific information.
The top portion of the dialog box contains a mix of standard fields (covered above under Specify routine information for any treatment) for any treatment, and field specific to the treatment you selected.
Note: The steps below contain all treatment-specific fields that might appear in this section. Ignore steps below for fields that do not appear on the screen for the treatment you selected.
-
For Volume, click the number pad icon to the right of the field, then enter the appropriate numerical values from the number pad dialog box that appears, to indicate the amount of a fluid administered during the treatment.
-
For each of the fields below, click the field or the list icon to the right of the field, then select the appropriate single option from the menu that appears.
Field Information needed Measure
The volume unit of the fluid administered to the patient.
Route
The path by which the fluid was taken into the body.
-
-
 Include general treatment information.
-
Under General, for Provider, click the field or the list icon to the right of the field, then select the appropriate single option from the menu that appears to identify the crew member who administered the treatment to the patiend, or (if it appears) click Other.
Other appears only if you selected Prior to Arrival in the previous steps. If you select Other, the Treatment By and Agency fields appear below Provider.
-
(If you selected Other) For each of the fields below, click the field or the list icon to the right of the field, then select the appropriate single option from the menu that appears.
Field Information needed Treatment by
The type of provider treated the patient prior to the arrival of your agency.
Agency
The name of the agency or department that performed the treatment.
-
For Patient Response, click Unchanged, Improved, or Worse to indicate whether the treatment helped the patient or not.
-
For Complication, click None or click the list icon to the right of the field, select all the appropriate options from the menu that appears, then click OK or click outside the menu to record any complications (abnormal effect on the patient) associated with the performance of the procedure on the patient.
-
For Medical Control, click Protocol, On-Line (Remote Verbal Order), On-Scene, or click Other and click the field or the list icon to the right of the field, then select the appropriate single option from the menu that appears to indicate the type of treatment authorization obtained.
Medical control is consultation between EMS providers and a physician, to guide care for an individual patient or EMS incident.
-
In Physician/Ref #, type the name or reference number of the authorizing physician ordering the procedure, if the order was provided by any manner other than protocol (standing order).
-
-
In the upper right corner of the dialog box, click OK.
The Flowchart tab reappears, listing the airway treatment you added.
-

