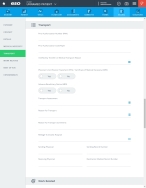
Record transport information
Patient transport is the manner in which EMS personnel moved a patient to a destination. Emergency transport requires arriving at a treatment facility as fast as possible. Medical transport involves moving someone who needs or wants medical care during the journey.
-
 (If you have not done so already) Access the EHR module in the ESO Suite.
-
Do one of the following.
-
(If you are already working in the ESO Suite) Click the Home icon in the upper left corner of the screen.
-
 (If you have not yet logged in) Log in to the ESO Suite.
-
In a web browser, go to https://www.esosuite.net/EsoSuite.
The ESO Suite login screen appears.
-
Enter your user name, password, and agency name, then click Let's Go.
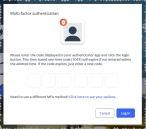
If MFA is enabled, the Multi-factor authentication dialog box appears, displaying one or more methods you can use to verify your login credentials. The number of methods that appear in the dialog box depends on what MFA methods your ESO Suite administrators enabled in the Admin module.

Click graphics
to open them.Information on enabling MFA and specific MFA methods is available in the Admin module online help, in Configure multiple-factor authentication.
Note: If your ESO Suite administrators have disabled MFA ("opted-out"), this dialog does not appear.
-
(If the Multi-factor authentication dialog box appears) Depending on which buttons appear in the dialog box, verify your login in one of the following ways.
 With an authenticator application.
-
Click MFA verification via authenticator app.
The dialog box updates with boxes for entering the numbers of the authentication code, and the ESO Suite sends an authentication code to the authenticator application installed on your device.
-
Open your authenticator application and note the authentication code currently displayed.
-
Enter the authentication code displayed in the authenticator application.
-
Click Log In.
 With a text message (SMS).
-
Click MFA verification via SMS.
The dialog box updates with boxes for entering the numbers of the authentication code, and the ESO Suite sends an authentication code to the phone number recorded in your PM records and identified with MFA codes.
-
Enter the authentication code sent to your MFA-registered phone number.
-
Click Log In.
 With an email message.
-
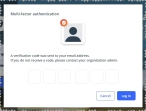
Click MFA verification via email.
The dialog box updates with boxes for entering the numbers of the authentication code, and the ESO Suite sends an authentication code to your agency or department email address, recorded in your PM records.
-
Enter the authentication code sent to your agency or department email address.
-
Click Log In.
-
-
The ESO Suite landing screen appears.

Click graphics
to open them.Note: If MFA is enabled, you can access and manage your MFA options through the PM module, on the Settings > Account page, as described in Manage a user account. If your agency or department has enabled MFA but has not purchased the full-featured version of the PM module, you can access your own MFA settings by clicking Change my Multi-Factor Authentication settings on the landing screen, then using the Settings > Account page that appears. If your agency has not enabled MFA, the Change my Multi-Factor Authentication settings link does not appear on the landing screen.
-
-
On the top side of the home screen, click EHR.
Tip: If your screen or browser window is too narrow to display all your agency's ESO Suite module icons, an options icon appears on the right side of the icon bar. If you click the options icon, a menu appears containing additional module icons.
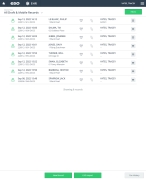
The EHR screen appears, displaying a list of patient records in the EHR module. The most-recent records appear at the top of the list.
Different record status icons can appear in the list.
Icon Status Unlocked/DraftThe patient record exists in the ESO Suite database, and all crew members listed in the patient record may edit all fields in the record. ESO Suite administrators and personnel with security roles of either
EHR SupervisororEHR Managercan edit non-clinical fields.MobileThe patient record exists on the mobile device, and has not been synchronized with the ESO Suite database. ESO Suite administrators, personnel with security roles of either
EHR SupervisororEHR Manager, and all crew members listed in the patient record can only access a print view of the record.Once the Mobile record synchronizes with the ESO Suite database. the record reflects its current status.
LockedThe patient record exists in the ESO Suite database, and is locked. Only non-clinical fields can be edited by crew members listed in the patient record, ESO Suite administrators and personnel with security roles of either
EHR SupervisororEHR Manager.
-
-
 (If you have not done so already) Add a new patient record, or search for the existing patient record you want to work with.
Information on adding or opening a patient record is available in Add a patient record and Search for a patient record.
The patient record opens and displays the Incident tab, with the Response bookmark selected in the left pane. Fields appear in the right pane for specifying basic information about the incident
If you manually created a new patient record, the Incident Number and State Tracking Number fields populate automatically with ESO Suite-assigned values. You must enter data in all other required fields.
If you imported data from a CAD system, the Incident Number field populates with the data from that source. Other fields in the EHR module may also populate from these sources, depending on what data was recorded in them before the data was imported into the EHR module.
-
At the top of the page, click the Billing tab.
The contents of the Billing tab appear, set to the Payment bookmark in the left pane.
-
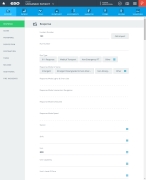
In the left pane, click the Transport bookmark.
The right pane scrolls down to the top of the Transport section of the page.
-
 Specify prior authorization information.
-
In Prior Authorization Number (PAN), type the prior authorization code provided by the insurance carrier/payer.
-
In Prior Authorization Code Payer, type the name of the payer who provided the prior authorization code.
Note: This field appears in the EHR module only if your ESO Suite administrator enabled it in the Admin module, under EHR > Billing Tab > Configurable fields.
Information on enabling EHR fields is available in the Admin module online help, in Configure tabs.
-
-
 Indicate transport reasons and supporting documentation.
-
For Transport Assessment, click the list icon to the right of the field, select all the appropriate options from the menu that appears, then click OK or click outside the menu to indicate the assessment of the patient's mobility.
Note: This field appears in the EHR module only if your ESO Suite administrator enabled it in the Admin module, under EHR > Billing Tab > Configurable fields.
Information on enabling EHR fields is available in the Admin module online help, in Configure tabs.
-
For Reason for Transport, click the list icon to the right of the field, select all the appropriate options from the menu that appears, then click OK or click outside the menu to indicate the billing explanation for the patient's transport.
-
(If you selected Other for Reason for Transport) In Reason for Transport Comments, type an explanation for the transport reason, if none of the normal reasons apply.
-
For Physician's Certification Statement (PCS) / Certificate of Medical Necessity (CMN), select either Yes or No to indicate whether a PCS or CMN is available documenting the medical necessity or the EMS encounter.
The PCS is the written order certifying the medical necessity of non-emergency ambulance transports. The CMN is for patients who have Medicare and Medicare Advantage/Replacement Programs, and is required for all non-emergency transports.
-
For Interfacility Transfer or Medical Reason Transport, click the field or the list icon to the right of the field, then select the appropriate single option from the menu that appears to indicate why the patient was transported to that particular destination.
Example: Cardiac specialty, dialysis, maternal/neonatal, pediatric speciality care
Note: This field appears in the EHR module only if your ESO Suite administrator enabled it in the Admin module, under EHR > Billing Tab > Configurable fields.
Information on enabling EHR fields is available in the Admin module online help, in Configure tabs.
-
For Advance Beneficiary Notice (ABN), select either Yes or No to indicate whether or not an ABN was provided to the patient to read and sign.
The ABN is a Medicare form designed to give patients an estimate of charges for non-covered services. The form should only be used for stable, non-emergency patients.
Non-covered services can be excessive mileage beyond the local area, transports to physician’s offices, and even repetitive transports that exceed the approved quantity of transports. ABNs are for non-emergency situations where the patient is requesting a service that is not reasonable and necessary.
-
-
 Document sending/receiving physicians, record numbers, and mileage.
-
In Sending Physician and Receiving Physician, type the names of the physician at the sending facility and receiving facility, respectively.
-
In Sending Record Number, type the medical record number assigned to this patient by the sending facility.
-
In Destination Medical Record Number, type the medical record number assigned to this patient by the receiving destination facility.
Note: This field appears in the EHR module only if your ESO Suite administrator enabled it in the Admin module, under EHR > Billing Tab > Configurable fields.
Information on enabling EHR fields is available in the Admin module online help, in Configure tabs.
-
For Mileage To Closest Hospital, click the number pad icon to the right of the field, then enter the appropriate numerical values from the number pad dialog box that appears to record the mileage from the scene to the nearest hospital.
Note:
-
The mileage is documented only if the patient was transported to a facility farther away than the closest hospital.
-
This field appears in the EHR module only if your ESO Suite administrator enabled it in the Admin module, under EHR > Billing Tab > Configurable fields.
Information on enabling EHR fields is available in the Admin module online help, in Configure tabs.
-
-

