Record patient assessments
A patient assessment is the process identifying and treating life-threatening problems, particularly level of consciousness, cervical spinal stabilization, airway, breathing, and circulation. It includes forming a general impression of the patient. to determine the priority of care based on your immediate assessment, and determining if the patient is a medical or trauma patient.
-
 (If you have not done so already) Access the EHR module in the ESO Suite.
-
Do one of the following.
-
(If you are already working in the ESO Suite) Click the Home icon in the upper left corner of the screen.
-
 (If you have not yet logged in) Log in to the ESO Suite.
-
In a web browser, go to https://www.esosuite.net/EsoSuite.
The ESO Suite login screen appears.
-
Enter your user name, password, and agency name, then click Let's Go.
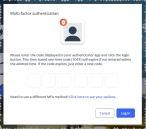
If MFA is enabled, the Multi-factor authentication dialog box appears, displaying one or more methods you can use to verify your login credentials. The number of methods that appear in the dialog box depends on what MFA methods your ESO Suite administrators enabled in the Admin module.

Click graphics
to open them.Information on enabling MFA and specific MFA methods is available in the Admin module online help, in Configure multiple-factor authentication.
Note: If your ESO Suite administrators have disabled MFA ("opted-out"), this dialog does not appear.
-
(If the Multi-factor authentication dialog box appears) Depending on which buttons appear in the dialog box, verify your login in one of the following ways.
 With an authenticator application.
-
Click MFA verification via authenticator app.
The dialog box updates with boxes for entering the numbers of the authentication code, and the ESO Suite sends an authentication code to the authenticator application installed on your device.
-
Open your authenticator application and note the authentication code currently displayed.
-
Enter the authentication code displayed in the authenticator application.
-
Click Log In.
 With a text message (SMS).
-
Click MFA verification via SMS.
The dialog box updates with boxes for entering the numbers of the authentication code, and the ESO Suite sends an authentication code to the phone number recorded in your PM records and identified with MFA codes.
-
Enter the authentication code sent to your MFA-registered phone number.
-
Click Log In.
 With an email message.
-
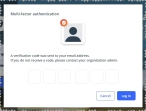
Click MFA verification via email.
The dialog box updates with boxes for entering the numbers of the authentication code, and the ESO Suite sends an authentication code to your agency or department email address, recorded in your PM records.
-
Enter the authentication code sent to your agency or department email address.
-
Click Log In.
-
-
The ESO Suite landing screen appears.

Click graphics
to open them.Note: If MFA is enabled, you can access and manage your MFA options through the PM module, on the Settings > Account page, as described in Manage a user account. If your agency or department has enabled MFA but has not purchased the full-featured version of the PM module, you can access your own MFA settings by clicking Change my Multi-Factor Authentication settings on the landing screen, then using the Settings > Account page that appears. If your agency has not enabled MFA, the Change my Multi-Factor Authentication settings link does not appear on the landing screen.
-
-
On the top side of the home screen, click EHR.
Tip: If your screen or browser window is too narrow to display all your agency's ESO Suite module icons, an options icon appears on the right side of the icon bar. If you click the options icon, a menu appears containing additional module icons.
The EHR screen appears, displaying a list of patient records in the EHR module. The most-recent records appear at the top of the list.
Different record status icons can appear in the list.
Icon Status Unlocked/DraftThe patient record exists in the ESO Suite database, and all crew members listed in the patient record may edit all fields in the record. ESO Suite administrators and personnel with security roles of either
EHR SupervisororEHR Managercan edit non-clinical fields.MobileThe patient record exists on the mobile device, and has not been synchronized with the ESO Suite database. ESO Suite administrators, personnel with security roles of either
EHR SupervisororEHR Manager, and all crew members listed in the patient record can only access a print view of the record.Once the Mobile record synchronizes with the ESO Suite database. the record reflects its current status.
LockedThe patient record exists in the ESO Suite database, and is locked. Only non-clinical fields can be edited by crew members listed in the patient record, ESO Suite administrators and personnel with security roles of either
EHR SupervisororEHR Manager.
-
-
 (If you have not done so already) Add a new patient record, or search for the existing patient record you want to work with.
Information on adding or opening a patient record is available in Add a patient record and Search for a patient record.
The patient record opens and displays the Incident tab, with the Response bookmark selected in the left pane. Fields appear in the right pane for specifying basic information about the incident
If you manually created a new patient record, the Incident Number and State Tracking Number fields populate automatically with ESO Suite-assigned values. You must enter data in all other required fields.
If you imported data from a CAD system, the Incident Number field populates with the data from that source. Other fields in the EHR module may also populate from these sources, depending on what data was recorded in them before the data was imported into the EHR module.
-
At the top of the page, click the Assessments tab.
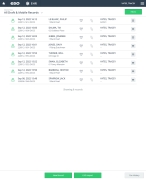
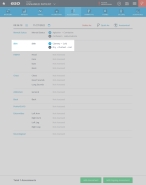
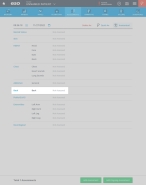
The contents of the Assessments tab appears, listing any assessments already performed on the patient.
-
At the bottom of the page, click Add Assessment.
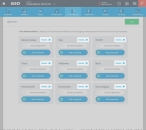
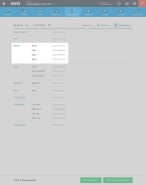
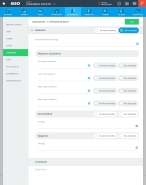
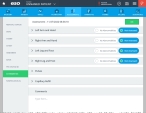
The screen updates to display a list of the body areas you need to assess.
In the upper left corner of the screen, the Date and Time fields populated automatically with the current date and time.
-
 (If necessary) Change the date and time.
-
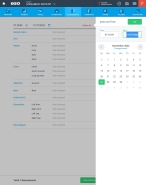
For the date field, click the field or the calendar icon on the right end of the field.
The Date and Time dialog box appears, displaying a calendar and with the value in Date highlighted.
-
Change the value in Date, or select the appropriate date from the calendar, then click OK.
-
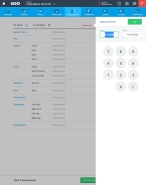
For the time field, click the field or the number pad icon on the right end of the field.
The Date and Time dialog box appears, displaying a number pad and with the value in Time highlighted.
-
Change the value in Time, or enter the appropriate numerical values from the number pad then click OK.
-
-
 (Optional) Enter quick assessments of the patient's conditions.
It can save time to select the "quick assessment" option, to quickly mark any assessment category as either “no abnormalities” or as "not assessed."
-
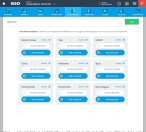
In the upper right corner of the page, click Quick Ax.
The Quick Ax dialog box appears. If you have not alerady documented the assessment category elsewhere in theEHR module , then Not Assessed selected by default.
-
For any assessment categories you determine the patient is uninjured or free of abnormalities, select either Normal Baseline or No Abnormalities.
-
For any assessment categories you need to record injuries or abnormality data, in the upper right corner of that category's card, click Assess.
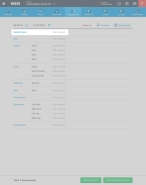
The Assessment dialog box appears, with the corresponding category selected in the left pane, and sections to enter the data for that category in the right pane.
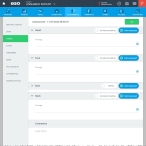
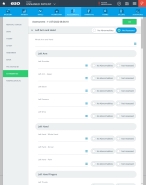
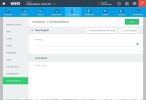
Example: If you click the Assess for the HEENT category, the Assessment dialog box appears, with HEENTselected in the left pane, and listing the Head, Face, Eyes, Neck, and Comments sections in the right pane. By default, the sections are collapsed.
-
Continue with the steps below to enter data for the assessment category you selected.
-
-
Add or edit assessments for the patient's record.
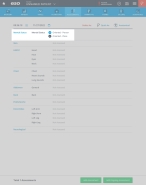
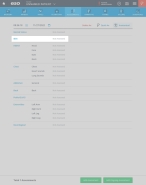
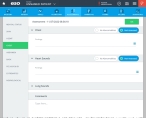
 Mental Status
Mental status includes a patient's level of consciousness and attentiveness, motor and speech activity, mood and affect, thought and perception, attitude and insight, reaction, and higher cognitive abilities. The specific cognitive functions of alertness, language, memory, constructional ability, and abstract reasoning are the most clinically relevant.
The mental status examination is a structured assessment of the patient's behavioral and cognitive functioning. A person with altered mental status may range from being comatose to being awake and alert but confused.
-
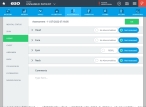
(If you are not in the Quick Ax dialog box) In the assessments list, click Mental Status.
The Assessment dialog box appears, with Mental Status selected in the left pane, and sections to enter mental status data in the right pane.
-
 List your mental status findings.
-
In the right pane, do one of the following.
-
Depending on the situation, select either Normal Baseline for Patient, or look for the appropriate finding.
Note:
-
Choosing either of these options wipes out any data you had previously entered for this assessment. Only text entered in the Comments section remains unaffected.
-
If you choose either of these options, skip to step d below.
-
-
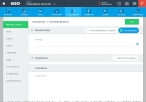
Click the expand icon (left-pointing arrow) to the left of the Mental Status section heading.
The section expands to display fields relevant to the data you need to collect.
-
-
(If you expanded Mental Status) For Findings, click the list icon to the right of the field.
The Findings dialog box appears.
-
For each of the options relevant to this assessment, select either the check mark or the X icon on the slider button.
Depending on which option you selected, the slider moves to the right or left, and either Present or Absent appears on the slider.
-
In the Findings dialog box, click OK.
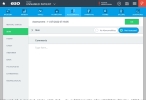
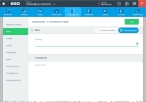
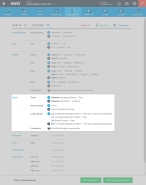
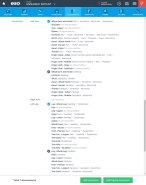
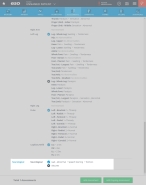
Under the section heading, the options you selected appear in a summary listing beside the present (
 ) and absent (
 ) icons.
-
-
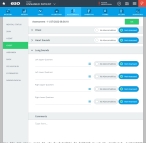
 Detail your orientation evaluation.
-
In the right pane, do one of the following.
-
Select Alert and Oriented x4.
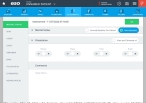
While the Orientation section does not automatically expand, the EHR module sets the Person, Place, Time, and Event fields in the section to Present.
Tip: To see the results of selecting Alert and Oriented x4, click the expand icon (left-pointing arrow) to the left of the Orientation section heading.
-
Click the expand icon (left-pointing arrow) to the left of the Orientation section heading.
The section expands to display fields relevant to the data you need to collect.
-
-
For the Person, Place, Time, and Event fields, select either the check mark or the X icon on the slider button.
Depending on which option you selected, the slider moves to the right or left, and either Present or Absent appears on the slider.
-
-
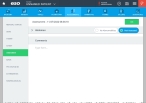
Under the Comments heading, click in the white area and type additional information relative to the patient's condition.
-
In the upper right corner of the Assessment box, click OK.
The assessments list reappears, displaying the updated information in the relevant section.
 Skin
Skin
Skin is the body's outer covering, which protects against heat and light, injury, and infection. Skin regulates body temperature and stores water, fat, and vitamin D, and is the body's largest organ.
-
(If you are not in the Quick Ax dialog box) In the assessments list, click Skin.
The Assessment dialog box appears, with Skin selected in the left pane, and sections to enter skin data in the right pane.
-
In the right pane, do one of the following.
-
Depending on the situation, select either No Abnormalities or Not Assessed.
Note:
-
Choosing either of these options wipes out any data you had previously entered for this assessment. Only text entered in the Comments section remains unaffected.
-
If you choose either of these options, skip to step f below.
-
-
Click the expand icon (left-pointing arrow) to the left of the Skin section heading.
The section expands to display fields relevant to the data you need to collect.
-
-
(If you expanded Skin) For Findings, click the list icon to the right of the field.
The Findings dialog box appears.
-
For each of the options relevant to this assessment, select either the check mark or the X icon on the slider button.
Depending on which option you selected, the slider moves to the right or left, and either Present or Absent appears on the slider.
-
In the Findings dialog box, click OK.
Under the section heading, the options you selected appear in a summary listing beside the present (
 ) and absent (
 ) icons.
 -
Under the Comments heading, click in the white area and type additional information relative to the patient's condition.
-
In the upper right corner of the Assessment box, click OK.
The assessments list reappears, displaying the updated information in the relevant section.
 HEENT
HEENT
A HEENT assessment focuses on the head, eyes, ears, nose, and throat of the patient.
-
(If you are not in the Quick Ax dialog box) In the assessments list, click HEENT.
The Assessment dialog box appears, with HEENT selected in the left pane, and sections to enter HEENT data in the right pane.
-
 List your head, face, and neck findings.
-
In the right pane, do one of the following.
-
Depending on the situation, for the Head, Face, and Neck sections, select either No Abnormalities or Not Assessed.
Note:
-
Choosing either of these options wipes out any data you had previously entered for this assessment. Only text entered in the Comments section remains unaffected.
-
If you choose either of these options, skip to step c below.
-
-
Click the expand icon (left-pointing arrow) to the left of the Head, Face, and Neck section headings.
Each of these sections expands to display fields relevant to the data you need to collect.
-
-
(If you expanded any of the Head, Face, and Neck sections) For Findings, click the list icon to the right of the field.
The Findings dialog box appears.
-
For each of the options relevant to this assessment, select either the check mark or the X icon on the slider button.
Depending on which option you selected, the slider moves to the right or left, and either Present or Absent appears on the slider.
-
In the Findings dialog box, click OK.
Under the section heading, the options you selected appear in a summary listing beside the present (
 ) and absent (
 ) icons.
-
-
 Detail your eyes evaluation.
-
In the right pane, do one of the following.
-
Depending on the situation, select either PERRL or Not Assessed.
PERRL is the assessment for eyes, during which EMS personnel examines the size, shape, and reaction of the pupil to light.
Note:
-
Choosing either of these options wipes out any data you had previously entered for this assessment. Data recorded in the Head, Face, Neck, and Comments sections remains unaffected.
-
If you choose either of these options, skip to step d below.
-
-
Click the expand icon (left-pointing arrow) to the left of the Eyes section heading.
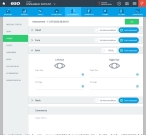
The section expands to display fields relevant to the data you need to collect.
-
-
 Under both Left Eye and Right Eye, do the following.
-
For Pupil Size, click either the eye icon above the field, or click the field or the list icon to the right of the field, then select the appropriate single option from the menu that appears.
-
For Findings, click the list icon to the right of the field.
The Findings dialog box appears.
-
For each of the options relevant to this assessment, select either the check mark or the X icon on the slider button.
Depending on which option you selected, the slider moves to the right or left, and either Present or Absent appears on the slider.
-
In the Findings dialog box, click OK.
Under the section heading, the options you selected appear in a summary listing beside the present (
 ) and absent (
 ) icons.
-
-
-
Under the Comments heading, click in the white area and type additional information relative to the patient's condition.
-
In the upper right corner of the Assessment box, click OK.
The assessments list reappears, displaying the updated information in the relevant section.
 Chest
Chest
The chest is the area of the body located between the neck and the abdomen. The chest contains the lungs, the heart, and part of the aorta.
-
(If you are not in the Quick Ax dialog box) In the assessments list, click Chest.
The Assessment dialog box appears, with Chest selected in the left pane, and sections to enter chest data in the right pane.
-
 List your chest and heart sounds findings.
-
In the right pane, do one of the following.
-
Depending on the situation, for the Chest and Heart Sounds sections, select either No Abnormalities or Not Assessed.
Note:
-
Choosing either of these options wipes out any data you had previously entered for this assessment. Only text entered in the Comments section remains unaffected.
-
If you choose either of these options, skip to step c below.
-
-
Click the expand icon (left-pointing arrow) to the left of the Chest and Heart Sounds section headings.
Each of these sections expands to display fields relevant to the data you need to collect.
-
-
(If you expanded either of the Chest and Heart Sounds sections) For Findings, click the list icon to the right of the field.
The Findings dialog box appears.
-
For each of the options relevant to this assessment, select either the check mark or the X icon on the slider button.
Depending on which option you selected, the slider moves to the right or left, and either Present or Absent appears on the slider.
-
In the Findings dialog box, click OK.
Under the section heading, the options you selected appear in a summary listing beside the present (
 ) and absent (
 ) icons.
-
-
 Detail the lung sounds.
-
Click the expand icon (left-pointing arrow) to the left of the Lung Sounds section heading.
The section expands to display fields relevant to the data you need to collect.
-
In the right pane, for Left Upper Quadrant, Left Lower Quadrant, Right Upper Quadrant, and Right Lower Quadrant, do one of the following.
-
Depending on the situation, select either No Abnormalities or Not Assessed.
Note:
-
Choosing either of these options wipes out any data you had previously entered for this assessment. Data recorded in the Chest, Heart Sounds, and Comments sections remains unaffected.
-
If you choose either of these options, skip to step d below.
-
-
 Record your findings for that quadrant of the lung.
-
Click the list icon to the right of the field.
The Findings dialog box appears.
-
For each of the options relevant to this assessment, select either the check mark or the X icon on the slider button.
Depending on which option you selected, the slider moves to the right or left, and either Present or Absent appears on the slider.
-
In the Findings dialog box, click OK.
Under the section heading, the options you selected appear in a summary listing beside the present (
 ) and absent (
 ) icons.
-
-
-
-
Under the Comments heading, click in the white area and type additional information relative to the patient's condition.
-
In the upper right corner of the Assessment box, click OK.
The assessments list reappears, displaying the updated information in the relevant section.
 Abdomen
The abdomen is the area of the body that contains all of the structures between the chest and the pelvis. The abdomen includes the stomach, small intestine, colon, rectum, liver, spleen, pancreas, kidneys, appendix, gallbladder, and bladder.
-
(If you are not in the Quick Ax dialog box) In the assessments list, click Abdomen.
The Assessment dialog box appears, with Abdomen selected in the left pane, and sections to enter abdomen data in the right pane.
-
In the right pane, do one of the following.
-
Depending on the situation, select either No Abnormalities or Not Assessed.
Note:
-
Choosing either of these options wipes out any data you had previously entered for this assessment. Only text entered in the Comments section remains unaffected.
-
If you choose either of these options, skip to step f below.
-
-
Click the expand icon (left-pointing arrow) to the left of the Abdomen section heading.
The section expands to display fields relevant to the data you need to collect.
-
-
 Specify general abdominal findings.
-
For General Abdomen Findings, for Findings, click the list icon to the right of the field.
The Findings dialog box appears.
-
For each of the options relevant to this assessment, select either the check mark or the X icon on the slider button.
Depending on which option you selected, the slider moves to the right or left, and either Present or Absent appears on the slider.
-
In the Findings dialog box, click OK.
Under the section heading, the options you selected appear in a summary listing beside the present (
 ) and absent (
 ) icons.
-
-
 Detail the abdomen quadrants examination.
-
In the right pane, for Left Upper Quadrant, Left Lower Quadrant, Right Upper Quadrant, and Right Lower Quadrant, do one of the following.
-
Depending on the situation, select either No Abnormalities or Not Assessed.
Note:
-
Choosing either of these options wipes out any data you had previously entered for this assessment. Data recorded in the Periumbilical and Epigastric sections remains unaffected.
-
If you choose either of these options, skip to step e below.
-
-
 Record your findings for that quadrant of the abdomen.
-
Click the list icon to the right of the field.
The Findings dialog box appears.
-
For each of the options relevant to this assessment, select either the check mark or the X icon on the slider button.
Depending on which option you selected, the slider moves to the right or left, and either Present or Absent appears on the slider.
-
In the Findings dialog box, click OK.
Under the section heading, the options you selected appear in a summary listing beside the present (
 ) and absent (
 ) icons.
-
-
-
-
 Record periumbilical and epigastric information.
The periumbilical region is situated or adjacent to the navel ("around the belly button"). The epigastric region is the upper part of your abdomen just below the rib cage.
-
In the right pane, do one of the following.
-
Depending on the situation, for the Periumbilical and Epigastric sections, select either No Abnormalities or Not Assessed.
Note:
-
Choosing either of these options wipes out any data you had previously entered for this assessment. Only text entered in the Comments section remains unaffected.
-
If you choose either of these options, skip to step f below.
-
-
 Specify your periumbilical and epigastric findings.
-
In the Periumbilical and Epigastric sections, For Findings, click the list icon to the right of the field.
The Findings dialog box appears.
-
For each of the options relevant to this assessment, select either the check mark or the X icon on the slider button.
Depending on which option you selected, the slider moves to the right or left, and either Present or Absent appears on the slider.
-
In the Findings dialog box, click OK.
Under the section heading, the options you selected appear in a summary listing beside the present (
 ) and absent (
 ) icons.
-
-
-
-
Under the Comments heading, click in the white area and type additional information relative to the patient's condition.
-
In the upper right corner of the Assessment box, click OK.
The assessments list reappears, displaying the updated information in the relevant section.
 Back
Back
The back is the posterior aspect of trunk, below the neck and above the buttocks, along and to the sides of the spine between the neck and the pelvis. It consists of the vertebral column with associated muscles (erector spinae and transversospinalis) and overlying integument.
-
(If you are not in the Quick Ax dialog box) In the assessments list, click Back.
The Assessment dialog box appears, with Back selected in the left pane, and sections to enter back data in the right pane.
-
In the right pane, do one of the following.
-
Depending on the situation, select either No Abnormalities or Not Assessed.
Note:
-
Choosing either of these options wipes out any data you had previously entered for this assessment. Only text entered in the Comments section remains unaffected.
-
If you choose either of these options, skip to step e below.
-
-
Click the expand icon (left-pointing arrow) to the left of the Back section heading.
The section expands to display fields relevant to the data you need to collect.
-
-
 Specify general back findings.
-
For Findings, click the list icon to the right of the field.
The Findings dialog box appears.
-
For each of the options relevant to this assessment, select either the check mark or the X icon on the slider button.
Depending on which option you selected, the slider moves to the right or left, and either Present or Absent appears on the slider.
-
In the Findings dialog box, click OK.
Under the section heading, the options you selected appear in a summary listing beside the present (
 ) and absent (
 ) icons.
-
-
 Detail the cervical, thoracic, lumbar, and sacral examinations.
-
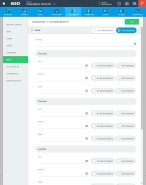
In the right pane, for Cervical, Thoracic, Lumbar, and Sacral, do one of the following.
-
Depending on the situation, select either No Abnormalities or Not Assessed.
Note:
-
Choosing either of these options wipes out any data you had previously entered for this assessment.
-
If you choose either of these options, skip to step e below.
-
-
 Record your findings for each of the cervical, thoracic, lumbar, and sacral examinations.
-
For Left, Midline, and Right, click the list icon to the right of the field.
The Findings dialog box appears.
-
For each of the options relevant to this assessment, select either the check mark or the X icon on the slider button.
Depending on which option you selected, the slider moves to the right or left, and either Present or Absent appears on the slider.
-
In the Findings dialog box, click OK.
Under the section heading, the options you selected appear in a summary listing beside the present (
 ) and absent (
 ) icons.
-
-
-
-
Under the Comments heading, click in the white area and type additional information relative to the patient's condition.
-
In the upper right corner of the Assessment box, click OK.
The assessments list reappears, displaying the updated information in the relevant section.
 Pelvis/GU/GI
The pelvis is the area of the body below the abdomen that is located between the hip bones and contains the bladder and rectum. The GU is the urinary system and genitalia, and the GI is the stomach and intestine, and
-
(If you are not in the Quick Ax dialog box) In the assessments list, click Pelvis/GU/GI.
The Assessment dialog box appears, with Pelvis/GU/GI selected in the left pane, and sections to enter pelvis, urogenital, and gastrointestinal in the right pane.
-
In the right pane, do one of the following.
-
Depending on the situation, select either No Abnormalities or Not Assessed.
Note:
-
Choosing either of these options wipes out any data you had previously entered for this assessment. Only text entered in the Comments section remains unaffected.
-
If you choose either of these options, skip to step f below.
-
-
Click the expand icon (left-pointing arrow) to the left of the Pelvis/GU/GI section heading.
The section expands to display fields relevant to the data you need to collect.
-
-
(If you expanded Pelvis/GU/GI) For Findings, click the list icon to the right of the field.
The Findings dialog box appears.
-
For each of the options relevant to this assessment, select either the check mark or the X icon on the slider button.
Depending on which option you selected, the slider moves to the right or left, and either Present or Absent appears on the slider.
-
In the Findings dialog box, click OK.
Under the section heading, the options you selected appear in a summary listing beside the present (
 ) and absent (
 ) icons.
 -
Under the Comments heading, click in the white area and type additional information relative to the patient's condition.
-
In the upper right corner of the Assessment box, click OK.
The assessments list reappears, displaying the updated information in the relevant section.
 Extremities
Extremities are the portions of the appendicular skeleton situated away from the center of the body, such as a legs, arms, hands, and feet.
-
(If you are not in the Quick Ax dialog box) In the assessments list, click Extremities.
The Assessment dialog box appears, with Extremities selected in the left pane, and sections to enter extremities data in the right pane.
-
 Specify arm and hand information.
-
In the right pane, for the Left Arm and Hand and Right Arm and Hand sections, do one of the following.
-
Depending on the situation, select either No Abnormalities or Not Assessed.
Note:
-
Choosing either of these options wipes out any data you had previously entered for this assessment. Only text entered in the Comments section remains unaffected.
-
If you choose either of these options, skip to step c below.
-
-
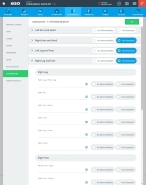
Click the expand icon (left-pointing arrow) to the left of the Left Arm and Hand and Right Arm and Hand section headings.
The section expands to display fields relevant to the data you need to collect.
-
-
 Specify arm and hand findings.
-
Under the Left Arm and Hand and Right Arm and Hand sections, for Whole Arm and Hand, click the list icon to the right of the field.
The Findings dialog box appears.
-
For each of the options relevant to this assessment, select either the check mark or the X icon on the slider button.
Depending on which option you selected, the slider moves to the right or left, and either Present or Absent appears on the slider.
-
In the Findings dialog box, click OK.
Under the section heading, the options you selected appear in a summary listing beside the present (
 ) and absent (
 ) icons.
 -
 Detail left arm findings.
-
Under Left Arm, for Left Shoulder, Left Arm - Upper, Left Elbow, Left Forearm, and Left Wrist, do one of the following.
-
Depending on the situation, select either No Abnormalities or Not Assessed.
Note:
-
Choosing either of these options wipes out any data you had previously entered for this assessment.
-
If you choose either of these options, skip to step 5 below.
-
-
 Record your findings for each of the shoulder, arm, elbow, forearm, and wrist examinations.
-
Click the list icon to the right of the field.
The Findings dialog box appears.
-
For each of the options relevant to this assessment, select either the check mark or the X icon on the slider button.
Depending on which option you selected, the slider moves to the right or left, and either Present or Absent appears on the slider.
-
In the Findings dialog box, click OK.
Under the section heading, the options you selected appear in a summary listing beside the present (
 ) and absent (
 ) icons.
-
-
-
-
 Detail left hand findings.
-
Under Left Hand, for Left Hand - Whole Hand, Left Hand - Dorsal, and Left Hand - Palm, do one of the following.
-
Depending on the situation, select either No Abnormalities or Not Assessed.
Note:
-
Choosing either of these options wipes out any data you had previously entered for this assessment.
-
If you choose either of these options, skip to step 6 below.
-
-
 Record your findings for each of the whole hand, dorsal, and palm examinations.
-
Click the list icon to the right of the field.
The Findings dialog box appears.
-
For each of the options relevant to this assessment, select either the check mark or the X icon on the slider button.
Depending on which option you selected, the slider moves to the right or left, and either Present or Absent appears on the slider.
-
In the Findings dialog box, click OK.
Under the section heading, the options you selected appear in a summary listing beside the present (
 ) and absent (
 ) icons.
-
-
-
-
 Detail left finger findings.
-
Under Left Hand Fingers, for Left Thumb, Left Finger (2nd) - Index, Left Finger (3rd) - Middle, Left Finger (4th) - Ring, and Finger (5th) - Smallest, do one of the following.
-
Depending on the situation, select either No Abnormalities or Not Assessed.
Note:
-
Choosing either of these options wipes out any data you had previously entered for this assessment.
-
If you choose either of these options, skip to step 7 below.
-
-
 Record your findings for each of the thumb and finger examinations.
-
Click the list icon to the right of the field.
The Findings dialog box appears.
-
For each of the options relevant to this assessment, select either the check mark or the X icon on the slider button.
Depending on which option you selected, the slider moves to the right or left, and either Present or Absent appears on the slider.
-
In the Findings dialog box, click OK.
Under the section heading, the options you selected appear in a summary listing beside the present (
 ) and absent (
 ) icons.
-
-
-
-
Repeat the steps above to detail the right arm, hand, and finger findings.
-
-
-
 Record leg and foot information.
-
In the right pane, for the Left Leg and Foot and Right Leg and Foot sections, do one of the following.
-
Depending on the situation, select either No Abnormalities or Not Assessed.
Note:
-
Choosing either of these options wipes out any data you had previously entered for this assessment. Only text entered in the Comments section remains unaffected.
-
If you choose either of these options, skip to step d below.
-
-
Click the expand icon (left-pointing arrow) to the left of the Left Leg and Foot and Right Leg and Foot section headings.
The section expands to display fields relevant to the data you need to collect.
-
-
 Specify leg and foot findings.
-
 Detail left leg findings.
-
Under Left Leg, for Left Leg - Whole Leg, Left Hip, Left Leg - Upper, Left Knee, Left Leg - Lower,and Left Wrist, do one of the following.
-
Depending on the situation, select either No Abnormalities or Not Assessed.
Note:
-
Choosing either of these options wipes out any data you had previously entered for this assessment.
-
If you choose either of these options, skip to step 2 below.
-
-
 Record your findings for each of the hip, leg, knee, and ankle examinations.
-
Click the list icon to the right of the field.
The Findings dialog box appears.
-
For each of the options relevant to this assessment, select either the check mark or the X icon on the slider button.
Depending on which option you selected, the slider moves to the right or left, and either Present or Absent appears on the slider.
-
In the Findings dialog box, click OK.
Under the section heading, the options you selected appear in a summary listing beside the present (
 ) and absent (
 ) icons.
-
-
-
-
 Detail left foot findings.
-
Under Left Foot, for Whole Foot - Left, Left Foot - Dorsal, and Left Foot - Plantar, do one of the following.
-
Depending on the situation, select either No Abnormalities or Not Assessed.
Note:
-
Choosing either of these options wipes out any data you had previously entered for this assessment.
-
If you choose either of these options, skip to step 3 below.
-
-
 Record your findings for each of the whole foot, dorsal, and plantar examinations.
-
Click the list icon to the right of the field.
The Findings dialog box appears.
-
For each of the options relevant to this assessment, select either the check mark or the X icon on the slider button.
Depending on which option you selected, the slider moves to the right or left, and either Present or Absent appears on the slider.
-
In the Findings dialog box, click OK.
Under the section heading, the options you selected appear in a summary listing beside the present (
 ) and absent (
 ) icons.
-
-
-
-
 Detail left toes findings.
-
Under Left Foot - Toes, for Left Toe (1st) - Largest, Left Toe (2nd), Left Toe (3rd), Left Toe (4th), and Left Toe (5th) - Smallest, do one of the following.
-
Depending on the situation, select either No Abnormalities or Not Assessed.
Note:
-
Choosing either of these options wipes out any data you had previously entered for this assessment.
-
If you choose either of these options, skip to step 4 below.
-
-
 Record your findings for each of the toe examinations.
-
Click the list icon to the right of the field.
The Findings dialog box appears.
-
For each of the options relevant to this assessment, select either the check mark or the X icon on the slider button.
Depending on which option you selected, the slider moves to the right or left, and either Present or Absent appears on the slider.
-
In the Findings dialog box, click OK.
Under the section heading, the options you selected appear in a summary listing beside the present (
 ) and absent (
 ) icons.
-
-
-
-
Repeat the steps above to detail the right leg, foot, and toe findings.
-
-
-
 Capture pulse information.
You should assess peripheral vascular systems to determine the characteristics of the pulse, ascertain the presence of an arterial bruit(s), and detect the occurrence of venous inflammation with possible secondary thrombosis of that vein.
-
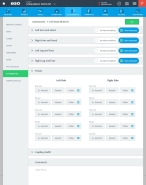
Click the expand icon (left-pointing arrow) to the left of the Pulses section heading.
The section expands to display fields relevant to the data you need to collect.
-
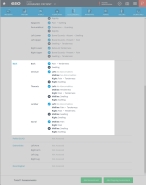
Under Left Side, for Brachial, Radial, Femoral, Pedal, and Carotid, select either 2+ Normal, Absent, or click Other and choose the single option that best-describes the pulse in that artery from the dialog box that appears.
-
Repeat the previous step under Right Side.
-
-
 Include capillary refill information.
Capillary refill is the time it takes for a distal capillary bed, such as those found in the fingers, to regain color after pressure has been applied to cause blanching. A prolonged refill time may indicate the presence of circulatory shock.
-
Click the expand icon (left-pointing arrow) to the left of the Capillary Refill section heading.
The section expands to display fields relevant to the data you need to collect.
-
Under Left Side, for Left Upper and Left Lower, select < 2 Sec, or click Other and choose the number of seconds it takes for the capillary refill to occur, from the dialog box that appears.
-
Repeat the previous step under Right Side.
-
-
Under the Comments heading, click in the white area and type additional information relative to the patient's condition.
-
In the upper right corner of the Assessment box, click OK.
The assessments list reappears, displaying the updated information in the relevant section.
 Neurological
Neurological assessment entails the body’s nervous system, including the brain, spinal cord and the nervous system.
-
(If you are not in the Quick Ax dialog box) In the assessments list, click Neurological.
The Assessment dialog box appears, with Neurological selected in the left pane, and sections to enter neurological data in the right pane.
-
In the right pane, do one of the following.
-
Depending on the situation, select either Normal Baseline for Patient or Not Assessed.
Note:
-
Choosing either of these options wipes out any data you had previously entered for this assessment. Only text entered in the Comments section remains unaffected.
-
If you choose either of these options, skip to step f below.
-
-
Click the expand icon (left-pointing arrow) to the left of the Neurological section heading.
The section expands to display fields relevant to the data you need to collect.
-
-
(If you expanded Neurological) For Findings, click the list icon to the right of the field.
The Findings dialog box appears.
-
For each of the options relevant to this assessment, select either the check mark or the X icon on the slider button.
Depending on which option you selected, the slider moves to the right or left, and either Present or Absent appears on the slider.
-
In the Findings dialog box, click OK.
Under the section heading, the options you selected appear in a summary listing beside the present (
 ) and absent (
 ) icons.
 -
Under the Comments heading, click in the white area and type additional information relative to the patient's condition.
-
In the upper right corner of the Assessment box, click OK.
The assessments list reappears, displaying the updated information in the relevant section.
-
-
 (If performing multiple assessments) Add another set of assessment to the patient's record.
-
In the lower left corner of the assessments list, click Add Ongoing Assessment.
The EHR module copies the current set of assessments, pastes the copy at the top of the assessments lists, and updates the counter in Total Assessments in the lower left corner of the page.
Tip: You can differentiate between the previous set of assessments and the new (copied) set of assessments by checking the time and date value in the upper left corner of the assessment.
You can now edit the values in the new set of assessments as needed for the ongoing assessment.
-

