Create a linkup
A linkup is a secure communications channel between EHR and a hospital or an EMS provider/agency, which lets a medic email, FAX, or hand-deliver a patient care report directly to the hospital or EMS provider.
The hospital or EMS provider/agency to receive the care report must meet the following prerequisites before you can create a linkup in the Admin module.
- ESO and the hospital EMS provider/agency have discussed and agreed to establishing a linkup for sharing patient data.
- A business associate agreement (BAA) is signed and on file with ESO.
In the Admin module, the following prerequisites must be met.
-
The hospital or EMS provider/agency has been created as a location.
Information on defining locations is available in Configure location information.
- The location's address has a match for both a zip code and county in the service area of a link-up hospital or EMS provider/agency. If both do not match, you will not be able to create a linkup.
-
Do one of the following.
-
(If you are already working in the ESO Suite) Click the Home icon in the upper left corner of the screen.
-
 (If you have not yet logged in) Log in to the ESO Suite.
-
In a web browser, go to https://www.esosuite.net/EsoSuite.
The ESO Suite login screen appears.
-
Enter your user name, password, and agency name, then click Let's Go.
If MFA is enabled, the Multi-factor authentication dialog box appears, displaying one or more methods you can use to verify your login credentials. The number of methods that appear in the dialog box depends on what MFA methods your ESO Suite administrators enabled in the Admin module.

Click graphics
to open them.Information on enabling MFA and specific MFA methods is available in the Admin module online help, in Configure multiple-factor authentication.
Note: If your ESO Suite administrators have disabled MFA ("opted-out"), this dialog does not appear.
-
(If the Multi-factor authentication dialog box appears) Depending on which buttons appear in the dialog box, verify your login in one of the following ways.
 With an authenticator application.
-
Click MFA verification via authenticator app.
The dialog box updates with boxes for entering the numbers of the authentication code, and the ESO Suite sends an authentication code to the authenticator application installed on your device.
-
Open your authenticator application and note the authentication code currently displayed.
-
Enter the authentication code displayed in the authenticator application.
-
Click Log In.
 With a text message (SMS).
-
Click MFA verification via SMS.
The dialog box updates with boxes for entering the numbers of the authentication code, and the ESO Suite sends an authentication code to the phone number recorded in your PM records and identified with MFA codes.
-
Enter the authentication code sent to your MFA-registered phone number.
-
Click Log In.
 With an email message.
-
Click MFA verification via email.
The dialog box updates with boxes for entering the numbers of the authentication code, and the ESO Suite sends an authentication code to your agency or department email address, recorded in your PM records.
-
Enter the authentication code sent to your agency or department email address.
-
Click Log In.
-
-
The ESO Suite landing screen appears.

Click graphics
to open them.Note: You can access and manage your MFA options through the PM module, on the Settings > Account page, as described in Manage a user account. If your agency or department has enabled MFA but has not purchased the full-featured version of the PM module, you can access your own MFA settings by clicking Change my Multi-Factor Authentication settings on the landing screen, then using the Settings > Account page that appears. If your agency has not enabled MFA, the Change my Multi-Factor Authentication settings link does not appear on the landing screen.
-
-
On the top side of the home screen, click Admin.
Tip: If your screen or browser window is too narrow to display all your agency's ESO Suite module icons, an options icon appears on the right side of the icon bar. If you click the options icon, a menu appears containing additional module icons.
The Admin screen appears, displaying the Welcome screen.
-
In the left pane, expand General > Locations.
A list of different types of locations appears.
-
Do one of the following.
 Create a hospital linkup
-
Scroll down, then select Hospitals.
The Hospitals screen appears.
-
Click Edit for the hospital you want to create a linkup for.
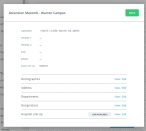
A dialog box appears, displaying a summary values already specified for that hospital.
-
At the bottom of that dialog box, verify that the label Link Available appears.
If the label No Link Available appears instead, one or more of the prerequisites for creating a linkup has not been met.
-
(If Link Available appears) For Hospital Link Up, click View / Edit.
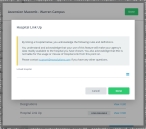
The Hospital Link Up dialog box appears.
- Read the agreement details for sharing patient data with the hospital.
-
For Linked Hospital, click the field or the list icon to the right of the field, then select the appropriate single option from the menu that appears.
The menu contains all the hospitals that ESO has set up in the ESO Suite, that have the same county and zip code as the location you are creating the linkup for.
- Click OK.
-
Click Done.
The Hospital Linked label appears in the location’s details dialog box.
If a medic using EHR selects the linked hospital in an patient care record, then that patient care report becomes available in the hospital’s EHR system to view as an incoming patient.
The hospital can view the record whether it has a draft or locked status, until you deactivate that location in the Admin module.
 Create an EMS provider/agency linkup
You can create an EMS provider/agency link-up as well, which can expedite a patient care transfer to another unit, such as from a ground unit to an air unit. The receiving provider would need to have a copy of the patient care record, and the linkup provides another way of delivering it.
-
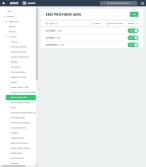
Select EMS Provider (Air) or EMS Provider (Ground).
The EMS Provider (Air) or EMS Provider (Ground) screen appears.
-
Click Edit for the EMS provider you want to create a linkup for.
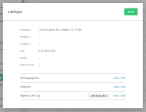
A dialog box appears, displaying a summary of values already specified for that EMS provider.
-
At the bottom of that dialog box, verify that the label Link Available appears.
If the label No Link Available appears instead, one or more of the prerequisites for creating a linkup has not been met.
-
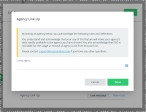
(If Link Available appears) For Agency Link Up, click View / Edit.
The Agency Link Up dialog box appears.
- Read the agreement details for sharing patient data with the EMS provider.
-
For Linked Agency, click click the field or the list icon to the right of the field, then select the appropriate single option from the menu that appears.
The menu contains all the EMS providers that ESO has set up in the ESO Suite, that have the same county and zip code as the agency you are creating the linkup for.
Warning: This is a list of all the EMS providers in your state. Be very careful when selecting the provider to link to, so that you do not inadvertently send patient data to the wrong provider.
- Click OK.
-
Click Done.
The Agency Linked label appears in the agency’s details dialog box.
If a medic using EHR selects the linked agency in an patient care record, then that patient care report becomes available in the agency’s ESO Suite to view as an incoming patient.
The agency can view the record whether it has a draft or locked status, until you deactivate that location in the Admin module.
-


