Attach a Physician's Certification Statement (PCS) form
A Physician's Certification Statement (PCS) is required for patients who are under the direct care of a physician and are required for scheduled and non-scheduled non-emergency ambulance transports. The physician is responsible for supervising the medical care of the patient, including reviewing the patient’s program of care, ordering medications, monitoring changes in the patient’s medical status, and signing and dating all orders.
Note: A PCS is not required for emergency transports or for non-scheduled, non-emergency transports of patients residing at home or in facilities where they are not under the direct care of a physician.
-
(If you have not done so already) Add a new incident, or open an existing incident, as described in Add or edit an incident.
By default, the Response tab and Incident Information sub-tab are selected.
-
Click the Patient tab, and then click the Insurance sub-tab.
Fields appear for specifying the information about any insurance the patient has.
-
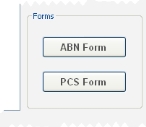
In the lower right corner of the interface, under Forms, click PCS Form.
The Physician's Certification Statement dialog box appears.
- Make selections in the form as appropriate.
- From Facility or Hospital Faculty Position, select the type of faculty authorizing the ambulance transportation.
-
 Capture the faculty signature.
-
Click Get Faculty Signature.
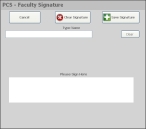
The PCS - Faculty Signature dialog box appears.
-
Click the Type Name field, and then use the keyboard that appears to type the name of the facility or hospital faculty who will sign the PCS.
Tip: To remove the name from Type Name, click Clear to the right of the field.
-
Under Please Sign Here, have the individual use the stylus, their finger, or the mouse pointer to "write" their signature in the box.
Tip: If the signature is not satisfactory, click Clear Signature and have the individual sign the form again.
-
Click Save Signature.
The PCS - Faculty Signature dialog box closes.
-
-
In the Physician's Certification Statement dialog box, click Get Patient Signature.
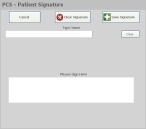
The PCS - Patient Signature dialog box appears.
- Repeat the steps under Capture the faculty signature above to capture the patient's signature.
-
Click View Form.
The form, as it would appear if you print it, appears in FH Medic.
Tip: You can print the PCS by clicking Print at the top right of the interface, and then following the prompts that appear.
- In the upper left corner of the interface, click Go Back.


