Print a schedule from the Schedule dialog box
- (If it is not open already) Open an existing schedule.
-
At the bottom of the dialog box, click Print.
The Print Scheduling Console dialog box appears.

- Under Print Schedule, type the name of the schedule you want to print, or click the lookup button
 and then use the Query dialog box which appears to select the schedule.
 -
 (Optional) Limit the amount of information included in the schedule you want to print.
-
Click Filtering.
The Filtering Options dialog box appears.

Note: Divisions(s) and Battalion(s) do not appear in the dialog box unless you have accessed the Administrative Options dialog box, and on the License tab, under Station Organization, selected Use Division/Battalion. When this option is cleared, the Ignore items without Station, Shift, Division, or Battalion is renamed Ignore items without Station, or Shift.
- In Stations, type the codes for the stations you want to include, or click the lookup button and then use the Lookup - Stations dialog box that appears to select the stations.
- In Units, type the codes for the units you want to include, or click the lookup button and then use the Lookup - Units dialog box that appears to select the units.
- (If it appears) In Division(s), type the codes for the divisions you want to include, or click the lookup button and then use the Lookup - Divisions dialog box that appears to select the divisions.
- (If it appears) In Battalion(s), type the codes for the battalions you want to include, or click the lookup button and then use the Lookup - Battalions dialog box that appears to select the battalions.
-
Select or clear Ignore items without Station, or Shift to indicate whether to include schedule information not tied to a station or a shift.
Note: This field may also be named Ignore items without Station, Shift, Division, or Battalion, depending on whether the administration option is enabled.
- (Optional) Click Clear Filter to reset the values in the dialog box to blank.
- Click Apply Filter, and then click Close.
-
-
In Shifts & Staff Status At, type the date and time of the information you want included in the schedule to print, or click the lookup button
and then use the Calendar dialog box that appears to select the date and time.Tip: Click Now to use today's date and the current time.
The shifts on duty at the date and time you specify appear in the list in the center of the dialog box.
-
(Optional, if multiple shifts appear) From the list, select the shifts you want to work with, and then select or clear Only show staff from selected shift(s) to indicate whether or not you want to view only the staff on the selected shift.
-
(Optional) Include specific additional information in the schedule you are printing.
-
Click Options.
The Scheduling Console Options dialog box appears.

-
Select or clear the options in the dialog box corresponding to the data you want to display in the printed schedule.
Select this To do this Display the All Involved section Include the All Involved Staff section in the printed schedule.

Display the
Assignments Not Covered sectionInclude the Assignments Not Covered section in the printed schedule. This section includes exchange records with no covering staff required.

Count Roles Count roles and display the totals in the group heading.

Count
PositionsCount positions and display the totals in the group heading.

Highlight shift changes This option is not supported for printed reports.
Show Staff Rank Display a staff rank column in the printed output.

Tip: If you have schedules with numerous staff, disable this option to improve performance.
Show Division and Battalion Group staff members by division and battalion.

Note: To activate this option, choose Administration → Administrative Options. In the Administrative Options dialog box that appears, click the License tab, and then under Station Organization, select Use Division/Battalion. Click OK.
Show Future
Unapproved Exchanges for the next __ daysDisplay exchanges in the future that have not been approved for the specified number of days.

-
Under Data Options, select or clear the options corresponding to the data that should be limited to only what is current at the specified time.
Example: An approved exchange has a staff member working the first two hours of a shift, but not for the rest of the shift, and you select Approved Exchanges in the Scheduling Console Options dialog box. The exchange information for that staff member appears in the Scheduling Console dialog box only if the time under Shifts & Staff Status At is within the first two hours of the shift.
-
Select or clear Combine Multiple Shift Activities to indicate whether or not to create a single activity that combines information when there are multiple shifts active at the time the activity is created.
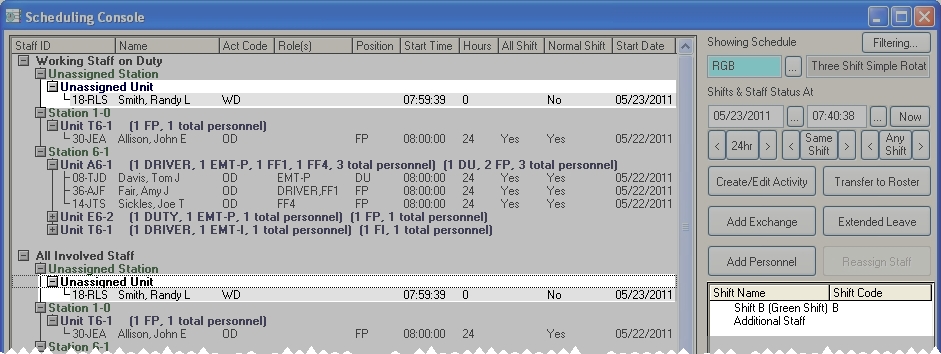
Example: An additional staff member (Randy Smith) has been added to a shift. Any time additional staff members are added to a shift, an additional shift is created to account for the additional staff members. In the Scheduling Console dialog box, the list of shifts appears on the right side of the dialog box.

If Combine Multiple Shift Activities is cleared, when you click Create/Edit Activity in the In the Scheduling Console dialog box, FH creates two activities--one for the staff members normally on the shift, and one for any additional staff members. If Combine Multiple Shift Activities is selected, FH creates a single activity that merges the information from the two activities into a single activity. In this case, the information for Randy Smith is added to the activity record for the rest of the staff.

Note: When you combine activities, some of the activity defaults may not match the shift defaults in the combined activity.
- Click OK.
-
-
Select or clear Print Working Staff Category to indicate whether or not to include the information in the left side of the Scheduling Console dialog box, under Working Staff On Duty.
- Select or clear Print All Assigned Staff Category to indicate whether or not to include the information in the left side of the Scheduling Console dialog box, under All Involved Staff.
- Select or clear Print Exchanges and Reassignments to indicate whether or not to include the assignment, exchange, and reassignment information in the lower left side of the Scheduling Console dialog box.
-
Click OK.
The Output Report To dialog box appears.

- Specify values in the dialog box as appropriate to your needs.
- Click OK.
- In the Print Scheduling Console dialog box, click Close.