Export incident records
-
Choose Administration → Database Administration → Custom Data Export.
The Custom Data Export dialog box appears.
-
Select Ontario Fire Export V 1.04, and then click Run.
You are prompted to confirm running the custom data export for Ontario Fire Export.
-
Click Yes.
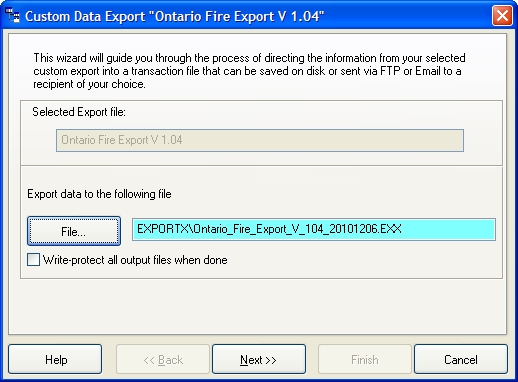
The Custom Data Export Ontario Fire Export dialog box appears.

-
Click Next > to accept the default file name and location.
The Completion screen of the wizard appears.
-
Select No, just leave the file on the hard drive, and then click Next >.
The summary screen of the wizard appears.
-
Review the information displayed, and then click Finish.
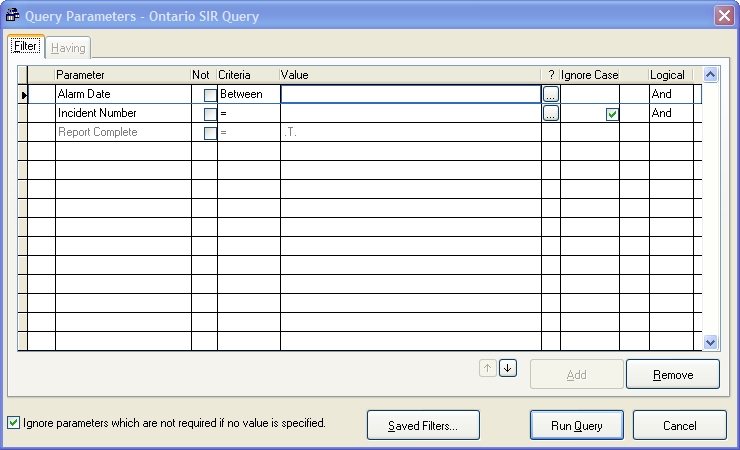
The Query Parameters - Ontario SIR Query dialog box appears.

-
Click Run Query.
The Custom Data Export Log Details dialog box appears, displaying information about the success of the export.
-
Click OK.
- Repeat steps 2-8 for Ontario Injury Export V 1.02.
- Navigate into FH installation location
\EXPORTX\. - Find the
Ontario_Fire_Export_V_104_yymmdd.EXXfile andOntario_Fire_Injury_V_102_yymmdd.EXXfiles and copy them. - Navigate to a different location on your hard drive and paste the files.
- Rename the
Ontario_Fire_Export_V_104_yymmdd.EXXfile tostinrep.txt. - Rename the
Ontario_Fire_Injury_V_102_yymmdd.EXXfile toinjury.txt. - Submit the renamed files to the Ontario File Marshall.