Use geocoding when adding new records
-
Depending on which module you want to add a record to, do one of the following.
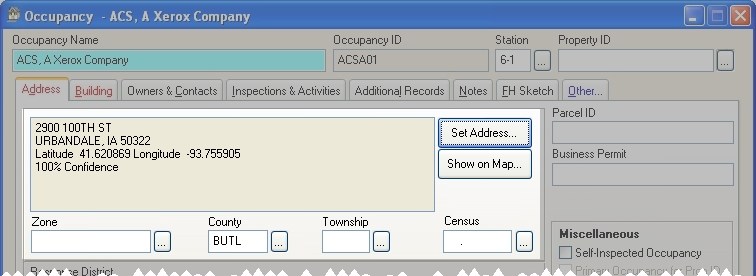
 Occupancy
- Begin a new occupancy record as normal.
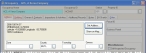
- On the Address tab, click Set Address.
EMS
- Begin a new EMS record as normal.
- On the Basic tab, under Address Type, choose the option that best describes the address you will enter.
- On the right side of the tab, click Set Address.
Dispatch (remote station incident report)
- Begin a new dispatch remote station incident report record as normal.
- On the Basic tab, under Address Type, choose the option that best describes the address you will enter.
- On the right side of the tab, click Set Address.
Hydrant
- Begin a new hydrant record as normal.
- In the top center of the tab, click Set Address.
Station lookup
-
Choose Tools → Lookup Tables.
The Lookup Tables dialog box appears.
- Expand System-Wide Codes, and then select Stations.
-
Click Setup.
The Lookup - Stations dialog box appears.
-
Click New.
The Code for Stations dialog box appears.
- In the upper right corner of the dialog box, click Set Address.
Incident
- Begin a new incident record as normal.
- On the Basic tab, under Address Type, choose the option that best describes the address you will enter.
-
On the Basic tab, on the right side of the tab, click Set Address.
Wildland fire
- Begin a new incident record as normal.
- On the Basic tab, under Address Type, choose the option that best describes the address you will enter.
- Click the Additional Reports tab.
-
Near the bottom of the tab, click Wildland Fire.
The Wildland Fire Report dialog box appears.
-
On the Scene tab, click Set Address.
The FIREHOUSE Software Address Geocoding dialog box appears.

-
Specify a location in one of the following ways.
Enter an address
- At the top of the dialog box, in Number, enter the house or building number of the address.
-
In Prefix, enter the directional descriptor appearing before a street or highway name.
Example: In the street name SE Oriole St.,
SEis the prefix of the street name. -
In Street/Highway, enter the street or highway name.
Example: In the street name SE Oriole St.,
Orioleis the name of the street. -
In Type, enter the street type descriptor appearing after a street or highway name.
Example: In the street name SE Oriole St.,
Stis the street type. -
In Suffix, enter the directional descriptor appearing after a street or highway name.
Example: In the street name Arizona Ave NW,
NWis the suffix of the street name. - In City, enter the name of the city.
- In State, enter the name of the state the city is located in.
- In Zip, enter the numerical code assigned by the U.S. Postal Service to all U.S. jurisdictions.
-
(If the location of the address involves additional information) Do the following.
- (Depending on the additional information needed) Select either Intersection or Line 2.
- In the fields to the right of Intersection and Line 2, enter information for Prefix, Street/Highway, Type, and Suffix as you did in steps b–f for the second road involved.
Pinpoint a location on a map
-
In the lower left corner of the map, note the current zoom distance.

This is the distance from the Earth of your current view of the map.
-
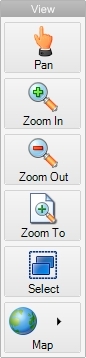
(If it is not already expanded) In the left navigation pane, click View to display buttons for manipulating the view of the map in the dialog box.
The View section of the left navigation pane expands.
-
Zoom in or out from your current view of the map in any of these ways, until you are at a reasonable distance for picking the location you want on the map.
- Click Zoom In or Zoom Out, and then click on the map to move closer to or further away from the Earth.
-
Click Zoom To, and then in the menu that appears, select a specific distance to zoom in or out to.
If you select Map Item in the menu, the Select item to zoom to dialog box appears, and you can select one of the zoom options in the dialog box.
The map view changes correspondingly each time you click the map.
- Click Pan, place the mouse pointer on the map, and then drag the mouse in any direction to move the view in the corresponding direction, until you can see the location you want to pick on the map.
- Repeat the previous two steps as needed until you can see the location you want to pick, with the accuracy you need.
-
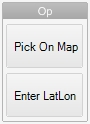
Click Op to display buttons for manipulating the view of the map in the dialog box.
The Op section of the left navigation pane expands.
-
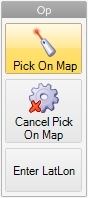
Click Pick On Map.
Under Op, Cancel Pick On Map appears, and Pick on Map updates to highlight and display an icon, indicating that you are currently in pick-on-map mode.
-
Place the mouse pointer on the map at the location you want to pinpoint, and click the mouse.
A pushpin icon appears on the map, and the right pane updates to include the geographic coordinates of the location you clicked.
Tip: If you pinpoint several locations on the map and have trouble deciding which pushpin icon corresponds to which address in the right pane, in the left pane, you can click Select, and then click one of the pushpins. The corresponding address in the right pane becomes selected.
Enter a latitude and longitude
-
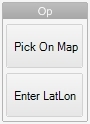
(If it is not already expanded) In the left navigation pane, click Op to display buttons for performing additional operations.
The Op section of the left navigation pane expands.
-
In the left navigation pane, click Enter LatLon.
The Input Lat/Long dialog box appears.
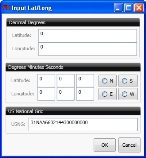
- In the appropriate fields, enter the geographic coordinates of the location, and then click OK.
-
(Optional) View the geographic coordinates listed in the right pane on the map in any of these ways.
All the geographic coordinates at once
-
Choose Map → Zoom to All.
The view of the map zooms out until all the pushpins for the locations listed in the right pane are visible in the map.
A specific set of geographic coordinates
- In the right pane, select the set of geographic coordinates you want to view on the map.
-
Depending on whether you want to change your current zoom level, do one of the following.
-
Choose Map → Pan to Selected.
The view of the map shifts (pans) as needed at the current zoom level to display the pushpin indicating the location you selected in the center of the map.
-
Choose Map → Zoom to Selected.
The zoom level on the map changes as needed to display only the pushpin indicating the location you selected in the center of the map.
-
Note: To automatically perform any of the functions listed above, choose Map → fourth option → Auto option name. The name of the fourth option in the menu changes to reflect the current selection from the menu extension.
-
-
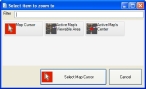
From the list of geographic coordinates for the address on the right, select the geographic coordinates you want to use for the address, and then click OK.
If there is information in address fields at the top of the FIREHOUSE Software Address Geocoding dialog box, and it does not conflict with the set of geographic coordinates you select from the right side of the dialog box, the geographic coordinates and confidence level for these coordinates appear in the module's dialog box.
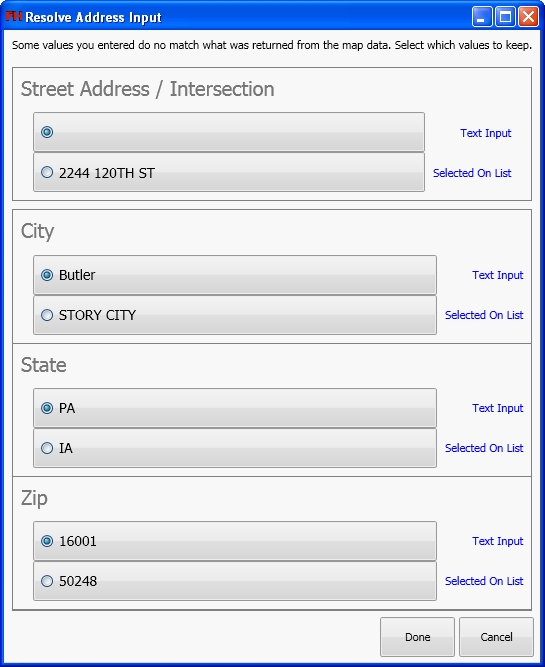
If there is information in address fields at the top of the FIREHOUSE Software Address Geocoding dialog box, and you select a set of geographic coordinates from the right side of the dialog box that does not match the address fields, the Resolve Address Input dialog box appears.

-
(If the Resolve Address Input dialog box appears) Select the information in the sections of the dialog box as needed for the location, and then click Done.
The geographic coordinates and confidence level for these coordinates appear in the module's dialog box.