Identify certifications, licenses, practice levels, credentials, qualifications, and skills
Note: For PM Basic, this only includes certifications, licenses, and practice levels. You must upgrade to the full PM version to also manage a person's credentials, qualifications, and skills.
For information on upgrading to the full version of PM, go to https://www.eso.com/pm-demo/ and fill out the fields to request a demonstration and speak with a sales representative.
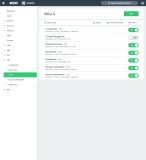
You can categorize the knowledge and training a person has by certifications, licenses, credentials, qualifications, and skills. Each of these categories contains lists relevant to that category.
Example: In the Skills category, the list includes procedures such as intubation, intravenous access, SCBA emergency don/doff procedures, and so forth.
For each category list choice, you can build a collection of individual records relevant to that item. A collection consists of the most-recent record and all the previous records for that item.
|
Example: In the Skills category, if you add Note: The intubation skill itself is only listed once on in the Skills section , regardless of how many records exist in the intubation skill collection. |
To see all the records in the collection, you can view the collection's history. If necessary, you can edit or delete any of the individual records in a collection.
-
 (If you have not done so already) Access the PM or PM Basic module in the ESO Suite.
Which version of the module opens depends on whether your agency or department has purchased the PM Basic or full version of the PM module.
-
Do one of the following.
-
(If you are already working in the ESO Suite) Click the Home icon in the upper left corner of the screen.
-
 (If you have not yet logged in) Log in to the ESO Suite.
-
In a web browser, go to https://www.esosuite.net/EsoSuite.
The ESO Suite login screen appears.
-
Enter your user name, password, and agency name, then click Let's Go.
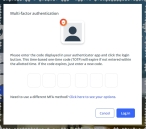
If MFA is enabled, the Multi-factor authentication dialog box appears, displaying one or more methods you can use to verify your login credentials. The number of methods that appear in the dialog box depends on what MFA methods your ESO Suite administrators enabled in the Admin module.

Click graphics
to open them.Information on enabling MFA and specific MFA methods is available in the Admin module online help, in Configure multiple-factor authentication.
Note: If your ESO Suite administrators have disabled MFA ("opted-out"), this dialog does not appear.
-
(If the Multi-factor authentication dialog box appears) Depending on which buttons appear in the dialog box, verify your login in one of the following ways.
 With an authenticator application.
-
Click MFA verification via authenticator app.
The dialog box updates with boxes for entering the numbers of the authentication code, and the ESO Suite sends an authentication code to the authenticator application installed on your device.
-
Open your authenticator application and note the authentication code currently displayed.
-
Enter the authentication code displayed in the authenticator application.
-
Click Log In.
 With a text message (SMS).
-
Click MFA verification via SMS.
The dialog box updates with boxes for entering the numbers of the authentication code, and the ESO Suite sends an authentication code to the phone number recorded in your PM records and identified with MFA codes.
-
Enter the authentication code sent to your MFA-registered phone number.
-
Click Log In.
 With an email message.
-
Click MFA verification via email.
The dialog box updates with boxes for entering the numbers of the authentication code, and the ESO Suite sends an authentication code to your agency or department email address, recorded in your PM records.
-
Enter the authentication code sent to your agency or department email address.
-
Click Log In.
-
-
The ESO Suite landing screen appears.

Click graphics
to open them.Note: If MFA is enabled, you can access and manage your MFA options through the PM module, on the Settings > Account page, as described in Manage a user account. If your agency or department has enabled MFA but has not purchased the full-featured version of the PM module, you can access your own MFA settings by clicking Change my Multi-Factor Authentication settings on the landing screen, then using the Settings > Account page that appears. If your agency has not enabled MFA, the Change my Multi-Factor Authentication settings link does not appear on the landing screen.
-
-
On the top side of the home screen, click PM.
Tip: If your screen or browser window is too narrow to display all your agency's ESO Suite module icons, an options icon appears on the right side of the icon bar. If you click the options icon, a menu appears containing additional module icons.
A list of all the personnel in the PM module appears, displayed in a grid format.
PM (full version) PM Basic Note: If you can access the full-featured PM module, you can view all your own information in it. The amount of information you can edit in the PM module depends on what roles and permissions your ESO Suite administrator assigned to your user account.
Information on user accounts, roles, and permissions is available in Manage a user account.
-
-
(If you have not done so already) Open the record of the person you want to work with, as described in Display, filter, and export personnel lists.
The personnel record opens and displays the page relevant to the list you were working with.
PM (full version) PM Basic -
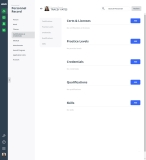
Click the Certifications & Credentials bookmark.
The contents of the Certifications & Credentials bookmark appear, set to the Certs & Licenses section at the top.
PM (full version) PM Basic -
Do any of the following.
 Work with certifications and licenses for the person.
A certification or license is a document from an external entity, verifying that a person has the required skills and knowledge in a certain area, and allowing them to conduct activities that would otherwise be illegal without the certification or license.
Example: A state-issued driver's license, firefighter certification, or paramedic or EMT certification.
Licenses and certifications are usually valid for a limited term and must be renewed periodically.
You can build a list of the various certifications and licenses the person holds, and record the duration of each certification. Common certifications include NREMT Paramedic, state EMT certifications or licenses, Firefighter I, and CDL. Common EMS licenses are EMR, EMT, AEMT, and Paramedic. A license can also include various forms of driver's licenses, hazardous materials licenses, and so forth.
 Understand how certifications and licenses defined on the Settings screen appear as menu options in the PM module.
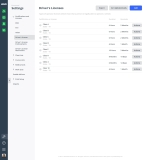
The certifications and licenses options you define and enable on the Settings screen, under Certifications and Licenses, appear when you click the Certification or License field elsewhere in the module.
Example: When adding a driver's license to a person's record, for the Certification or License field, Driver's License menu extension, you may need options such as Class A, Class B, Class C, Class D, Class E, and so forth. Your PM module administrator must add corresponding ADL items on the Settings screen, under Certifications and Licenses > Driver's License, for these items to appear as menu choices in the Driver's License menu extension.
For driver's licenses, you may need to also ask your PM administrator to add items to the ADLs on the Settings screen, Certifications and Licenses > Driver's License Endorsements and Certifications and Licenses> Driver's License Restrictions. These lists provide the menu options for the Endorsements and Restrictions fields that appear when adding a driver's license in the PM module.
If no options appear, or if the menu does not have an option that meets your needs, contact your PM module administrator and ask them to add the necessary menu choices. You will need to work closely with your administrator to create and maintain these lists, as your department's needs evolve over time.
Information on creating the certifications and licenses lists is available in Build certifications and licenses lists.
-
Do any of the following.
 Add a certification or license.
-
On the right side of the Certs & Licenses section, click Add.
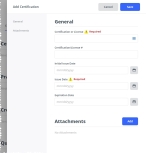
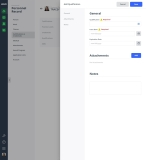
The Add Certification dialog box appears on the right, displaying the General section of the dialog box.
-
 Provide information about the certification or license.
-
For Certification or License, click the field or the list icon to the right of the field.
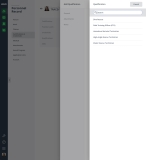
A list of certification or license categories appears.
-
Click the right-pointing arrow for the category the certification or license you want to add would be in.
A list of certifications or licenses specific to that category appears.
Example: If you chose Driver's License as the category, a list of driver's license selections appears.
-
Select the option corresponding to the certification or license you are adding.
The Add Certification dialog box becomes visible again. If you chose Certification or License > Driver's License > license class, the Endorsements and Restrictions fields appear in the dialog box.
- In Certification/License #, type the unique number of the certification or license.
-
For Initial Issue Date, Issue Date and Expiration Date, click the calendar icon on the right end of the field and select the appropriate date from the calendar that appears.
If a duration period was specified when the certification or license was defined, then the module automatically calculates the expiration date based on the duration period.
Information on defining a certification or license duration period is available in Build certifications and licenses lists.
- (If adding a driver's license) For Endorsements and Restrictions, click the list icon to the right of the field, select all the appropriate options from the menu that appears, then click OK or click outside the menu.
-
-
 Attach any supporting documentation needed for the certification or license.
You can attach electronic copies of images and documents the person has received, as part of their record collection.
Note: You can preview image and PDFs files. To view other types of files, such as Word or Excel documents, download the file first, then open it from your download location.
-
On the left, click the Attachments bookmark.
The right side scrolls down to the Attachments section of the dialog box.
-
On the right side of the dialog box, to the right of the Attachments heading, click Add.
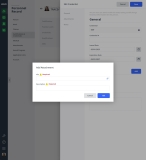
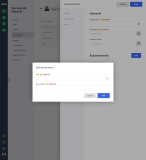
The Add Attachment dialog box appears.
- For File, click the paperclip (
 ) icon on the right side of the field, then use the file browser that appears to find and select the file you want to attach to the person's record.
 -
In Description, type a short description of the contents of the file you are attaching.
-
Click OK.
The module attaches the file to the personnel record, and a listing of the file appears in the Attachments section of the dialog box.
If the attachment is an image file, a thumbnail image appears on the left side of the attachment listing. If the attachment is not an image, a simple file icon appears instead.


-
 (Optional) Work with the attachment in any of the following ways.
 View the attachment.
-
View the attachment in one of these ways.
-
To the left of the certification or license's listing, click the attachment thumbnail icon.
-
In the listing for the file you want to see, click View.
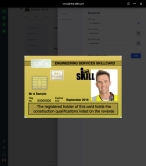
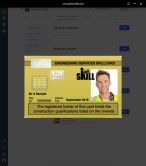
The attachments viewer opens. If the attachment is an image or PDF file, the image or PDF appears; if the file is of some other type, a message that this type of file can not be previewed appears.
Tip: (Optional, if there are multiple attachments) In the upper left corner of the attachment viewer, in the attachments counter, click the left- and right-pointing arrows to scroll through and view the attached files.
-
-
In the upper right corner of the viewer, click the close (X) icon.
 View information about an attachment.
-
In the listing for the file you want to see, click View.
The attachments viewer opens. If the attachment is an image or PDF file, the image or PDF appears; if the file is of some other type, a message that this type of file can not be previewed appears.
Tip: (Optional, if there are multiple attachments) In the upper left corner of the attachment viewer, in the attachments counter, click the left- and right-pointing arrows to scroll through and view the attached files.
-
In the upper right corner of the viewer, click the information icon (an i in a circle), then read the information in the menu that appears.
-
In the upper right corner of the viewer, click the close (X) icon.
 Download an attachment.
-
In the listing for the file you want to see, click View.
The attachments viewer opens. If the attachment is an image or PDF file, the image or PDF appears; if the file is of some other type, a message that this type of file can not be previewed appears.
Tip: (Optional, if there are multiple attachments) In the upper left corner of the attachment viewer, in the attachments counter, click the left- and right-pointing arrows to scroll through and view the attached files.
-
In the upper right corner of the viewer, click the three-dot menu icon, then choose Download.
The file downloads to the default download location on your computer.
-
In the upper right corner of the viewer, click the close (X) icon.
 Print an attachment.
-
In the listing for the file you want to see, click View.
The attachments viewer opens. If the attachment is an image or PDF file, the image or PDF appears; if the file is of some other type, a message that this type of file can not be previewed appears.
Tip: (Optional, if there are multiple attachments) In the upper left corner of the attachment viewer, in the attachments counter, click the left- and right-pointing arrows to scroll through and view the attached files.
-
In the upper right corner of the viewer, click the three-dot menu icon, then choose Print.
A new browser tab appears, displaying the standard Windows browser printing capabilities.
- Continue with the print process in the new browser tab.
-
In the upper right corner of the viewer, click the close (X) icon.
 Edit the description of an attachment.
-
Edit the description of the attachment in one of these ways.
 While viewing the attachment.
-
In the listing for the file you want to see, click View.
The attachments viewer opens. If the attachment is an image or PDF file, the image or PDF appears; if the file is of some other type, a message that this type of file can not be previewed appears.
Tip: (Optional, if there are multiple attachments) In the upper left corner of the attachment viewer, in the attachments counter, click the left- and right-pointing arrows to scroll through and view the attached files.
-
In the upper right corner of the viewer, click the three-dot menu icon, then choose Edit Description.
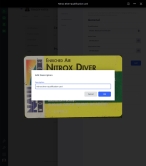
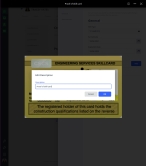
The Edit Description dialog box appears.
- In Description, edit the text describing the attachment as needed.
-
Click OK.
The attachment's description updates in the center of the attachment viewer's top black bar and on the Attachments tab.
-
In the upper right corner of the viewer, click the close (X) icon.
 From the attachment's listing in the dialog box.
-
In the listing for the file you want to update, click Edit Description.
The Edit Description dialog box appears.
- In Description, edit the text describing the attachment as needed.
-
Click OK.
The attachment's description updates in the attachment's listing, in the Attachments section of the dialog box.
-
 Delete an attachment.
-
Delete an attachment in one of these ways.
 While viewing the attachment.
-
In the listing for the file you want to see, click View.
The attachments viewer opens. If the attachment is an image or PDF file, the image or PDF appears; if the file is of some other type, a message that this type of file can not be previewed appears.
Tip: (Optional, if there are multiple attachments) In the upper left corner of the attachment viewer, in the attachments counter, click the left- and right-pointing arrows to scroll through and view the attached files.
-
In the upper right corner of the viewer, click the three-dot menu icon, then choose Delete.
The Delete Confirmation dialog box appears.
-
Click Yes.
The module deletes the file and closes the viewer.
 From the attachment's listing in the dialog box.
-
In the listing for the file you want to remove, click Delete.
A delete confirmation dialog box appears.
-
Click Yes.
The module deletes the attachment.
-
-
-
Repeat the attachment steps as many times as needed to provide additional supporting files.
Each additional attachment appears as a list item in the Attachments section of the dialog box.
-
-
Click Save.
The information you entered appears as a summary in the Certs & Licenses section on the Certifications & Credentials bookmark, and any attachments you added are indicated by an updated icon to the right of the summary. If you attached multiple files, the number of attachments appears in a bar across the icon.
 Renew a certification or license.
-
In the listing for the certification or license you want to renew, click Renew.
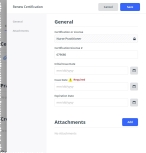
The Renew Certification dialog box appears, displaying the General section of the dialog box. The value for Certification or License is automatically set to the same type as the certification or license you are renewing. If a certification or license number, or if an initial issued date was specified in the record you are renewing, that number and date also appear in Certification/License # and Initial Issue Date, respectively.
-
 Provide information about the certification or license.
- (If necessary) In Certification/License #, type the unique number of the renewed certification or license.
- (Optional) In Initial Issue Date, click the calendar icon on the right end of the field and select the appropriate date from the calendar that appears.
-
For Issue Date and Expiration Date, click the calendar icon on the right end of the field and select the appropriate date from the calendar that appears.
If a duration period was specified when the certification or license was defined, then the module automatically calculates the expiration date based on the duration period.
- (If renewing a driver's license) For Endorsements and Restrictions, click the field or the list icon to the right of the field, then select the appropriate single option from the menu that appears.
-
 Attach any supporting documentation needed for the renewal.
-
On the left, click the Attachments bookmark.
The right side scrolls down to the Attachments section of the dialog box.
-
Add attachments as needed as supporting documentation for the renewal.
Note: The process for attaching and working with supporting documentation for a renewal is the same as when adding a certification or license record.
Information on adding and working with attachments is available under Add a new certification or license. (above), step c, Attach any supporting documentation needed for the certification or license.
-
-
Click Save.
The module adds another record to the certification and license's collection, using the new dates you entered. The summary in the Certs & Licenses section on the Certifications & Credentials bookmark updates to list the most-recent earned and expiration dates, in addition to when the certification or license was initially issued.
Note: If you add the same certification or license again, it does not appear as a repeated listing on the Certifications & Credentials bookmark. Instead, it is added as another record in the collection for that certification or license. To see the full record collection for the certification or license, you need to view the certification or license's history.
 Inactivate or activate a certificate or license.
When you want to preserve the history of an individual's certifications and licenses after they are no longer relevant, you can inactivate the certification or license and retain the information associated with it. This prevents an expired but irrelevant certification or license from appearing in the Expiring Certifications and Licenses list or being labeled as expired in the Certs & Licenses section.
Example: A personnel member has an EMT-Advanced certification, and has now gotten their Paramedic certification. While the EMT-Advanced certification has a valid end date, your agency wants to track the end date of the higher-level Paramedic certification instead. You can inactivate the EMT-Advanced certification so that it does not appear in the Expiring Certifications and Licenses list when the valid end date is reached.
You can also re-activate a certification or license if you mistakenly inactivated a certification or license, or if the personnel member goes back to using the currently inactive certification or license.
-
In the listing for the certification or license you want to review the history for, click Inactivate or Activate.
A confirmation dialog box appears.
-
Click Yes.
If you inactivated the certificate or license, the label Inactivate appears to the right of the certificate or license name, and below the certificate or license name, Activate changes back to Inactivate.
If you re-activated the certificate or license, the label Inactive disappears from the right of the certificate or license name, and below the certificate or license name, Inactivate changes to Activate.
 View the history, renew, inactivate or activate, edit, or delete a certification or license record.
-
In the listing for the certification or license you want to review the history for, click History.
The Certification History dialog box appears.
- View the summary information under Most Recent and Previous.
-
Do any of the following.
 Renew the certification or license.
-
Under Most Recent, click Renew.
The Renew Certification dialog box appears.
Renewing a certification or license from the Certification History dialog box is the same as renewing it from the Certifications & Credentials bookmark.
- Under step 4, Work with certifications and licenses information for the person. (above), follow the directions in Renew a certification or license for information on completing this process.
 Inactivate or activate a certification or license.
When you want to preserve the history of an individual's certifications and licenses after they are no longer relevant, you can inactivate the certification or license and retain the information associated with it. This prevents an expired but irrelevant certification or license from appearing in the Expiring Certifications and Licenses list or being labeled as expired in the Certs & Licenses section.
Example: A personnel member has an EMT-Advanced certification, and has now gotten their Paramedic certification. While the EMT-Advanced certification has a valid end date, your agency wants to track the end date of the higher-level Paramedic certification instead. You can inactivate the EMT-Advanced certification so that it does not appear in the Expiring Certifications and Licenses list when the valid end date is reached.
You can also re-activate a certification or license if you mistakenly inactivated a certification or license, or if the personnel member goes back to using the currently inactive certification or license.
-
Under Most Recent, click Inactivate or Activate.
A confirmation dialog box appears.
-
Click Yes.
If you inactivated the certificate or license, the label Inactivate appears to the right of the certificate or license name, and below the certificate or license name, Activate changes back to Inactivate.
If you re-activated the certificate or license, the label Inactive disappears from the right of the certificate or license name, and below the certificate or license name, Inactivate changes to Activate.
 Edit a record in the certification or license collection record.
Note: If you make additions, updates, or deletions for attachments when editing the certification or license, but then click Cancel in the Edit Certification dialog box, your additions, deletions, or updates to the attachments are not saved.
-
In the listing for the certification or license record you want to edit, click Edit.
The Edit Certification dialog box appears, displaying the information already specified for the certification or license.
-
Change the information in the fields as needed.
Note: You can also make changes to, or delete, attachments to the current record.
- Click Save.
 Delete a record from the certification or license collection.
-
In the listing for the certification or license you want to delete, click Delete.
A confirmation dialog box appears.
-
Click Yes.
Note: Deleting a record from the Previous section of the dialog box deletes only that record. However, if there is only one record in the collection and you delete that record, then the module deletes the certification or license's listing from the Certifications & Credentials bookmark.
-
- Click Done.
 Add attachments to an existing certification or license.
If you have already added a certification or license to the personnel record, but have not yet attached supporting documentation for it, a paperclip icon with a plus sign beside it appears.

If this icon appears, you can still attach electronic copies of images and documents the person has received, as part of their record collection.
-
In the Certs & Licenses section, to the left of the listing for the certification or license you want to add an attachment to, click the paperclip icon with a plus sign.
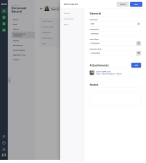
The Edit Certification dialog box appears, with the Add Attachment dialog box over it.
- For File, click the paperclip (
 ) icon on the right side of the field, then use the file browser that appears to find and select the file you want to attach to the certification or license's record.
 -
In Description, type a short description of the contents of the file you are attaching.
-
Click OK.
The module attaches the file to the personnel record, and a listing of the file appears in the Attachments section of the dialog box.
Tip: You may need to click the Attachments bookmark on the left to scroll the dialog box to the Attachments section.
If the attachment is an image file, a thumbnail image appears on the left side of the attachment listing. If the attachment is not an image, a simple file icon appears instead. If there are multiple attachments, a simple file icon appears, with a file number label across the bottom of the icon.


- (If necessary) To the right of the Attachments heading, click Add, then repeat steps b–d to add more attachments for the certification or license.
-
(Optional) Work with the added attachments while still in the Edit Certification dialog box.
You can view the attachment itself, view information about the attachment, download it, print it, and more.
Information on working with attachments is available under Add a certification or license. (above), step c, Attach any supporting documentation needed for the certification or license., step vi, (Optional) Work with the attachment in any of the following ways.
-
Click Save.
The icon image to the left of the certification or license's listing updates to reflect the type and/or number of files you attached.
 Work with a certification or license's attachments.
You can work with a certification or license's attachments even after you create a certification or license.
 View a certification or license's attachments.
-
To the left of the certification or license's listing, click the attachment thumbnail icon.
The attachments viewer opens. If the attachment is an image or PDF file, the image or PDF appears; if the file is of some other type, a message that this type of file can not be previewed appears.
Tip: (Optional, if there are multiple attachments) In the upper left corner of the attachment viewer, in the attachments counter, click the left- and right-pointing arrows to scroll through and view the attached files.
-
In the upper right corner of the viewer, click the close (X) icon.
 View information about an attachment.
-
In the listing for the file you want to see, click View.
The attachments viewer opens. If the attachment is an image or PDF file, the image or PDF appears; if the file is of some other type, a message that this type of file can not be previewed appears.
Tip: (Optional, if there are multiple attachments) In the upper left corner of the attachment viewer, in the attachments counter, click the left- and right-pointing arrows to scroll through and view the attached files.
-
In the upper right corner of the viewer, click the information icon (an i in a circle), then read the information in the menu that appears.
-
In the upper right corner of the viewer, click the close (X) icon.
 Edit the description of an attachment.
-
To the left of the certification or license's listing, click the attachment thumbnail icon.
The attachments viewer opens. If the attachment is an image or PDF file, the image or PDF appears; if the file is of some other type, a message that this type of file can not be previewed appears.
Tip: (Optional, if there are multiple attachments) In the upper left corner of the attachment viewer, in the attachments counter, click the left- and right-pointing arrows to scroll through and view the attached files.
-
In the upper right corner of the viewer, click the three-dot menu icon, then choose Edit Description.
The Edit Description dialog box appears.
- In Description, edit the text describing the attachment as needed.
-
Click OK.
The attachment's description updates in the center of the attachment viewer's top black bar and on the Attachments tab.
-
In the upper right corner of the viewer, click the close (X) icon.
 Download an attachment.
-
To the left of the certification or license's listing, click the attachment thumbnail icon.
The attachments viewer opens. If the attachment is an image or PDF file, the image or PDF appears; if the file is of some other type, a message that this type of file can not be previewed appears.
Tip: (Optional, if there are multiple attachments) In the upper left corner of the attachment viewer, in the attachments counter, click the left- and right-pointing arrows to scroll through and view the attached files.
-
In the upper right corner of the viewer, click the three-dot menu icon, then choose Download.
The file downloads to the default download location on your computer.
-
In the upper right corner of the viewer, click the close (X) icon.
 Print an attachment.
-
To the left of the certification or license's listing, click the attachment thumbnail icon.
The attachments viewer opens. If the attachment is an image or PDF file, the image or PDF appears; if the file is of some other type, a message that this type of file can not be previewed appears.
Tip: (Optional, if there are multiple attachments) In the upper left corner of the attachment viewer, in the attachments counter, click the left- and right-pointing arrows to scroll through and view the attached files.
-
In the upper right corner of the viewer, click the three-dot menu icon, then choose Print.
A new browser tab appears, displaying the standard Windows browser printing capabilities.
- Continue with the print process in the new browser tab.
-
In the upper right corner of the viewer, click the close (X) icon.
 Delete an attachment.
-
To the left of the certification or license's listing, click the attachment thumbnail icon.
The attachments viewer opens. If the attachment is an image or PDF file, the image or PDF appears; if the file is of some other type, a message that this type of file can not be previewed appears.
Tip: (Optional, if there are multiple attachments) In the upper left corner of the attachment viewer, in the attachments counter, click the left- and right-pointing arrows to scroll through and view the attached files.
-
In the upper right corner of the viewer, click the three-dot menu icon, then choose Delete.
The Delete Confirmation dialog box appears.
-
Click Yes.
The module deletes the file and closes the viewer.
-
 Work with practice levels for the person.
A practice level is the certification level at which the individual provides patient care services for their agency. This level is set by the agency, and setting drives what medications you are allowed to administer to patients, what procedures you are allowed to perform, and so forth. The setting may not reflect the person's actual level of certifications or credentials.
Example: A person is certified and practicing as a paramedic, but then is demoted or makes a serious mistake in the field with a patient's care. The agency's medical director can set that person's allowed practice level for the agency to a lower level, such as EMT-basic or EMT-intermediate, despite the person having certification as a paramedic. Once the person is promoted or demonstrates the skill set needed for a higher patent care level, the medical director can reset the person's practice level to their actual certification level again.
You can have multiple practice levels active at the same time, and you can end and renew each practice level as needed. This lets you track the person's practice level as part of their historical record.
Note: A practice level only needs to be set if it differs from an individual's certification level. If practice levels are set, they are used for state demographic submissions for EMS, and are not required.
-
On the left, click the Practice Levels bookmark.
The right side scrolls down to the Practice Levels section of the Certifications & Credentials tab.
PM (full version) PM Basic -
Do any of the following.
 Add a practice level.
-
On the right side of the Practice Levels section, click Add.
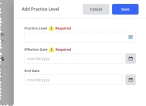
The Add Practice Level dialog box appears on the right.
- For Practice Level, click the field or the list icon to the right of the field, then select the appropriate single option from the menu that appears.
- For Effective Date and End Date, click the calendar icon on the right end of the field and select the appropriate date from the calendar that appears.
-
Click Save.
The information you entered appears as a summary in the Practice Levels section on the Certifications & Credentials bookmark.
 Renew a practice level.
-
In the listing for the practice level you want to renew, click Renew.
The Renew Practice Level dialog box appears, and the value for Skill Type is automatically set to the same type as the skill you are renewing.
-
For Effective Date and End Date, click the calendar icon on the right end of the field and select the appropriate date from the calendar that appears.
-
Click Save.
The module adds another record to the practice level's collection, using the new information you entered. The summary in the Practice Levels section on the Certifications & Credentials bookmark updates to list the most-recent effective and end dates.
Note: If you add the same practice level again, it does not appear as a repeated listing on the Certifications & Credentials bookmark. Instead, it is added as another record in the collection for that practice level. To see the full record collection for the practice level, you need to view the practice level's history.
 View the history, edit, or delete a practice level's record.
-
In the listing for the practice level you want to review the history for, click History.
The Practice Level History dialog box appears.
- View the summary information under Most Recent and Previous.
-
(Optional) Do any of the following.
 Edit the information for a record in the practice level collection.
-
In the listing for the practice level you want to edit, click Edit.
The Edit Practice Level dialog box appears, displaying the information already specified for the practice level.
- Change the information in the fields as needed.
- Click Save.
 Delete a record from the practice level collection.
-
In the listing for the practice level you want to delete, click Delete.
A confirmation dialog box appears.
-
Click Yes.
Note: Deleting a record from the Previous section of the dialog box deletes only that record. However, if there is only one record in the collection and you delete that record, then the module deletes the practice level listing from the Certifications & Credentials bookmark.
 Renew the practice level.
-
Under Most Recent, click Renew.
The Renew Practice Level dialog box appears.
Renewing a skill from the Practice Level History dialog box is the same as renewing it from the Certifications & Credentials bookmark.
- Under step 4, Work with practice level information for the person. (above), follow the directions in step b, Renew a practice level, for information on completing this process.
-
- Click Done.
-
 (PM full version only) Work with credentials for the person.
A credential is granted locally to a person within an agency or department, allowing that person to perform duties aligned with a certain level of task. Credentials relate to conditions of employment within your agency.
Example: A medical director credentialing an EMS provider, or a physician being credentialed to practice in a hospital.
You can build a list of the various credentials the person holds, that are relevant to the agency.
 Understand the link between the PM and Admin modules, when specifying credential information.
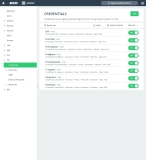
Before you begin adding credentials, you may need to contact your ESO Suite administrator and ask them to add items to the ADLs in the Admin module, under PM > Credentials. These lists provide the menu options for the Credential field in the PM module.
Example: In the PM module, for the Credential field, Fire menu extension, you may need options such as Fire Chief, Fire Inspector, Firefighter, Lieutenant, and so forth. Your ESO Suite administrator must add corresponding ADL items in the Admin module, under PM > Credentials, for these items to appear as menu choices in the PM module.
If no options appear, or if the menu does not have an option that meets your needs, contact your ESO Suite administrator and ask them to add the necessary menu choices. You will need to work closely with your administrator to create and maintain these lists, as your department's needs evolve over time.
Information on defining credential menu options is available in List credentials.
-
On the left, click the Credentials bookmark.
The right side scrolls down to the Credentials section of the Certifications & Credentials bookmark.
-
Do any of the following.
 Add a credential.
-
On the right side of the Credentials granted section, click Add.
The Add Credential dialog box appears on the right.
-
For Credential, click the field or the list icon to the right of the field.
A list of credential categories appears.
-
Click the right-pointing arrow for the category the credential you want to add would be in.
A list of credentials specific to that category appears.
Example: If you chose Fire as the category, a list of fire service credentials selections appears.
-
Select the option corresponding to the credential you are adding.
The Add Credential dialog box becomes visible again.
- In Credential #, type the unique number on the credential documentation that identifies that person as having earned the credential.
-
For Issued Date and Expiration Date, click the calendar icon on the right end of the field and select the appropriate date from the calendar that appears.
If a duration period was specified when the credential was defined, then the PM module automatically calculates the expiration date based on the duration period.
Information on defining a credential duration period is available in List credentials, under Add a credential.
-
 Attach any supporting documentation needed for the credential.
You can attach electronic copies of images and documents the person has received, as part of their record collection.
Note: You can preview image and PDFs files. To view other types of files, such as Word or Excel documents, download the file first, then open it from your download location.
-
On the left, click the Attachments bookmark.
The right side scrolls down to the Attachments section of the dialog box.
-
To the right of the Attachments heading, click Add.
The Add Attachment dialog box appears.
- For File, click the paperclip (
 ) icon on the right side of the field, then use the file browser that appears to find and select the file you want to attach to the person's record.
 -
In Description, type a short description of the contents of the file you are attaching.
-
Click OK.
The module attaches the file to the personnel record, and a listing of the file appears in the Attachments section of the dialog box.
If the attachment is an image file, a thumbnail image appears on the left side of the attachment listing. If the attachment is not an image, a simple file icon appears instead.


-
 (Optional) Work with the attachment in any of the following ways.
 View the attachment.
-
View the attachment in one of these ways.
-
To the left of the credential's listing, click the attachment thumbnail icon.
-
In the listing for the file you want to see, click View.
The attachments viewer opens. If the attachment is an image or PDF file, the image or PDF appears; if the file is of some other type, a message that this type of file can not be previewed appears.
-
-
In the upper right corner of the viewer, click the close (X) icon.
 View information about an attachment.
-
In the listing for the file you want to see, click View.
The attachments viewer opens. If the attachment is an image or PDF file, the image or PDF appears; if the file is of some other type, a message that this type of file can not be previewed appears.
Tip: (Optional, if there are multiple attachments) In the upper left corner of the attachment viewer, in the attachments counter, click the left- and right-pointing arrows to scroll through and view the attached files.
-
In the upper right corner of the viewer, click the information icon (an i in a circle), then read the information in the menu that appears.
-
In the upper right corner of the viewer, click the close (X) icon.
 Download an attachment.
-
In the listing for the file you want to see, click View.
The attachments viewer opens. If the attachment is an image or PDF file, the image or PDF appears; if the file is of some other type, a message that this type of file can not be previewed appears.
Tip: (Optional, if there are multiple attachments) In the upper left corner of the attachment viewer, in the attachments counter, click the left- and right-pointing arrows to scroll through and view the attached files.
-
In the upper right corner of the viewer, click the three-dot menu icon, then choose Download.
The file downloads to the default download location on your computer.
-
In the upper right corner of the viewer, click the close (X) icon.
 Print an attachment.
-
In the listing for the file you want to see, click View.
The attachments viewer opens. If the attachment is an image or PDF file, the image or PDF appears; if the file is of some other type, a message that this type of file can not be previewed appears.
Tip: (Optional, if there are multiple attachments) In the upper left corner of the attachment viewer, in the attachments counter, click the left- and right-pointing arrows to scroll through and view the attached files.
-
In the upper right corner of the viewer, click the three-dot menu icon, then choose Print.
A new browser tab appears, displaying the standard Windows browser printing capabilities.
- Continue with the print process in the new browser tab.
-
In the upper right corner of the viewer, click the close (X) icon.
 Edit the description of an attachment.
-
Edit the description of the attachment in one of these ways.
 While viewing the attachment.
-
In the listing for the file you want to see, click View.
The attachments viewer opens. If the attachment is an image or PDF file, the image or PDF appears; if the file is of some other type, a message that this type of file can not be previewed appears.
Tip: (Optional, if there are multiple attachments) In the upper left corner of the attachment viewer, in the attachments counter, click the left- and right-pointing arrows to scroll through and view the attached files.
-
In the upper right corner of the viewer, click the three-dot menu icon, then choose Edit Description.
The Edit Description dialog box appears.
- In Description, edit the text describing the attachment as needed.
-
Click OK.
The attachment's description updates in the center of the attachment viewer's top black bar and on the Attachments tab.
-
In the upper right corner of the viewer, click the close (X) icon.
 From the attachment's listing in the dialog box.
-
In the listing for the file you want to update, click Edit Description.
The Edit Description dialog box appears.
- In Description, edit the text describing the attachment as needed.
-
Click OK.
The attachment's description updates in the attachment's listing, in the Attachments section of the dialog box.
-
 Delete an attachment.
-
Delete an attachment in one of these ways.
 While viewing the attachment.
-
In the listing for the file you want to see, click View.
The attachments viewer opens. If the attachment is an image or PDF file, the image or PDF appears; if the file is of some other type, a message that this type of file can not be previewed appears.
Tip: (Optional, if there are multiple attachments) In the upper left corner of the attachment viewer, in the attachments counter, click the left- and right-pointing arrows to scroll through and view the attached files.
-
In the upper right corner of the viewer, click the three-dot menu icon, then choose Delete.
The Delete Confirmation dialog box appears.
-
Click Yes.
The module deletes the file and closes the viewer.
 From the attachment's listing in the dialog box.
-
In the listing for the file you want to remove, click Delete.
A delete confirmation dialog box appears.
-
Click Yes.
The module deletes the attachment.
-
-
-
Repeat the attachment steps as many times as needed to provide additional supporting files.
Each additional attachment appears as a list item in the Attachments section of the dialog box.
-
-
Click Save.
The information you entered appears as a summary in the Credentials section on the Certifications & Credentials bookmark.
 Renew a credential.
-
In the listing for the credential you want to renew, click Renew.
The Renew Credential dialog box appears. The value for Credential is automatically set to the same type as the credential you are renewing, and if there is a credential number specified in the record you are renewing, that number appears in Credential #.
- (If necessary) In Credential #, type the unique number of the renewed credential.
-
For Issued Date and Expiration Date, click the calendar icon on the right end of the field and select the appropriate date from the calendar that appears.
If a duration period was specified when the credential was defined, then the PM module automatically calculates the expiration date based on the duration period.
- In Notes, type any additional information regarding the credential and this person.
-
Scroll down to the Attachments section of the dialog box and add any attachments needed as supporting documentation for the renewal.
Note: The process for attaching and working with supporting documentation for a renewal is the same as when adding a credential record.
Information on adding and working with attachments is available under Add a new credential. (above), step viii, Attach any supporting documentation for the credential..
-
Click Save.
The PM module adds another record to the credential's collection, using the new information you entered. The summary in the Credentials section on the Certifications & Credentials bookmark updates to list the most-recent issued and expiration dates, in addition to when the credential was initially issued.
Note: If you add the same credential again, it does not appear as a repeated listing on the Certifications & Credentials bookmark. Instead, it is added as another record in the collection for that credential. To see the full record collection for the credential, you need to view the credential's history.
- Click Save.
 Inactivate or activate a credential.
When you want to preserve the history of an individual's credentials after they are no longer relevant, you can inactivate the credential and retain the information associated with it. This prevents an expired but irrelevant credential from appearing in the Expiring Credentials list or being labeled as expired in the Credentials section.
Example: A personnel member has a firefighter credential, and has now gotten their fire inspector credential. While the firefighter credential has a valid end date, your agency wants to track the end date of the higher-level fire inspector credential instead. You can inactivate the firefighter credential so that it does not appear in the Expiring Credentials list when the valid end date is reached.
You can also re-activate a credential if you mistakenly inactivated a credential, or if the personnel member goes back to using the currently inactive credential.
When you want to preserve the history of an individual's certifications and licenses after they are no longer relevant, you can inactivate the certification or license and retain the information associated with it. This prevents an expired but irrelevant certification or license from appearing in the Expiring Certifications and Licenses list or being labeled as expired in the Certs & Licenses section.
Example: A personnel member has an EMT-Advanced certification, and has now gotten their Paramedic certification. While the EMT-Advanced certification has a valid end date, your agency wants to track the end date of the higher-level Paramedic certification instead. You can inactivate the EMT-Advanced certification so that it does not appear in the Expiring Certifications and Licenses list when the valid end date is reached.
You can also re-activate a certification or license if you mistakenly inactivated a certification or license, or if the personnel member goes back to using the currently inactive certification or license.
-
In the listing for the credential you want to review the history for, click Inactivate or Activate.
A confirmation dialog box appears.
-
Click Yes.
If you inactivated the credential, the label Inactivate appears to the right of the credential name, and below the credential name, Activate changes to Inactivate.
If you re-activated the credential, the label Inactive disappears, and below the credential name, Activate changes back to Inactivate.
 View the history, renew, inactivate or activate, edit, or delete a credential's record.
-
In the listing for the credential you want to review the history for, click History.
The Credential History dialog box appears.
- View the summary information under Most Recent and Previous.
-
(Optional) Do any of the following.
 Renew the credential.
-
Under Most Recent, click Renew.
The Renew Credential dialog box appears.
Renewing a credential from the Credential History dialog box is the same as renewing it from the Certifications & Credentials bookmark.
- Under step 4, Work with credentials information for the person. (above), follow the directions in Renew a credential. for information on completing this process.
 Inactivate or activate a credential.
When you want to preserve the history of an individual's credentials after they are no longer relevant, you can inactivate the credential and retain the information associated with it. This prevents an expired but irrelevant credential from appearing in the Expiring Credentials list or being labeled as expired in the Credentials section.
Example: A personnel member has a firefighter credential, and has now gotten their fire inspector credential. While the firefighter credential has a valid end date, your agency wants to track the end date of the higher-level fire inspector credential instead. You can inactivate the firefighter credential so that it does not appear in the Expiring Credentials list when the valid end date is reached.
You can also re-activate a credential if you mistakenly inactivated a credential, or if the personnel member goes back to using the currently inactive credential.
-
Under Most Recent, click Inactivate or Activate.
A confirmation dialog box appears.
-
In the listing for the credential you want to review the history for, click Inactivate or Activate.
A confirmation dialog box appears.
-
Click Yes.
If you inactivated the credential, the label Inactivate appears to the right of the credential name, and below the credential name, Activate changes to Inactivate.
If you re-activated the credential, the label Inactive disappears, and below the credential name, Activate changes back to Inactivate.
 Edit the information for a record in the credential collection.
-
In the listing for the credential you want to edit, click Edit.
The Edit Credential dialog box appears, displaying the information already specified for the credential.
- Change the information in the fields as needed.
- Click Save.
 Delete a record from the credential collection.
-
In the listing for the credential you want to delete, click Delete.
A confirmation dialog box appears.
-
Click Yes.
Note: Deleting a record from the Previous section of the dialog box deletes only that record. However, if there is only one record in the collection and you delete that record, then the module deletes the PM credential listing from the Certifications & Credentials bookmark.
-
- Click Done.
 Add attachments to an existing credential.
If you have already added a credential to the personnel record, but have not yet attached supporting documentation for it, a paperclip icon with a plus sign beside it appears.

If this icon appears, you can still attach electronic copies of images and documents the person has received, as part of their record collection.
-
In the Credentials section, to the left of the listing for the credential you want to add an attachment to, click the paperclip icon with a plus sign.
The Edit Credential dialog box appears, with the Add Attachment dialog box over it.
- For File, click the paperclip (
 ) icon on the right side of the field, then use the file browser that appears to find and select the file you want to attach to the credential's record.
 -
In Description, type a short description of the contents of the file you are attaching.
-
Click OK.
The module attaches the file to the personnel record, and a listing of the file appears in the Attachments section of the dialog box.
If the attachment is an image file, a thumbnail image appears on the left side of the attachment listing. If the attachment is not an image, a simple file icon appears instead. If there are multiple attachments, a simple file icon appears, with a file number label across the bottom of the icon.


-
(Optional) Work with the added attachments while still in the Edit Credential dialog box.
You can view the attachment itself, view information about the attachment, download it, print it, and more.
Information on working with attachments is available under Add a credential. (above), step vii, Attach any supporting documentation needed for the credential., step 6, (Optional) Work with the attachment in any of the following ways.
-
Click Save.
The icon image to the left of the credential's listing updates to reflect the type and/or number of the files you attached.
 Work with a credential's attachments.
You can work with a credential's attachments even after you create the credential.
 View a credential's attachments.
-
To the left of the credential's listing, click the attachment thumbnail icon.
The attachments viewer opens. If the attachment is an image or PDF file, the image or PDF appears; if the file is of some other type, a message that this type of file can not be previewed appears.
Tip: (Optional, if there are multiple attachments) In the upper left corner of the attachment viewer, in the attachments counter, click the left- and right-pointing arrows to scroll through and view the attached files.
-
In the upper right corner of the viewer, click the close (X) icon.
 View information about an attachment.
-
To the left of the credential's listing, click the attachment thumbnail icon.
The attachments viewer opens. If the attachment is an image or PDF file, the image or PDF appears; if the file is of some other type, a message that this type of file can not be previewed appears.
Tip: (Optional, if there are multiple attachments) In the upper left corner of the attachment viewer, in the attachments counter, click the left- and right-pointing arrows to scroll through and view the attached files.
-
In the upper right corner of the viewer, click the information icon (an i in a circle), then read the information in the menu that appears.
-
In the upper right corner of the viewer, click the close (X) icon.
 Edit the description of an attachment.
-
To the left of the credential's listing, click the attachment thumbnail icon.
The attachments viewer opens. If the attachment is an image or PDF file, the image or PDF appears; if the file is of some other type, a message that this type of file can not be previewed appears.
Tip: (Optional, if there are multiple attachments) In the upper left corner of the attachment viewer, in the attachments counter, click the left- and right-pointing arrows to scroll through and view the attached files.
-
In the upper right corner of the viewer, click the three-dot menu icon, then choose Edit Description.
The Edit Description dialog box appears.
- In Description, edit the text describing the attachment as needed.
-
Click OK.
The attachment's description updates in the center of the attachment viewer's top black bar and on the Attachments tab.
-
In the upper right corner of the viewer, click the close (X) icon.
 Download an attachment.
-
To the left of the credential's listing, click the attachment thumbnail icon.
The attachments viewer opens. If the attachment is an image or PDF file, the image or PDF appears; if the file is of some other type, a message that this type of file can not be previewed appears.
Tip: (Optional, if there are multiple attachments) In the upper left corner of the attachment viewer, in the attachments counter, click the left- and right-pointing arrows to scroll through and view the attached files.
-
In the upper right corner of the viewer, click the three-dot menu icon, then choose Download.
The file downloads to the default download location on your computer.
-
In the upper right corner of the viewer, click the close (X) icon.
 Print an attachment.
-
To the left of the credential's listing, click the attachment thumbnail icon.
The attachments viewer opens. If the attachment is an image or PDF file, the image or PDF appears; if the file is of some other type, a message that this type of file can not be previewed appears.
Tip: (Optional, if there are multiple attachments) In the upper left corner of the attachment viewer, in the attachments counter, click the left- and right-pointing arrows to scroll through and view the attached files.
-
In the upper right corner of the viewer, click the three-dot menu icon, then choose Print.
A new browser tab appears, displaying the standard Windows browser printing capabilities.
- Continue with the print process in the new browser tab.
-
In the upper right corner of the viewer, click the close (X) icon.
 Delete an attachment.
-
To the left of the credential's listing, click the attachment thumbnail icon.
The attachments viewer opens. If the attachment is an image or PDF file, the image or PDF appears; if the file is of some other type, a message that this type of file can not be previewed appears.
Tip: (Optional, if there are multiple attachments) In the upper left corner of the attachment viewer, in the attachments counter, click the left- and right-pointing arrows to scroll through and view the attached files.
-
In the upper right corner of the viewer, click the three-dot menu icon, then choose Delete.
The Delete Confirmation dialog box appears.
-
Click Yes.
The module deletes the file and closes the viewer.
-
 (PM full version only) Work with qualifications for the person.
Qualifications are defined within the agency. Qualifications may be related to credentials or certifications, but are not necessarily tied to them. Qualifications are used to define the roles of individuals in the agency that may influence duty assignments and other operational roles, such as with Water Rescue Technician, Bike Medic, High-Angle Rescue Technician, Field Training Officer (FTO), and so forth.
 Understand the link between the PM and Admin modules, when specifying qualification information.
Before you begin adding qualifications, you may need to contact your ESO Suite administrator and ask them to add items to the ADLs in the Admin module, underPM > Work Lists > Qualifications. This list provides the menu options for the Qualification field in the PM module.
Example: In the PM module, for the Qualification field, you may need options such as Dive Rescue, Field Training Officer (FTO), Hazardous Material Technician, High-Angle Rescue Technician, Water Rescue Technician, and so forth. Your ESO Suite administrator must add corresponding ADL items in the Admin module, under PM > Work Lists > Qualifications, for these items to appear as menu choices in the PM module.
If no options appear, or if the menu does not have an option that meets your needs, contact your ESO Suite administrator and ask them to add the necessary menu choices. You will need to work closely with your administrator to create and maintain these lists, as your department's needs evolve over time.
Information on defining qualification menu options is available in Build a qualifications list.
-
On the left, click the Qualifications bookmark.
The right side scrolls down to the Qualifications section of the Certifications & Credentials bookmark.
-
Do any of the following.
 Add a qualification.
-
On the right side of the Qualifications section, click Add.
The Add Qualification dialog box appears on the right.
-
For Qualification, click the field or the list icon to the right of the field, then select the appropriate single option from the menu that appears.
-
For Issue Date and Expiration Date, click the calendar icon on the right end of the field and select the appropriate date from the calendar that appears.
If a duration period was specified when the qualification was defined, then the PM module automatically calculates the expiration date based on the duration period.
Information on defining a qualification duration period is available in Build work lists, under Add a qualification.
-
 Attach any supporting documentation needed for the qualification.
You can attach electronic copies of images and documents the person has received, as part of their record collection.
Note: You can preview image and PDFs files. To view other types of files, such as Word or Excel documents, download the file first, then open it from your download location.
-
To the right of the Attachments heading, click Add.
The Add Attachment dialog box appears.
- For File, click the paperclip (
 ) icon on the right side of the field, then use the file browser that appears to find and select the file you want to attach to the person's record.
 -
In Description, type a short description of the contents of the file you are attaching.
-
Click OK.
The module attaches the file to the personnel record, and a listing of the file appears in the Attachments section of the dialog box.
If the attachment is an image file, a thumbnail image appears on the left side of the attachment listing. If the attachment is not an image, a simple file icon appears instead.


-
 (Optional) Work with the attachment in any of the following ways.
 View the attachment.
-
View the attachment in one of these ways.
-
To the left of the qualification's listing, click the attachment thumbnail icon.
-
In the listing for the file you want to see, click View.
The attachments viewer opens. If the attachment is an image or PDF file, the image or PDF appears; if the file is of some other type, a message that this type of file can not be previewed appears.
-
-
In the upper right corner of the viewer, click the close (X) icon.
 View information about an attachment.
-
In the listing for the file you want to see, click View.
The attachments viewer opens. If the attachment is an image or PDF file, the image or PDF appears; if the file is of some other type, a message that this type of file can not be previewed appears.
Tip: (Optional, if there are multiple attachments) In the upper left corner of the attachment viewer, in the attachments counter, click the left- and right-pointing arrows to scroll through and view the attached files.
-
In the upper right corner of the viewer, click the information icon (an i in a circle), then read the information in the menu that appears.
-
In the upper right corner of the viewer, click the close (X) icon.
 Download an attachment.
-
In the listing for the file you want to see, click View.
The attachments viewer opens. If the attachment is an image or PDF file, the image or PDF appears; if the file is of some other type, a message that this type of file can not be previewed appears.
Tip: (Optional, if there are multiple attachments) In the upper left corner of the attachment viewer, in the attachments counter, click the left- and right-pointing arrows to scroll through and view the attached files.
-
In the upper right corner of the viewer, click the three-dot menu icon, then choose Download.
The file downloads to the default download location on your computer.
-
In the upper right corner of the viewer, click the close (X) icon.
 Print an attachment.
-
In the listing for the file you want to see, click View.
The attachments viewer opens. If the attachment is an image or PDF file, the image or PDF appears; if the file is of some other type, a message that this type of file can not be previewed appears.
Tip: (Optional, if there are multiple attachments) In the upper left corner of the attachment viewer, in the attachments counter, click the left- and right-pointing arrows to scroll through and view the attached files.
-
In the upper right corner of the viewer, click the three-dot menu icon, then choose Print.
A new browser tab appears, displaying the standard Windows browser printing capabilities.
- Continue with the print process in the new browser tab.
-
In the upper right corner of the viewer, click the close (X) icon.
 Edit the description of an attachment.
-
Edit the description of the attachment in one of these ways.
 While viewing the attachment.
-
In the listing for the file you want to see, click View.
The attachments viewer opens. If the attachment is an image or PDF file, the image or PDF appears; if the file is of some other type, a message that this type of file can not be previewed appears.
Tip: (Optional, if there are multiple attachments) In the upper left corner of the attachment viewer, in the attachments counter, click the left- and right-pointing arrows to scroll through and view the attached files.
-
In the upper right corner of the viewer, click the three-dot menu icon, then choose Edit Description.
The Edit Description dialog box appears.
- In Description, edit the text describing the attachment as needed.
-
Click OK.
The attachment's description updates in the center of the attachment viewer's top black bar and on the Attachments tab.
-
In the upper right corner of the viewer, click the close (X) icon.
 From the attachment's listing in the dialog box.
-
In the listing for the file you want to update, click Edit Description.
The Edit Description dialog box appears.
- In Description, edit the text describing the attachment as needed.
-
Click OK.
The attachment's description updates in the attachment's listing, in the Attachments section of the dialog box.
-
 Delete an attachment.
-
Delete an attachment in one of these ways.
 While viewing the attachment.
-
In the listing for the file you want to see, click View.
The attachments viewer opens. If the attachment is an image or PDF file, the image or PDF appears; if the file is of some other type, a message that this type of file can not be previewed appears.
Tip: (Optional, if there are multiple attachments) In the upper left corner of the attachment viewer, in the attachments counter, click the left- and right-pointing arrows to scroll through and view the attached files.
-
In the upper right corner of the viewer, click the three-dot menu icon, then choose Delete.
The Delete Confirmation dialog box appears.
-
Click Yes.
The module deletes the file and closes the viewer.
 From the attachment's listing in the dialog box.
-
In the listing for the file you want to remove, click Delete.
A delete confirmation dialog box appears.
-
Click Yes.
The module deletes the attachment.
-
-
-
Repeat the attachment steps as many times as needed to provide additional supporting files.
Each additional attachment appears as a list item in the Attachments section of the dialog box.
-
-
Click Save.
The information you entered appears as a summary in the Qualifications section on the the Certifications & Credentials bookmark.
 Renew a qualification.
-
In the listing for the qualification you want to renew, click Renew.
The Renew Qualification dialog box appears, and the value for Qualification is automatically set to the same type as the qualification you are renewing.
-
For Issue Date and Expiration Date, click the calendar icon on the right end of the field and select the appropriate date from the calendar that appears.
If a duration period was specified when the qualification was defined, then the PM module automatically calculates the expiration date based on the duration period.
-
Scroll down to the Attachments section of the dialog box and add any attachments needed as supporting documentation for the renewal.
Note: The process for attaching and working with supporting documentation for a renewal is the same as when adding a qualification record.
Information on adding and working with attachments is available under Add a new qualification. (above), step d, Attach any supporting documentation needed for the qualification..
- In Notes, type any additional information regarding the qualification and this person.
-
Click Save.
The PM module adds another record to the qualification's collection, using the new dates you entered. The summary in the Qualifications section on the Certifications & Credentials bookmark updates to list the most-recent issue and expiration dates, in addition to when the qualification was initially issued.
Note: If you add the same qualification again, it does not appear as a repeated listing on the Certifications & Credentials bookmark. Instead, it is added as another record in the collection for that qualification. To see the full record collection for the qualification, you need to view the qualification's history.
 View the history, edit, or delete a qualification's record.
-
In the listing for the qualification you want to review the history for, click History.
The Qualification History dialog box appears.
- View the summary information under Most Recent and Previous.
-
(Optional) Do any of the following.
 Edit the information for a record in the qualification collection.
-
In the listing for the qualification you want to edit, click Edit.
The Edit Qualification dialog box appears, displaying the information already specified for the qualification.
- Change the information in the fields as needed.
- Click Save.
 Delete a record from the qualification collection.
-
In the listing for the qualification you want to delete, click Delete.
A confirmation dialog box appears.
-
Click Yes.
Note: Deleting a record from the Previous section of the dialog box deletes only that record. However, if there is only one record in the collection and you delete that record, then the module deletes the PM credential listing from the Certifications & Credentials bookmark.
 Renew the qualification.
-
Under Most Recent, click Renew.
The Renew Qualification dialog box appears.
Renewing a qualification from the Qualification History dialog box is the same as renewing it from the Certifications & Credentials bookmark.
- Under step 4, Work with qualification information for the person. (above), follow the directions in step b, Renew a qualification, for information on completing this process.
-
- Click Done.
 Add attachments to an existing qualification.
If you have already added a qualification to the personnel record, but have not yet attached supporting documentation for it, a paperclip icon with a plus sign beside it appears.

If this icon appears, you can still attach electronic copies of images and documents the person has received, as part of their record collection.
-
In the Qualifications section, to the left of the listing for the qualification you want to add an attachment to, click the paperclip icon with a plus sign.
The Edit Qualification dialog box appears, with the Add Attachment dialog box over it.
- For File, click the paperclip (
 ) icon on the right side of the field, then use the file browser that appears to find and select the file you want to attach to the qualification's record.
 -
In Description, type a short description of the contents of the file you are attaching.
-
Click OK.
The module attaches the file to the personnel record, and a listing of the file appears in the Attachments section of the dialog box.
If the attachment is an image file, a thumbnail image appears on the left side of the attachment listing. If the attachment is not an image, a simple file icon appears instead. If there are multiple attachments, a simple file icon appears, with a file number label across the bottom of the icon.


-
(Optional) Work with the added attachments while still in the Edit Qualifications dialog box.
You can view the attachment itself, view information about the attachment, download it, print it, and more.
Information on working with attachments is available under Add a qualification. (above), step d, Attach any supporting documentation needed for the qualification., step v, (Optional) Work with the attachment in any of the following ways.
-
Click Save.
The icon image to the left of the qualification's listing updates to reflect the type and/or number of the files you attached.
 Work with qualification attachments.
You can work with a qualification's attachments even after you create the qualification.
 View a qualification's attachments.
-
To the left of the qualification's listing, click the attachment thumbnail icon.
The attachments viewer opens. If the attachment is an image or PDF file, the image or PDF appears; if the file is of some other type, a message that this type of file can not be previewed appears.
Tip: (Optional, if there are multiple attachments) In the upper left corner of the attachment viewer, in the attachments counter, click the left- and right-pointing arrows to scroll through and view the attached files.
-
In the upper right corner of the viewer, click the close (X) icon.
 View information about an attachment.
-
To the left of the qualification's listing, click the attachment thumbnail icon.
The attachments viewer opens. If the attachment is an image or PDF file, the image or PDF appears; if the file is of some other type, a message that this type of file can not be previewed appears.
Tip: (Optional, if there are multiple attachments) In the upper left corner of the attachment viewer, in the attachments counter, click the left- and right-pointing arrows to scroll through and view the attached files.
-
In the upper right corner of the viewer, click the information icon (an i in a circle), then read the information in the menu that appears.
-
In the upper right corner of the viewer, click the close (X) icon.
 Edit the description of an attachment.
-
To the left of the qualification's listing, click the attachment thumbnail icon.
The attachments viewer opens. If the attachment is an image or PDF file, the image or PDF appears; if the file is of some other type, a message that this type of file can not be previewed appears.
Tip: (Optional, if there are multiple attachments) In the upper left corner of the attachment viewer, in the attachments counter, click the left- and right-pointing arrows to scroll through and view the attached files.
-
In the upper right corner of the viewer, click the three-dot menu icon, then choose Edit Description.
The Edit Description dialog box appears.
- In Description, edit the text describing the attachment as needed.
-
Click OK.
The attachment's description updates in the center of the attachment viewer's top black bar and on the Attachments tab.
-
In the upper right corner of the viewer, click the close (X) icon.
 Download an attachment.
-
To the left of the qualification's listing, click the attachment thumbnail icon.
The attachments viewer opens. If the attachment is an image or PDF file, the image or PDF appears; if the file is of some other type, a message that this type of file can not be previewed appears.
Tip: (Optional, if there are multiple attachments) In the upper left corner of the attachment viewer, in the attachments counter, click the left- and right-pointing arrows to scroll through and view the attached files.
-
In the upper right corner of the viewer, click the three-dot menu icon, then choose Download.
The file downloads to the default download location on your computer.
-
In the upper right corner of the viewer, click the close (X) icon.
 Print an attachment.
-
To the left of the qualification's listing, click the attachment thumbnail icon.
The attachments viewer opens. If the attachment is an image or PDF file, the image or PDF appears; if the file is of some other type, a message that this type of file can not be previewed appears.
Tip: (Optional, if there are multiple attachments) In the upper left corner of the attachment viewer, in the attachments counter, click the left- and right-pointing arrows to scroll through and view the attached files.
-
In the upper right corner of the viewer, click the three-dot menu icon, then choose Print.
A new browser tab appears, displaying the standard Windows browser printing capabilities.
- Continue with the print process in the new browser tab.
-
In the upper right corner of the viewer, click the close (X) icon.
 Delete an attachment.
-
To the left of the qualification's listing, click the attachment thumbnail icon.
The attachments viewer opens. If the attachment is an image or PDF file, the image or PDF appears; if the file is of some other type, a message that this type of file can not be previewed appears.
Tip: (Optional, if there are multiple attachments) In the upper left corner of the attachment viewer, in the attachments counter, click the left- and right-pointing arrows to scroll through and view the attached files.
-
In the upper right corner of the viewer, click the three-dot menu icon, then choose Delete.
The Delete Confirmation dialog box appears.
-
Click Yes.
The module deletes the file and closes the viewer.
-
 (PM full version only) Work with skills for the person.
A skill is the ability to carry out a task with determined results often within a given amount of time, energy, or both. Common skills include intubation, intravenous access, SCBA emergency don/doff procedures, and so forth. You can build a list of the various skills the person has demonstrated, and record the duration of each skill.
 Understand the link between the PM and Admin modules, when specifying skill information.
Before you begin adding skills, you may need to contact your ESO Suite administrator and ask them to add items to the ADLs in the Admin module, under PM > Skills. This list provides the menu options for the Skill field in the PM module.
Example: In the PM module, for the Skill Type field, you may need options such as 12 Lead ECG, Advanced Airway, Glucometer, Intubations, Transport Ventilator, and so forth. Your ESO Suite administrator must add corresponding ADL items in the Admin module, under PM > Skills, for these items to appear as menu choices in the PM module.
If no options appear, or if the menu does not have an option that meets your needs, contact your ESO Suite administrator and ask them to add the necessary menu choices. You will need to work closely with your administrator to create and maintain these lists, as your department's needs evolve over time.
Information on defining skill menu options is available in List skills.
-
On the left, click the Skills bookmark.
The right side scrolls down to the Skills section of the Certifications & Credentials bookmark.
-
Do any of the following.
 Add a new skill.
-
On the right side of the Skills granted section, click Add.
The Add Skill dialog box appears on the right.
- For Skill Type, click the field or the list icon to the right of the field, then select the appropriate single option from the menu that appears.
-
For Earned Date and Expiration Date, click the calendar icon on the right end of the field and select the appropriate date from the calendar that appears.
If a duration period was specified when the skill was defined, then the PM module automatically calculates the expiration date based on the duration period.
Information on defining a skill duration period is available in List skills, under Add a skill.
-
 Attach any supporting documentation needed for the skill.
You can attach electronic copies of images and documents the person has received, as part of their record collection.
Note: You can preview image and PDFs files. To view other types of files, such as Word or Excel documents, download the file first, then open it from your download location.
-
To the right of the Attachments heading, click Add.
The Add Attachment dialog box appears.
- For File, click the paperclip (
 ) icon on the right side of the field, then use the file browser that appears to find and select the file you want to attach to the person's record.
 -
In Description, type a short description of the contents of the file you are attaching.
-
Click OK.
The module attaches the file to the personnel record, and a listing of the file appears in the Attachments section of the dialog box.
If the attachment is an image file, a thumbnail image appears on the left side of the attachment listing. If the attachment is not an image, a simple file icon appears instead.


-
 (Optional) Work with the attachment in any of the following ways.
 View the attachment.
-
View the attachment in one of these ways.
-
To the left of the skill's listing, click the attachment thumbnail icon.
-
In the listing for the file you want to see, click View.
The attachments viewer opens. If the attachment is an image or PDF file, the image or PDF appears; if the file is of some other type, a message that this type of file can not be previewed appears.
-
-
In the upper right corner of the viewer, click the close (X) icon.
 View information about an attachment.
-
In the listing for the file you want to see, click View.
The attachments viewer opens. If the attachment is an image or PDF file, the image or PDF appears; if the file is of some other type, a message that this type of file can not be previewed appears.
Tip: (Optional, if there are multiple attachments) In the upper left corner of the attachment viewer, in the attachments counter, click the left- and right-pointing arrows to scroll through and view the attached files.
-
In the upper right corner of the viewer, click the information icon (an i in a circle), then read the information in the menu that appears.
-
In the upper right corner of the viewer, click the close (X) icon.
 Download an attachment.
-
In the listing for the file you want to see, click View.
The attachments viewer opens. If the attachment is an image or PDF file, the image or PDF appears; if the file is of some other type, a message that this type of file can not be previewed appears.
Tip: (Optional, if there are multiple attachments) In the upper left corner of the attachment viewer, in the attachments counter, click the left- and right-pointing arrows to scroll through and view the attached files.
-
In the upper right corner of the viewer, click the three-dot menu icon, then choose Download.
The file downloads to the default download location on your computer.
-
In the upper right corner of the viewer, click the close (X) icon.
 Print an attachment.
-
In the listing for the file you want to see, click View.
The attachments viewer opens. If the attachment is an image or PDF file, the image or PDF appears; if the file is of some other type, a message that this type of file can not be previewed appears.
Tip: (Optional, if there are multiple attachments) In the upper left corner of the attachment viewer, in the attachments counter, click the left- and right-pointing arrows to scroll through and view the attached files.
-
In the upper right corner of the viewer, click the three-dot menu icon, then choose Print.
A new browser tab appears, displaying the standard Windows browser printing capabilities.
- Continue with the print process in the new browser tab.
-
In the upper right corner of the viewer, click the close (X) icon.
 Edit the description of an attachment.
-
Edit the description of the attachment in one of these ways.
 While viewing the attachment.
-
In the listing for the file you want to see, click View.
The attachments viewer opens. If the attachment is an image or PDF file, the image or PDF appears; if the file is of some other type, a message that this type of file can not be previewed appears.
Tip: (Optional, if there are multiple attachments) In the upper left corner of the attachment viewer, in the attachments counter, click the left- and right-pointing arrows to scroll through and view the attached files.
-
In the upper right corner of the viewer, click the three-dot menu icon, then choose Edit Description.
The Edit Description dialog box appears.
- In Description, edit the text describing the attachment as needed.
-
Click OK.
The attachment's description updates in the center of the attachment viewer's top black bar and on the Attachments tab.
-
In the upper right corner of the viewer, click the close (X) icon.
 From the attachment's listing in the dialog box.
-
In the listing for the file you want to update, click Edit Description.
The Edit Description dialog box appears.
- In Description, edit the text describing the attachment as needed.
-
Click OK.
The attachment's description updates in the attachment's listing, in the Attachments section of the dialog box.
-
 Delete an attachment.
-
Delete an attachment in one of these ways.
 While viewing the attachment.
-
In the listing for the file you want to see, click View.
The attachments viewer opens. If the attachment is an image or PDF file, the image or PDF appears; if the file is of some other type, a message that this type of file can not be previewed appears.
Tip: (Optional, if there are multiple attachments) In the upper left corner of the attachment viewer, in the attachments counter, click the left- and right-pointing arrows to scroll through and view the attached files.
-
In the upper right corner of the viewer, click the three-dot menu icon, then choose Delete.
The Delete Confirmation dialog box appears.
-
Click Yes.
The module deletes the file and closes the viewer.
 From the attachment's listing in the dialog box.
-
In the listing for the file you want to remove, click Delete.
A delete confirmation dialog box appears.
-
Click Yes.
The module deletes the attachment.
-
-
-
Repeat the attachment steps as many times as needed to provide additional supporting files.
Each additional attachment appears as a list item in the Attachments section of the dialog box.
-
-
Click Save.
The information you entered appears as a summary in the Skills section on the Certifications & Credentials bookmark.
 Renew a skill.
-
In the listing for the skill you want to renew, click Renew.
The Renew Skill dialog box appears, and the value for Skill Type is automatically set to the same type as the skill you are renewing.
-
For Earned Date and Expiration Date, click the calendar icon on the right end of the field and select the appropriate date from the calendar that appears.
If a duration period was specified when the skill was defined, then the PM module automatically calculates the expiration date based on the duration period.
-
Scroll down to the Attachments section of the dialog box and add any attachments needed as supporting documentation for the renewal.
Note: The process for attaching and working with supporting documentation for a renewal is the same as when adding a skill record.
Information on adding and working with attachments is available under Add a new skill. (above), step d, Attach any supporting documentation needed for the skill..
-
Click Save.
The PM module adds another record to the skill's collection, using the new information you entered. The summary in the Skills section on the Certifications & Credentials bookmark updates to list the most-recent earned and expiration dates, in addition to when the skill was initially earned.
Note: If you add the same skill again, it does not appear as a repeated listing on the Certifications & Credentials bookmark. Instead, it is added as another record in the collection for that skill. To see the full record collection for the skill, you need to view the skill's history.
 View the history, edit, or delete a skill's record.
-
In the listing for the skill you want to review the history for, click History.
The Skill History dialog box appears. If a skill record was added manually in the Work page or through a group records addition, the Edit, Delete, and Renew options appear under the skill name. If the skill was acquired through an agency or department training and tracked in the PM module's training classes feature, the Renew and View in Training options appear instead.
Information on training classes is available in Manage training records.
- View the summary information under Most Recent and Previous.
-
(Optional) Do any of the following.
 Edit the information for a record in the skill collection.
-
In the listing for the skill you want to edit, click Edit.
The Edit Skill dialog box appears, displaying the information already specified for the skill.
- Change the information in the fields as needed.
- Click Save.
 Delete a record from the skill collection.
-
In the listing for the skill you want to delete, click Delete.
A confirmation dialog box appears.
-
Click Yes.
Note: Deleting a record from the Previous section of the dialog box deletes only that record. However, if there is only one record in the collection and you delete that record, then the module deletes the PM skill listing from the Certifications & Credentials bookmark.
 Renew the skill.
-
Under Most Recent, click Renew.
The Renew Skill dialog box appears.
Renewing a skill from the Skill History dialog box is the same as renewing it from the Certifications & Credentials bookmark.
- Under step 4, Work with skill information for the person. (above), follow the directions in step b, Renew a skill, for information on completing this process.
-
- Click Done.
 Add attachments to an existing skill.
If you have already added a skill to the personnel record, but have not yet attached supporting documentation for it, a paperclip icon with a plus sign beside it appears.

If this icon appears, you can still attach electronic copies of images and documents the person has received, as part of their record collection.
-
In the Skills section, to the left of the listing for the skill you want to add an attachment to, click the paperclip icon with a plus sign.
The Edit Skill dialog box appears, with the Add Attachment dialog box over it.
- For File, click the paperclip (
 ) icon on the right side of the field, then use the file browser that appears to find and select the file you want to attach to the skill's record.
 -
In Description, type a short description of the contents of the file you are attaching.
-
Click OK.
The module attaches the file to the personnel record, and a listing of the file appears in the Attachments section of the dialog box.
If the attachment is an image file, a thumbnail image appears on the left side of the attachment listing. If the attachment is not an image, a simple file icon appears instead. If there are multiple attachments, a simple file icon appears, with a file number label across the bottom of the icon.


-
(Optional) Work with the added attachments while still in the Edit Skill dialog box.
You can view the attachment itself, view information about the attachment, download it, print it, and more.
Information on working with attachments is available under Add a skill. (above), step d, Attach any supporting documentation needed for the skill., step v, (Optional) Work with the attachment in any of the following ways.
-
Click Save.
The icon image to the left of the skill's listing updates to reflect the type and/or number of the files you attached.
 Work with skill attachments.
You can work with a skill's attachments even after you create the skill.
 View a skill's attachments.
-
To the left of the skill's listing, click the attachment thumbnail icon.
The attachments viewer opens. If the attachment is an image or PDF file, the image or PDF appears; if the file is of some other type, a message that this type of file can not be previewed appears.
Tip: (Optional, if there are multiple attachments) In the upper left corner of the attachment viewer, in the attachments counter, click the left- and right-pointing arrows to scroll through and view the attached files.
-
In the upper right corner of the viewer, click the close (X) icon.
 View information about an attachment.
-
To the left of the skill's listing, click the attachment thumbnail icon.
The attachments viewer opens. If the attachment is an image or PDF file, the image or PDF appears; if the file is of some other type, a message that this type of file can not be previewed appears.
Tip: (Optional, if there are multiple attachments) In the upper left corner of the attachment viewer, in the attachments counter, click the left- and right-pointing arrows to scroll through and view the attached files.
-
In the upper right corner of the viewer, click the information icon (an i in a circle), then read the information in the menu that appears.
-
In the upper right corner of the viewer, click the close (X) icon.
 Edit the description of an attachment.
-
To the left of the skill's listing, click the attachment thumbnail icon.
The attachments viewer opens. If the attachment is an image or PDF file, the image or PDF appears; if the file is of some other type, a message that this type of file can not be previewed appears.
Tip: (Optional, if there are multiple attachments) In the upper left corner of the attachment viewer, in the attachments counter, click the left- and right-pointing arrows to scroll through and view the attached files.
-
In the upper right corner of the viewer, click the three-dot menu icon, then choose Edit Description.
The Edit Description dialog box appears.
- In Description, edit the text describing the attachment as needed.
-
Click OK.
The attachment's description updates in the center of the attachment viewer's top black bar and on the Attachments tab.
-
In the upper right corner of the viewer, click the close (X) icon.
 Download an attachment.
-
To the left of the skill's listing, click the attachment thumbnail icon.
The attachments viewer opens. If the attachment is an image or PDF file, the image or PDF appears; if the file is of some other type, a message that this type of file can not be previewed appears.
Tip: (Optional, if there are multiple attachments) In the upper left corner of the attachment viewer, in the attachments counter, click the left- and right-pointing arrows to scroll through and view the attached files.
-
In the upper right corner of the viewer, click the three-dot menu icon, then choose Download.
The file downloads to the default download location on your computer.
-
In the upper right corner of the viewer, click the close (X) icon.
 Print an attachment.
-
To the left of the skill's listing, click the attachment thumbnail icon.
The attachments viewer opens. If the attachment is an image or PDF file, the image or PDF appears; if the file is of some other type, a message that this type of file can not be previewed appears.
Tip: (Optional, if there are multiple attachments) In the upper left corner of the attachment viewer, in the attachments counter, click the left- and right-pointing arrows to scroll through and view the attached files.
-
In the upper right corner of the viewer, click the three-dot menu icon, then choose Print.
A new browser tab appears, displaying the standard Windows browser printing capabilities.
- Continue with the print process in the new browser tab.
-
In the upper right corner of the viewer, click the close (X) icon.
 Delete an attachment.
-
To the left of the skill's listing, click the attachment thumbnail icon.
The attachments viewer opens. If the attachment is an image or PDF file, the image or PDF appears; if the file is of some other type, a message that this type of file can not be previewed appears.
Tip: (Optional, if there are multiple attachments) In the upper left corner of the attachment viewer, in the attachments counter, click the left- and right-pointing arrows to scroll through and view the attached files.
-
In the upper right corner of the viewer, click the three-dot menu icon, then choose Delete.
The Delete Confirmation dialog box appears.
-
Click Yes.
The module deletes the file and closes the viewer.
-
-

