Manage locations and sublocations
Hospitals, stations, and vehicles are physical locations where an agency may stock inventory. The Inventory module accesses any information that exists in the Admin module for these types of locations, and displays it in the Inventory module.
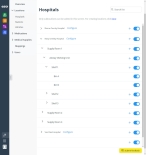
In the Admin module, on the General > Locations > Hospitals page, the Boone County Hospital, Mary Greeley Hospital, and Van Diest Hospital are listed. In the Inventory module, on the Settings > Locations > Hospitals page, the same three hospitals automatically appear.
Similarly, in the Admin module, on the General > Stations page, five different stations are listed. In the Inventory module, on the Settings > Locations > Stations page, the same five stations appear.
And finally, in the Admin module, on the General > Vehicles page, five different vehicles are listed. In the Inventory module, on the Settings > Locations > Vehicles page, the same five vehicles appear.
Within each location in "the real world," your agency's inventory is organized in storage rooms, on shelves, in cabinets, in totes, bins, or bags, and so forth. In the Inventory module, you can mirror this real-world organization by defining sublocations within each of the agency's locations, up to five levels deep.
|
Example: Your agency maintains a stock of medicines and medical supplies at Mary Greeley Hospital, in a storage room on each of three floors, and the storage rooms are organized with shelving units, labeled shelves, and bins or boxes on the shelves. In the Inventory module, you can add nested sublocations to the Mary Greeley Hospital location that reflect this physical organizational strategy. You can assign corresponding names to the sublocations, such as |
|
Example: Your agency also maintains a stock of medicines and medical supplies in the ambulances for Mary Greeley Hospital. These are vehicle locations, and in the Inventory module, you may create sublocations named |
When your Inventory administrator initially configured the Inventory module for your agency, they set up the sublocations and locations your agency used at that time.
Note: If your agency adds locations or closes existing ones, or changes sublocation structures within existing locations, you need to update the Inventory module accordingly, to keep accurate track of where your agency stores its items.
If your agency stocks inventory at hospitals, stations, or vehicles that are not yet in the ESO Suite database, ask your Admin module administrators to add these locations to the Admin module.
Information on configuring locations, stations, and vehicles is available in Configure location information, Configure stations, and Configure vehicles, respectively.
-
 If you have not done so already) Access the Inventory module in the ESO Suite.
-
Do one of the following.
-
(If you are already working in the ESO Suite) Click the Home icon in the upper left corner of the screen.
-
 (If you have not yet logged in) Log in to the ESO Suite.
-
In a web browser, go to https://www.esosuite.net/EsoSuite.
The ESO Suite login screen appears.
-
Enter your user name, password, and agency name, then click Let's Go.
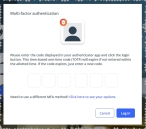
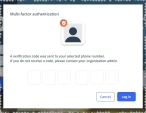
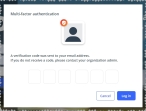
If MFA is enabled, the Multi-factor authentication dialog box appears, displaying one or more methods you can use to verify your login credentials. The number of methods that appear in the dialog box depends on what MFA methods your ESO Suite administrators enabled in the Admin module.
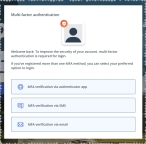
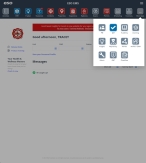
Click graphics
to open them.Information on enabling MFA and specific MFA methods is available in the Admin module online help, in Configure multiple-factor authentication.
Note: If your ESO Suite administrators have disabled MFA ("opted-out"), this dialog does not appear.
-
(If the Multi-factor authentication dialog box appears) Depending on which buttons appear in the dialog box, verify your login in one of the following ways.
 With an authenticator application.
-
Click MFA verification via authenticator app.
The dialog box updates with boxes for entering the numbers of the authentication code, and the ESO Suite sends an authentication code to the authenticator application installed on your device.
-
Open your authenticator application and note the authentication code currently displayed.
-
Enter the authentication code displayed in the authenticator application.
-
Click Log In.
 With a text message (SMS).
-
Click MFA verification via SMS.
The dialog box updates with boxes for entering the numbers of the authentication code, and the ESO Suite sends an authentication code to the phone number recorded in your PM records and identified with MFA codes.
-
Enter the authentication code sent to your MFA-registered phone number.
-
Click Log In.
 With an email message.
-
Click MFA verification via email.
The dialog box updates with boxes for entering the numbers of the authentication code, and the ESO Suite sends an authentication code to your agency or department email address, recorded in your PM records.
-
Enter the authentication code sent to your agency or department email address.
-
Click Log In.
-
-
The ESO Suite landing screen appears.

Click graphics
to open them.Note: If MFA is enabled, you can access and manage your MFA options through the PM module, on the Settings > Account page, as described in Manage a user account. If your agency or department has enabled MFA but has not purchased the full-featured version of the PM module, you can access your own MFA settings by clicking Change my Multi-Factor Authentication settings on the landing screen, then using the Settings > Account page that appears. If your agency has not enabled MFA, the Change my Multi-Factor Authentication settings link does not appear on the landing screen.
-
-
On the top side of the home screen, click Inventory.

The Inventory module opens, displaying the Action now page.
Click graphics
to open them.
-
-
In the left pane, near the bottom, click the Settings icon.

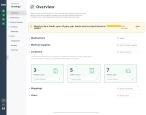
The Settings screen appears, displaying the Overview pane on the right. This page provides a summary of the information in the Settings pages. The Overview pane groups the information into drop-downs named Medications, Medical Supplies, Locations, Mappings, and Users. By default, these drop-downs are expanded; however, you can collapse and expand them as needed to view only the information you want.
These drop-downs contain one or more categories within them, to help further organize the information.
Example: The Locations drop-down contains the Stations, Hospitals, and Vehicles categories, to represent the different types of locations your agency may stock with inventory.
The numbers on the category summaries indicate how many items that your agency currently has enabled in the item catalog, in each category.
Example: If the numbers on the card are 44/49, that indicates that your agency has enabled 44 of the 49 available items in the catalog, and tracks the inventory records for those 44 items.
-
Access the type of location you want to work with in one of these ways.
-
 From the category card on the Overview page.
-
Collapse the Medications and Medical Supplies drop-downs, or scroll down the Overview page until you find the Locations drop-down.
-
In the expanded Locations drop-down, on the category card for the location containing the sublocation you want to update, click View.
Example: You want to update the sublocations in the Boone County Hospital. In the Locations drop-down, on the Hospitals category card, you would click View.
-
The corresponding location category page appears in the right pane, displaying the full listing of locations in that category.
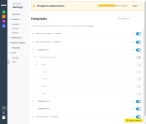
Example: When your Inventory administrator originally configured the Inventory module, they enabled the Boone County Hospital, Mary Greeley Hospital, and Van Diest Hospital as hospital locations your agency supplies inventory to. If you click Locations > Hospitals, those three hospitals appear in the right pane.
-
-
 (Optional) Search the location list for a character combination.
If your agency has a longer list of locations, you can search the entire list for a specific combination of characters, to quickly find the location you want to work with.
-
Above the list of items, on the right side, in the Search list field, type the combination of characters you want to search the entire list for.
As you type each character, the list of items on the page reduces to only those whose names or values contain that combination of characters.
Example: If you typed the character
e, the entire list reduces to display only the locations whose names contain this character.
-
-
Update the locations in the category in any of these ways.
 Disable or enable an entire location.
-
To the right of a location's name, drag the slider to the left to disable that location, or to the right to enable it.
If you disable the location, the slider, the plus (+) icon to the left of the slider, and the Configure link, gray out to indicate that this location is not one your agency provides stock for. If you enable a location, the slider, link, and plus (+) icon turn blue or black, depending on their function.
Note:
-
If your agency provided stock for a location in the past, and if that location still has existing stock from your agency, you can not disable that location until all stock has been discarded or transferred to another location.
-
If you disable a location, all sublocations within that location are also disabled.
-
The Inventory module does not record stock for disabled locations, and disabled locations do not appear in lists in other areas of the Inventory module.
-
If you re-enable a location that has a hierarchy of sublocations defined under it, the sublocations do not automatically re-enable with the location. You must re-enable each sublocation individually to return them to service in that location.
-
 Disable or enable a specific sublocation.
-
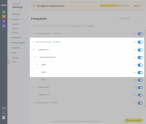
Expand the location containing the sublocation you want to work with, then keep expanding the sublocations in the hierarchy until you find the sublocation you want to enable or disable.
Example: To find the Bin A sublocation at Mary Greeley Hospital, you would expand the hospital name, then expand Supply Room 1, then Airway Shelving Unit, and finally, Shelf 1.
-
To the right of a sublocation's name, drag the slider to the left to disable that location, or to the right to enable it.
If you disable the sublocation, the slider, the plus (+) icon to the left of the slider, and the Configure link, gray out to indicate that this sublocation is not one your agency provides stock for. If you enable a sublocation, the slider, link, and plus (+) icon turn blue or black, depending on their function.
Note:
-
If your agency provided stock for a sublocation in the past, and if that sublocation still has existing stock from your agency, you can not disable that sublocation until all stock has been discarded or transferred to another location or sublocation.
-
If you disable a sublocation, all sublocations in the hierarchy within that sublocation are also disabled.
-
The Inventory module does not record stock for disabled sublocations, and disabled sublocations do not appear in lists in other areas of the Inventory module.
-
If you re-enable a sublocation that has a hierarchy of sublocations defined under it, the sublocations do not automatically re-enable with the sublocation above it. You must re-enable each sublocation individually to return them to service in that sublocation.
-
 Add a sublocation.
First-level sublocations, such as storage rooms, large cabinets, or large lockers, are the biggest organizing spaces within a location. Second-level sublocations, such as shelving units in a storage room, shelves in large cabinets, and so forth, are the largest organizing space within a sublocation. Additional-level sublocations continue organizing the space into smaller units, such as shelves in a shelving unit, bins on the shelves, and so forth. You can continue adding nested sublocations up to five levels deep.
Note: Once you add a sublocation, you can rename it or disable it, but you cannot delete it.
-
Expand the location and the hierarchy of sublocations until you reach the place in the hierarchy were you want to add another sublocation.
Example: At Mary Greeley Hospital, you have added some storage bins to the second shelf of the airway shelving unit in the supply room on the first floor. To find the sublocation to add the new bin sublocations to, in the Inventory module, you would expand the hospital name, then expand Supply Room 1, then Airway Shelving Unit, so that you can see the sublocation (Shelf 2) you want to add sublocations to.
-
To the right of the name of the location or sublocation you want to add a sublocation into, click the plus (+) icon.
The Add Sublocation to dialog box appears.
-
In Name, type the name you want the sublocation to have, then click Save.
Example:
Bin CA brief success message appears in the upper right corner of the page, then the sublocation appears as a new listing under the location or sublocation, indented to indicate that it is hierarchically "under" or "within" the location or sublocation. A downward-pointing arrow also appears to the left of the location or sublocation's name, to indicate that it has hierarchical content within it, and is currently expanded.
Note: If the plus (+) icon does not appear to the left of the slider icon for the new sublocation, you have reached the maximum number of levels you can add to the hierarchy.
-


