Add a new, blank dashboard
You can create new dashboards as needed to present data from one or more data sources, so that you can quickly scan the information of most importance to your agency or department. On a dashboard, "widgets" display the data in visually appealing forms such as pie graphs, charts, maps, counters, and pivot tables.
|
Example: On the dashboard you created for EMS data, you can add widgets that display the total number of items and calculated averages in a specific window of time, a chart widget that visually displays the rise and fall of data over a window of time, and a map widget that displays data over a geographic area. You can also add pivot table widgets to display detailed data in a table format.
|
When you create a new, blank dashboard, you need to add widgets to it and configure the dashboard and widgets with the necessary filters to display the data your agency or department needs.
Note: You must have a designer role assigned to you in the ESO Insights module to add a new dashboard.
Information on role assignments is available in Assign user roles in the ESO Insights module.
-
 (If you have not done so already) Access the ESO Insights module in the ESO Suite.
-
Do one of the following.
-
(If you are already working in the ESO Suite) Click the Home icon in the upper left corner of the screen.
-
 (If you have not yet logged in) Log in to the ESO Suite.
-
In a web browser, go to https://www.esosuite.net/EsoSuite.
The ESO Suite login screen appears.
-
Enter your user name, password, and agency name, then click Let's Go.
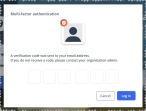
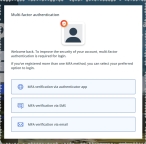
If MFA is enabled, the Multi-factor authentication dialog box appears, displaying one or more methods you can use to verify your login credentials. The number of methods that appear in the dialog box depends on what MFA methods your ESO Suite administrators enabled in the Admin module.
Click graphics
to open them.Information on enabling MFA and specific MFA methods is available in the Admin module online help, in Configure multiple-factor authentication.
Note: If your ESO Suite administrators have disabled MFA ("opted-out"), this dialog does not appear.
-
(If the Multi-factor authentication dialog box appears) Depending on which buttons appear in the dialog box, verify your login in one of the following ways.
 With an authenticator application.
-
Click MFA verification via authenticator app.
The dialog box updates with boxes for entering the numbers of the authentication code, and the ESO Suite sends an authentication code to the authenticator application installed on your device.
-
Open your authenticator application and note the authentication code currently displayed.
-
Enter the authentication code displayed in the authenticator application.
-
Click Log In.
 With a text message (SMS).
-
Click MFA verification via SMS.
The dialog box updates with boxes for entering the numbers of the authentication code, and the ESO Suite sends an authentication code to the phone number recorded in your PM records and identified with MFA codes.
-
Enter the authentication code sent to your MFA-registered phone number.
-
Click Log In.
 With an email message.
-
Click MFA verification via email.
The dialog box updates with boxes for entering the numbers of the authentication code, and the ESO Suite sends an authentication code to your agency or department email address, recorded in your PM records.
-
Enter the authentication code sent to your agency or department email address.
-
Click Log In.
-
-
The ESO Suite landing screen appears.

Click graphics
to open them.Note: If MFA is enabled, you can access and manage your MFA options through the PM module, on the Settings > Account page, as described in Manage a user account. If your agency or department has enabled MFA but has not purchased the full-featured version of the PM module, you can access your own MFA settings by clicking Change my Multi-Factor Authentication settings on the landing screen, then using the Settings > Account page that appears. If your agency has not enabled MFA, the Change my Multi-Factor Authentication settings link does not appear on the landing screen.
-
-
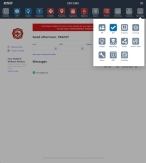
On the top side of the home screen, click Insights.
Tip: If your screen or browser window is too narrow to display all your agency's ESO Suite module icons, an options icon appears on the right side of the icon bar. If you click the options icon, a menu appears containing additional module icons.
-
A list of all the dashboards in the ESO Insights module appears.
The capabilities you have in the ESO Insights module depends on what roles and permissions your ESO Suite administrator assigned to your user account. It also depends on what roles your ESO Insights manager assigned to your user account within the ESO Insights module.
Information on user accounts, roles, and permissions is available in Manage a user account. Information on roles assigned with the ESO Insights module is available in Assign user roles in the ESO Insights module.
-
-
In the upper right corner of the screen, click Add Dashboard.
The Add Dashboard dialog box appears.
-
For Datasource, click the field or the list icon to the right of the field, then select the appropriate single option from the menu that appears.
Note: If only one data source is available, that data source is chosen by default and a menu of data sources does not appear.
-
In Dashboard Name, type the name of the dashboard as you want it to appear in the dashboard list.
-
Click Accept.
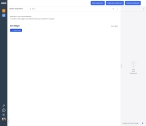
The blank dashboard appears, with its name and the data source you selected at the top. You will add new widgets to the blank center of this page, and to the right is a blank gray pane where you will add filters to manage the data in the dashboard.
-
 Add a field to the new widget.
-
Under New Widget, click Select Data.
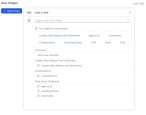
The <data source> / Add a Field dialog box appears, displaying the list of tables and fields available from that data source. The icon to the left of a field name indicates the type value that field contains (alphabetic characters, numbers, dates, and so forth).
-
In Type to search for fields, begin typing characters in the name of the field you want to find.
As you type, the list of fields reduces to only those whose names still match the characters you are typing.
-
Click the name of a field you want to display in the widget.
Buttons and fields appear for defining the type of widget to add and the values to track for the field, and the name of the field appears in a blue label in the upper left corner of the widget.
Warning: While you can continue adding fields and working with these fields on this basic widget screen, there are features that are not available on this screen that you need to fully and accurately configure the widget. It is strongly recommended that you use the advanced configuration widget screen instead of this basic screen.
-
In the lower left corner of the widget definition, click Advanced Configuration.
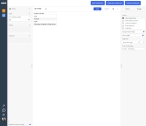
The page updates to display additional panes. The left pane contains sections for filtering and working with the data, and the right pane contains sections for formatting the appearance of the data in the widget. The center pane contains a general layout for the widget, though it does not display actual data yet.
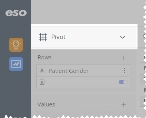
Note: The ESO Insights module selects the pivot table widget by default, but you can change that selection to any of the widgets the module supports.
-
-
 Specify a title and description for the widget.
-
At the top of the middle pane, click Set a Title and type a name for the widget you are adding.
-
To the right of the title, click the information (
 ) icon.
 The Start typing to add a description field appears.
-
Click Start typing to add a description and enter a short description for the widget.
As you type, the field becomes a dialog box with a Reset option, and save (
 ) and cancel (
 ) icons.
 -
Click the save icon.
-
-
 Choose the widget type and configure the widget.
-
In the left pane, at the top, click the name of the widget type and choose the type you want to work from from the menu that appears.
The sections and fields in the left and right panes and the sample display in the center pane update to match your new selection.
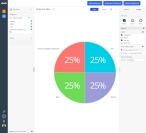
Example: If you had originally selected a pivot table for the data, but now you select a pie chart, the left pane updates to contain the Categories and Values sections, the center pane updates to display a sample pie chart, and the right pane updates to contain sections of data formatting and visual options.
-
Continue with Configure widgets to add fields, formulas, and other parameters to the type of widget you selected.
-
-
In the upper right corner of the widget, click Apply.
The ESO Insights module saves the configurations and changes you made to the widget, and applies them to the dashboard you are creating or the existing dashboard you opened. The list of all the dashboards in the ESO Insights module appears.


