Build class lists
Class lists are a collection of information that instructors use when creating training classes. Class lists include the following information.
-
Training location – The name and address of training locations your agency employs.
-
Educational facility – The educational credentialing system that your local program or external programs fall under. If your agency is certified by your state as an educational facility, you can use the agency's name as the education facility. If your crew members and staff utilize external facilities, use the information about those facilities.
-
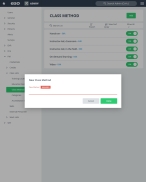
Method – The methods of instruction used in your agency's training programs, such as lecture, classroom, lab, hands-on, video, and so forth.
-
Category – Broad-based themes by which classes are grouped together into categories.
Example: If your agency uses National Registry training courses, a category might be
Mandatory Airway, Breathing and Cardiology. -
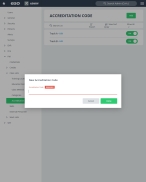
Accreditation code – The code the credentialing authority such as ISO, NREMT, or NFPA, uses to identify the class.
You can build lists of the training locations, educational facilities, teaching methods, categories, and accreditation codes that correspond to the various bits of information needed to identify and describe a class.
Options corresponding to these lists appear in the PM module, for the Training Location, Education Facility, Method, Accreditation Code, and Category fields.
|
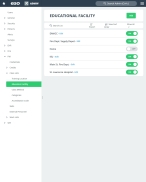
Example: In the PM module, on the Classes tab, when you click Add, the Add Class dialog box appears on the right. When you click the Educational Facility field, the list items you defined under PM > Class Lists > Educational Facility in the Admin module appear. |
-
Do one of the following.
-
(If you are already working in the ESO Suite) Click the Home icon in the upper left corner of the screen.
-
 (If you have not yet logged in) Log in to the ESO Suite.
-
In a web browser, go to https://www.esosuite.net/EsoSuite.
The ESO Suite login screen appears.
-
Enter your user name, password, and agency name, then click Let's Go.
If MFA is enabled, the Multi-factor authentication dialog box appears, displaying one or more methods you can use to verify your login credentials. The number of methods that appear in the dialog box depends on what MFA methods your ESO Suite administrators enabled in the Admin module.

Click graphics
to open them.Information on enabling MFA and specific MFA methods is available in the Admin module online help, in Configure multiple-factor authentication.
Note: If your ESO Suite administrators have disabled MFA ("opted-out"), this dialog does not appear.
-
(If the Multi-factor authentication dialog box appears) Depending on which buttons appear in the dialog box, verify your login in one of the following ways.
 With an authenticator application.
-
Click MFA verification via authenticator app.
The dialog box updates with boxes for entering the numbers of the authentication code, and the ESO Suite sends an authentication code to the authenticator application installed on your device.
-
Open your authenticator application and note the authentication code currently displayed.
-
Enter the authentication code displayed in the authenticator application.
-
Click Log In.
 With a text message (SMS).
-
Click MFA verification via SMS.
The dialog box updates with boxes for entering the numbers of the authentication code, and the ESO Suite sends an authentication code to the phone number recorded in your PM records and identified with MFA codes.
-
Enter the authentication code sent to your MFA-registered phone number.
-
Click Log In.
 With an email message.
-
Click MFA verification via email.
The dialog box updates with boxes for entering the numbers of the authentication code, and the ESO Suite sends an authentication code to your agency or department email address, recorded in your PM records.
-
Enter the authentication code sent to your agency or department email address.
-
Click Log In.
-
-
The ESO Suite landing screen appears.

Click graphics
to open them.Note: You can access and manage your MFA options through the PM module, on the Settings > Account page, as described in Manage a user account. If your agency or department has enabled MFA but has not purchased the full-featured version of the PM module, you can access your own MFA settings by clicking Change my Multi-Factor Authentication settings on the landing screen, then using the Settings > Account page that appears. If your agency has not enabled MFA, the Change my Multi-Factor Authentication settings link does not appear on the landing screen.
-
-
On the top side of the home screen, click Admin.
Tip: If your screen or browser window is too narrow to display all your agency's ESO Suite module icons, an options icon appears on the right side of the icon bar. If you click the options icon, a menu appears containing additional module icons.
The Admin screen appears, displaying the Welcome screen.
-
In the left pane, expand PM > Class Lists.
A list of class lists appears.
-
Click the class list containing the information you want to work with.
A screen named corresponding to the class list you selected appears.
-
Do any of the following.
 Add information to a class list.
-
In the upper right corner, click Add.
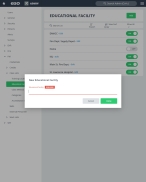
Depending on which kind of list you are working with, different dialog boxes appear.
Note: You must fill in all fields indicated as
REQUIREDon this screen. Training Location
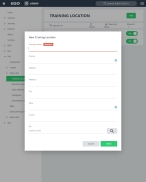
The New Training Location dialog box appears.
- In Training Location, type the name of the location you are adding to the list.
- For Country, click the field or the list icon to the right of the field, then select the appropriate single option from the menu that appears.
- In Address 1 and Address 2, enter the street address and any other unit-specific information.
-
In Zip, type the zip code for the location, then click the search icon (magnifying glass).
A list of cities, states, or zip codes matching what you entered appears.
Example: In Zip, type
50248, then click the search icon.A list of zip codes matching
50248appears on the right. -
Select the entry that corresponds to the rest of the address you are entering.
City, State, and County automatically populate in the address menu with the information from the selected match.
- Click Done.
Note: It may take a few moments for a new list item in the Admin module to propagate to the corresponding field in the PM module. You may need to refresh the web browser to see the new item, or leave the PM module page and return to it to repopulate the list.
 Edit information in a class list.
-
For the list item you want to edit, click Edit to the right of the item name.
Note: If Edit does not appear beside the item name, on the right side of the list, drag the slider button to the right, until On appears. The item must be activated before you can edit it.
The Edit dialog box appears, displaying the values already specified for that list item.
- Change the information in the fields as needed.
- Click Done.
 Deactivate information in a class list.
-
For the item you want to deactivate, on the right side of the list item, drag the slider button to the left, until Off appears.
The Edit link to the right of the item name disappears when the item is deactivated.
Note: While you are in the Admin module, deactivated items still appear in the list; in all other ESO Suite modules, deactivated items do not appear in the lists.
 Video: Activate and deactivate a list item
Note: The process for activating and deactivating a list item shown below applies to any list in the ESO Suite.
 Search the information in a class list.
-
In the Search field, type the characters in the name of the list item you need to find.
As you add each character, the list automatically reduces to only items containing that sequence of characters.
 Video: Search a list
Note: The process for searching a list shown below applies to any list in the ESO Suite.
 Sort the information in a class list.
Note: Lists in the Admin module always appear in alphabetical order, and display both active and deactivated items.
-
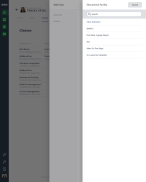
In the upper right corner of the list, click View Sort Order.
The Sort dialog box appears.
Note: Only the active items in the list appear in the Sort dialog box.
-
For Sort list alphabetically, drag the slider button to the left, until Off appears.
You can now change the order of the values in the list, and buttons for manually sorting the list appear below Sort list alphabetically.
-
In the list on the right, select the item you want to move up or down in the list.
A green, right-pointing arrow appears next to the list item to confirm that it is selected.
- On the left, click the up or down arrows to move the item up or down one place, or to the top or bottom of the list.
- Repeat the previous two steps as many times as needed to arrange the items in the order you want in the list.
-
Click OK.
The dialog box closes, and the list appears in the new order, unless you are working in the Admin module.
Note: Lists in the Admin module always appear in alphabetical order.
 Video: Sort a list
Note: The process for sorting a list shown below applies to any list in the ESO Suite.
 Filter the information in a class list.
-
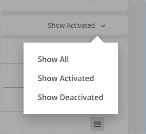
On the right side of the screen, click the filter menu.
Note: The name of the menu varies, reflecting the option currently selected for filtering the list. Show All appears as the default selected option.
The menu of filter options appears.
-
Select the option you want to use to filter the list.
The list updates to reflect your selection.
 Video: Filter a list
Note: The process for filtering a list shown below applies to any list in the ESO Suite.
 Export the class list to a .csv file.
-
In the upper right corner of the list, click Export.
The Admin module generates a
.csvfile containing all the items in the list, whether they are activated or deactivated, and regardless of how you are filtering the list. The.csvfile downloads to your default download location.
-
