Enter agency information
You can complete your agency setup by adding information specific to your agency.
Note: While much of this information will already be populated, based on the information you provided in the Project Management Planning Worksheet you submitted to ESO after your agency purchased the ESO Suite, you should still review it for accuracy and add additional information as necessary.
-
 Gather the following required information for your agency.
Note: Required fields are highlighted in red on the application.
- Agency number – The unique EMS agency number provided by your state licensing credentialing department.
- Provider Identifier – The national provider identifier associated with the NPS, used in all standard HIPAA transactions such as electronic claim filing.
- The agency's street, address, city, state, and zip code
- Time zone
- Daylight savings, if your region observes DST.
- Level of service – The level of service which the agency provides EMS care for every request for service (the minimum certification level). This may be the license level granted by the state EMS office.
- Agency status –Volunteer, non-volunteer, or mixed
- Total service size area – The total square miles in the agency's service area.
-
Total service area population – The total population in the agency's service area, based on year 2000 census data (if possible).
Note: This number does not include population changes associated with daily work flow or seasonal movements.
- Annual 911 call volume
- Annual dispatch volume
- Annual EMS transports
- Annual EMS patient contacts
- First and last name for the primary contact at your agency
-
Do one of the following.
-
(If you are already working in the ESO Suite) Click the Home icon in the upper left corner of the screen.
-
 (If you have not yet logged in) Log in to the ESO Suite.
-
In a web browser, go to https://www.esosuite.net/EsoSuite.
The ESO Suite login screen appears.
-
Enter your user name, password, and agency name, then click Let's Go.
If MFA is enabled, the Multi-factor authentication dialog box appears, displaying one or more methods you can use to verify your login credentials. The number of methods that appear in the dialog box depends on what MFA methods your ESO Suite administrators enabled in the Admin module.

Click graphics
to open them.Information on enabling MFA and specific MFA methods is available in the Admin module online help, in Configure multiple-factor authentication.
Note: If your ESO Suite administrators have disabled MFA ("opted-out"), this dialog does not appear.
-
(If the Multi-factor authentication dialog box appears) Depending on which buttons appear in the dialog box, verify your login in one of the following ways.
 With an authenticator application.
-
Click MFA verification via authenticator app.
The dialog box updates with boxes for entering the numbers of the authentication code, and the ESO Suite sends an authentication code to the authenticator application installed on your device.
-
Open your authenticator application and note the authentication code currently displayed.
-
Enter the authentication code displayed in the authenticator application.
-
Click Log In.
 With a text message (SMS).
-
Click MFA verification via SMS.
The dialog box updates with boxes for entering the numbers of the authentication code, and the ESO Suite sends an authentication code to the phone number recorded in your PM records and identified with MFA codes.
-
Enter the authentication code sent to your MFA-registered phone number.
-
Click Log In.
 With an email message.
-
Click MFA verification via email.
The dialog box updates with boxes for entering the numbers of the authentication code, and the ESO Suite sends an authentication code to your agency or department email address, recorded in your PM records.
-
Enter the authentication code sent to your agency or department email address.
-
Click Log In.
-
-
The ESO Suite landing screen appears.

Click graphics
to open them.Note: You can access and manage your MFA options through the PM module, on the Settings > Account page, as described in Manage a user account. If your agency or department has enabled MFA but has not purchased the full-featured version of the PM module, you can access your own MFA settings by clicking Change my Multi-Factor Authentication settings on the landing screen, then using the Settings > Account page that appears. If your agency has not enabled MFA, the Change my Multi-Factor Authentication settings link does not appear on the landing screen.
-
-
On the top side of the home screen, click Admin.
Tip: If your screen or browser window is too narrow to display all your agency's ESO Suite module icons, an options icon appears on the right side of the icon bar. If you click the options icon, a menu appears containing additional module icons.
The Admin screen appears, displaying the Welcome screen.
- In the left pane, expand General > Agency Info.
-
 Specify the agency address.
This is the primary street address for your agency.
Note: You must fill in all fields indicated as
REQUIREDon this screen.-
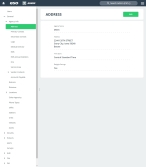
Click Agency.
The Address screen appears.
-
In the upper right corner, click Edit.
The Edit Agency Address dialog box appears.
- In Agency Name, type the name of your agency.
-
For Address, click Edit.
A menu appears to the right, with fields for specifying the details of the address.
- In Address 1 and Address 2, enter the street address and any other unit-specific information.
-
In Zip, type the zip code for the location, then click the search icon (magnifying glass).
A list of cities, states, or zip codes matching what you entered appears.
Example: In Zip, type
50248, then click the search icon.A list of zip codes matching
50248appears on the right. -
Select the entry that corresponds to the rest of the address you are entering.
City, State, and County automatically populate in the address menu with the information from the selected match.
- For Country, click the field or the list icon to the right of the field, then select the appropriate single option from the menu that appears.
-
At the top of the Address menu, click OK.
The menu closes, and the address information you entered appears on the previous screen.
-
For Time Zone, and Daylight Savings, click the field or the list icon to the right of the field, then select the appropriate single option from the menu that appears.
Note: In the Search field at the top of the list, if you type characters corresponding to the item you want, the list automatically reduces to only items containing that sequence of characters.
- Click Done.
-
-
 Enter primary contact information.
This is the director, chief, lead administrator, or CEO of your agency, and his or her professional address at the agency.
-
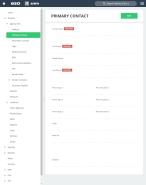
Click Primary Contact.
The Primary Contact screen appears.
-
In the upper right corner, click Edit.
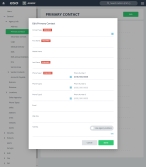
The Edit Primary Contact dialog box appears.
- For Contact Type, click the field or the list icon to the right of the field, then select the appropriate single option from the menu that appears.
- In First Name, Middle Name, and Last Name, type the name of the primary contact.
- From Phone Type 1, Phone Type 2, and/or Phone Type 3, click the field or the list icon to the right of the field, then select the appropriate single option from the menu that appears.
- In Phone Number 1, Phone Number 2, and/or Phone Number 3, type the corresponding phone number of the contact.
-
In Email, type the primary contact's email address.
Email addresses must be in the
name@domain.suffixformat.Example:
YourName@eso.com -
In Web Site, type the URL for the agency's web site.
-
Depending on whether the primary contact's address is the same as the agency's address, for Address, do one of the following.
 The address is the same
- Select Use Agency Address to quickly populate the address fields instead of manually re-entering the information.
 The address is different
-
Click Use Agency Address to disable the automatic use of that address.
The Edit link appear to the right of Address.
-
For Address, click Edit.
A menu appears to the right, with fields for specifying the details of the address.
- In Address 1 and Address 2, enter the street address and any other unit-specific information.
-
In Zip, type the zip code for the location, then click the search icon (magnifying glass).
A list of cities, states, or zip codes matching what you entered appears.
Example: In Zip, type
50248, then click the search icon.A list of zip codes matching
50248appears on the right. -
Select the entry that corresponds to the rest of the address you are entering.
City, State, and County automatically populate in the address menu with the information from the selected match.
- For Country, click the field or the list icon to the right of the field, then select the appropriate single option from the menu that appears.
-
At the top of the Address menu, click OK.
The menu closes, and the address information you entered appears on the previous screen.
- Click Done.
-
-
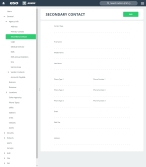
 Enter secondary contact information.
This is the secondary contact and his or her professional address at the agency.
-
 Add a logo graphic for the agency.
You can upload a logo graphic that appears in the ESO Suite, in the upper left corner of the landing screen. This logo appears only in the ESO Suite, and does not appear in patient care or health records sent to hospitals or other care facilities.
-
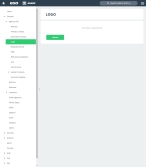
Click Logo.
The Logo screen appears.
-
Do one of the following.
 Upload a logo graphic.
Note: The image for the logo graphic must be less than 1 MB in size, and must be in the
.png,.jpg, or.jpegfile formats. If you have trouble converting your logo to one of these formats, please email it to support@esosolutions.com, and we will be glad to assist you.-
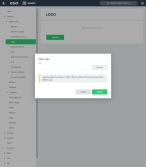
Click Upload.
The Logo Upload dialog box appears.
- Click the browse button to the right of the field, then use the file browser that appears to find and select the logo graphic to upload to the ESO Suite.
-
Click Attach.
A link to the logo image appears in the center of the Logo screen.
Tip: To verify that you've linked to the correct image, click the link and view the image in the browser window that appears.
When you return to the ESO Suite landing screen, the logo image appears in the upper left corner of the screen.
Note: For the logo graphic to appear in EHR on mobile computers, ask EHR users to click Update System Data on their login screen.
 Delete the logo graphic.
-
Click Remove.
A prompt for removing the logo appears.
-
Click Delete.
The link to the logo graphic disappears from the Logo screen.
-
- In the upper left corner, click the Agency Info arrow to return to the previous screen.
-
-
 Enter medical director information.
This is the medical director of your agency, and his or her professional address at the agency.
-
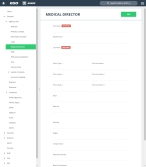
Click Medical Director.
The Medical Director screen appears.
-
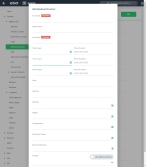
In the upper right corner, click Edit.
The Edit Medical Director dialog box appears.
- In First Name, Middle Name, and Last Name, type the name of the medical director.
- From Phone Type 1, Phone Type 2, and/or Phone Type 3, click the field or the list icon to the right of the field, then select the appropriate single option from the menu that appears.
- In Phone Number 1, Phone Number 2, and/or Phone Number 3, type the corresponding phone number of the medical director.
-
In Email, type the medical director's email address.
Email addresses must be in the
name@domain.suffixformat.Example:
YourName@eso.com -
In Web Site, type the URL for the medical director on the agency's web site.
-
For Specialty, Degree, Compensation, and Fellowship Trained, click the field or the list icon to the right of the field, then select the appropriate single option from the menu that appears.
- For Board Certifications, click the list icon to the right of the field, select all the appropriate options from the menu that appears, then click OK or click outside the menu.
-
Depending on whether the medical director's address is the same as the agency's address, for Address, do one of the following.
 The address is the same
- Select Use Agency Address to quickly populate the address fields instead of manually re-entering the information.
 The address is different
-
Click Use Agency Address to disable the automatic use of that address.
The Edit link appear to the right of Address.
-
For Address, click Edit.
A menu appears to the right, with fields for specifying the details of the address.
- In Address 1 and Address 2, enter the street address and any other unit-specific information.
-
In Zip, type the zip code for the location, then click the search icon (magnifying glass).
A list of cities, states, or zip codes matching what you entered appears.
Example: In Zip, type
50248, then click the search icon.A list of zip codes matching
50248appears on the right. -
Select the entry that corresponds to the rest of the address you are entering.
City, State, and County automatically populate in the address menu with the information from the selected match.
- For Country, click the field or the list icon to the right of the field, then select the appropriate single option from the menu that appears.
-
At the top of the Address menu, click OK.
The menu closes, and the address information you entered appears on the previous screen.
- Click Done.
-
-
 EMS response information.
This is the identification and classification information for the EMS portion of your agency. It is used primarily for NEMSIS reporting.
-
Click EMS.
The EMS screen appears.
-
In the upper right corner, click Edit.
The Edit EMS dialog box appears.
-
In Agency Number, NPI (National Provider Identifier), Additional National Provider, and State ID, type the required identification numbers.
The agency number is the unique EMS agency number provided by your state licensing credentialing department.
The national provider number is the national provider identifier associated with NPS, used in all standard HIPAA transactions such as electronic claim filing. This is the NPI your agency operates under.
The state ID is the identification number assigned to your agency by the state.
- For Organizational Type and Agency Status, click the field or the list icon to the right of the field, then select the appropriate single option from the menu that appears.
- For Billing Status, click either Yes or No.
- For Tax Status, Level of Service, and Primary Service Type, click the field or the list icon to the right of the field, then select the appropriate single option from the menu that appears.
- For Other Service Types, Specialty Service Capabilities, and Patient Monitoring Capabilities, click the list icon to the right of the field, select all the appropriate options from the menu that appears, then click OK or click outside the menu.
- Click Done.
-
-
 Provide EMS annual statistical information.
-
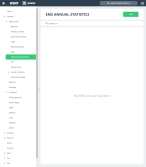
Click EMS Annual Statistics.
The EMS Annual Statistics screen appears.
-
Do one of the following.
Note: You should update these statistics every year for NEMSIS demographic file reporting.
 Edit the statistics for a year.
-
For the year you want to edit, do one of the following.
- To the right of the year, click View.
-
On the right side of the year's row, click the item menu icon, then choose Edit from the menu that appears.
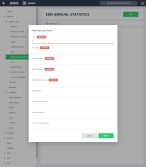
The Edit EMS Annual Stats dialog box appears, displaying the numbers entered for that year.
- Change the information in the fields as needed.
-
Click Done.
-
-
-
 Specify fire response information.
Fire response information is required for NFIRS reporting.
-
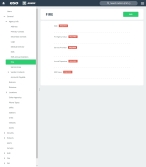
Click Fire.
The Fire screen appears.
-
In the upper right corner, click Edit.
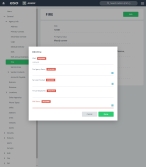
The Edit Fire dialog box appears.
-
In FDID and Annual Dispatches, type the numbers for your agency.
The FDID number may also identify the county, fire district, or other jurisdiction in which the fire department is located. Many states use the two left-most digits to identify the particular department within a jurisdiction. All five spaces in this field must be occupied by numerals or alphanumeric characters.
- For Fire Agency Status and EMS Status, click the field or the list icon to the right of the field, then select the appropriate single option from the menu that appears.
- For Services Provided, click the list icon to the right of the field, select all the appropriate options from the menu that appears, then click OK or click outside the menu.
- Click Done.
-
-
 Add service area information.
NEMSIS reporting requires information about where your agency provides service.
Note: If you provided ESO with information for creating your agency in the ESO Suite, the fields on this screen may already be populated with your agency's data.
-
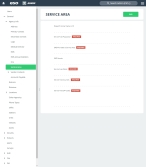
Click Service Area.
The Service Area screen appears.
-
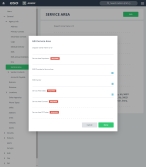
In the upper right corner, click Edit.
The Edit Service Area dialog box appears.
- In Dispatch Center Name or ID, Service Area Size, and Service Area Population, type the numbers necessary for your agency.
- For EMD Vendor, Service Area States, Service Area Counties, and Service Area Zip Codes, click the list icon to the right of the field, select all the appropriate options from the menu that appears, then click OK or click outside the menu.
- Click Done.
-
-
 Add vendor contact information.
-
In the left pane, expand General > Agency Info > Vendor Contacts.
Options for several different types of vendors appear in the left pane.
-
 Specify the CAD vendor contact information.
A CAD vendor is a dispatch company that your ESO Suite integrates with, to automatically receive dispatches and incident information, so that the appropriate incident records can be created as soon as possible in the ESO Suite. CAD dispatch vendors include, but are not limited to, Spillman, Printrack Motorola Premier CAD, Positron PowerCAD, Tiburon CAD, Generic Oracle, and so forth.
-
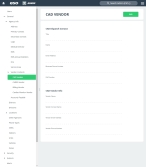
In the left pane, click CAD Vendor.
The CAD Vendor screen appears.
-
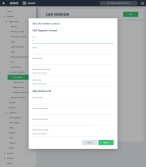
In the upper right corner, click Edit.
The Edit CAD Vendor Contact dialog box appears.
-
 Specify the CAD dispatch person's contact information.
- In Title, type the title (Mr., Ms., or Mrs.) of the contact.
- In Name, type the full name of the name of the
-
In Email Address, type the contact's email address.
Email addresses must be in the
name@domain.suffixformat.Example:
YourName@eso.com - In Business Phone Number and Cell Number, type the corresponding phone numbers for the dispatch contact.
-
 Specify the CAD vendor's general business contact information.
- In Vendor Name, type business name of the vendor your ESO Suite integrates with.
- In Vendor Contact Name, type the full name of the name of the primary contact at the vendor business.
-
In Vendor Email Address, type the business email address for the vendor.
Email addresses must be in the
name@domain.suffixformat.Example:
YourName@eso.com - In Vendor Phone Number, type the main business phone number for the vendor.
- Click Done.
-
-
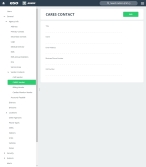
 Specify the CARES vendor contact information.
The CARES registry focuses on cardiac arrest data, and collates EMS records from records that meet their specific criteria, so that researchers can use the data to improve care and treatment protocols for cardiac arrest outcomes.
Information on the CARES registry is available at https://mycares.net/.
Note: There are third-party vendors for the CARES registry—you only need to identify the person in your agency who is the point of contact to discuss CARES-related issues.
The ESO Suite supports an automated process for agencies enrolled in the CARES registry, to get the requisite records submitted for them. You need to work with your ESO representative to determine which records your agency sends CARES, and the ESO representative configures the integration in the ESO Suite.
Note: Integration with CARES requires the following steps.
-
Your agency meets the CARES qualification requirements, and enroll in CARES.
-
CARES approves the automatic submission of your agency's cardiac arrest calls. If your agency does not meet the automatic submission requirements, you can enter the cardiac arrest calls manually in the CARES system.
-
Your ESO representative configures the integration with CARES to automatically submit the qualified records to CARES, in a format that CARES can accept.
-
In the left pane, click CARES Vendor.
The CAD Contact screen appears.
-
In the upper right corner, click Edit.
The Edit CARES Contact dialog box appears.
- In Title, type the title (Mr., Ms., or Mrs.) of the contact.
- In Name, type the full name of the name of the
-
In Email Address, type the contact's email address.
Email addresses must be in the
name@domain.suffixformat.Example:
YourName@eso.com - In Business Phone Number and Cell Number, type the corresponding phone numbers for the dispatch contact.
- Click Done.
-
-
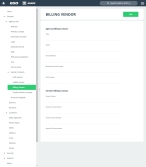
 Specify the billing vendor contact information.
-
In the left pane, click Billing Vendor.
The Billing Vendor screen appears.
-
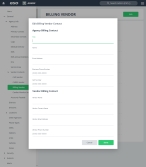
In the upper right corner, click Edit.
The Edit Billing Vendor Contact dialog box appears.
-
 Specify your agency's billing vendor contact information.
- In Title, type the title (Mr., Ms., or Mrs.) of the contact.
- In Name, type the full name of the name of the
-
In Email Address, type the contact's email address.
Email addresses must be in the
name@domain.suffixformat.Example:
YourName@eso.com - In Business Phone Number and Cell Number, type the corresponding phone numbers for the dispatch contact.
-
 Specify the billing vendor's general business contact information.
- In Vendor Name, type business name of the vendor your ESO Suite integrates with.
- In Vendor Contact Name, type the full name of the name of the primary contact at the vendor business.
-
In Vendor Email Address, type the business email address for the vendor.
Email addresses must be in the
name@domain.suffixformat.Example:
YourName@eso.com - In Vendor Phone Number, type the main business phone number for the vendor.
- Click Done.
-
-
 Specify the cardiac monitor vendor contact information.
A cardiac monitor vendor is a device that you to record the electrical activity of a heart, to either identify or rule out a heart rhythm disorder and to determine the right course of treatment. Cardiac monitor vendors include, but are not limited to, Phillips, Physio Controls, Zoll, and so forth.
-
In the left pane, click Cardiac Monitor Vendor.
The Cardiac Monitor Vendor screen appears.
-
In the upper right corner, click Edit.
The Edit Cardiac Monitor Vendor Contact dialog box appears.
-
 Specify your agency's cardiac monitor vendor contact information.
- In Title, type the title (Mr., Ms., or Mrs.) of the contact.
- In Name, type the full name of the name of the
-
In Email Address, type the contact's email address.
Email addresses must be in the
name@domain.suffixformat.Example:
YourName@eso.com - In Business Phone Number and Cell Number, type the corresponding phone numbers for the dispatch contact.
-
 Specify the cardiac monitor vendor's general business contact information.
- In Vendor Name, type business name of the vendor your ESO Suite integrates with.
- In Vendor Contact Name, type the full name of the name of the primary contact at the vendor business.
-
In Vendor Email Address, type the business email address for the vendor.
Email addresses must be in the
name@domain.suffixformat.Example:
YourName@eso.com - In Vendor Phone Number, type the main business phone number for the vendor.
-
In Model, type the model number of the cardiac monitor your agency uses.
Example: Zoll, Physio-Controls, and Phillips are common brand names for cardiac monitors.
-
In Means of Transmission, type an indication of whether your agency uses a Cloud component, a cable hookup, or a WiFi transfer for their cardiac monitor.
- Click Done.
-
-
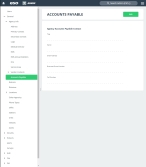
 Specify the accounts payable contact information.
You can identify who in your agency is the point of contact person to discuss accounts payable-related issues.
-
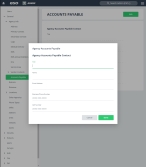
In the left pane, click Accounts Payable.
The Agency Accounts Payable screen appears.
-
In the upper right corner, click Edit.
The Agency Accounts Payable dialog box appears.
- In Title, type the title (Mr., Ms., or Mrs.) of the contact.
- In Name, type the full name of the name of the
-
In Email Address, type the contact's email address.
Email addresses must be in the
name@domain.suffixformat.Example:
YourName@eso.com - In Business Phone Number and Cell Number, type the corresponding phone numbers for the dispatch contact.
- Click Done.
-
-


