View and request billing information
You can view the configuration of a billing file, review the recent request history of a file, and request a copy of a file for a specific date/time range.
Information on downloading a billing file is available in Regenerate and download billing files.
-
Do one of the following.
-
(If you are already working in the ESO Suite) Click the Home icon in the upper left corner of the screen.

-
 (If you have not yet logged in) Log in to the ESO Suite.
-
In a web browser, go to https://www.esosuite.net/EsoSuite.
The ESO Suite login screen appears.
-
Enter your user name, password, and agency name, then click Let's Go.
If MFA is enabled, the Multi-factor authentication dialog box appears, displaying one or more methods you can use to verify your login credentials. The number of methods that appear in the dialog box depends on what MFA methods your ESO Suite administrators enabled in the Admin module.

Click graphics
to open them.Information on enabling MFA and specific MFA methods is available in the Admin module online help, in Configure multiple-factor authentication.
Note: If your ESO Suite administrators have disabled MFA ("opted-out"), this dialog does not appear.
-
(If the Multi-factor authentication dialog box appears) Depending on which buttons appear in the dialog box, verify your login in one of the following ways.
With an authenticator application.
-
Click MFA verification via authenticator app.
The dialog box updates with boxes for entering the numbers of the authentication code, and the ESO Suite sends an authentication code to the authenticator application installed on your device.

-
Open your authenticator application and note the authentication code currently displayed.
-
Enter the authentication code displayed in the authenticator application.
-
Click Log In.
With a text message (SMS).
-
Click MFA verification via SMS.
The dialog box updates with boxes for entering the numbers of the authentication code, and the ESO Suite sends an authentication code to the phone number recorded in your PM records and identified with MFA codes.

-
Enter the authentication code sent to your MFA-registered phone number.
-
Click Log In.
With an email message.
-
Click MFA verification via email.
The dialog box updates with boxes for entering the numbers of the authentication code, and the ESO Suite sends an authentication code to your agency or department email address, recorded in your PM records.

-
Enter the authentication code sent to your agency or department email address.
-
Click Log In.
-
-
The ESO Suite landing screen appears.

Click graphics
to open them.Note: You can access and manage your MFA options through the PM module, on the Settings > Account page, as described in Manage a user account. If your agency or department has enabled MFA but has not purchased the full-featured version of the PM module, you can access your own MFA settings by clicking Change my Multi-Factor Authentication settings on the landing screen, then using the Settings > Account page that appears. If your agency has not enabled MFA, the Change my Multi-Factor Authentication settings link does not appear on the landing screen.

-
-
On the top side of the home screen, click Admin.
Tip: If your screen or browser window is too narrow to display all your agency's ESO Suite module icons, an options icon appears on the right side of the icon bar. If you click the options icon, a menu appears containing additional module icons.

The Admin screen appears, displaying the Welcome screen.

-
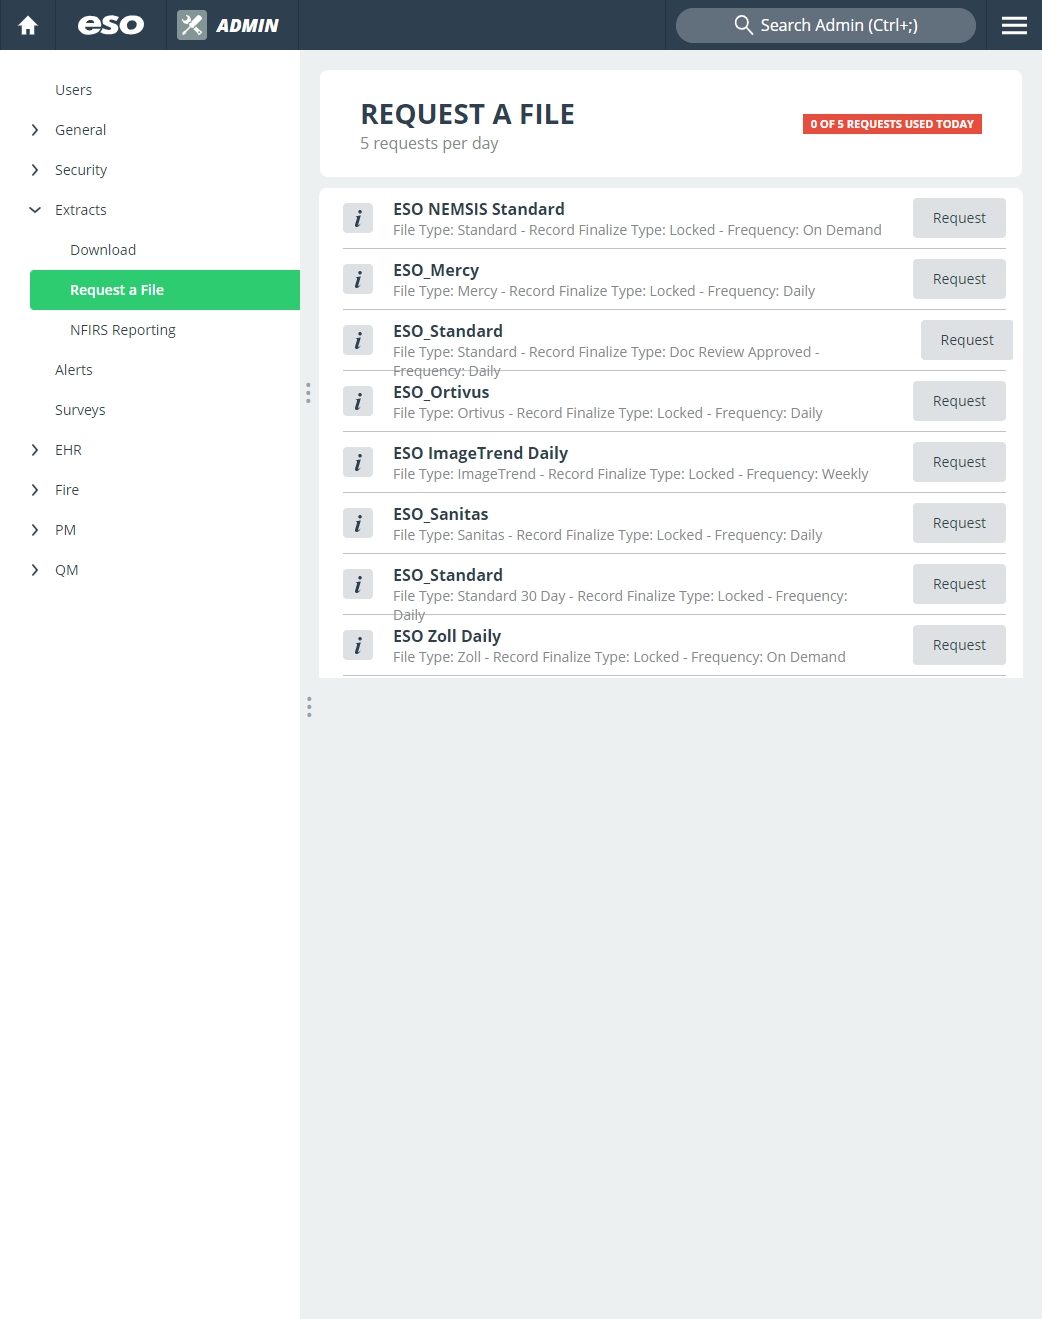
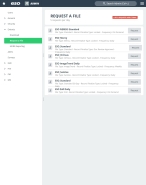
In the left pane, expand Extracts, then click Request a File.
The Request a File screen appears, listing all the billing files configured for your agency.
-
Do any of the following.
View configuration information for a billing file.
-
Below the name of the billing file you want to view configuration information for, read the gray text.
This text defines how your agency wants records submitted to the billing file.
- File Type indicates the type of file created for the billing company.
- Record Finalize Type indicates whether the file is simply locked in EHR, or whether it has gone through a quality management (QM) or quality improvement (QI) process, after which it is marked as ready for billing with one of the approval processes there.
- Frequency indicates how often ESO generates the file (daily weekly, monthly, and so forth.
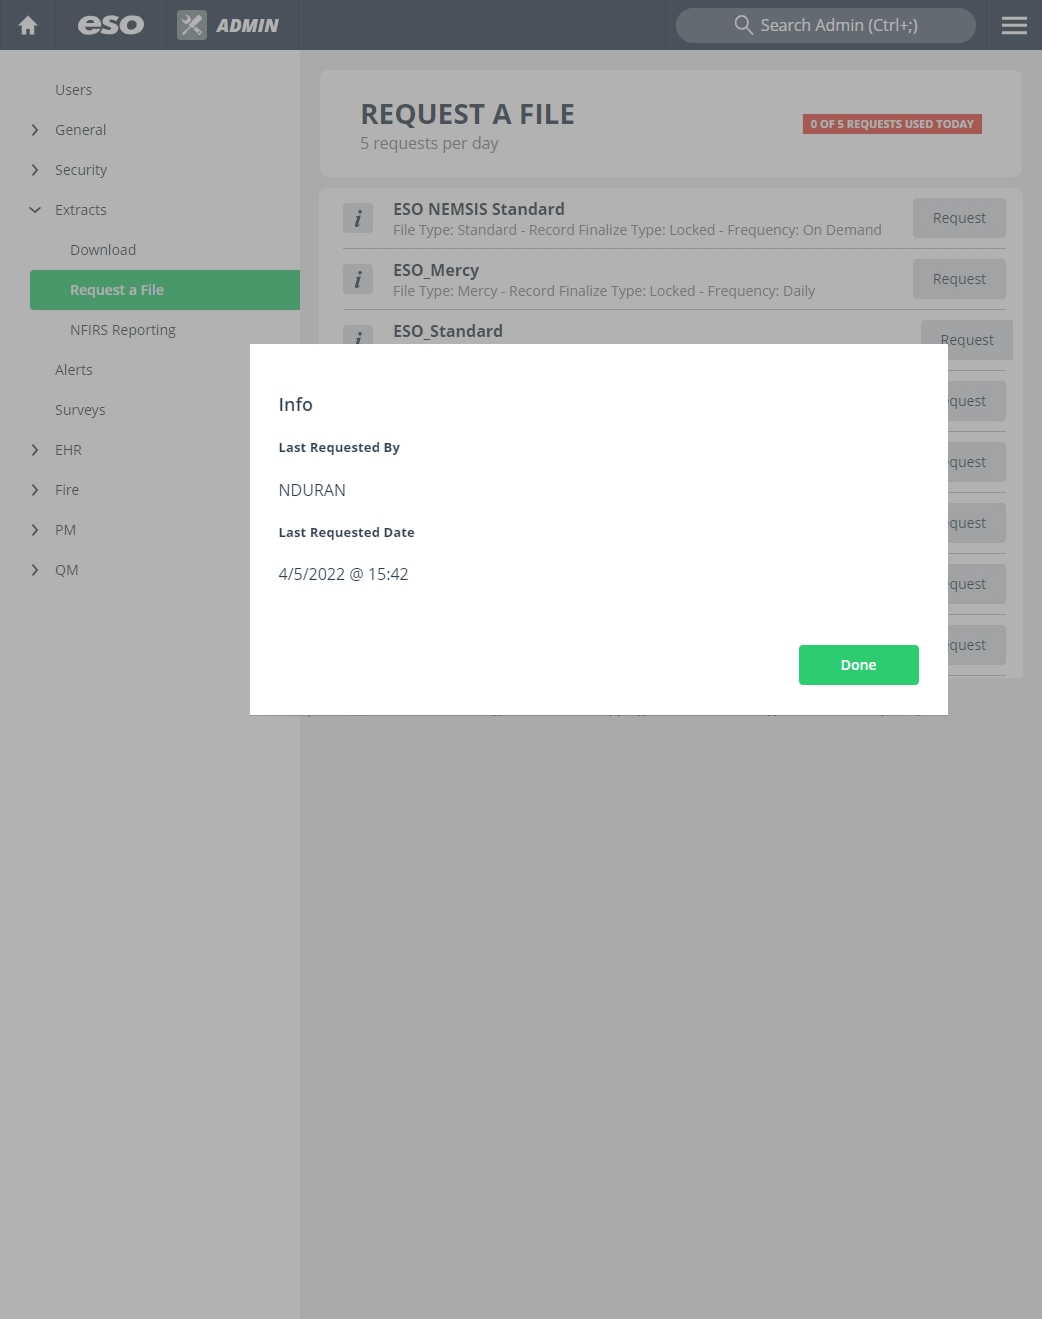
View recent request history for a billing file.
-
To the left any a file's name, click the information (i) icon.
The Info dialog box appears, listing the name of the person who had last requested the file, and when.

- Read the information about the file.
- Click Done.
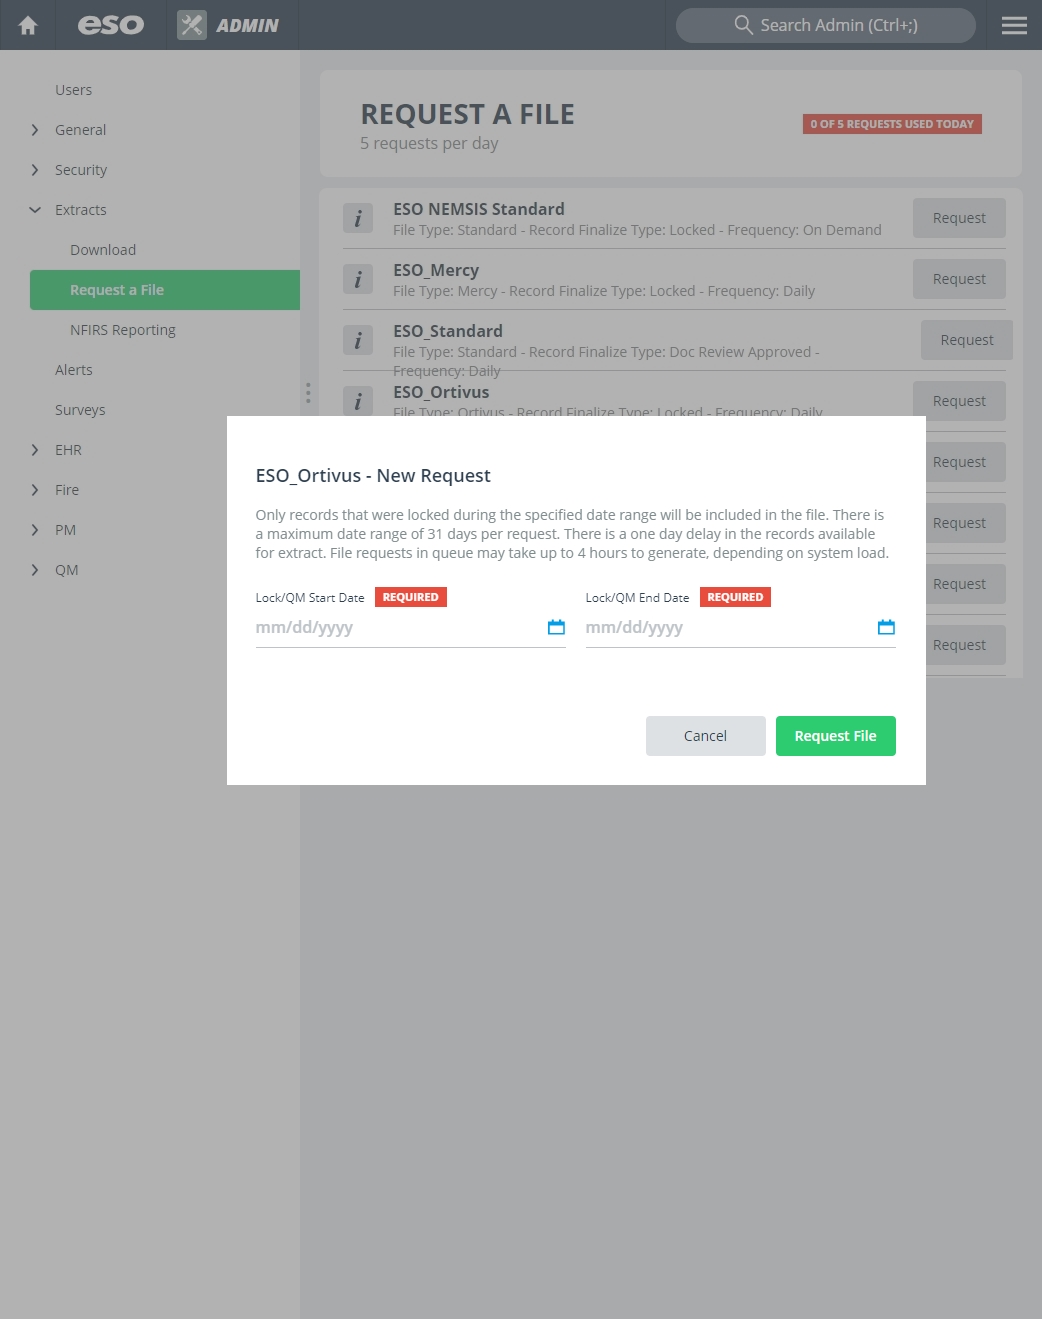
Request a copy of a billing file.
-
Click Request.
The New Request dialog box appears.
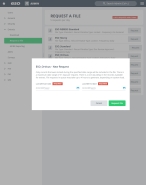
-
For Lock/QM Start Date and Lock/QM EndDate, click the calendar icon on the right end of the field and select the appropriate date from the calendar that appears.
You can specify any time period during which the agency was and ESO client.
Note: Each file you request is limited to a month's worth of data (31 days).
-
Click Request File.
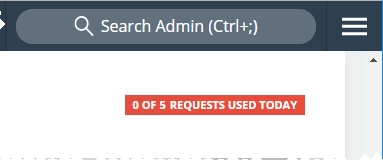
In the upper right corner of the Request A File screen, a red label with a counter updates to reflect the number of requests you have made in the last 24-hour time period. By default, you can make up to five requests per day.
If you went to the Extracts > Download screen, the file you requested appears at the top of the list.
Information on downloading the file is available in Regenerate and download billing files.
-