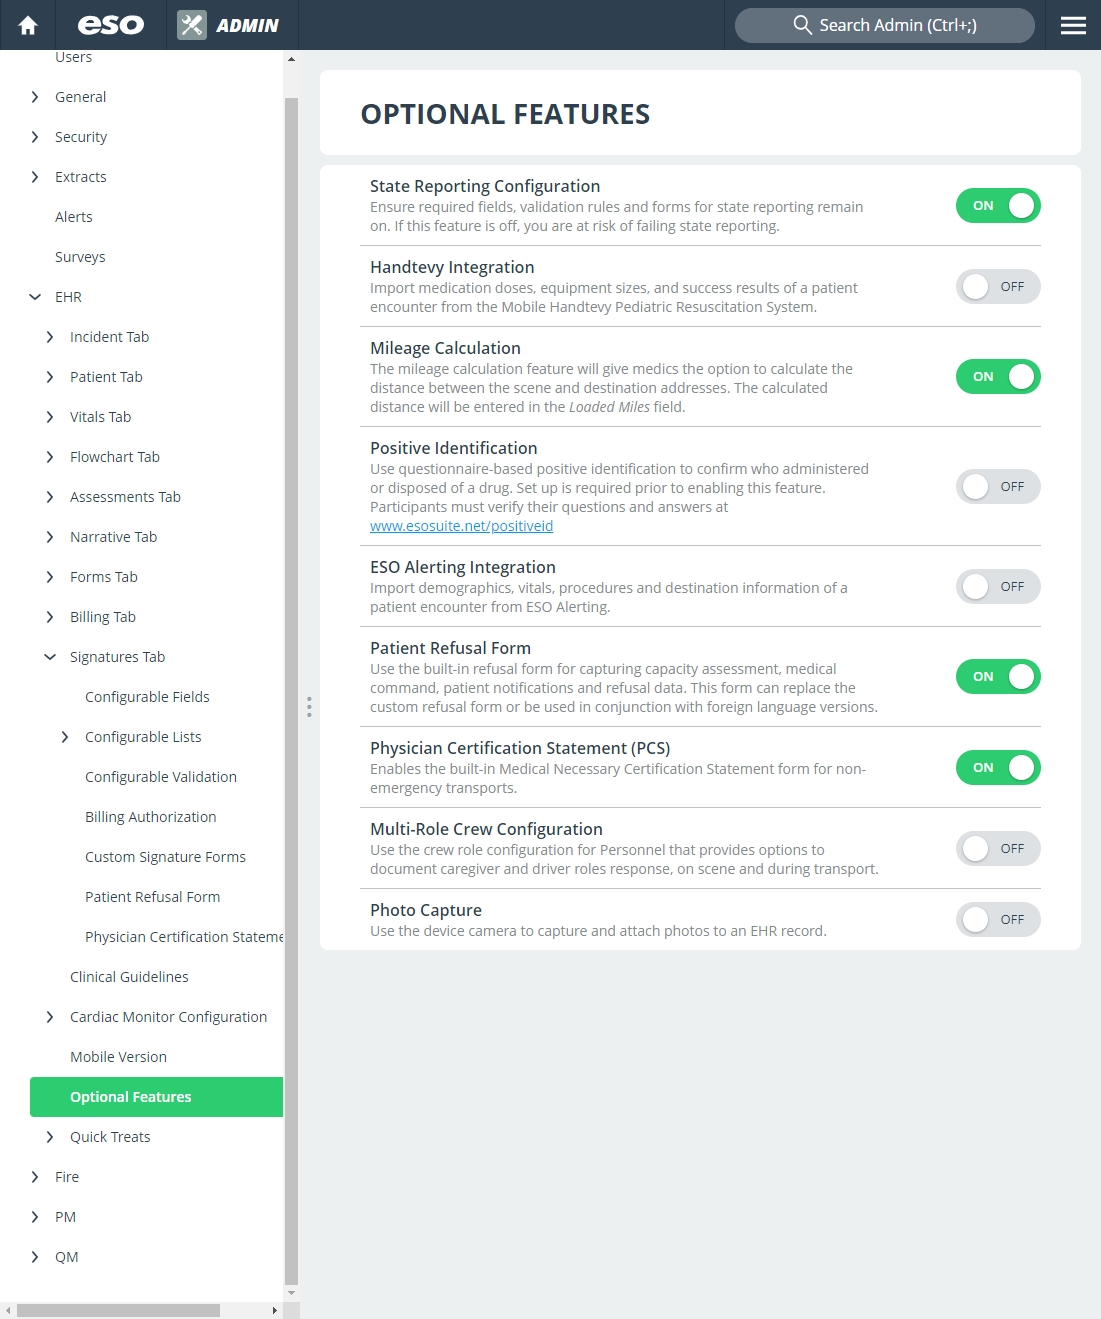
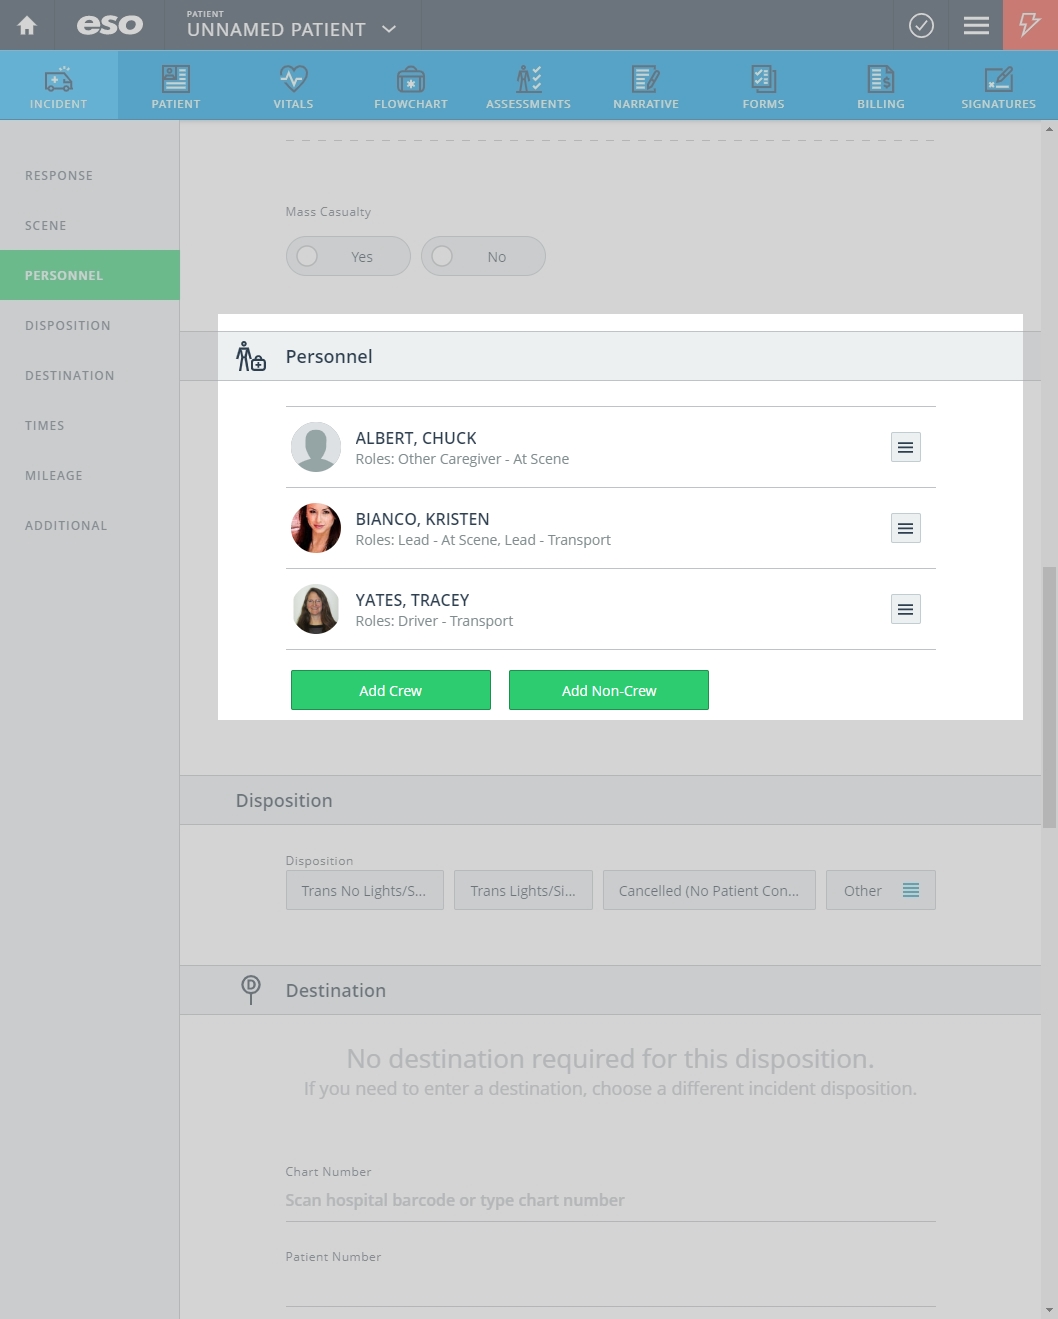
Activate optional features
EHR boasts some optional features you can activate to make a medic's job more efficient in the field.
The features include:
- Activating state-required fields, rules, and forms.
- Importing data from a Mobile Handtevy Pediatric Resuscitation System into ESO Suite's EHR module.
- Letting Google Maps calculate loaded miles.
- Confirm the identify of the person administering or disposing of a drug.
- Importing data from Alerting into ESO Suite's EHR module.
- Disabling the built-in patient refusal form to use the older refusal form functionality.
- Enabling the Medical Necessary Certification Statement for non-emergency transports.
Note: These features require an Internet connection.
-
Do one of the following.
-
(If you are already working in the ESO Suite) Click the Home icon in the upper left corner of the screen.

-
 (If you have not yet logged in) Log in to the ESO Suite.
-
In a web browser, go to https://www.esosuite.net/EsoSuite.
The ESO Suite login screen appears.
-
Enter your user name, password, and agency name, then click Let's Go.
If MFA is enabled, the Multi-factor authentication dialog box appears, displaying one or more methods you can use to verify your login credentials. The number of methods that appear in the dialog box depends on what MFA methods your ESO Suite administrators enabled in the Admin module.

Click graphics
to open them.Information on enabling MFA and specific MFA methods is available in the Admin module online help, in Configure multiple-factor authentication.
Note: If your ESO Suite administrators have disabled MFA ("opted-out"), this dialog does not appear.
-
(If the Multi-factor authentication dialog box appears) Depending on which buttons appear in the dialog box, verify your login in one of the following ways.
With an authenticator application.
-
Click MFA verification via authenticator app.
The dialog box updates with boxes for entering the numbers of the authentication code, and the ESO Suite sends an authentication code to the authenticator application installed on your device.

-
Open your authenticator application and note the authentication code currently displayed.
-
Enter the authentication code displayed in the authenticator application.
-
Click Log In.
With a text message (SMS).
-
Click MFA verification via SMS.
The dialog box updates with boxes for entering the numbers of the authentication code, and the ESO Suite sends an authentication code to the phone number recorded in your PM records and identified with MFA codes.

-
Enter the authentication code sent to your MFA-registered phone number.
-
Click Log In.
With an email message.
-
Click MFA verification via email.
The dialog box updates with boxes for entering the numbers of the authentication code, and the ESO Suite sends an authentication code to your agency or department email address, recorded in your PM records.

-
Enter the authentication code sent to your agency or department email address.
-
Click Log In.
-
-
The ESO Suite landing screen appears.

Click graphics
to open them.Note: You can access and manage your MFA options through the PM module, on the Settings > Account page, as described in Manage a user account. If your agency or department has enabled MFA but has not purchased the full-featured version of the PM module, you can access your own MFA settings by clicking Change my Multi-Factor Authentication settings on the landing screen, then using the Settings > Account page that appears. If your agency has not enabled MFA, the Change my Multi-Factor Authentication settings link does not appear on the landing screen.

-
-
On the top side of the home screen, click Admin.
Tip: If your screen or browser window is too narrow to display all your agency's ESO Suite module icons, an options icon appears on the right side of the icon bar. If you click the options icon, a menu appears containing additional module icons.

The Admin screen appears, displaying the Welcome screen.

-
In the left pane, expand EHR, then click Optional Features.
The Optional Features screen appears.
-
Do any of the following.
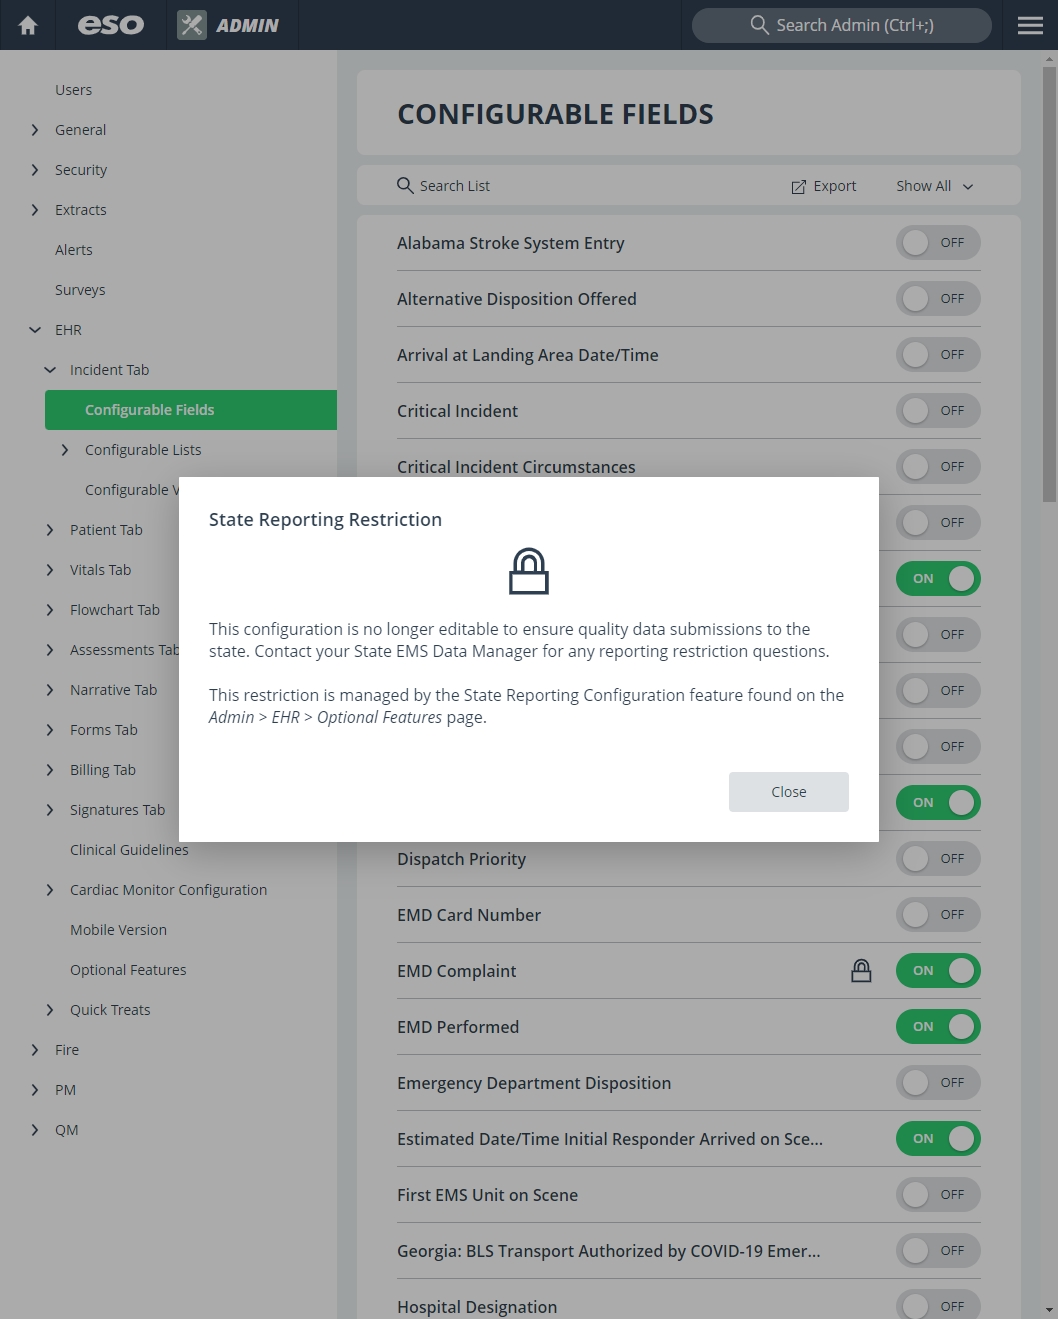
Configure state reporting.
If your agency submits data to your state, you can ensure that fields and forms required by your state are identified on the EHR module screens, and that rules for collecting appropriate data in those fields are enforced. If your agency does not submit data to the state, you can disable this feature.
-
For State Reporting Configuration, drag the slider button to the left, until On appears.
The Applying State Reporting Configuration dialog box appears.

-
Click OK.
Note: If the state reporting configuration option is enabled and you disable it, the Admin module sends a message to other administrator inboxes for awareness.
When you next navigate to EHR > tab_name Tab > Configurable Fields, Configurable Lists, or Configurable Validation, a lock icon appears next to the slider button for any state-required fields, list items, or validations.

If you try to disable a state-required field, list item, or validation, the State Reporting Restriction dialog box appears.

Integrate with a mobile Handtevy system.
If a medic uses a Mobile Handtevy Pediatric Resuscitation System, EHR can import data such as medication doses, equipment sizes, and success results, and so forth, instead of the medic re-entering the data manually.
Note: Before activating the Handtevy integration in the Admin module, you must first have an integration account established with Handtevy. To have this account set up, contact your Handtevy representative with the request and send the representative the following information for the account.
- Agency State ID
- Agency Number
- State GNIS Code
Once you receive confirmation that the account is ready, proceed with the step below.
-
For Handtevy Integration, drag the slider button to the left, until On appears.
Use Google Maps to calculate distance for loaded miles.
You can have EHR calculate the distance between the scene and destination addresses, using Google Maps. The calculated value automatically populates the Loaded Miles field in EHR.
-
For Mileage Calculation, drag the slider button to the left, until On appears.
Activate positive identification for drug administration or disposal.
Positive identification is a method of identifying an individual through evidence, proving that they are who they say they are. A positive identification system can prevent the use of a single identity by several people.
ESO provides an optional positive identification process using security questions to confirm who administers or disposes of a drug. Use of this process can decrease paper usage, enhance accountability, and increase medication security.
-
Require any of your agency's EMS personnel who might administer or witness the disposal of medications to go to www.esosuite.net/positiveid and answer a minimum number of questions on that page.
Note:
- No two answers can be the same.
-
The number of questions needed to be answered is determined by your agency's governing entity.
Example: The State of Ohio Board of Pharmacy requires a minimum of 15 questions to be answered.
-
For Positive Identification, drag the slider button to the left, until On appears.
If enabled, the EHR, Positive Identification appears on the right side in the header of every patient care record. The icon to the left of Positive Identification indicates whether or not verification is required, and (when required) confirmed.
If this appears It indicates Gray vertical line

No positive identification is required.
Red exclamation point

Positive identification is required, and medication has been administered and/or disposed of.
Green vertical line
Positive identification is confirmed for the documented administered and/or disposed medication(s).
Note: Modifications to the medications documented on the record may change status color on the icon.
Note: The Positive Identification icon must be gray or green to finalize (lock) a record. If it is not, validation errors will appear.
Additional information on using this feature in EHR is available in the Positive Identification of Medication Use Guide.
Integrate with ESO Alerting.
ESO Alerting is a hospital notification tool that runs on mobile devices, to let a medic in the field securely send information from an incident site in the field to hospital emergency departments and catheterization laboratories.
If you enable the integration between ESO Alerting and the ESO Suite, ESO Alerting can also push the patient data to the ESO Suite's EHR module.
Note: Because ESO Alerting is an add-on feature, you also need to activate the feature for your agency in the Alerting application.
Information on these activation steps is available in the Alerting online help, under Getting started.
- For ESO Alerting Integration, drag the slider button to the left, until On appears.
Disable the built-in patient refusal signature form.
By default, the built-in patient refusal signature form provides legal text regarding patient refusal from Page, Wolf, & Wirth LLC, the top-most legal firm for EMS. You can edit the content of the refusal form with your agency's own legal text as needed. , or you can disable the built-in form and use the patient refusals feature the way it functioned prior to the ESO Suite 5.16 release.
-
For Patient Refusal Form, drag the slider button to the left, until Off appears.
The Patient Refusal Form Disablement dialog box appears.

- Click OK.
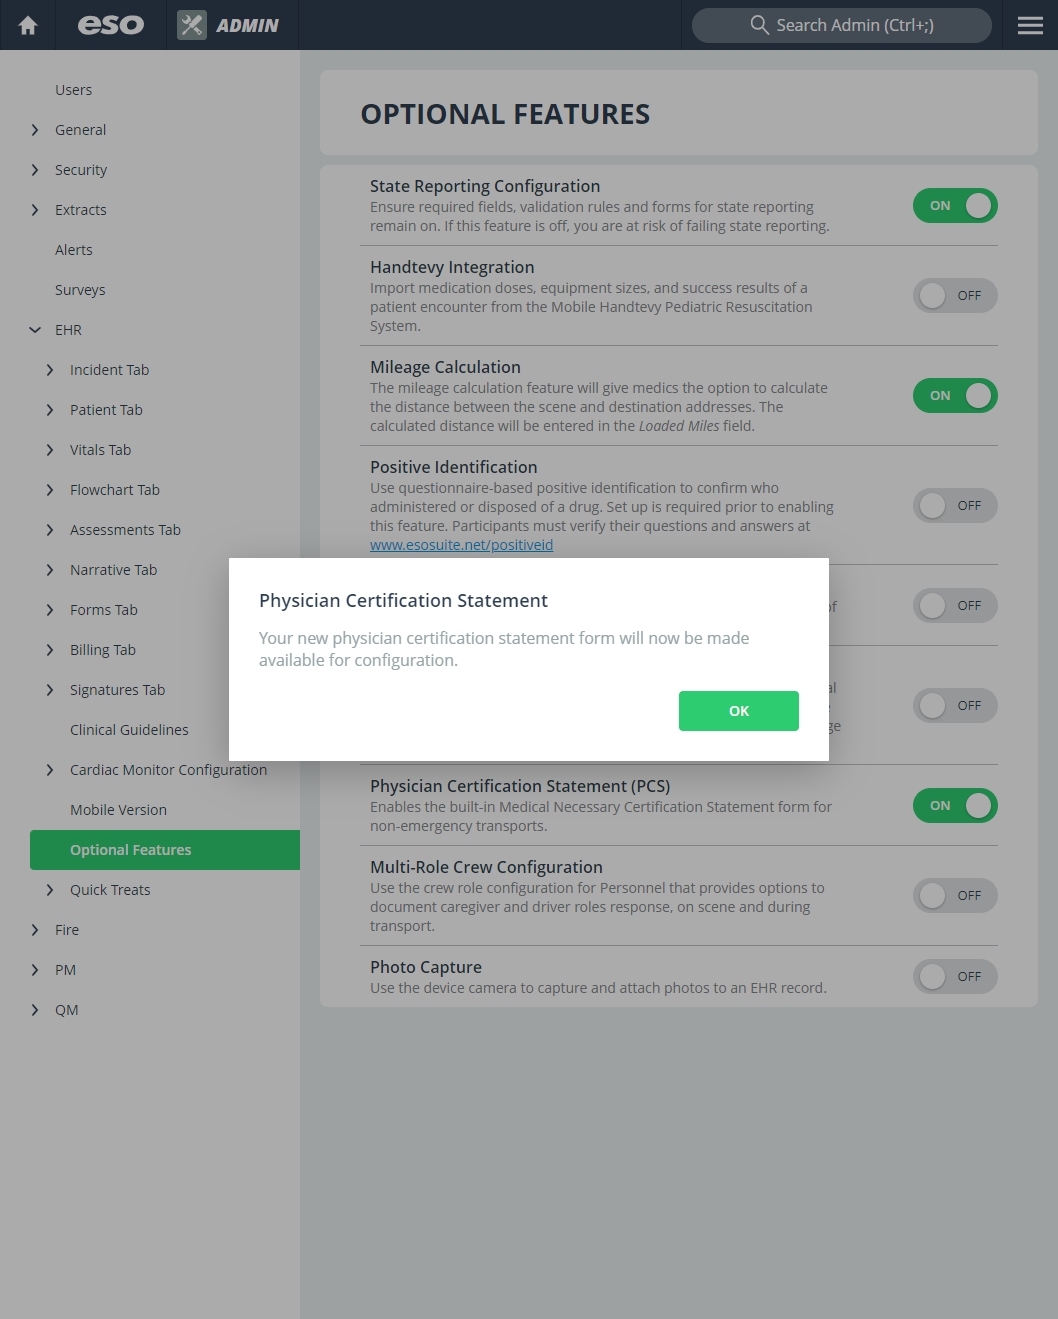
Control the appearance of the PCS form in the EHR module.
Beginning January 1, 2020, there is a distinction between a Physician Certification Statement (PCS) and a Non-Physician Certification Statement.
-
A Physician Certification Statement is defined as a statement signed by the beneficiary’s attending physician.
-
A Non-Physician Certification Statement is defined as a statement signed by an individual other than the beneficiary’s attending physician.
The EHR module provides a built-in Medical Necessity Certification Statement form for non-emergency transports, which covers the case where a Non-Physician Certification Statement is needed. You can enable or disable the display of this form in the EHR module.
-
For Physician Certification Statement (PCS), drag the slider button to the left, until Off appears.
The Physician Certification Statement dialog box appears.

- Click OK.
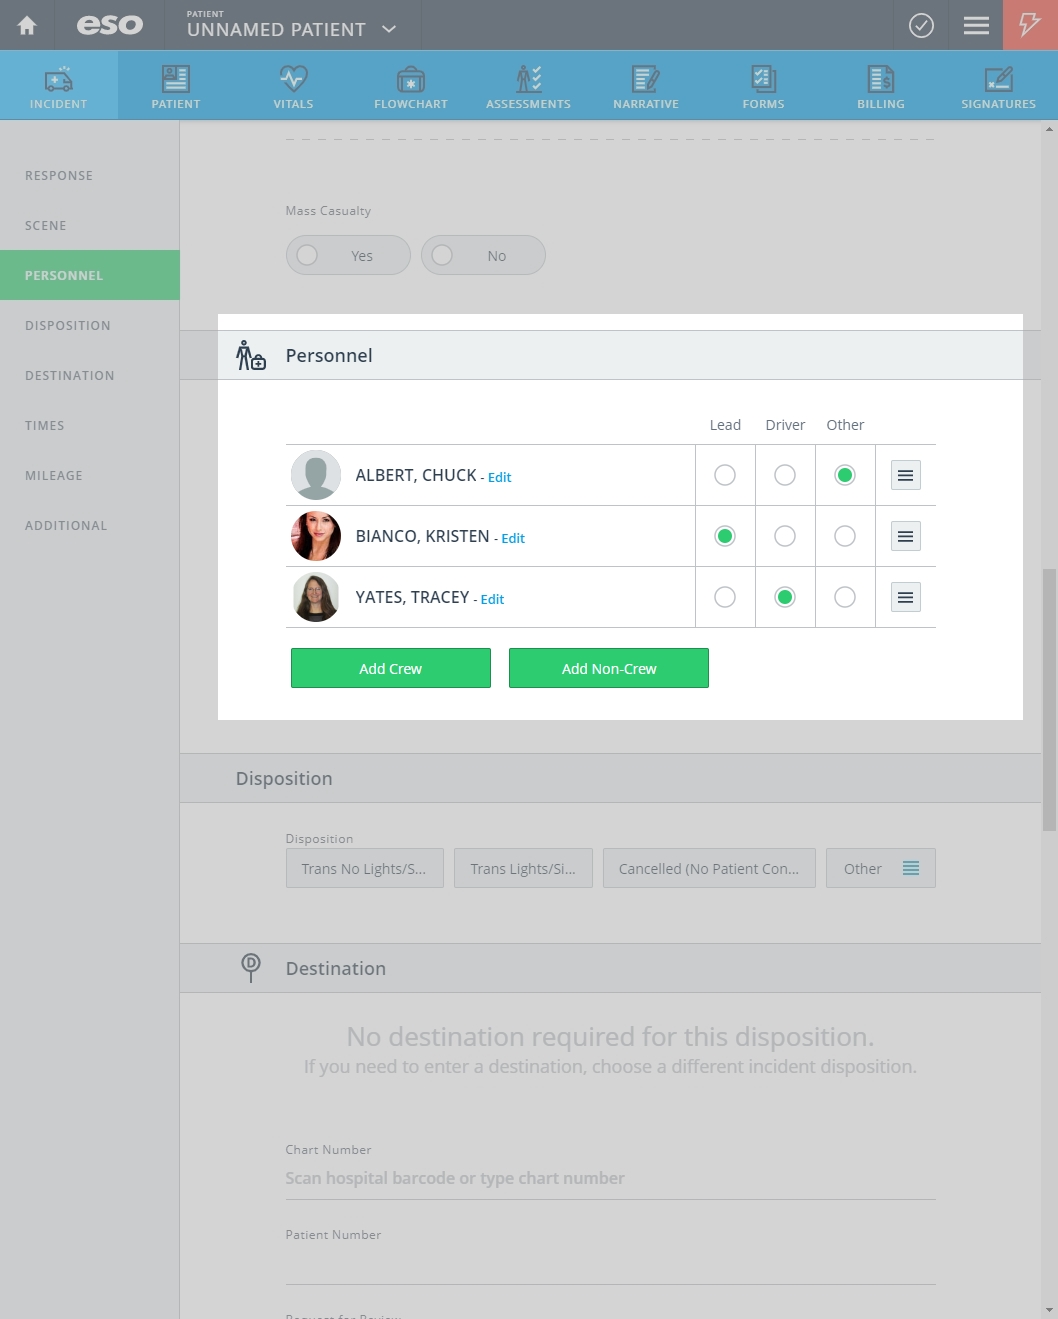
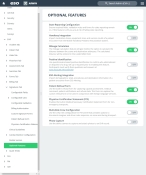
Enable multiple-role crew configuration.
You can upgrade the level of granularity when documenting the roles a provider played during an EHR incident. By default, you can only choose one role (lead, driver, or "other") for each crew member responding to an incident. If you upgrade to a multiple-role crew configuration, you can select more than one role for each crew member, and the role choices available are more descriptive of what each person did at the incident.
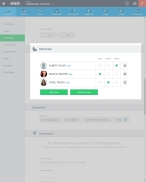
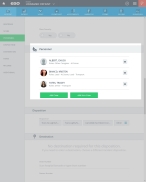
- For Multi-Role Crew Configuration, drag the slider button to the left, until On appears.
Activate photo capture.
You have the option to let crew members take pictures with the camera on their device, and attach those pictures to an EHR record. This feature can be particularly useful when documenting injuries, stroke symptoms, the location or position of the patient when the crew arrived, and so forth.
Note: Pictures taken with this feature are saved directly to the ESO Suite database and are not stored on the mobile device. This keeps photographic HIPAA data securely within the EHR module.
- For Photo Capture, drag the slider button to the left, until On appears.
-