Configure EHR tabs
In the EHR module, there are a number of tabs across the top of screen. Depending on which tab you click, different fields appear on the screen below. In the Admin module, you can determine which optional fields appear on each tab's screen, which menu choices appear when specific fields are clicked, and what validation rules are enabled.
|
Click graphics
|
-
Do one of the following.
-
(If you are already working in the ESO Suite) Click the Home icon in the upper left corner of the screen.
-
 (If you have not yet logged in) Log in to the ESO Suite.
-
In a web browser, go to https://www.esosuite.net/EsoSuite.
The ESO Suite login screen appears.
-
Enter your user name, password, and agency name, then click Let's Go.
If MFA is enabled, the Multi-factor authentication dialog box appears, displaying one or more methods you can use to verify your login credentials. The number of methods that appear in the dialog box depends on what MFA methods your ESO Suite administrators enabled in the Admin module.

Click graphics
to open them.Information on enabling MFA and specific MFA methods is available in the Admin module online help, in Configure multiple-factor authentication.
Note: If your ESO Suite administrators have disabled MFA ("opted-out"), this dialog does not appear.
-
(If the Multi-factor authentication dialog box appears) Depending on which buttons appear in the dialog box, verify your login in one of the following ways.
 With an authenticator application.
-
Click MFA verification via authenticator app.
The dialog box updates with boxes for entering the numbers of the authentication code, and the ESO Suite sends an authentication code to the authenticator application installed on your device.
-
Open your authenticator application and note the authentication code currently displayed.
-
Enter the authentication code displayed in the authenticator application.
-
Click Log In.
 With a text message (SMS).
-
Click MFA verification via SMS.
The dialog box updates with boxes for entering the numbers of the authentication code, and the ESO Suite sends an authentication code to the phone number recorded in your PM records and identified with MFA codes.
-
Enter the authentication code sent to your MFA-registered phone number.
-
Click Log In.
 With an email message.
-
Click MFA verification via email.
The dialog box updates with boxes for entering the numbers of the authentication code, and the ESO Suite sends an authentication code to your agency or department email address, recorded in your PM records.
-
Enter the authentication code sent to your agency or department email address.
-
Click Log In.
-
-
The ESO Suite landing screen appears.

Click graphics
to open them.Note: You can access and manage your MFA options through the PM module, on the Settings > Account page, as described in Manage a user account. If your agency or department has enabled MFA but has not purchased the full-featured version of the PM module, you can access your own MFA settings by clicking Change my Multi-Factor Authentication settings on the landing screen, then using the Settings > Account page that appears. If your agency has not enabled MFA, the Change my Multi-Factor Authentication settings link does not appear on the landing screen.
-
-
On the top side of the home screen, click Admin.
Tip: If your screen or browser window is too narrow to display all your agency's ESO Suite module icons, an options icon appears on the right side of the icon bar. If you click the options icon, a menu appears containing additional module icons.
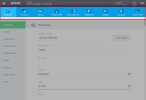
The Admin screen appears, displaying the Welcome screen.
-
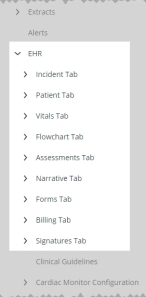
In the left pane, expand EHR > name Tab.
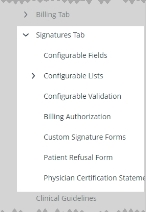
The list of features you can configure for the EHR module appears. Under most of the name Tabs, the Configurable Fields, Configurable Lists, and Configurable Validation options appear. Additional configuration options appear under the Flowchart Tab, Forms Tab, and Signatures Tab.
Example: For EHR > Incident Tab, you can configure fields, lists, and validation rules. For EHR > Signatures Tab, you can configure billing authorizations, custom signature forms, and patient refusal forms in addition to fields, lists, and validation rules.
-
 (If the Configurable Fields option appears) Do the following.
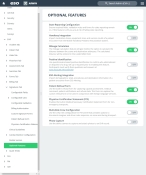
There are a number of optional fields you can choose to display or hide on a tab in EHR, depending on your agency or state's patient care data collection needs.
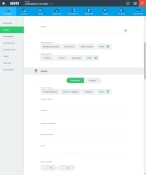
Example: If you expand EHR > Incident Tab > Configurable Fields, in the list on the right, you can disable EMD Card Number, and enable EMD Complaint, EMD Performed. In the EHR module then, on the Incident tab, the EMD Card Number field does not appear, and the EMD Complaint and EMD Performed fields do appear.
-
Do any of the following.
 Activate a configurable field.
- For the item you want to collect data for, on the right side of the list, drag the slider button to the right, until On appears.
 Video: Activate and deactivate a list item
Note: The process for activating and deactivating a list item shown below applies to any list in the ESO Suite.
 Search the configurable field list.
-
In the Search field, type the characters in the name of the list item you need to find.
As you add each character, the list automatically reduces to only items containing that sequence of characters.
 Video: Search a list
Note: The process for searching a list shown below applies to any list in the ESO Suite.
 Filter the configurable field list.
-
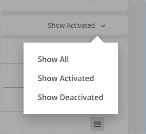
On the right side of the screen, click the filter menu.
Note: The name of the menu varies, reflecting the option currently selected for filtering the list. Show All appears as the default selected option.
The menu of filter options appears.
-
Select the option you want to use to filter the list.
The list updates to reflect your selection.
 Video: Filter a list
Note: The process for filtering a list shown below applies to any list in the ESO Suite.
 Export the configurable field list to a .csv file.
-
In the upper right corner of the list, click Export.
The Admin module generates a
.csvfile containing all the items in the list, whether they are activated or deactivated, and regardless of how you are filtering the list. The.csvfile downloads to your default download location.
-
-
 (If the Configurable Lists option appears) Do the following.
In the Admin module, you can determine which menu options appear when you click specific fields in the EHR module, such as the Disposition or Unit's Level of Care fields that appear on the Incident tab.
Example: If you expand EHR > Incident Tab > Configurable Lists > Unit's Level of Care, you can enable list items on the right that correspond to the levels of care a unit can provide to patients, and disable the list items for the levels of care the unit cannot provide. In the EHR module then, on the Incident tab, when you click the Unit's Level of Care field, only the list items you enabled in the Admin module appear as menu choices.
In most cases, the lists of items are system lists and all the values are predetermined for you, and you only need to activate or deactivate the values you want to display or hide in EHR. System lists are based on NEMSIS and state reporting requirements.
In other cases, the lists of items are agency-defined lists, and you must add items to the list in the Admin module. This lets you create a custom list tailored to your agency's needs.
Example: Under Patient Tab > Configurable Lists > Personal Items, you can create a list of items, such as cell phone, glasses, dentures, keys, jewelry, and so forth. This list appears in the EHR module, on the Patient tab, when you click Personal Items.
You can identify an agency-defined list by the Add button and a View Sort Order option in the upper right corner of the screen. System lists do not have this button and option.
-
(Patient Tab, Forms Tab, Billing Tab, and Signatures Tab) For agency-defined lists, do any of the following.
 Add a list item.
-
In the upper right corner, click Add.
Depending on which kind of list you are working with, different dialog boxes appear.
Note: You must fill in all fields indicated as
REQUIREDon this screen. Billing Tab > Insurance Companies
The New Insurance Company dialog box appears.
- In Name, type the name of the insurance company you are adding to the list.
- For Country, click the field or the list icon to the right of the field, then select the appropriate single option from the menu that appears.
- In Address 1 and Address 2, enter the street address and any other unit-specific information.
-
In Zip, type the zip code for the location, then click the search icon (magnifying glass).
A list of cities, states, or zip codes matching what you entered appears.
Example: In Zip, type
50248, then click the search icon.A list of zip codes matching
50248appears on the right. -
Select the entry that corresponds to the rest of the address you are entering.
City, State, and County automatically populate in the address menu with the information from the selected match.
- Click Done.
Note: It may take a few moments for a new list item in the Admin module to propagate to the corresponding field in the EHR module.
 Edit a list item.
-
For the list item you want to edit, click Edit to the right of the item name.
Note: If Edit does not appear beside the item name, on the right side of the list, drag the slider button to the right, until On appears. The item must be activated before you can edit it.
The Edit dialog box appears, displaying the values already specified for that list item.
- Change the information in the fields as needed.
- Click Done.
 Sort the list items.
Note: Lists in the Admin module always appear in alphabetical order, and display both active and deactivated items.
-
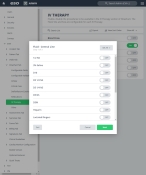
In the upper right corner of the list, click View Sort Order.
The Sort dialog box appears.
Note: Only the active items in the list appear in the Sort dialog box.
-
For Sort list alphabetically, drag the slider button to the left, until Off appears.
You can now change the order of the values in the list, and buttons for manually sorting the list appear below Sort list alphabetically.
-
In the list on the right, select the item you want to move up or down in the list.
A green, right-pointing arrow appears next to the list item to confirm that it is selected.
- On the left, click the up or down arrows to move the item up or down one place, or to the top or bottom of the list.
- Repeat the previous two steps as many times as needed to arrange the items in the order you want in the list.
-
Click OK.
The dialog box closes, and the list appears in the new order, unless you are working in the Admin module.
Note: Lists in the Admin module always appear in alphabetical order.
 Video: Sort a list
Note: The process for sorting a list shown below applies to any list in the ESO Suite.
-
-
For both system and agency-defined lists, do any of the following.
 Activate a configurable list item.
-
For the menu list you want to activate, on the right side of the list, drag the slider button to the right, until On appears.
Edit appears beside the item name.
-
Click either of the following categories.
- Trauma Criteria
- CDC 2011 Trauma Criteria
The Trauma Criteria or CDC 2011 Trauma Criteria dialog box appears.
-
Scroll down, then for Trauma Activation, select No.
The Reason Not Activated field appears below Trauma Activation.
-
Click either of the following categories.
- Trauma Criteria
- CDC 2011 Trauma Criteria
The Trauma Criteria or CDC 2011 Trauma Criteria dialog box appears. The Trauma Level appears about halfway down the dialog box.
-
Click the Mobile Integrated Healthcare – Referral category.
The Mobile Integrated Healthcare – Referral dialog box appears.
-
For Patient requires followup, select Yes.
The following fields with configurable lists appear.
- Patient Referred To
-
Name of Referral or Program
Note: This field also appears when you click the Mobile Integrated Healthcare – Visit category.
- Reason for Referral
- Location / Patient Flags
-
Click the Mobile Integrated Healthcare – Visit category.
The Mobile Integrated Healthcare – Visit dialog box appears, and Patient Referred From appears as the first field in the dialog box.
 Video: Activate and deactivate a list item
Note: The process for activating and deactivating a list item shown below applies to any list in the ESO Suite.
 Note: Finding fields with configurable lists on the Forms tab.
In the EHR module, on the Forms tab, patient forms are grouped into specialty categories. As a result, the fields with the configurable lists that you define in the Admin module appear in the EHR module only after you click the button corresponding to the appropriate specialty category.
Example: In the Admin module, under EHR > Forms > Configurable Lists > Trauma Level, you can configure the options that appear for the Trauma Level field in the EHR module.
In the EHR module, on the Forms tab, you can find the Trauma Level field if you click the Trauma Criteria specialty category button.
The Trauma Criteria dialog box appears on the right, and the Trauma Level field appears in it.
To find this field on the Forms tab Do this Reason Not Activated
Trauma Level
Patient Referred To,
Name of Referral or Program,
Reason for Referral,
Location / Patient Flags
Patient Referred From
 Search for a configurable list item.
-
In the Search field, type the characters in the name of the list item you need to find.
As you add each character, the list automatically reduces to only items containing that sequence of characters.
 Video: Search a list
Note: The process for searching a list shown below applies to any list in the ESO Suite.
 Filter for a configurable list item.
-
On the right side of the screen, click the filter menu.
Note: The name of the menu varies, reflecting the option currently selected for filtering the list. Show All appears as the default selected option.
The menu of filter options appears.
-
Select the option you want to use to filter the list.
The list updates to reflect your selection.
 Video: Filter a list
Note: The process for filtering a list shown below applies to any list in the ESO Suite.
 Export the configurable list to a .csv file.
-
In the upper right corner of the list, click Export.
The Admin module generates a
.csvfile containing all the items in the list, whether they are activated or deactivated, and regardless of how you are filtering the list. The.csvfile downloads to your default download location.
-
-
-
 (If the Configurable Validations option appears) Do the following.
Validations are based on state-reporting validation and agency-protocol needs, and which are available to the agency. The baseline validations are from NEMSIS, and additional validations might be required by your state.
Configurable validations let you define the documentation requirements for your agency.
Note:
-
If your state requires additional validations, a lock icon appears to the left of validation slider icon in the validation list.
- If you have an agency that operates in two different states and you have two different instances of the ESO Suite (one for each state), you would see a different list of state-mandated validations in each instance.
-
Do any of the following.
 Activate a validation.
- For the validation you want to activate, on the right side of the list, drag the slider button to the right, until On appears.
 Video: Activate and deactivate a list item
Note: The process for activating and deactivating a list item shown below applies to any list in the ESO Suite.
 Search the validation list.
-
In the Search field, type the characters in the name of the list item you need to find.
As you add each character, the list automatically reduces to only items containing that sequence of characters.
 Video: Search a list
Note: The process for searching a list shown below applies to any list in the ESO Suite.
 Filter the validation list.
-
On the right side of the screen, click the filter menu.
Note: The name of the menu varies, reflecting the option currently selected for filtering the list. Show All appears as the default selected option.
The menu of filter options appears.
-
Select the option you want to use to filter the list.
The list updates to reflect your selection.
 Video: Filter a list
Note: The process for filtering a list shown below applies to any list in the ESO Suite.
 Export the validation list to a .csv file.
-
In the upper right corner of the list, click Export.
The Admin module generates a
.csvfile containing all the items in the list, whether they are activated or deactivated, and regardless of how you are filtering the list. The.csvfile downloads to your default download location.
-
-
Configure additional options for some EHR tabs.
 Flowchart Tab
In the EHR module, on the Flowchart tab, a row of buttons appears along the bottom of the screen. Each of these buttons correspond to an option in the Admin module, under EHR > Flowchart Tab.
In the Admin module, you can determine which procedure flowchart options appear when you click the buttons along the bottom of the screen in the EHR module's Flowchart tab.
Example: If you expand EHR > Flowchart Tab > Critical Care, you can enable selection options that correspond to the critical care procedure flowcharts that your agency can provide, and disable the selection options for flowcharts that your agency cannot provide. In the EHR module then, on the Flowchart tab, when you click the Critical Care button at the bottom of the screen, only the selection options you enabled in the Admin module appear as choices.
Note: While you simply enable or disable the display for most flowcharts to appear in EHR, more data is needed for medications and IV therapy procedures. You must configure each medication or IV therapy to collect that data.
-
Do any of the following.
 Activate a flowchart item.
- For the flowchart item you want to activate, on the right side of the list, drag the slider button to the right, until On appears.
 Video: Activate and deactivate a list item
Note: The process for activating and deactivating a list item shown below applies to any list in the ESO Suite.
 Search the flowchart items.
-
In the Search field, type the characters in the name of the list item you need to find.
As you add each character, the list automatically reduces to only items containing that sequence of characters.
 Video: Search a list
Note: The process for searching a list shown below applies to any list in the ESO Suite.
 Sort the flowchart items.
Note: Lists in the Admin module always appear in alphabetical order, and display both active and deactivated items.
-
In the upper right corner of the list, click View Sort Order.
The Sort dialog box appears.
Note: Only the active items in the list appear in the Sort dialog box.
-
For Sort list alphabetically, drag the slider button to the left, until Off appears.
You can now change the order of the values in the list, and buttons for manually sorting the list appear below Sort list alphabetically.
-
In the list on the right, select the item you want to move up or down in the list.
A green, right-pointing arrow appears next to the list item to confirm that it is selected.
- On the left, click the up or down arrows to move the item up or down one place, or to the top or bottom of the list.
- Repeat the previous two steps as many times as needed to arrange the items in the order you want in the list.
-
Click OK.
The dialog box closes, and the list appears in the new order, unless you are working in the Admin module.
Note: Lists in the Admin module always appear in alphabetical order.
 Video: Sort a list
Note: The process for sorting a list shown below applies to any list in the ESO Suite.
 Filter the flowchart item list.
-
On the right side of the screen, click the filter menu.
Note: The name of the menu varies, reflecting the option currently selected for filtering the list. Show All appears as the default selected option.
The menu of filter options appears.
-
Select the option you want to use to filter the list.
The list updates to reflect your selection.
 Video: Filter a list
Note: The process for filtering a list shown below applies to any list in the ESO Suite.
 Export the flowchart item list to a .csv file.
-
In the upper right corner of the list, click Export.
The Admin module generates a
.csvfile containing all the items in the list, whether they are activated or deactivated, and regardless of how you are filtering the list. The.csvfile downloads to your default download location.
-
 (Medications flowchart) Identify measurement, route, and dose for the medication.
-
For the item you want to collect data for, on the right side of the list, on the right side of the list, drag the slider button to the right, until On appears.
To the right of the medication name, Configure appears.
Note: If Configure does not appear beside the medication name, on the right side of the list, drag the slider button to the right, until On appears. The medication must be activated before you can edit it.
-
Click Configure.
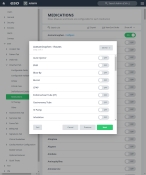
The medication wizard appears, displaying the Measures screen.
-
For the units of measure applicable to this type of medication, on the right side of the list, drag the slider button to the right, until On appears.
Note: On all screens of the wizard, you can do the following.
 Sort the list.
Note: Lists in the Admin module always appear in alphabetical order, and display both active and deactivated items.
-
In the upper right corner of the list, click View Sort Order.
The Sort dialog box appears.
Note: Only the active items in the list appear in the Sort dialog box.
-
For Sort list alphabetically, drag the slider button to the left, until Off appears.
You can now change the order of the values in the list, and buttons for manually sorting the list appear below Sort list alphabetically.
-
In the list on the right, select the item you want to move up or down in the list.
A green, right-pointing arrow appears next to the list item to confirm that it is selected.
- On the left, click the up or down arrows to move the item up or down one place, or to the top or bottom of the list.
- Repeat the previous two steps as many times as needed to arrange the items in the order you want in the list.
-
Click OK.
The dialog box closes, and the list appears in the new order, unless you are working in the Admin module.
Note: Lists in the Admin module always appear in alphabetical order.
 Video: Sort a list
Note: The process for sorting a list shown below applies to any list in the ESO Suite.
-
-
Click Next.
The Routes screen of the wizard appears.
- For the routes this medication can be administered to the patient, on the right side of the list, drag the slider button to the right, until On appears.
-
Click Next.
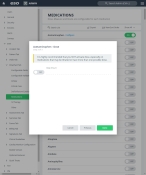
The Dose screen of the wizard appears.
Warning: While you have the option to specify the dosage of a medication on this screen, we strongly recommend that you do not do so.
In the field, the medic may need to administer more or less of a dose than is typical, depending on the situation they are responding to. If the dosage is pre-filled in EHR, the medic may not remember to change the dosage from the default amount, and the incident will pass validation with the inaccurate dosage value.
- (If you decide to specify a dosage for the medication) Drag the slider button to the left, until On appears.
- In Dose Amount, type the numerical value for the dosage to administer.
-
Click Done.
When the medic chooses the medication in EHR, only options you selected in the wizard appear as choices.
-
-
 (IV Therapy flowchart) Identify the fluid, site, and needle size for the therapy.
-
For the item you want to collect data for, on the right side of the list, on the right side of the list, drag the slider button to the right, until On appears.
To the right of the IV therapy name, Configure appears.
Note: If Configure does not appear beside the IV therapy name, on the right side of the list, drag the slider button to the right, until On appears. The IV therapy must be activated before you can edit it.
-
Click Configure.
The IV therapy wizard appears, displaying the Fluid screen.
-
For the type of fluid used in this IV therapy, on the right side of the list, drag the slider button to the right, until On appears.
Note: On all screens of the wizard, you can do the following.
 Sort the list.
Note: Lists in the Admin module always appear in alphabetical order, and display both active and deactivated items.
-
In the upper right corner of the list, click View Sort Order.
The Sort dialog box appears.
Note: Only the active items in the list appear in the Sort dialog box.
-
For Sort list alphabetically, drag the slider button to the left, until Off appears.
You can now change the order of the values in the list, and buttons for manually sorting the list appear below Sort list alphabetically.
-
In the list on the right, select the item you want to move up or down in the list.
A green, right-pointing arrow appears next to the list item to confirm that it is selected.
- On the left, click the up or down arrows to move the item up or down one place, or to the top or bottom of the list.
- Repeat the previous two steps as many times as needed to arrange the items in the order you want in the list.
-
Click OK.
The dialog box closes, and the list appears in the new order, unless you are working in the Admin module.
Note: Lists in the Admin module always appear in alphabetical order.
 Video: Sort a list
Note: The process for sorting a list shown below applies to any list in the ESO Suite.
-
-
Click Next.
The Site screen of the wizard appears.
- For the locations on the body where this IV therapy can be administered to the patient, on the right side of the list, drag the slider button to the right, until On appears.
-
Click Next.
The Size screen of the wizard appears.
- For the sizes of needle this IV therapy can be administered with, on the right side of the list, drag the slider button to the right, until On appears.
-
Click Done.
When the medic chooses the IV therapy in EHR, only options you selected in the wizard appear as choices.
-
 Forms Tab
In EHR, the Forms tab provides a set of forms that let medics in the field capture additional information about specific situations, such as a trauma, a burn, an intubation, and so forth.
In the Admin module, you can determine which forms to display for your agency and its protocols.
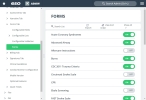
Example: If you expand EHR > Forms Tab > Forms, you can enable list items on the right that correspond to the forms a unit can access in the field, and disable the list items for the forms they cannot. In the EHR module then, on the Forms tab, only the list items you enabled in the Admin module appear as form choices.
-
Do any of the following.
 Activate a form.
- For the form you want to display, on the right side of the list, drag the slider button to the right, until On appears.
 Video: Activate and deactivate a list item
Note: The process for activating and deactivating a list item shown below applies to any list in the ESO Suite.
 Search for a form.
-
In the Search field, type the characters in the name of the list item you need to find.
As you add each character, the list automatically reduces to only items containing that sequence of characters.
 Video: Search a list
Note: The process for searching a list shown below applies to any list in the ESO Suite.
 Sort the forms list.
Note: Lists in the Admin module always appear in alphabetical order, and display both active and deactivated items.
-
In the upper right corner of the list, click View Sort Order.
The Sort dialog box appears.
Note: Only the active items in the list appear in the Sort dialog box.
-
For Sort list alphabetically, drag the slider button to the left, until Off appears.
You can now change the order of the values in the list, and buttons for manually sorting the list appear below Sort list alphabetically.
-
In the list on the right, select the item you want to move up or down in the list.
A green, right-pointing arrow appears next to the list item to confirm that it is selected.
- On the left, click the up or down arrows to move the item up or down one place, or to the top or bottom of the list.
- Repeat the previous two steps as many times as needed to arrange the items in the order you want in the list.
-
Click OK.
The dialog box closes, and the list appears in the new order, unless you are working in the Admin module.
Note: Lists in the Admin module always appear in alphabetical order.
 Video: Sort a list
Note: The process for sorting a list shown below applies to any list in the ESO Suite.
 Filter the forms list.
-
On the right side of the screen, click the filter menu.
Note: The name of the menu varies, reflecting the option currently selected for filtering the list. Show All appears as the default selected option.
The menu of filter options appears.
-
Select the option you want to use to filter the list.
The list updates to reflect your selection.
 Video: Filter a list
Note: The process for filtering a list shown below applies to any list in the ESO Suite.
 Export the forms list to a .csv file.
-
In the upper right corner of the list, click Export.
The Admin module generates a
.csvfile containing all the items in the list, whether they are activated or deactivated, and regardless of how you are filtering the list. The.csvfile downloads to your default download location.
 Signatures Tab
You can specify your agency's billing authorization verbiage, patient refusal form, PCS form, and any other agency-specific, custom forms that require signatures.
Billing authorizations contain your agency's billing legal authorization verbiage, patient refusal forms contain legal verbiage to address concerns about potential liability if a patient refuses care, and the PCS form proves medical necessity for non-emergent stretcher transport that will be covered by Medicare or by other federally-funded programs. You can add billing authorizations and patient refusal forms in up to three languages (English, Spanish, and French).
You can also upload images of custom signature forms, which patients can "sign" over top of, to meet any other documentation needs your agency has.
 Where is the billing authorization signature form in the EHR module?
While you edit and manage the content of the billing authorization signature forms in the Admin module, it useful to know where these forms appear in the EHR module.
-
In the list of patient records, click the patient record you want to work with.
The patient record opens, with the Incident tab selected in the blue bar across the top.
-
Click the Signatures tab.
The screen updates to display the list of signature forms available in EHR.
-
Under Billing Authorization (Choose One), click Section 1 - Patient / Parent of Minor Authorization Signature.
The Section 1 - Patient / Parent of Minor Authorization Signature dialog box appears, displaying the text for the patient refusal signature form.
 Where is the patient refusal signature form in the EHR module?
While you edit and manage the content of the patient refusal signature forms in the Admin module, it useful to know where these forms appear in the EHR module.
-
In the list of patient records, click the patient record you want to work with.
The patient record opens, with the Incident tab selected in the blue bar across the top.
-
Click the Signatures tab.
The screen updates to display the list of signature forms available in EHR.
-
Under Standard Signatures, click Refusal.
The Patient Refusal Form dialog box appears, with Capacity Assessment selected in the left pane.
-
In the left pane, click Patient Refusals.
The right pane scrolls down to the Patient Refusals section, where the text for the patient refusal signature form appears.
 Where is the PCS in the EHR module?
While you edit and manage the content of the PCS in the Admin module, it useful to know where these forms appear in the EHR module.
-
In the list of patient records, click the patient record you want to work with.
The patient record opens, with the Incident tab selected in the blue bar across the top.
-
Click the Signatures tab.
The screen updates to display the list of signature forms available in EHR.
-
Under Standard Signatures, click Physician Certification Statement.
The Physician Certification Statement dialog box appears, with Transport Details selected in the left pane.
-
In the left pane, click Signature.
The right pane scrolls down to the Signature section, where the Physician Certification Statement appears.
-
Do any of the following.
 Work with billing authorization signature forms.
-
Do any of the following.
 Add a billing authorization signature form.
-
Click Billing Authorization.
The Billing Authorization screen appears.
-
Click Add.
Note: If you have already added three billing authorizations, the Add button no longer appears on the screen. If you delete one or more of the existing billing authorizations, the Add button reappears.
The New Billing Authorization screen appears.
-
For Language, click the field or the list icon to the right of the field, then select the appropriate single option from the menu that appears.
Note: Options in the list reflect only the languages you have not added already.
Example: If you have already selected Spanish for a billing authorization, then only French and English appear as choices in the Language menu when you add another billing authorization.
-
In Label, type a label for the billing authorization you are adding as a signature option.
This is the signature description the medic in the field sees.
-
In Text, type the text of the billing authorization for the signature option.
This field can contain a lot of text; the text wraps as you continue typing.
Caution: Proofread your text carefully before clicking Done, as you will not be able to edit the text later.
This provides a form of version control for older billing authorizations, as your agency's authorization verbiage changes over time.
-
Click Done.
The billing authorization verbiage appears in the patient care report in EHR, and includes a section for the patient (or the patient’s authorized representative) to sign the form.
-
 Work with patient refusal signature forms.
-
Do any of the following.
 Edit the custom patient refusal form.
By default, the built-in patient refusal signature form provides legal text regarding patient refusal from Page, Wolf, & Wirth LLC, the top-most legal firm for EMS. You can edit the content of the refusal form with your agency's own legal text as needed.
Note: If you want to use the patient refusals functionality the way it functioned prior to the ESO Suite 5.16 release, you can still do so by disabling the built-in patient refusal form feature.
 Use the custom refusal form image functionality available prior to the 5.16 release.
Before the 5.16 release, custom refusal forms were images of the forms, which the patient could sign by "writing" or drawing on the form with the mouse or their finger.
Note: While the patient is not actually entering information into the form, their touch-screen and mouse strokes are captured as part of the patient care record.
Images must be in
.PNG,.JPEGor.JPGformat and less than 5 MB in size. For best results, the image should be 800 px by 600 px wide.-
Do any of the following.
 Add a custom patient refusal form.
-
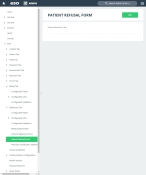
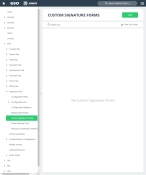
Under EHR, expand Signatures Tab, then click Custom Signature Forms.
The Custom Signature Forms screen appears.
-
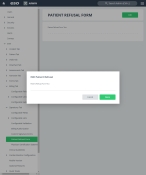
Click Add.
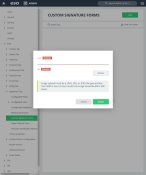
A new signature form dialog box appears.
- For Language, click the field or the list icon to the right of the field, then select the appropriate single option from the menu that appears.
-
In Label, type a label for the refusal form you are adding as a signature option.
This is the signature description the medic in the field sees.
- For File, click Browse, then use the file browser that appears to select the image file you want to use as the refusal form for the signature option.
- Click Attach.
 Search the list of custom patient refusal forms.
-
In the Search field, type the characters in the name of the list item you need to find.
As you add each character, the list automatically reduces to only items containing that sequence of characters.
 Video: Search a list
Note: The process for searching a list shown below applies to any list in the ESO Suite.
 Sort the list of custom patient refusal forms.
Note: Lists in the Admin module always appear in alphabetical order, and display both active and deactivated items.
-
In the upper right corner of the list, click View Sort Order.
The Sort dialog box appears.
Note: Only the active items in the list appear in the Sort dialog box.
-
For Sort list alphabetically, drag the slider button to the left, until Off appears.
You can now change the order of the values in the list, and buttons for manually sorting the list appear below Sort list alphabetically.
-
In the list on the right, select the item you want to move up or down in the list.
A green, right-pointing arrow appears next to the list item to confirm that it is selected.
- On the left, click the up or down arrows to move the item up or down one place, or to the top or bottom of the list.
- Repeat the previous two steps as many times as needed to arrange the items in the order you want in the list.
-
Click OK.
The dialog box closes, and the list appears in the new order, unless you are working in the Admin module.
Note: Lists in the Admin module always appear in alphabetical order.
 Video: Sort a list
Note: The process for sorting a list shown below applies to any list in the ESO Suite.
-
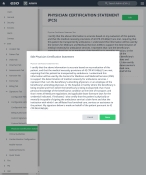
 Edit the Physician Certification Statement (PCS).
By default, the built-in PCS form provides legal text for a Physician Certification Statement from Page, Wolf, & Wirth LLC, the top-most legal firm for EMS. You can edit the content of the form with your agency's own legal text as needed.
-
Under EHR, expand Signatures Tab, then click Physician Certification Statement (PCS).
The Physician Certification Statement (PCS) screen appears.
-
Click Edit.
The Edit Physician Certification Statement dialog box appears.
-
In Physician Certification Statement Text, make any edits needed to the existing legal text.
- Click Done.
 Work with custom signature forms.
-
Do any of the following.
 Add a custom signature form.
-
Click Custom Signature Forms.
The Custom Signatures Forms screen appears.
-
Click Add.
A new signature form dialog box appears.
- For Language, click the field or the list icon to the right of the field, then select the appropriate single option from the menu that appears.
-
In Label, type a label for the custom form you are adding as a signature option.
This is the signature description the medic in the field sees.
- For File, click Browse, then use the file browser that appears to select the image file you want to use as the custom form for the signature option.
- Click Attach.
-
 Search or sort the billing authorization or custom signature forms list.
- Depending on what you want to search or sort, click either Billing Authorization or Custom Signature Forms.
-
On the screen that appears, do one of the following.
 Search the list.
-
In the Search field, type the characters in the name of the list item you need to find.
As you add each character, the list automatically reduces to only items containing that sequence of characters.
 Video: Search a list
Note: The process for searching a list shown below applies to any list in the ESO Suite.
 Sort the list.
Note: Lists in the Admin module always appear in alphabetical order, and display both active and deactivated items.
-
In the upper right corner of the list, click View Sort Order.
The Sort dialog box appears.
Note: Only the active items in the list appear in the Sort dialog box.
-
For Sort list alphabetically, drag the slider button to the left, until Off appears.
You can now change the order of the values in the list, and buttons for manually sorting the list appear below Sort list alphabetically.
-
In the list on the right, select the item you want to move up or down in the list.
A green, right-pointing arrow appears next to the list item to confirm that it is selected.
- On the left, click the up or down arrows to move the item up or down one place, or to the top or bottom of the list.
- Repeat the previous two steps as many times as needed to arrange the items in the order you want in the list.
-
Click OK.
The dialog box closes, and the list appears in the new order, unless you are working in the Admin module.
Note: Lists in the Admin module always appear in alphabetical order.
 Video: Sort a list
Note: The process for sorting a list shown below applies to any list in the ESO Suite.
-
-
-
